After creating a PowerPoint presentation, you have to convert it to video using movie maker to share it on social media platforms or post it on video sharing sites. Therefore we wiil introduce the powerpoint to movie maker converter free download to play the videos on computers that do not have PowerPoint installed or save your presentations as video files.
This guide will teach you how to convert PowerPoint to MP4 or video effortlessly.Part 1: The Easiest PowerPoint to MP4 Converter
For the people who want to easily to converrt convert ppt to video using movie maker or other free downoad converter, look here to know thw easy edit step.
Bonus Tips:
Here is the easiest PowerPoint to MP4 converter to use, iMyFone Filme is very simple, it is powerful enough to make video files that are compatible with Mac, Windows, and Android operating systems.
Special offer that can free try the resoureces for paid. Download it for trying it out!
How to Use the Tools to Convert PowerPoint to MP4
As we have stated, iMyFone Filme allows you to convert PowerPoint to MP4 videos. After editing and optimizing the video, you can upload it to your blog, site, social media, or video-sharing site. Here is how to convert your presentation to MP4 with iMyFone Filme.
Look the Video First
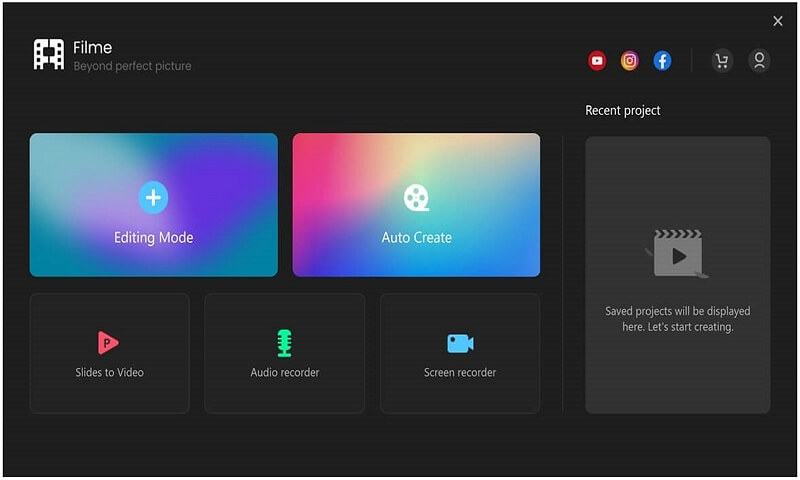
Step 1: Click on the "Slides to Video"
Download iMyFone Filme from the official site and launch it on your desktop computer. Click on the "Slides to Video" button.
Step 2: Import your PowerPoint
Click on the "+" button and import your PowerPoint presentation.
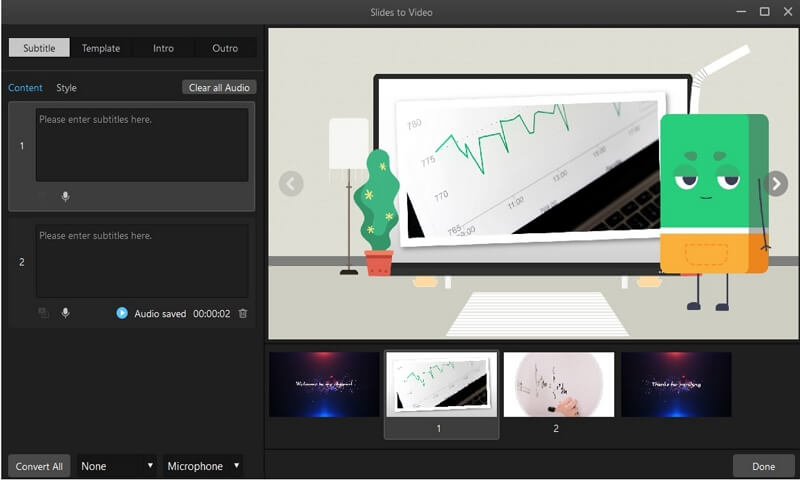
Step 3: Change the Subtitle
Now, you need to add subtitles to the video. You can write subtitles manually. Filme also offers you to record your voice over.
Step 4: Preview & Export
When the conversion has ended, click on the "Export" button. A settings menu will pop up. Use it to adjust the name, format, and quality of the video. You can finally upload it to your social media platform, especially upload the video to facebook.
You can download the tool from the official iMyFone Filme site and enjoy the free trial. It has different modes that facilitate the creation of presentations, recording, and editing of videos. The intuitive drag and drop interface of iMyFone Filme makes the tool very easy to use. You can convert your PowerPoint to MP4 videos within minutes.
Key Features
-
Fast video mode that allows users to use built-in templates to make presentation videos
-
Multiple editing modes for more flexibility
-
Quick slideshow maker
-
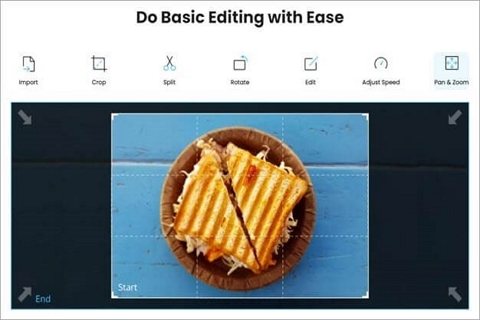
Offers basic editing tools like crop tool, split tool, rotate tool, and adjust the speed
Part 2: Tutorial: Convert Your PowerPoint 2010 to MP4
If you are a Microsoft PowerPoint 2010 user, then you already know that Microsoft added the "Create a Video" option. The option allows you to export and save your PowerPoint videos in WMV or MP4 format. In other words, you can open your PPTX files on your computer and use the option to convert them to MP4 without the need for PPTX to MP4 third-party tools. Here is how to convert your PowerPoint 2010 file to MP4.
Step 1: Launch PowerPoint and click on the "File" menu near the top-left corner.
Step 2: Click on the "Export" tab on the drop-down menu and then choose "Create a Video" to start the conversion process.
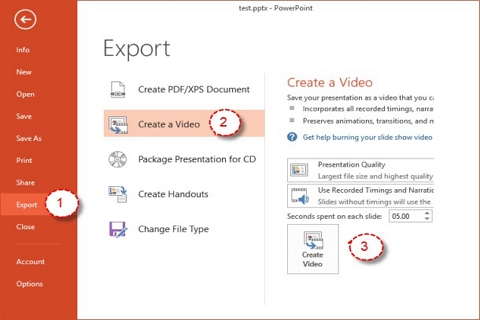
Step 3: A PowerPoint to video conversion settings panel will appear. It shows 2 drop-down menus along with slide duration settings. On the first drop-down menu, choose the output video resolution, the target player, and the size of your video. On the second drop-down menu, choose to exclude or include any narrations or timings you prefer. Set the time value and click the "Create a Video" button.
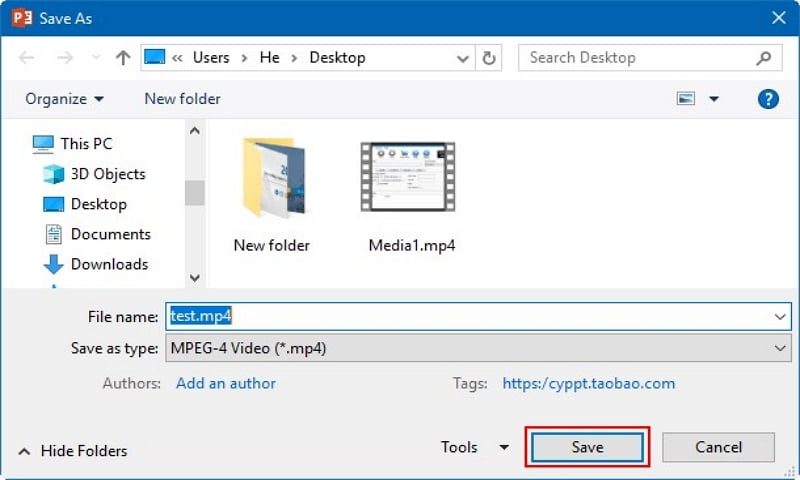
Step 4: On the "Save as" popup menu, set the video name and choose MP4 as the output video format from the MP4 or WMV menu. Also, choose the destination folder to save the new MP4 video file.
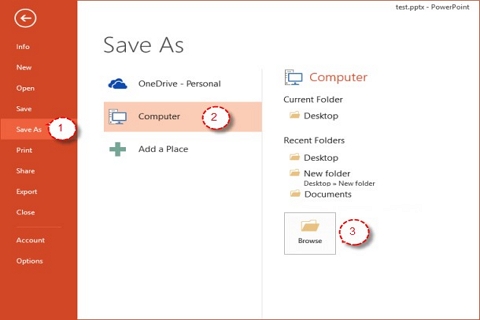
Step 5: Click on the "Save" button. The MS PowerPoint will start the exportation and conversion of PPTX to MP4 file immediately.
Part 3: Tutorial: Convert Your PowerPoint 2007 and Earlier Version to MP4
Windows PowerPoint 2007 and the earlier versions are different from Windows PowerPoint 2010. The versions do not allow direct conversion of PPTX to MP4. However, you can still convert your files to MP4 with help of MP4 to PowerPoint converter free online tool or use Windows Movie Maker, which is a free video editor designed for Windows. Windows Movie Maker allows you to use image files of your PowerPoint slides to make MP4 videos. Except this tool, there are many ppt to video converters that you can try. Here is how to use it.
Step 1: Install the Windows Movie Maker if you do not have it on your computer. Most Windows PC versions come with Windows Movie Maker installed, but if you are using Windows 7 or 8, you have to download it from the Microsoft site.
Step 2: After installing Microsoft Movie Maker, convert your PowerPoint presentation slides into JPG files. To do that:
Click on the "File"menu or "Office" button and choose "Save As."
Click the "Save as type" menu and choose "JPEG File" Interchange Format "*.jpg."
Select or make a new directory for your slide files.
Click on the "Save" button and choose "All Slides"on the pop-up menu.

Step 3: Open Windows Movie Maker to start importing the slide files. To do that:
Click on the "File" menu and choose "Import into Collections." When using Movie Maker 2012, choose "Add videos and photos."
Move to the folder containing the JPG files you created and choose all of them. The folder will bear the same name as your PPTX presentation.
Click "Open" and choose all the files. Movie Maker will open all the image files.
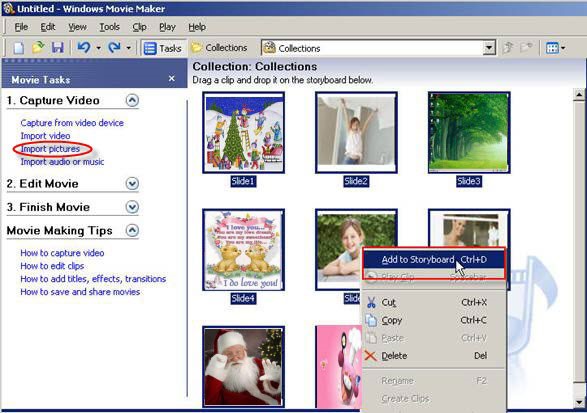
Step 4: Arrange the slides. When using an older version of Movie Maker, choose all the imported images and drag them onto the "Timeline." When using Movie Maker 2012, your slides will be arranged automatically to make a slideshow. If you wanna to make a movie, the movie video maker online is the best choice.
Step 5: Decrease or increase the slide transition duration to match the amount of text you would want your audience to read. Ensure that your audience will have enough time to take in the information.
Step 6: Use Movie Maker's transition tools to add a transition between the slides.
Step 7: Save the Movie as an MP4 file. To do that:
Click on "Save movie" or the "Save to my computer" button.
Choose "For a computer" or any other device.
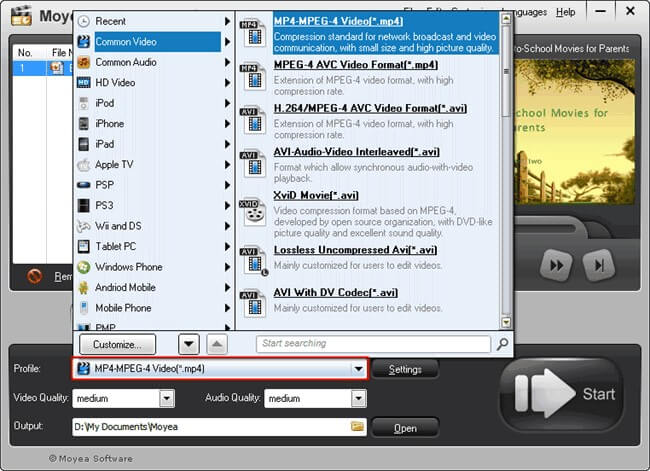
Name and save your file. Ensure that it is in MP4 format. If it is not, choose "MPEG" from the "Save as type" menu.
Step 8: After saving the file, Movie Maker will start making the movie file. This might take several minutes if the presentation is long. Play the file after it is created to know whether it is in the right form.
Part 4: How to Make Your Video Shinning after Converting to MP4
iMyFone Filme offers many resources, including specific components, transitions, effects, music, text, and filters, that make it more appealing and user-friendly. The tool will come in handy when editing your video after converting it to MP4. Here is how you can use it to make your presentations stunning.
- Make Basic Edits on the Video
You can make a few basic edits using the crop, trim, resize, and split feature on your MP4 video. To carry out the processes, you just need to choose your video on the timeline and click on the appropriate icon to start the task.
- Add Filters
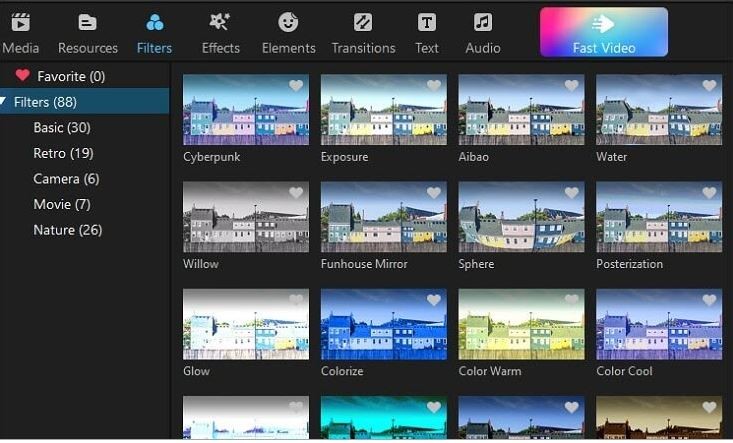
After learning how to convert PowerPoint to MP4 on Mac, you can use iMyFone Filme to include filter effects on your media files. To add them, upload your video file on the timeline and press on the "Filter" options situated on the toolbar near the top of your computer screen. From the displayed content, select your favorite filter effects to apply to your new MP4 video. You can also choose "Elements" or "Effects" on the toolbar to access the filter effects modules.
- Use Transitions
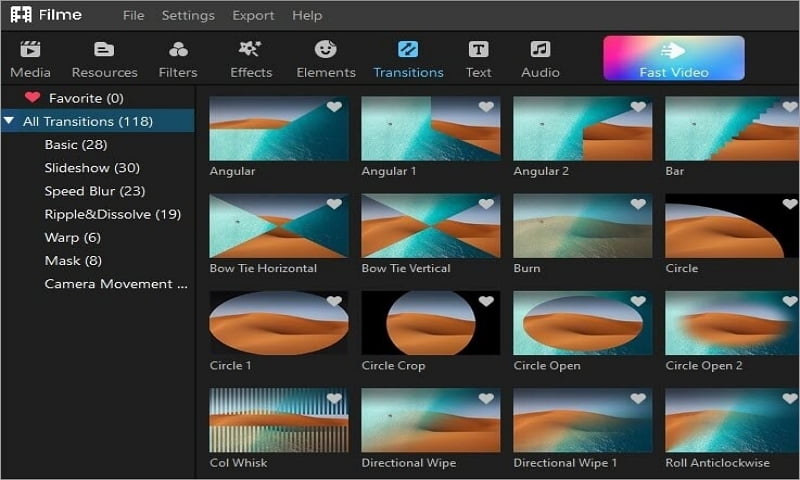
If you have to join two MP4 video files or more, you can use transitions between them. The transition duration is two seconds but you can modify it to match your needs. Select the "Transition" option from your "Media Library" near the left panel of your computer screen.
Choose a transition from the transition list situated on the right-hand side and right-click on a transition. Choose the "Apply" button to add the effect on your timeline media file. You can further drag and drop some transition effects over your timeline videos to add many transition effects.
- Add Texts
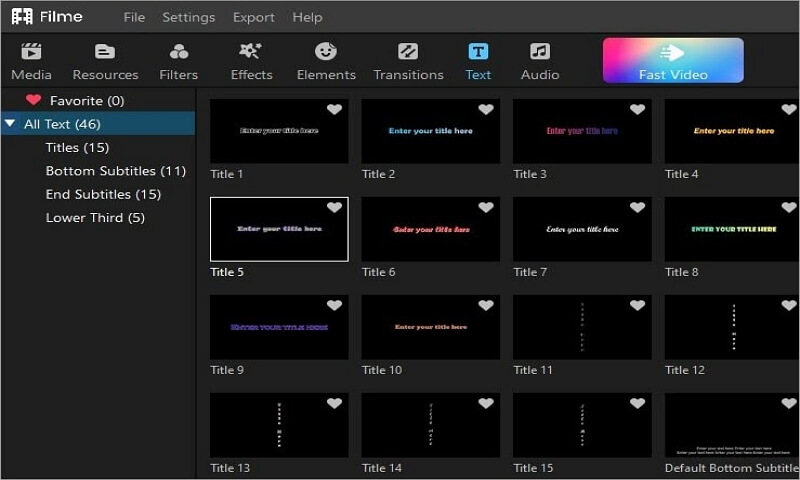
You can drop several words on the slideshow you converted to MP4 using iMyFone Filme. To do that, click on the "T" icon situated on the toolbar and expand the "All Texts" in the Media Library to access the different word formats. Select a word format and right-click on it to choose "Apply." Drop it on your timeline to start editing texts.
- Many Export Formats and Share Options
iMyFone Filme allows you to tweak your MP4 file when saving it on your computer so that it can match the requirements of the medium you plan to play it on. You can choose a low resolution, medium resolution, or high resolution. After that, you can share the video to your social media platform of choice.
Final Thoughts
Content marketing is among the biggest trends and therefore the ability to convert PowerPoint to MP4 video files, distributing, and presenting them is crucial to interactions and your overall success. Converting presentations to MP4 format allows you to reach a wide audience. Your files will be easy to access without the comprehension and knowledge of PowerPoint. Sharing a PowerPoint document may lead to the deletion of some slides or alteration of some information. After conversion will receive the document how you want it.


 Don't Click
 I just knew you will click it, LOL!
 Sent ! Please Check Email


 Youtube Videos
 Anime Character
 TikTok Videos
 Celebrity AI Voices
 Advertisement
 Podcast
 Video Games
 IVR Voices
 E-leaning


