Creating PNG files of your pictures with the transparent ground is generally thought to be something only done by Photoshop. However, it is not the truth. Many ways can be used to create transparent PNG files without Photoshop –an expensive and professional software.
We will look into some best ways of creating transparent PNG files without a Photoshop editor.
Best Method - MagicPic AI PNG Background Remover
iMyFone MagicPic
Tips
Hunting for a tool to cut out images for free? Why not try a professional remover iMyFone MagicPic to remove backgrounds 100% Auto with AI-powered Technology within 5 secs in 1 click. Just try it out free below!
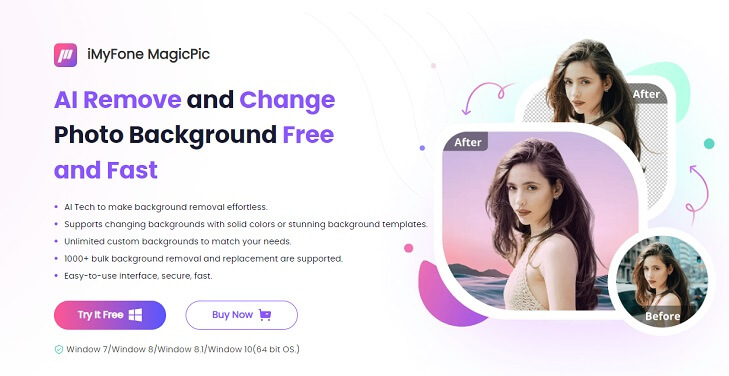
iMyFone MagicPic is an AI-powered tool used for editing photos. You can remove and replace photo background with single click. Besides, it also supports bulk background removal and replacement.
There are myriads of trendy background images for you to customize your photo, and you are also allowed to upload your own images as the background. The most prominent features of the tool are as follows:
-
User-friendly interface
-
Easy to remove background with single click
-
Supports removing and changing background in bulk
-
Suitable for any background removal needs, like making ID photos, doing e-commerce, and more.
Here is the step-by-step guide to creating transparent PNG files without Photoshop with the MagicPic.
Step 1: Install and Launch The Application
You can download the software from the official website of iMyFone MagicPic, complete the installation process & account creation, and launch the program. You’re shown many background removal options like Background Remover, ID photo, E-commerce, etc, among which ID photo is the best for removing bg for photos of people while E--commerce is better for removing background for product images. You can choose any of them based on your needs to make the PNG image transparent.

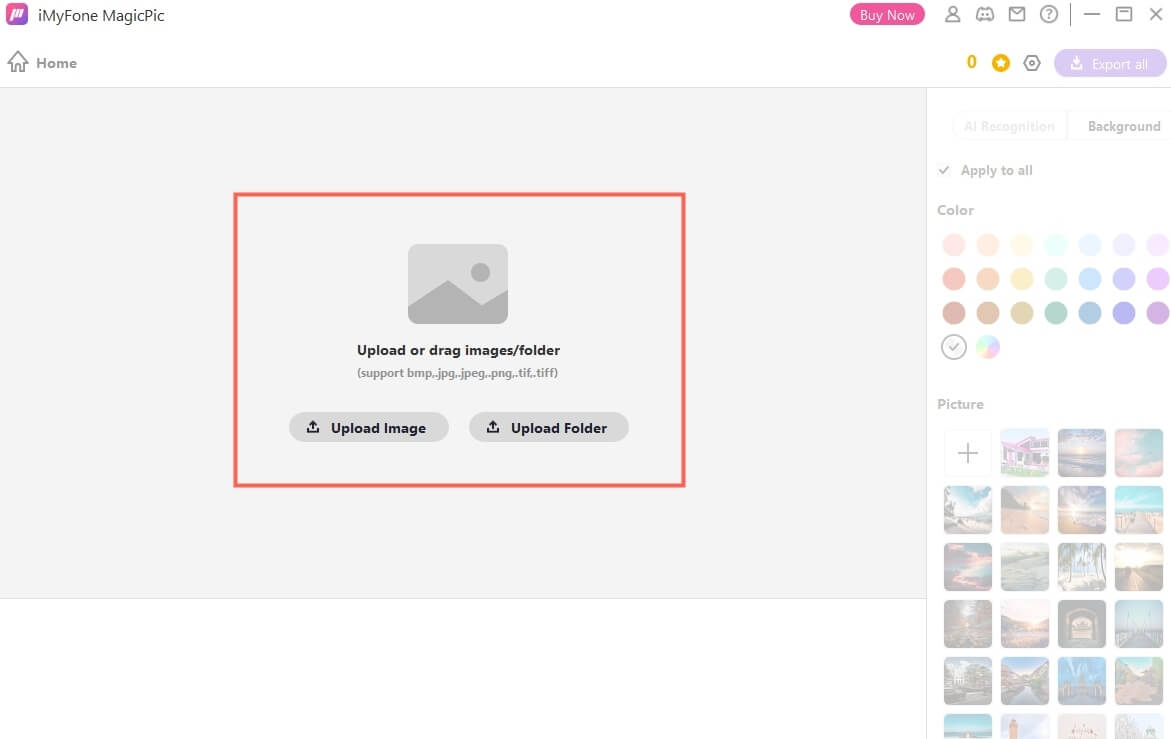
Step 2: Upload The PNG Image
The new window opens up, telling you to upload the PNG, JPG, JPEG image you want to edit. You can also edit multiple images at the same time.
Step 3: AI Remove Background
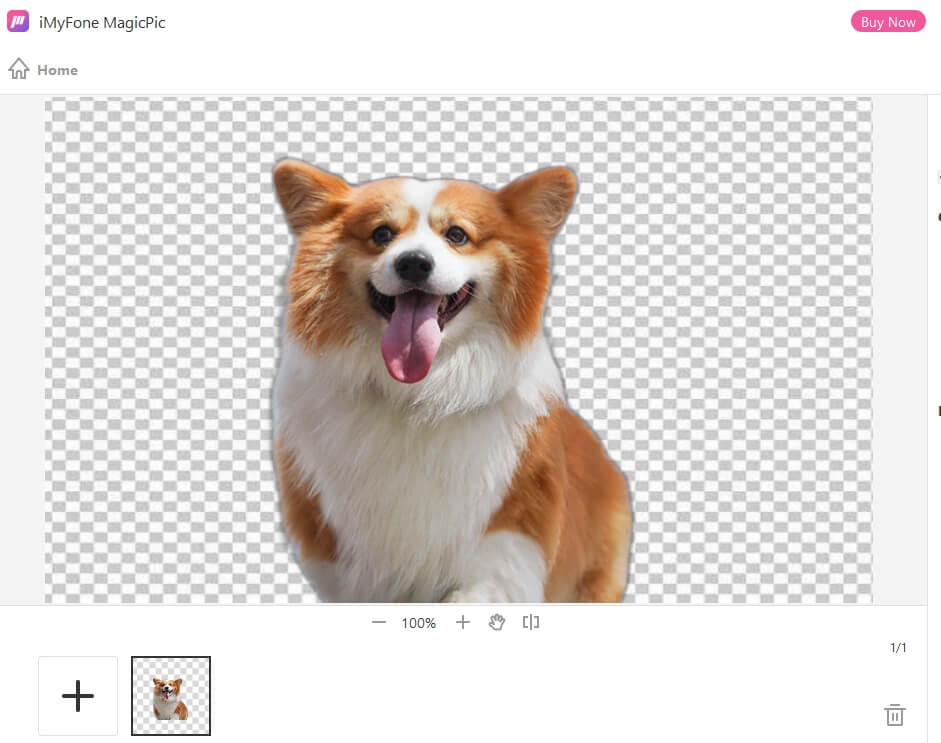
Once the image has been uploaded, the software’s AI technology detects and removes the background accurately. If some part of the background hasn't been removed completely due to the complexity of the image, you can remove it manually by directly erasing it using brush.
Step 4: Export The Image
Once you’re satisfied with the results, you have to hit the Export button. As a result, you can effortlessly create a transparent PNG image without getting into the complex software of Photoshop.
Create Transparent PNG File Using Canva
Canva is a powerful software and platform. It’s more than just photo editing. Basically, the software is made for people with graphic designing needs, but they’re not professional editors. The drag-and-drop functionality of the platform makes it convenient for everyone to do the editing and create attractive infographics, banners, etc.
Here is a step-by-step guide to creating transparent PNGs with Canva.
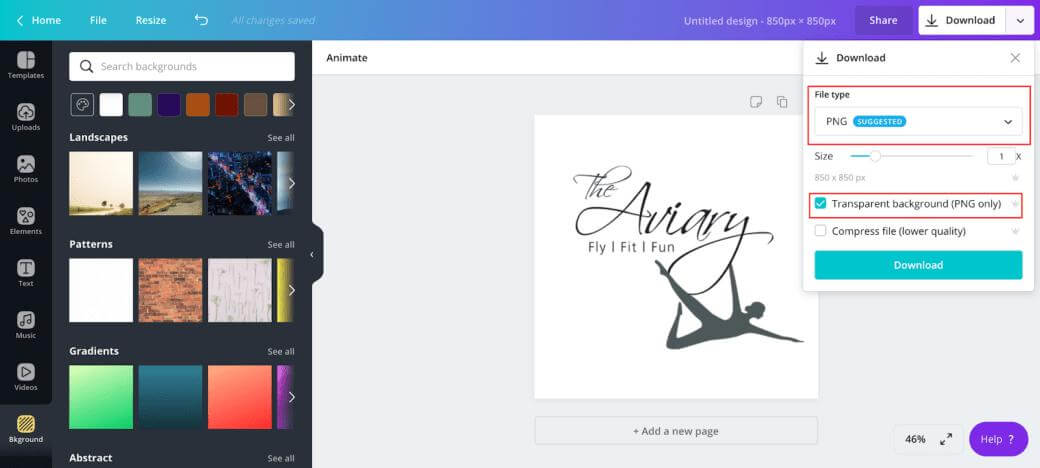
Step 1: Create Account or Sign In
If you already don’t have a Canva account, you will start with signing up for the platform. Add your details and create your account.
Step 2: Create A New Design
Click on Create a New Design and choose the Edit Photo option given at the bottom of the drop-down menu.
Step 3: Upload The PNG File
Clicking on the Edit Photo option will open an overlay asking you to choose a photo from your device. Click the desired photo, and it will be uploaded to Canva for editing.
Step 4: Remove Background
Once you enter the editing window, there will be an edit image option at the top of the editing frame. Clicking it will open numerous options. You can choose a background removal tool and get started. However, it is important to note here that the background removal tool is a premium feature of Canva that can only be unlocked with a premium subscription.
Step 5: Download The File
Once the background has been removed, download the file on your device
Create Transparent PNG File Using Microsoft
Microsoft Word is also a powerful document creating and editing tool. It also lets you remove the image background, play with transparency and make parts of the image transparent. Here is a step-by-step guide for removing the complete background, making the image transparent, or removing a part of the image.
Step 1: Add the Image to Microsoft Word
Open the Microsoft Word app and insert the PNG/JPG/JPEG image by simple drag and drop function. You can also copy/paste the image or manually insert the image from the menu in Microsoft Word.
Step 2: Double Click on The Image
Double-click on the image activates the controls of the image. You can control transparency, contrast, size, dimensions, background removal, and more. You have to remove the background of the image in order to create a transparent PNG without Photoshop in Microsoft.
Step 3: Choose ‘Remove Background’
If you want to make a part of the image transparent in Word, you must click on the Remove Background tab.
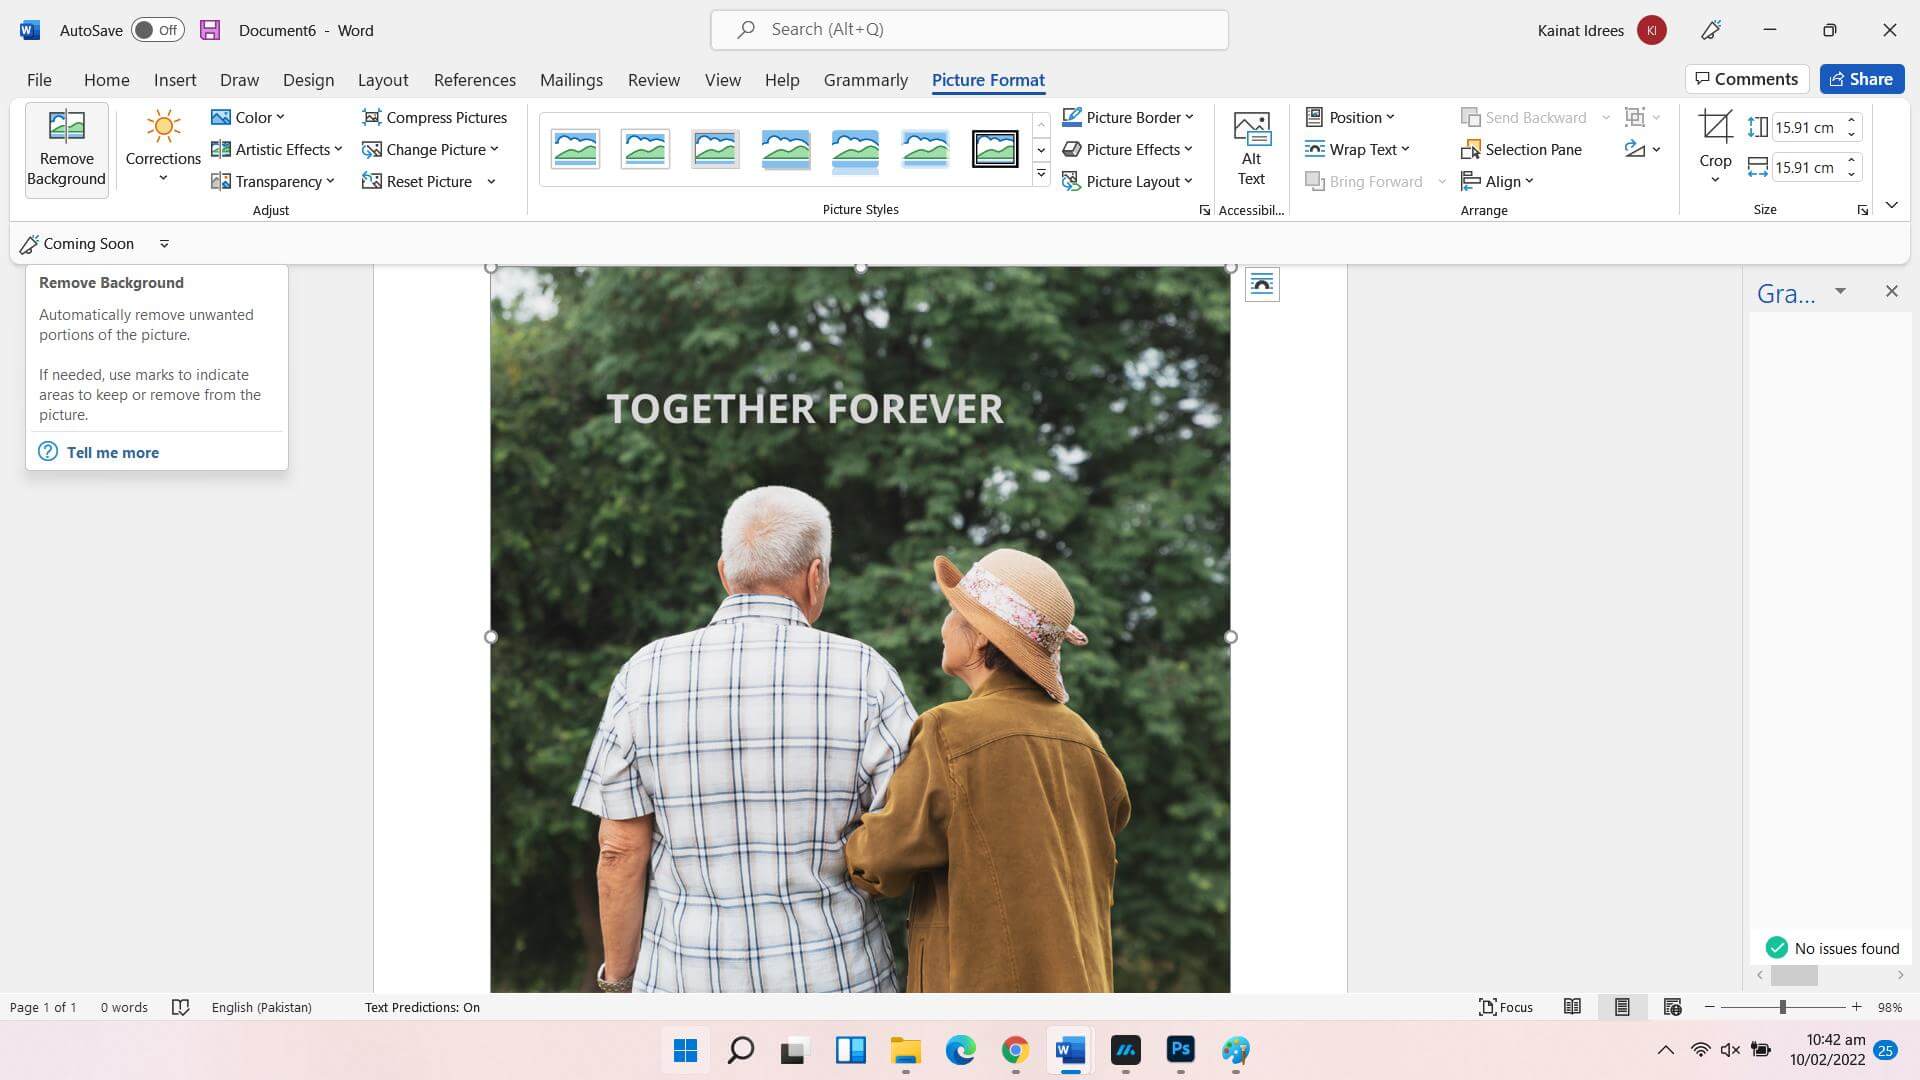
Step 4: Remove Background or Make Part Of Image Transparent
Once there, you can select or deselect areas for removal. Once done, tap the enter button to get an image as desired.
Step 5: Save File As Image
Once done, right-click the image to open the menu. Choose ‘Save as Image’ and save it to your device.
Create Transparent PNG File Using Pixlr
Pixlr is also an online photo editor with numerous features to let you edit photos, make adjustments, apply filters, and more. Here is a method of creating transparent PNG without Photoshop using the Pixlr software.
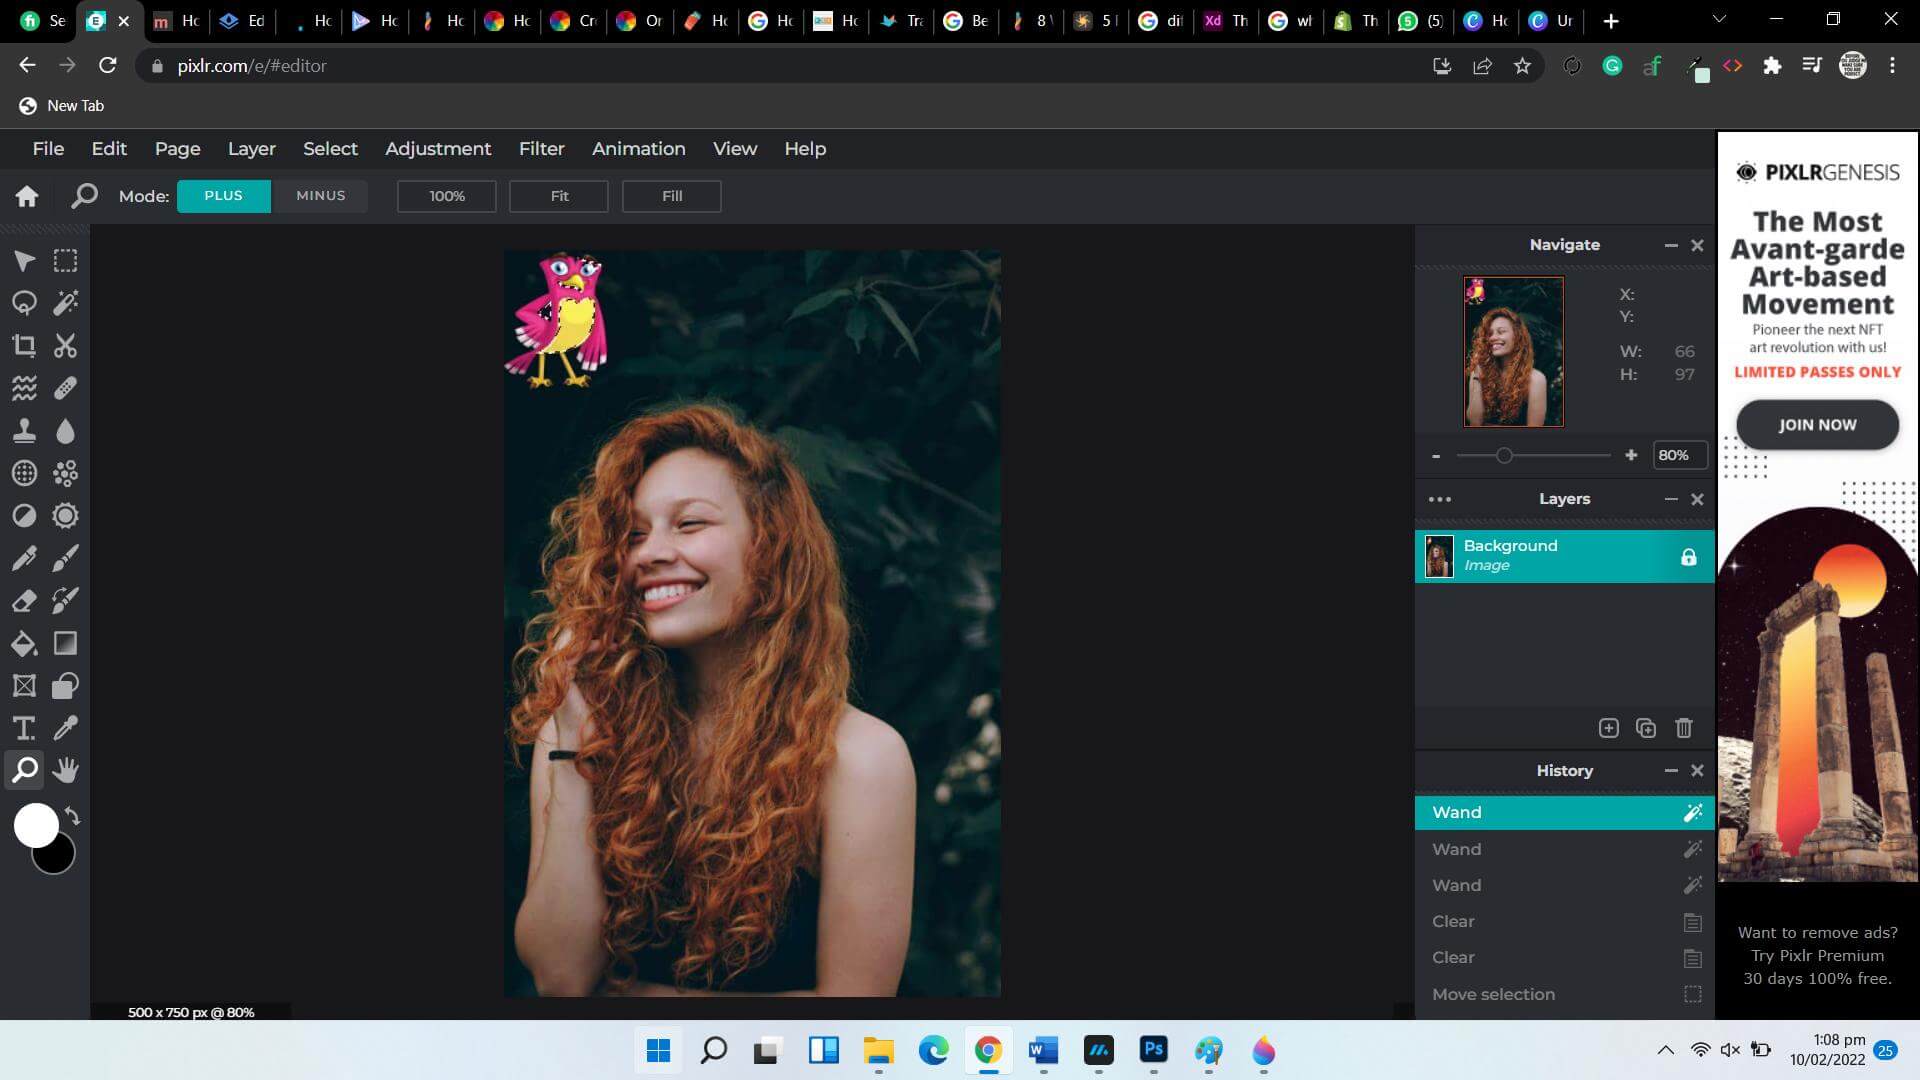
Step 1: Log on to the Online Photo Editor
Visit the official website of Pixlr to get started. Click on ‘Start a Photo Editing Project’.
Step 2: Upload The PNG Image
As soon as you start the project, you have to upload the PNG you want to edit with Pixlr. Once there, add the image you desire to make transparent.
Step 3: Remove The Background
Click on the Magic Wand tool to select the background of the photo that you want to make transparent. Once selected, hit the delete button, and it will erase all the selected areas from the background.
Step 4: Download The File On Your Device
All you have to do now is download the file on your device and use it for different purposes.
Conclusion
We have discussed different tools and methods on how to create a PNG file without Photoshop. Most methods are effective and efficient, but some are expensive and can not be smart decisions if you’re an occasional editor.
With MagicPic, you can effortlessly get transparent png file within no time. The AI-technology of the software lets you do tasks in seconds instead of several minutes. Here is the link for getting your personal software for photo editing and creating transparent PNGs without Photoshop:


