


Mosaic is one of the drawbacks of digital photography, taking the soft-focus effect and making it more pronounced. This article will provide you with the steps necessary to uncensor a video or image without altering your original image. Digital photography can produce some mosaic blur. It's not like the days of film, when an image was really in focus. If it becomes too fuzzy, you might want to remove it and unpixelate the image.

Part 1. AI Remove Mosaic from Photo/ Decensored Video
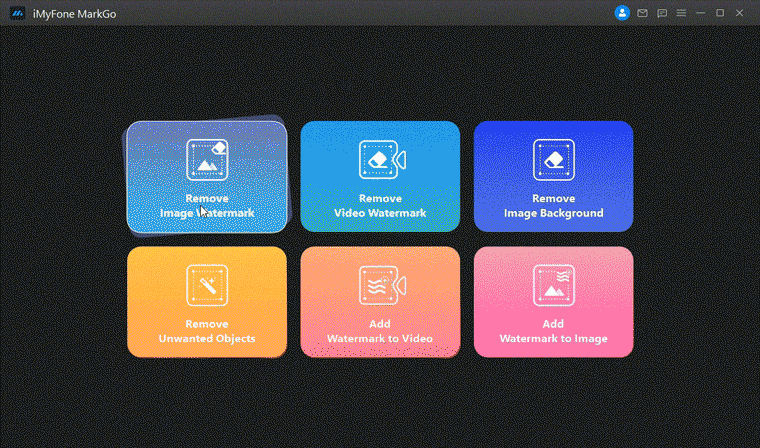
Watermarking with iMyFone MarkGo is a great tool for beginners and experts alike. Experts can use it to save time and edit images and videos quickly, and beginners can use it without any hassle. Watermarks, text, and unwanted objects on images and videos can be easily removed with MarkGo. The AI algorithm makes it stand out from other watermark removal tools. The software is intelligent enough to detect watermarks, text, and objects on its own. It erases them instantly with a single click. Sometimes you need remove censored parts from photo when you get some mosaic blur pictures.
Step by Step Guide
Step 1: Upload the picture

Step 2: Choose Selection Tool

Step 3: Click on Remove Now

Step 4: Export Now
You might be interested in:
Fix Snapchat Blurry Video Issue
Tricks to Remove Background for Photos
How to Remove Watermark on Mac Quickly
Part 2. How to Remove Mosaic Blur from Picture with Photoshop
In order to see this clearly, you have to have the ambient light of the scene evenly distributed. If there are dark spots in your photo, it can be an indicator of this problem. In order to properly adjust the focus for a photo or video, you should make sure that the entire screen is evenly lit. You can also remove censored parts from photo with Photoshop.
Pros of Photoshop:


Cons of Photoshop:
![]()
![]()
![]()
Most cameras have autofocus and manual focus to help you with this. Mosaic blur can be caused by a faulty camera lens, but it can also be a result of not setting your camera correctly. To see if it's the latter, check your focal depth to see if you used a wide depth or macro mode. You could also have used autofocus or auto exposure when taking your photo or video. In any case, incorrect settings may result in a blurry pixelated censor image with this effect called mosaic blur. You can remove it using the following easy steps:
Steps to Remove Photo Mosaic Blur with Photoshop
Step 1: Open the Adobe Photoshop, you’ll see the following main screen:
Step 2: Click on the file button and click on import button to import an image. You can also click on open button to import a recent project. The recent project has to be in the adobe extension.
Step 3: Select the images you want to remove mosaic from. You can import Jpeg, or png files.
Step 4: Once the picture is on your screen, click on the move tool button from the menu on the left and after that double click on the background option that will open another window. Now, select ok button to proceed.
Step 5: Now click on image option from the main menu and select image size.

Step 6: As you select image size, a window will open. Increase the resolution to 300.

Step 7: Now click on the filter button from the main menu and select noise. Now, click on despeckle and repeat this step atleast 3 times.

Step 8: Now, click on the filter button from the main menu then select noise, reduce noise and set the parameters as per below attached image and click on ok.

Step 9: Again, click on the filter button from the main menu then select sharpen, now go to smart sharpen and set the parameters as per your requirements.

Step 10: That's it. You can save your edited image.
There are many options available to decensored a video or images if you want to know how to depixelate an image. There are online tools as well but mostly are paid. If you want to remove mosaic quickly, Adobe Photoshop is a good option. Other than this feature, there are many other features available in this software which will help you to make your picture professional and clear.
Part 3. Make Video Clear with iMyFone Filme
Do you have a video that turns out blurry? Does this happen to you when you are filming with your friends on the beach or on the ski slopes? If so, don't worry. You can fix this easily using iMyFone Filme. The best editing software, iMyFone Filme, is the best editing software for this. It will allow you to combine photos together in order to create one image.
Also, this software can remove mosaic blur from the videos that you take that end up blurry. However, you should use photos that were taken in daylight or when there was adequate lighting otherwise this will not work.
With its powerful face area recognition technique, it will detect a person’s face and allow you to erase them from a scene or a video. This is very useful if you don’t want people in a scene but have recorded scenes with people in them by accident.
Pros of Filme:
Cons of Filme:
![]()
Steps to Make Video Less Blurry with Filme
Step 1: Open iMyFone Filme on your computer. You will have the main interface in front of you.
Step 2: Please select option File and then click on New Project.
Step 3: Now, select the media and select the video and / or audio files from which you want to edit or remove mosaic from. Now, drag the video on your timeline.

Step 4: Now, we have to edit the video. Double click on the video and it will open a new tab. The tab will allow you to change the effects, text, contrast and filters. You can set it as per your requirements.

Step 5: Click on the export button to save the video in your desired extension.
Now, we hope that you have decided which software is best and convenient for you. If you want to edit your video professionally and in less time, than select iMyFone Filme, as it’s free, and has many unique features available. There latest updates always add new and trending features.
Part 4. How to Remove Mosaic from Video with Premiere Pro
If you want to remove mosaic blur from a video, there are some tools that you can use. One of the most effective ways is by using a stabilizing program such as Adobe Premiere Pro CC. Other programs such as Sony Vegas and Apple Final Cut Pro contain this function, which is why it’s recommended for users.

If your video is in HD quality or higher, scan lines will be visible when you add stabilization to it. This tool not only eliminates the effect of the mosaic blur but also corrects errors in the pixelated censor image and removes shaky movements. If you prefer to use a more basic application, you can always use Windows Movie Maker or any similar tool that allows for basic editing and stabilization.
Pros of Premiere Pro:
Cons of Premiere Pro:
![]()
![]()
![]()
Steps to Remove Video Mosaic Blur with Premiere Pro
Step 1: Open the Adobe premiere pro version on your pc. It will show the main interface with multiple options.
Step 2: Click on the file button and then click on the import button. You can select the file / video from your desktop which you want to edit or add effects to.
Step 3: Now, drag the video on the timeline so that it can be edited. Make sure any other videos are not on the timeline. If there are any other content, don’t forget to delete those.
Step 4: On the left tab there is a menu. Click on the effect from the menu, you will have the option to search. You’ve to search “Unsharp mask”, click on this option and drag it over the video.

Step 5: Now to edit it, double click on the video and few options will be available. Click on the effect control if you don’t have the options. Using this you can add effects on different portion of the video. It gives you the options to add keyframes, which will help you to add a specific effect on your desired portion.

Step 6: Increase or decrease the density of Radius, Amount and Threshold till your required part is clear.
Step 7: That’s it, now you can save the video. There are many extensions available to save your video.
FAQs about How to Remove Mosaic from Image
1) What is the best free watermark remover to remove image mosaic?
iMyFone MarkGo. With iMyFone MarkGo, you can naturally remove mosaic from pictures with just a few clicks.
2) Is there any tools I can use to erase mosaic blur from a video?
If you want to get rid of mosaic blur from a video, there are some tools that you can use. Adobe Premiere Pro CC is really a good choice for you. You can also remove background with ease using iMyFone MarkGo.
3) Is it against the law to take a mosaic?
It depends on the case. When you just want to enjoy and use the picture without mosaic, it's definitely not against the law. If you post it on some social media for others to share, it may volate the law.
Conclusion
It is crucial to keep the camera settings as such for taking good photos and videos. You could just use your camera and then take a photo. However, the setting may become irrelevant after a long time because of which you will end up with an image or video that has mosaic blur. By following these tips, you can easily get rid of mosaic blur from video and also from photos. Removing censored parts from photo with iMyFone MarkGo will be your first choice. On top of that, it can also help you remove subtitles, blur or background with the advanced AI algorithms.


