How many times does it happen that you post, crystal clear, HD video on Facebook but it automatically blurs after uploading? It is quite frustrating as the uploaded video looks like garbage compared to the original video.
Given this, we are here with a comprehensive guide on Facebook video settings to upload the best quality video for your friends to watch. Additionally, we are going to walk you through the best export settings for Facebook video using a professional video editor.
Let's dive in.
Why is it always blurry when I upload videos on Facebook?
Facebook has become one of the most popular videos streaming platforms especially after Facebook rolled out its monetization policy. Content creators from every part of the world upload their videos to entertain the audience.
However, many users complain of losing the video quality once it's uploaded on Facebook – regardless of how impressive its original output is. Hate to break it to you but Facebook deliberately admonishes the quality of your video. Here are the official reasons:
1. Facebook Compresses Video
Stating the obvious, you need a strong internet connection to stream high-quality videos on Facebook or any other platform.
Acknowledging the fact that not every user has strong enough Wi-Fi or data connection to load the videos in HD, Facebook has built-in video compressors that reduce the video size for sustaining the servers as well as allowing everyone to watch it without lagging. This is the major reason why your videos appear blurred.
2. Video Compatibility
Many a time, the compression algorithms of the video aren't compatible with the Facebook formats. The absence of codecs or poor codecs may also trigger this issue and as a result, the video quality is lost to make it compatible with the format set by Facebook.
3. Uploading HD Video Takes Time
Another plausible explanation for lower-quality videos on Facebook is that the platform takes sufficient time to adjust the video resolution to default settings. It changes the video quality to match the display settings of your Facebook account (that you can change anytime).
That is, if you're uploading a video greater than 1080 resolution, Facebook will process it and change the display to 1080p – and it might appear that the video quality has reduced.
Best Facebook Video Settings for High Quality
Optimizing the video quality on Facebook to get the best results is not a straightforward task because of the multiple ways Facebook delivers video content to the audience. Whether you're posting a video to your feed or an entertainment page, or you're promoting a brand, here are the ideal Facebook video upload settings to help you stand out.
1. Video Format
While Facebook supports multiple video formats but the most recommended formats are MP4 and MOV – the former being the best. Your video file must have a name like xxx.mp4 or xxx.mov.
Additionally, use the H.264 codec for your Facebook video which delivers the best quality output. Any video converter will transcode your video's codecs to the H.264 codec.
2. Aspect Ratio
Aspect ratio is the Facebook video dimension in "horizontal:vertical" terms. The ideal aspect ratio for Facebook live video quality settings is 1280x720 pixels. Uploading any video with a higher resolution will automatically be downsized by Facebook.
However, letting Facebook adjust the aspect ratio could further reduce the video quality so, use a video editor to optimize the dimensions to 1280x720 pixels before uploading.
3. Video Frame
Facebook allows you to upload videos up to 30 frames per second. Don't use a greater frame rate as Facebook will itself downsize it – which could blur your video.
Again, you might need a third-party software to reduce the video to 30fps or less. Similarly, make sure your videos do not contain edit lists or special boxes in file containers.
4. Video Length
Users can upload a video up to 25 minutes in length as long as it's less than 4 GB. However, try to keep your videos short to engage more audience. No one would like to watch a 25-minute video.
The experts recommend to keep video your video length to 3-5 minutes to get the best possible results.
With these Facebook upload video settings, you can be well on track to captivate your viewers with the highest quality videos.
Tips for High-Quality Facebook Video
Now that you know what are the most recommended Facebook video settings HD, let us discuss how to guarantee uploading your Facebook videos in high quality.
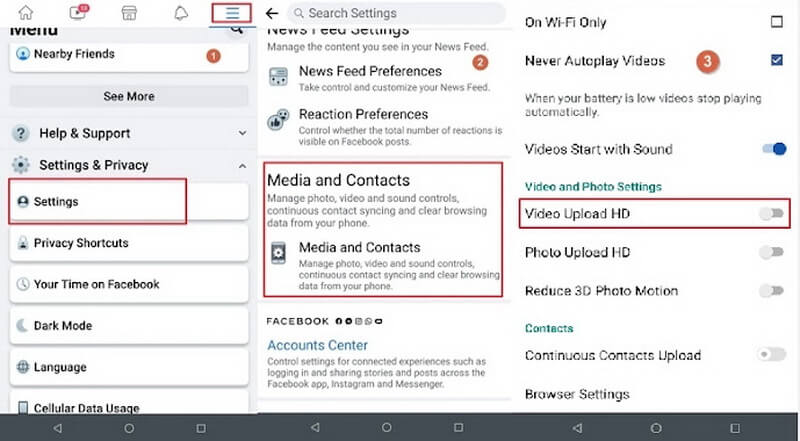
First of all, be sure you have turned on the "Upload HD" mode if you're using the Facebook app on your smartphone. To do that:
Launch Facebook and tap Menu at the bottom right corner.
Tap Settings & privacy > Settings > Media.
Under the "Video and photo settings", enable the toggle in front of Video Upload HD.
Confirm if you have a strong internet connection while uploading the video on Facebook.
Additionally, you should make sure your video is fulfilling all the "optimum Facebook video requirements" explained in Part 2. For that, you need the services of an efficient video editor as letting Facebook adjust the video resolution and fps automatically could result in a significant loss in your video quality.
FAQs
We have answered some commonly asked queries of our readers related to the topic at hand.
1. How do I change Facebook video privacy settings?
If you want to change Facebook video privacy settings, then:
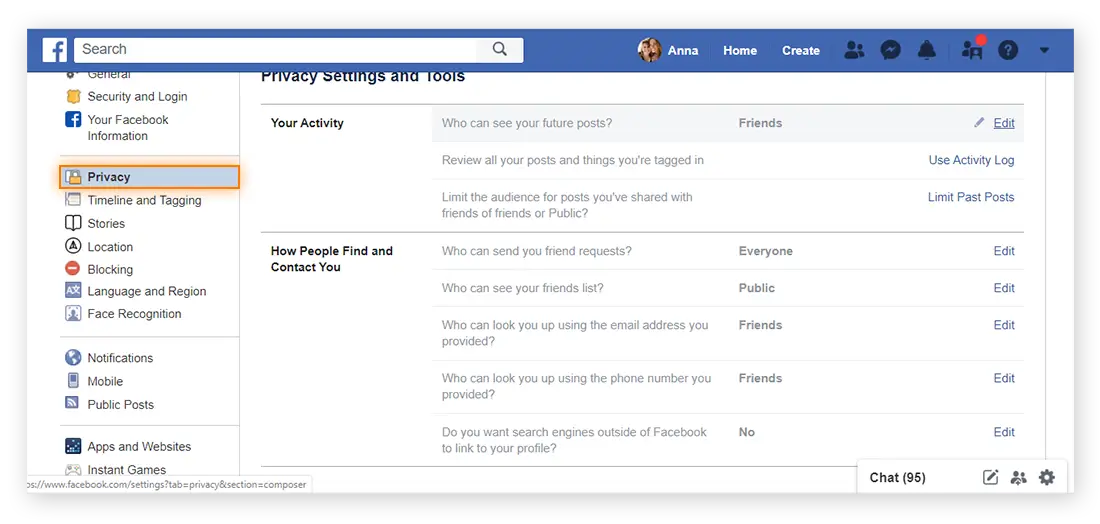
Open your Facebook account and hit on the drop-down arrow on the top-right corner. Click on Settings.
Now, choose Privacy. Click on Edit in front of "Who can see your future posts?"
Select any option – Public, Friends, Friends Except, Only Me - to specify who can view your videos.
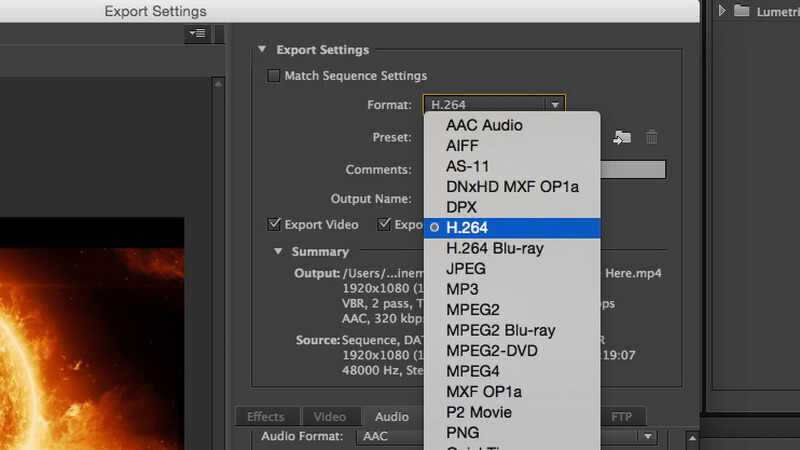
2. What are premiere pro export settings for Facebook videos?
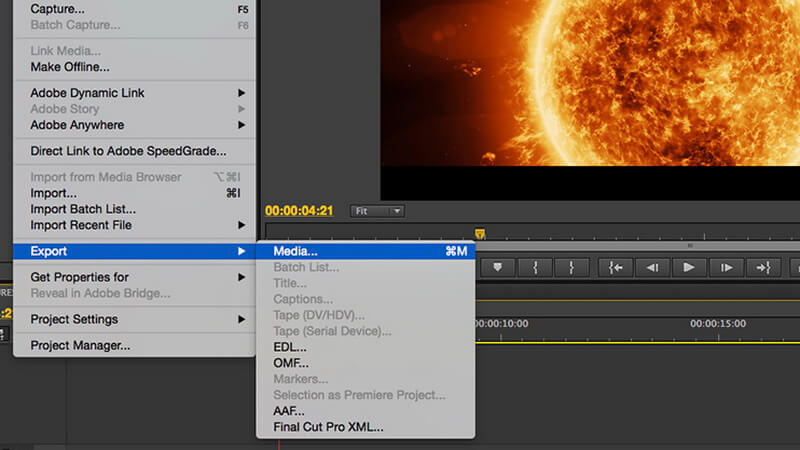
Once you have edited the video on Premier Pro, click on File > Export > Media.
In the Exports window, select H.26 and set the Resolution to 1280 x 720.
3. How to disable the AutoPlay video on Facebook?
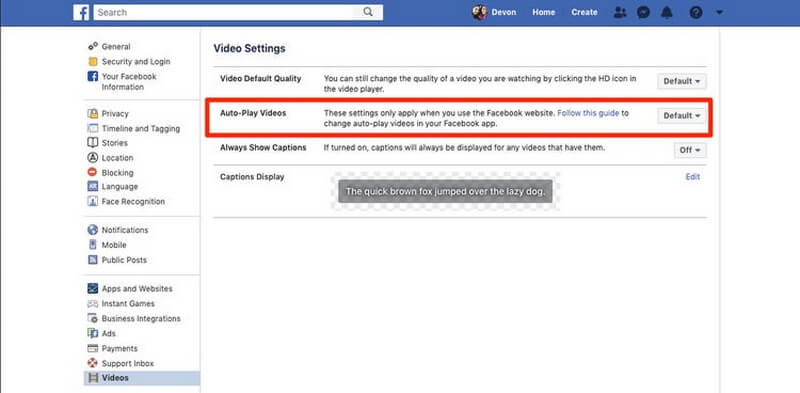
Here is Facebook settings video Autoplay on the web:
Click on the drop-down menu on the top right corner and select "Settings & Privacy" > "Settings."
Hit on Videos on the left tab and turn off the toggle in front of Autoplay.
Best Video Editor to Render Facebook Video - iMyFone Filme
As mentioned earlier, content creators need a professional video editor to meet the best Facebook video codec settings requirements. Look no further as iMyFone Filme is your ideal choice. It is a one-stop solution to edit your videos like a pro.
Aside from offering all basic and advanced video editing features, Filme makes it exceptionally easy to render face video settings in just a couple of minutes. Its clean and innovative interface works in tandem with the impeccable editing features to ensure you get a captivating video tailored to Facebook videos on watch settings.
Thanks to its shallow learning curve, both beginners and professionals can use it without any technical hassle.
Features of Filme
-
Renders Facebook videos quickly
-
A complete video editor
-
Slideshow maker
-
Slides to video maker
-
Offers unlimited video effects, transitions, and overlays
-
Tons of built-in templates
-
Screen recorder
-
Voice over themes
Text Guide
Using Filme to render Facebook video is a straightforward procedure. Here's how to do it:
Step 1
After installing iMyFone Filme, launch it on your computer.
Step 2
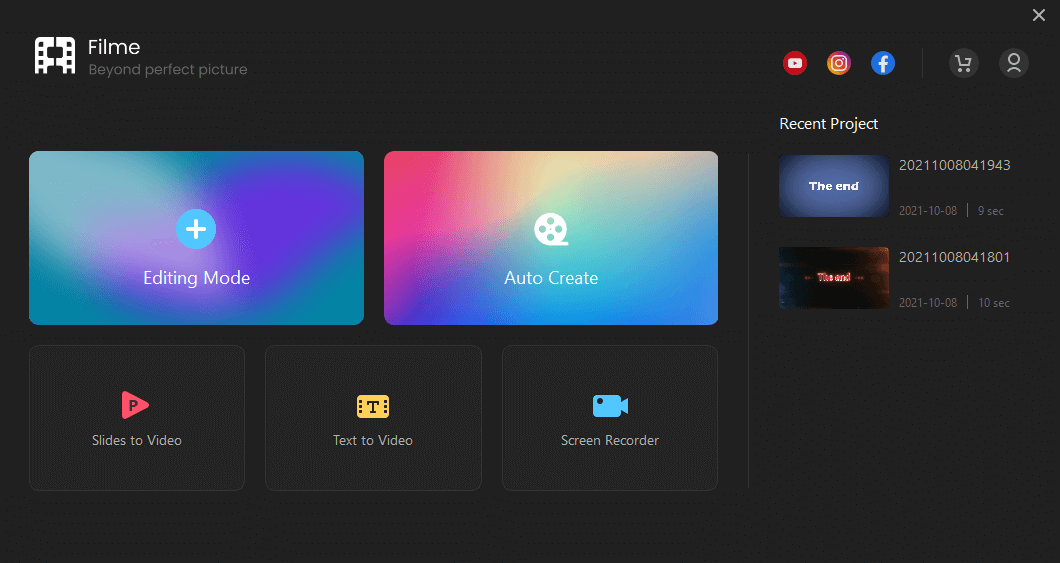
On its Home interface, click on "Editing Mode" to get started.
Step 3
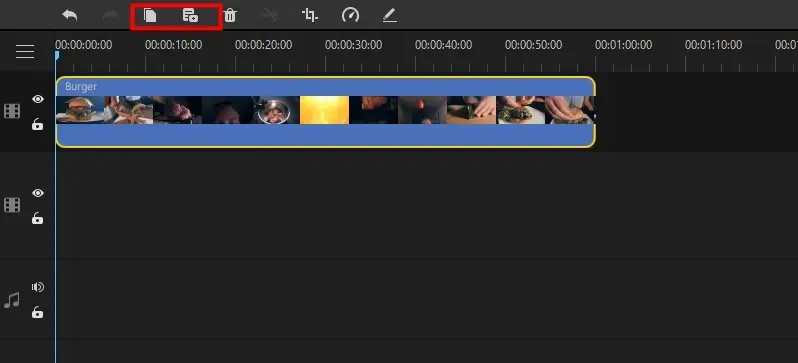
Click on the "+" icon to import the Facebook video into the program. Drop and drag it to the timeline. Here, you can apply any editing tools you want.
Step 4
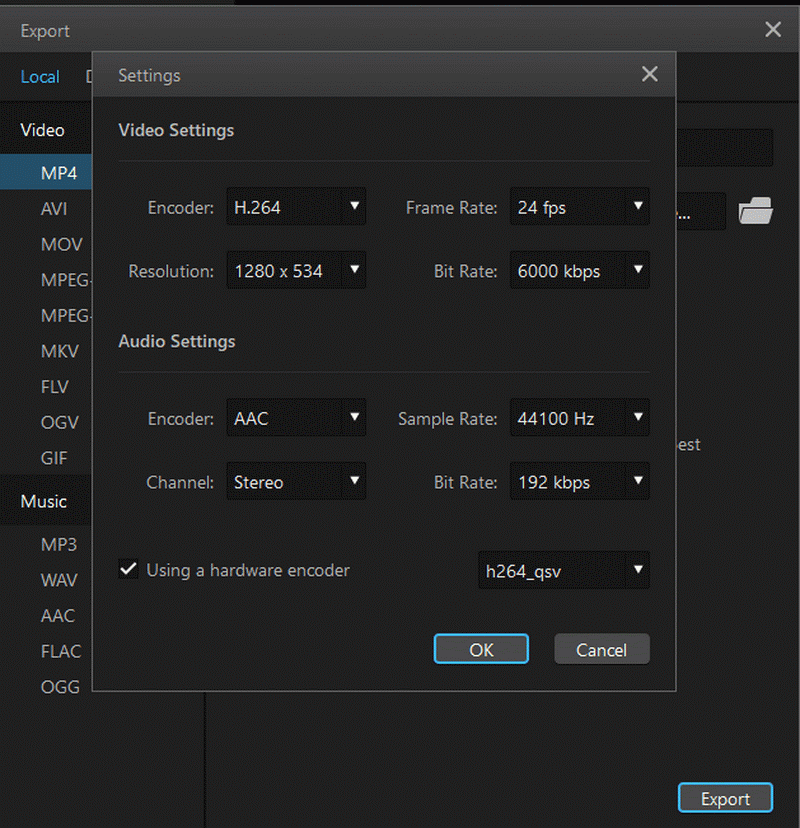
Once you're done, click on Export. Now, select the below settings:
Select MP4 output format
Encoder: H.264
Frame Rate: 30 fps
Resolution: 1280 x 720
Bit Rate: 4000 kbps
Check the "Using a hardware encoder" box.
Hit Ok to save the video on your computer.
Also Read:
Best Video Settings for Twitter >>
Best Render Setting for Sony Vegas >>
Final Words
To sum up, this article has walked you through a step-by-guide on the best Facebook video settings to impress your audience. Now, you're in a better position to understand why your videos might appear blur on Facebook and how to fix this issue in the video settings.
We recommend installing iMyFone Filme to render your Facebook video to ensure it fulfills the most recommended video settings. This way, you will achieve the best video output on Facebook. With just a few clicks, you can create a Facebook HD video that is bound to cast a magic spell on your audience.


 Don't Click
 I just knew you will click it, LOL!
 Sent ! Please Check Email


 Youtube Videos
 Anime Character
 TikTok Videos
 Celebrity AI Voices
 Advertisement
 Podcast
 Video Games
 IVR Voices
 E-leaning


