If you're fond of sharing your creative videos on different social media platforms like Facebook, Instagram, and TikTok, you pay close attention to their video quality.
Posting dark or blurry videos to these platforms isn't a pleasant experience, as you know your viewers won't appreciate the degraded video quality. Luckily, you can sort out this problem with relative ease.
In this article, we talk about why your videos end up blurry in the first place. Plus, we mention the top ways you can use to fix blurry TikTok/Instagram/Facebook videos and make them sharp and bright. The best thing is, the methods mentioned below don't require you to be any pro video editor, they're relatively easy to use!
So, without any further ado, let's dive straight into it.
Part 1. Why are my Uploaded TikTok/Instagram/Facebook Videos Blurry?
Here are the top reasons your social media photos may appear blurry or dark.
1. Incompetent Camera Hardware
The first, and probably the most obvious reason your TikTok/Instagram/Facebook videos are blurry, is your camera hardware. You see, you can't expect to shoot a video on a cheap smartphone and expect it to be great.
You need a high-quality camera that can shoot great quality videos. Today's smartphones are pretty good at taking photos and videos. However, you need to make sure you're purchasing a smartphone with a good camera. Apple's iPhones and Google's Pixel lineup are good options.
If you want to go the extra mile and take even better videos, you can get a DSLR camera. However, we recommend investing in a DSLR only if you're going to use it for professional purposes. Otherwise, smartphones with good cameras are more than enough.
2. Bad Lighting
Another reason your TikTok/Instagram/Facebook videos might be coming blurry is unfavorable lighting. You see, cameras work by taking in light through their lenses and developing images through it. If there's not enough light, your camera might not be able to take a clear photo.
Modern smartphones do come with a night mode for photos, but it's still hard to make great quality videos in bad lighting conditions.
3. Bad Focus
Last but not least, the human factor could be solely responsible for taking blurry or noisy videos. You need to keep the subject in focus throughout the entirety of the video. If you don't, the video may end up blurry in certain sections.
Many modern smartphone cameras come with auto-focus nowadays. With this feature, your camera can focus on subjects automatically. But sometimes, you need to focus manually to ensure you're capturing the subject you care about.
Part 2. How to Fix Blurry TikTok/Facebook Videos with iMyFone Filme
Now, as we're done with the reasons behind blurry and dark photos, let's talk about iMyFone Filme — one of the best tools you can use to fix this pesky problem.
iMyFone Filme is a fully-fledged video editor that you can use for several basic and professional editing tasks. However, this guide only talks about how you can fix blurriness and dullness from the TikTok/Instagram/Facebook videos.
Steps with iMyFone Filme
Step 1: Download and install iMyFone Filme
Download iMyFone Filme video editor from the official site by clicking here. After the setup archive is downloaded, run it. Follow the on-screen instructions to complete the installation process.
Step 2: Open iMyFone Filme and choose editing mode
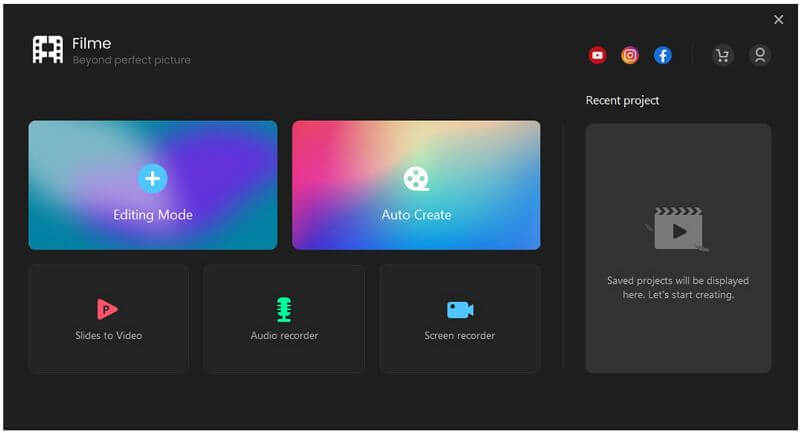
Double-tap the desktop shortcut or open Filme using the search bar. On the main page, you will see several features included in the Filme application. You can create a new video, edit an existing one, record audio, or record your computer screen. However, as we want to fix an existing video in this tutorial, go ahead and click "Editing Mode".
Step 3: Adjust video settings to brighten it and remove the blur
Now as you're in, you can import your video files and make changes to them. As we're only going to talk about a single video in this article, we only import one file into the application. Click "Import media here and apply it to multiple projects." — then your file explorer will open and you'd be able to select a video file. Choose the video you want to edit, then click "Open".
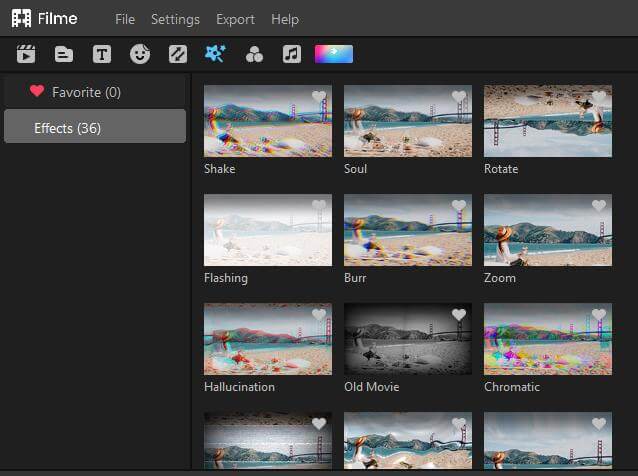
When the file has been important, now you have the option to adjust different attributes of the video, as well as apply different effects to it. We recommend adjusting the brightness, saturation, and contrast to make the video look how you want it to look.
Step 4: Save the video file and upload it to social media
After you've adjusted the video settings according to your preferences, it's time to save the file onto your computer so you can upload it to social media. Click "File" in the top-left corner, then click "Save". You can save the file in different formats, but we recommend saving it as an MP4 so it can be viewed on various devices.
Last but not least, open up the social media platform of your choice and upload the newly-edited video.
Part 3. How to Make Blurry TikTok/Instagram/Facebook Video Clear Using Clideo Video Editor Online
If for any obvious reasons, you don't want to download and install any application to edit your TikTok/Facebook video; maybe you're low on mobile data or your storage is full — you can use an online tool for the job. Although there are several online video editing tools available on the web, we are specifically going to talk about Clideo Video Editor in this guide.
Steps with Clideo Online
Step 1: Open Clideo Video Editor on your web browser
You don't need to be on any specific device to access Clideo Video Editor — all you need is an internet-connected device, be it an iPhone, Android smartphone, PC, or Mac. Open your web browser and access the official web app of Clideo by clicking here.

Step 2: Select a file from your computer or Google Drive
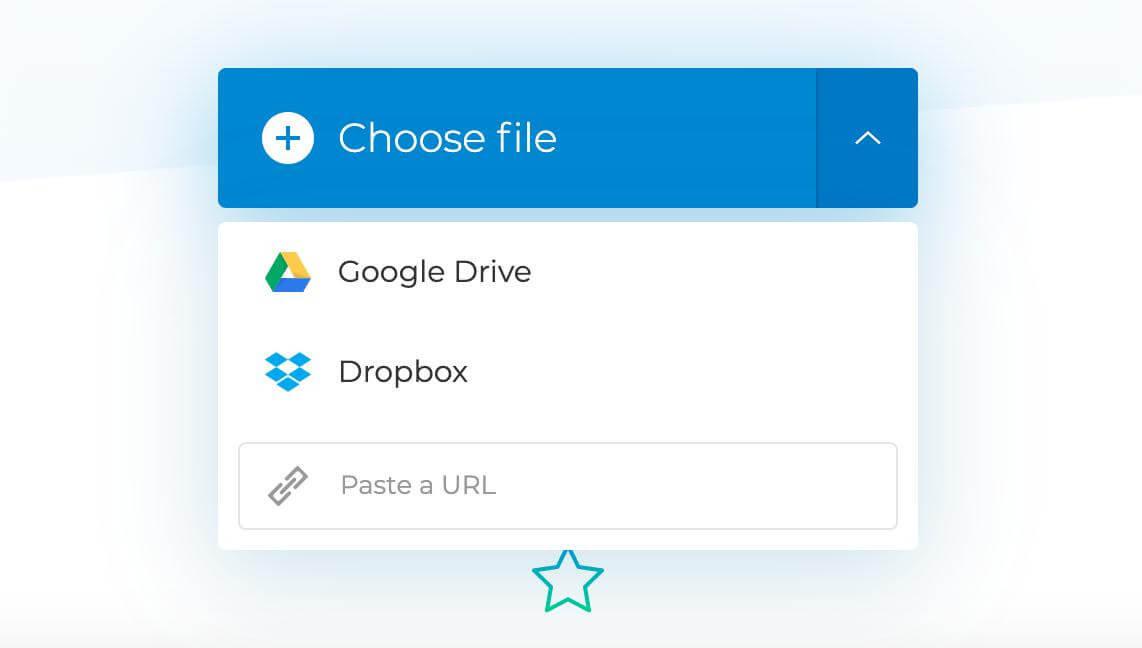
Click the big, blue button "Choose file". Browse through your files and select the video file you want to edit. Alternatively, you can access the drop-down menu right next to the button to select a file from Google Drive or Dropbox.
Step 3: Adjust video attributes using sliders
After the video file has been uploaded, now you can adjust different attributes of the video to make it clearer. As shown in the previous part, you should adjust the brightness, saturation, and contrast of the video to make it brighter and sharper.
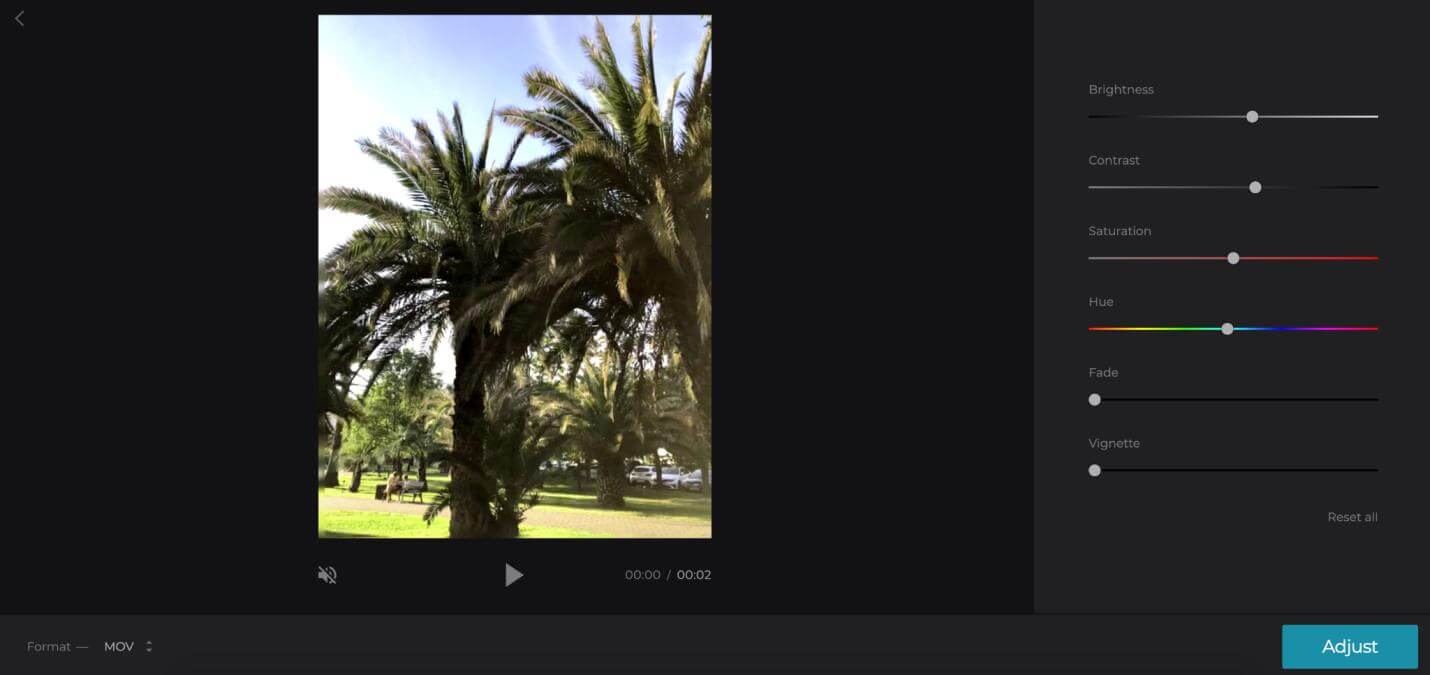
Step 4: Select a file format and save the video
Last but not least, you can select the file format for your output video. Click the "Format" selector in the bottom-left corner, and then choose a format. We recommend choosing MP4 for its versatility and compatibility with different social media platforms.
Click "Adjust" on the bottom-right corner and the video will start processing. When it's done, click "Download" and the video file be saved to your computer.
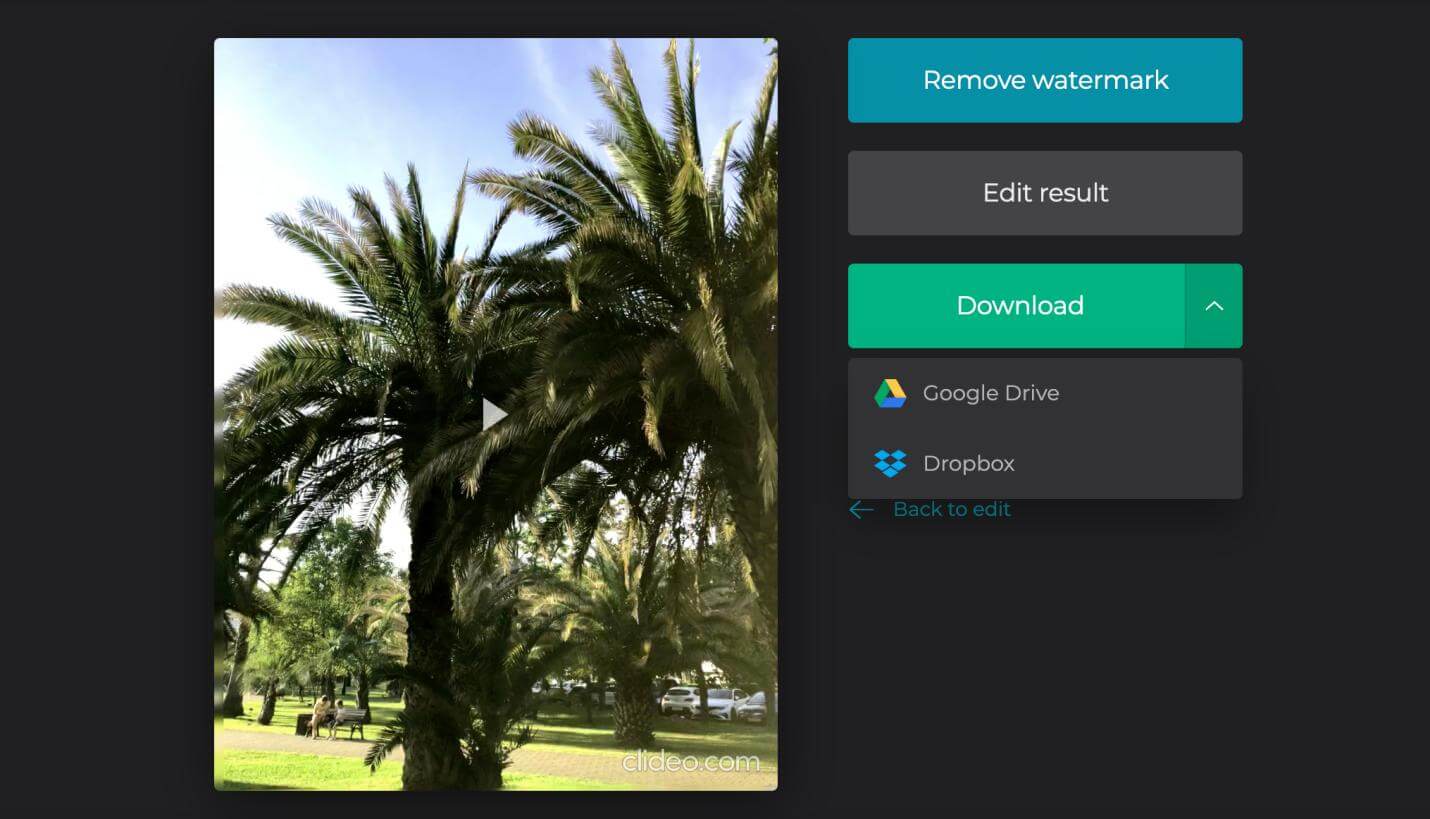
That said, you can access the Clideo Editor on any browser from any device. When you're done editing, you can download the output file on the same device.
Conclusion
The first rule of capturing a great video is to have decent camera hardware. However, sometimes, the video doesn't turn out to be good even when we use the best of the best camera. There might be several reasons for that, including unfavorable lighting conditions, lack of focus, and just human error.
However, it's easy to fix dull and blurry videos in no time. That's made possible with tools like iMyFone Filme — which can help you clear your blurry videos in just a few minutes. All you have to do is to get the tool from its official download page, install it, and make some adjustments to your video using the editing tool.
Alternatively, you can also use a tool like Clideo Video Editor to make these adjustments online. It's recommended when the video file is small and you don't want to edit multiple files. In those cases, it's better to just download iMyFone and work with it.


