


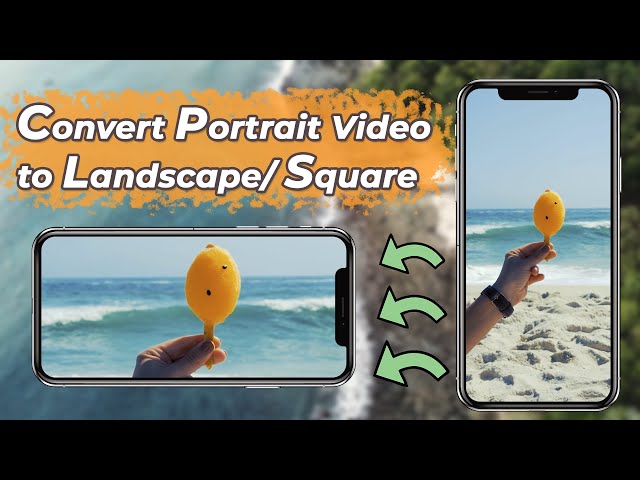
Facebook is a social media platform that is widely used to stay connected with your friends and family by sharing posts both written and visuals. The media needs to be in the correct format so the receiver can fully understand it without any inconvenience. So, in this article, we will walk through certain ways and tips about how you should rotate your video on Facebook. We will introduce an popular and easy-to-use video editor iMyFone Filme which can rotate video for Facebook easily.

Part 1: Rotate Video on Facebook Post before Uploading
It is always a better idea to solve the problem before it arises so it's ideal that you rotate your video before posting it to Facebook and you can do so by using very simple software, iMyFone Filme is a very user-friendly software to edit your videos for social media or any purpose. Filme can move the video clip during the rotating, or even rotate the video clip slightly which is a unique feature of Filme. So, let us have a look at how to use it to rotate video for Facebook.
Before digging into the detailed text guide, video tutorial is also available for how to rotate video effortlessly.
Step 1: Launch iMyFone Filme. Import the media you wish to rotate.
Step 2: Select the media from the timeline.
Step 3: Press 'Ctrl+E' and a menu will open up in the right. You can also double click the specific video on the timeline to open the menu.


Step 4: Drag the cursor in the direction you wish to rotate it in. Or you can input the number on the right box to specifically set the rotation.
Step 5: Save and export your file.

-
Fast Video Mode: Make a video in just one click using the available templates.
-
Effects: Animations and effects to make your videos more interesting.You can use filme to remove background noise from video easily.
-
Audio: Add your customized audio to keep your viewers engaged and set the mood as you like.
-
Instant preview option: Keep track of the changes as you make. This will constantly give you an idea of how well you are doing so you can eliminate any mistake there and then instead of at the end, making your work more efficient.
Key Functions:
Part 2: How to Rotate Video on Facebook Live
In the previous part, we talked about how to rotate a pre-recorded video before posting it to Facebook. In this part, we will talk about how to rotate Facebook live video if you are broadcasting live on Facebook.
Unfortunately, Facebook does not allow its user to change the orientation of the video once the broadcasting has started so the only way to broadcast the video in the orientation you want is to set the orientation before starting the broadcast. You can do so by following some simple steps to rotate Facebook live video . Below is a step by step demonstration of how you can change the orientation of your live video.
Step 1: Log in your Facebook and click on 'Live video'. Make sure the orientation of your device isn't locked so you can adjust your video by rotating your device.
Step 2: Once you are in the live menu and have granted the camera and microphone permissions, click on the magic wand in the bottom right corner.

Step 3: After you click on this icon, you will see many advanced options shown in the picture below. Go ahead and click on the extreme right 'screwdriver' icon.

Step 4: After you click on this icon, in the bottom left corner, it will give you the option to rotate or flip your video however you want.

Step 5: After you choose the orientation and other settings, click the 'X' icon in the top left and you will be back from where you started. Now you can press the blue button on the right and start your broadcast.

Part 3: Can I Rotate Video Uploaded on Facebook?
Unlike before, we cannot rotate the video after posting on Facebook. It was there till 2018 until Facebook removed this option. Many users have complained that it is not convenient for them to watch videos in the incorrect orientation especially laptop users for whom it is very difficult to watch vertical videos.
Facebook hasn't addressed these complaints to date but hopefully, they will consider adding this option again in the future. For now, the only option to rotate a video uploaded is to take it down, use editing software, and rotate your video following the demonstration in Part 1 and then re-uploading it.
This is not the ideal option as it results in a loss of comments and likes but it is the only option, at least for now until Facebook re-introduces the option or offers a solution.

Part 4: More Tips for Rotating Video
Communication is the key to any aspect of life and thus effective communication is extremely important for the optimal use of resources. Likewise, your energy and the content you put in your videos are a resource that shouldn't be wasted. To make sure your message is properly conveyed your video should be well-edited and a well-edited video is in the correct orientation. So here are a few tips by which you can rotate your video effectively without any hassle.

1. Always keep the original video file.
Whether it be rotating or any sort of editing, it is always smarter to have an original copy of the media. There can be several reasons why you can need the original file back such as if you are not satisfied by the rotation effects or if the quality has decreased during the edit or rotation and you wish to revert to the original file.
2. Difference between flip and rotate.
People often confuse the two editing features-Flip and rotate. They are indeed similar but not the same. When you rotate your media, it changes the direction of the picture or video but when you flip your media, it turns over and forms a mirror image of the media either vertically or horizontally.
3. Adjusting the frame and maintaining the aspect ratio.
At no point in your video, the media should be distorted and uneven. This can put off and discourage the audience to view the whole video so therefore this is vital to be taken care of.
4. Make sure the editing stays aligned.
You will have to make sure that any edits that you have made are also rotated with the media. These edits can be filters, the brightness that you have applied to a specific area. Likewise, if you have highlighted a certain part of the media, it should be automatically adjusted and not changed due to the rotation of the orientation. Or you may need to trim the videoif the video is too big to be uploaded.
5. Use precise software.
You should use a software that provides detailed precision such as the iMyFone Filme. This will allow you to have greater control over the edit and will give you the exact result which you want.
-
Easy video rotation feature that helps you rotate a video in seconds
-
Free effects and filters to give your videos a pop
-
Create videos or slideshows in one click using templates
-
Numerous editing features including trimming, crop, rotation, speed adjust


