Since the arrival of the blur feature, the demand for it has been increasing immensely. Almost everyone expresses a desire to hide something from the video.There can be so many valid reasons behind hiding faces and objects from videos. You'll find thousands of articles in Google telling you the reasons for blurring out objects.
After gathering the knowledge about the blur feature, the following things that come to your mind would be the appropriate ways to blur out your objects.You'd probably think whether it's befitting to use a blur tool in Android, iPhone, or Desktop. Luckily, you'll find fascinating blur tools for almost every device you'd like to use.
Whether it's an iPhone or Android, you'll get to see appropriate video editors that offer reliable services when it comes to blurring out your faces or objects.In this article, we've made up the mind to introduce ways to blur out your objects without any fuss.
Part 1. Blur Objects/Faces in Video with iMyFone Filme
Everybody knows about the supremacy of iMyFone and the value which it adds to the editing world. Besides offering almost every kind of editing feature, iMyFone Filme lets you allow blur out your objects/faces without any fuss.Let's talk about the steps to blur out faces using iMyFone Filme.
Steps of Blurring Out Faces Using iMyFone Filme
Step 1: Launch iMyFone Filme Software
To blur out your Faces, the first thing you need to do is install the application and open it on your desktop.
Step 2: Upload a file
The next thing you need to do is upload a video from the device you want to blur out faces. To serve your purpose, you need to Launch New project and import any video file from thereon.
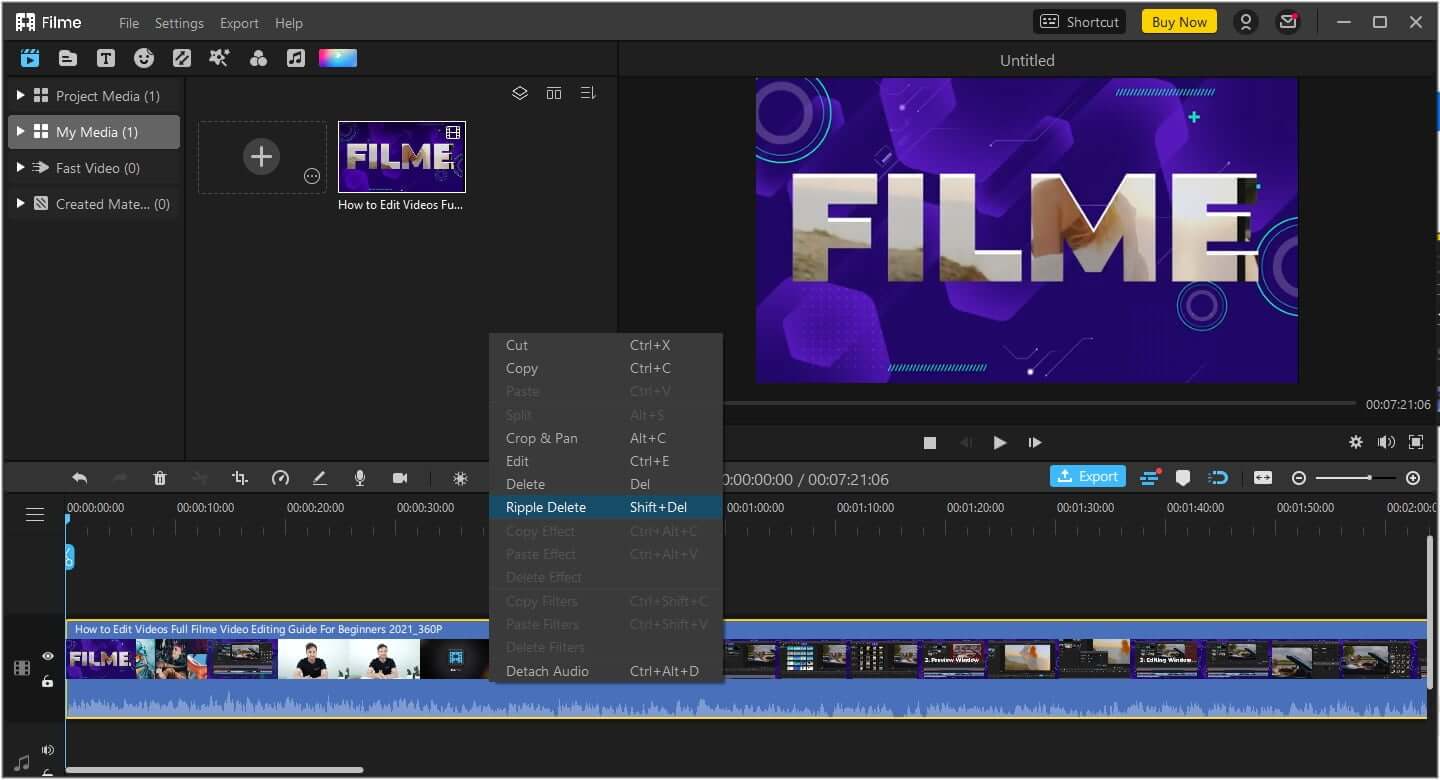
Step 3: Choose the part you want to blur.
Click edit and change blurriness properties.Now, after you click edit option,you can change blurriness properties.Now you'll need to decide whether you want to blur out the whole video or your faces only after you need to select the target clip and its duration to blur it out.
After deciding it, click on the More Tools option and hit the Highlight and Conceal possibility.
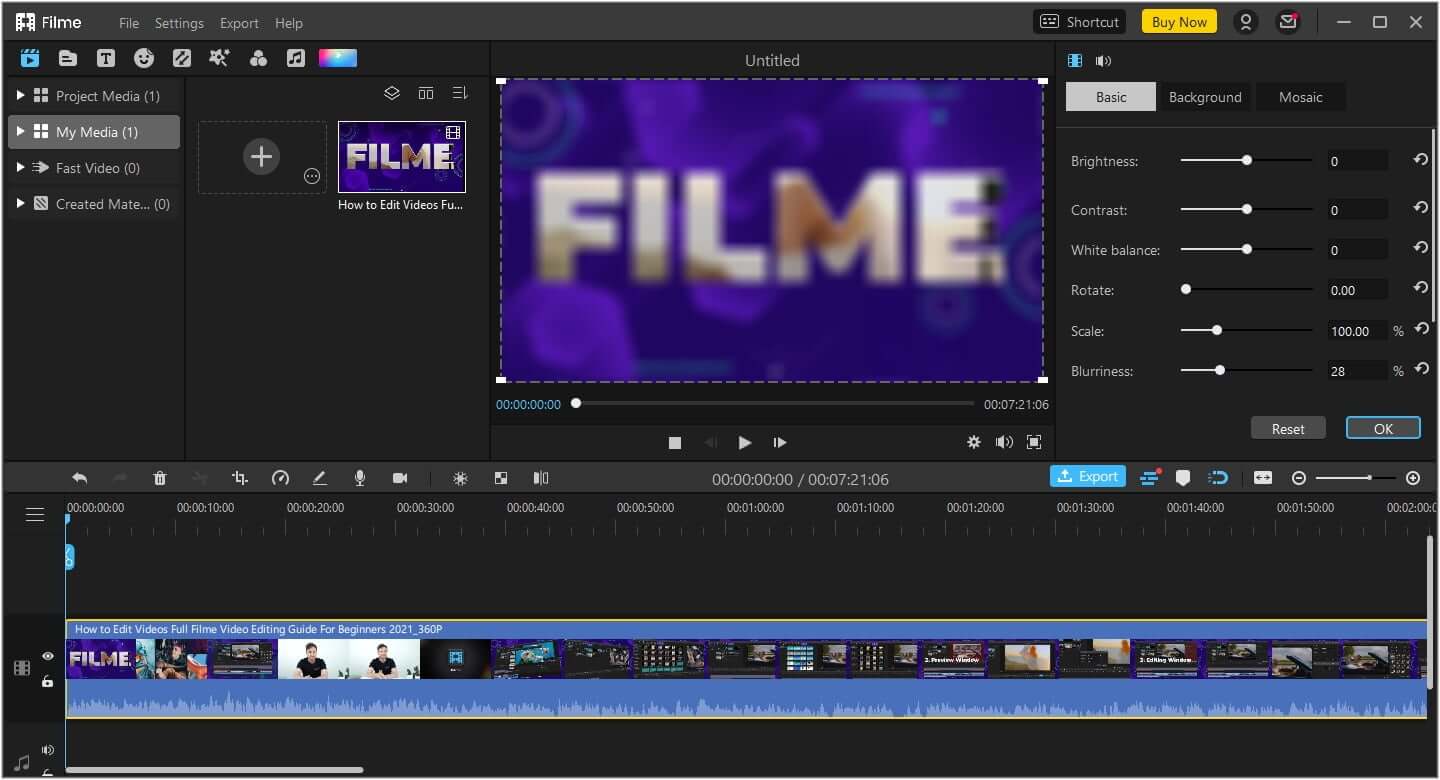
Step 4: Hit Mask Properties
In this phase, you can add appropriate effects to your video. After adding effect features, you need to adjust the frame you're using to cover the blurred area. Later, it would help if you hit Mask Properties to adjust the blur setting.
Part 2. Blur Moving Objects/Faces in Video with Adobe Premiere Pro
You'll find many third-party applications offering you the opportunity to blur out your objects or faces, but only a few are trustworthy.
Sometimes, your video quality doesn't remain the same after adding blur effect, but you'd not face such an issue with Adobe Premiere Pro.
It's fascinating software that has earned unbelievable success over the years. You only need to go through some simple instructions to blur your moving face with Adobe Premiere Pro.
Steps for Blur Moving Face Using Adobe Premiere Pro
Step 1: Import your Video
After acquiring the tool's services, you need to launch it. Later, you'll need to import a file you want to blur faces.
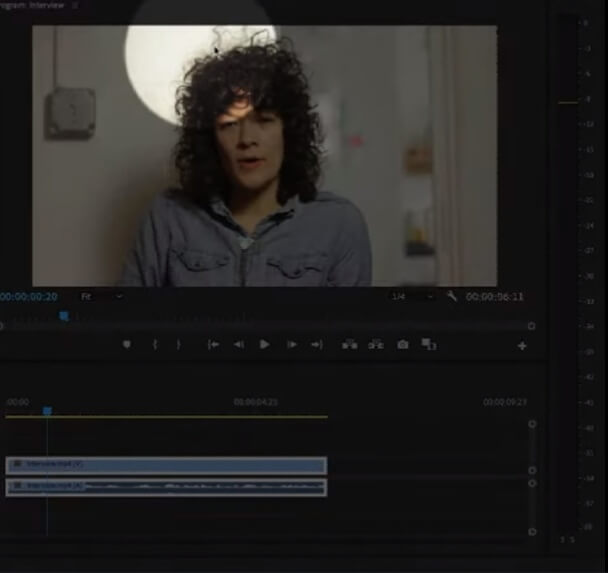
Step 2: Choose an appropriate option
You'll see some blur effect options to choose from. Gaussian Blur is one of the most popular blur options you'll ever find.
Let us select Gaussian Blur.

Step 3: Push towards the timeline.
After choosing an appropriate option, you need to drag the blur effect towards the timeline.
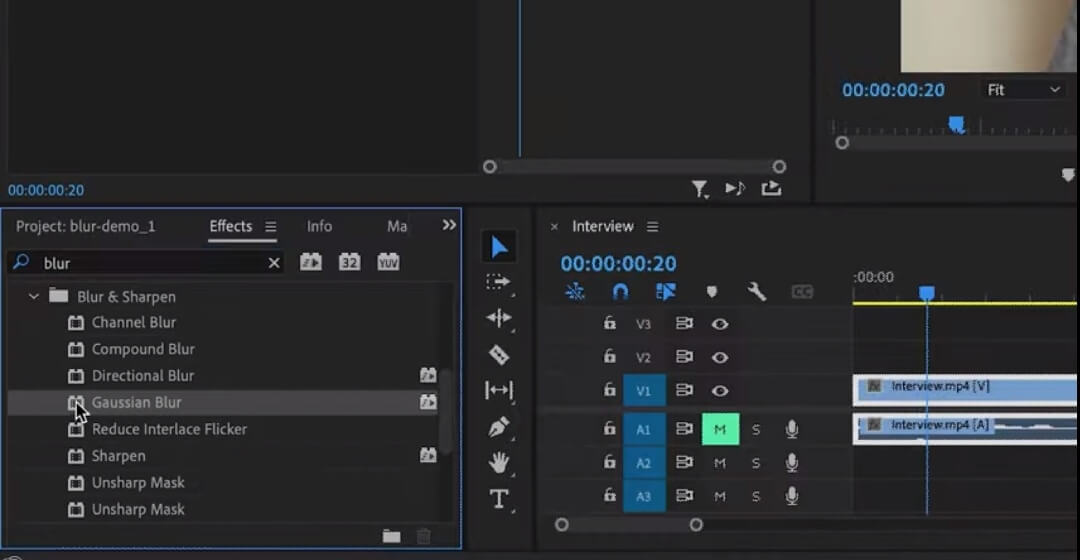
Step 4: Click on Effects Control
In this step, you need to hit the Effects Control option. After, you can see the Gaussian Blur effect below. The blur effect has been applied to the whole video, but we needed to blur only the face.
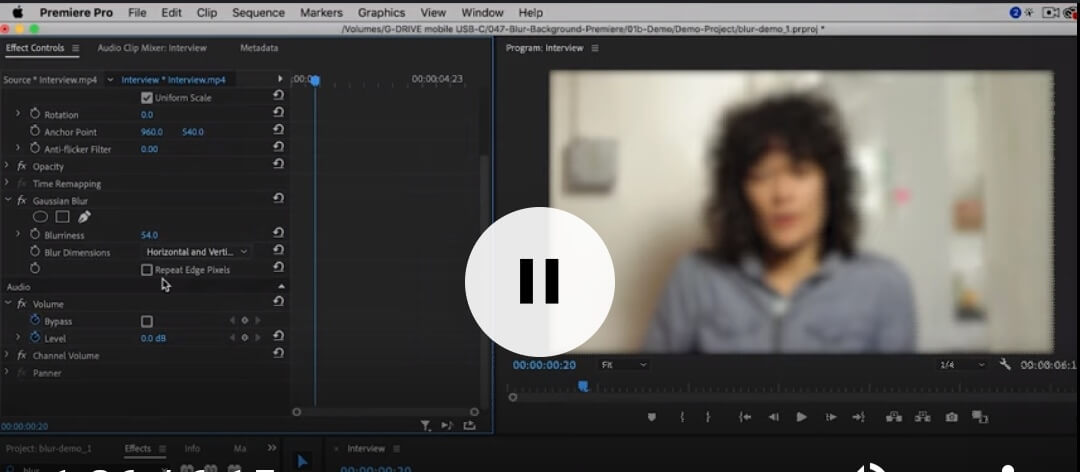
Step 5: Look for a Free Draw Bezier
It would help if you searched for Free Draw Bezier. After finding it, you need to click on it to cut the video part you don't like to blur. Cut every aspect of the video apart from your face.
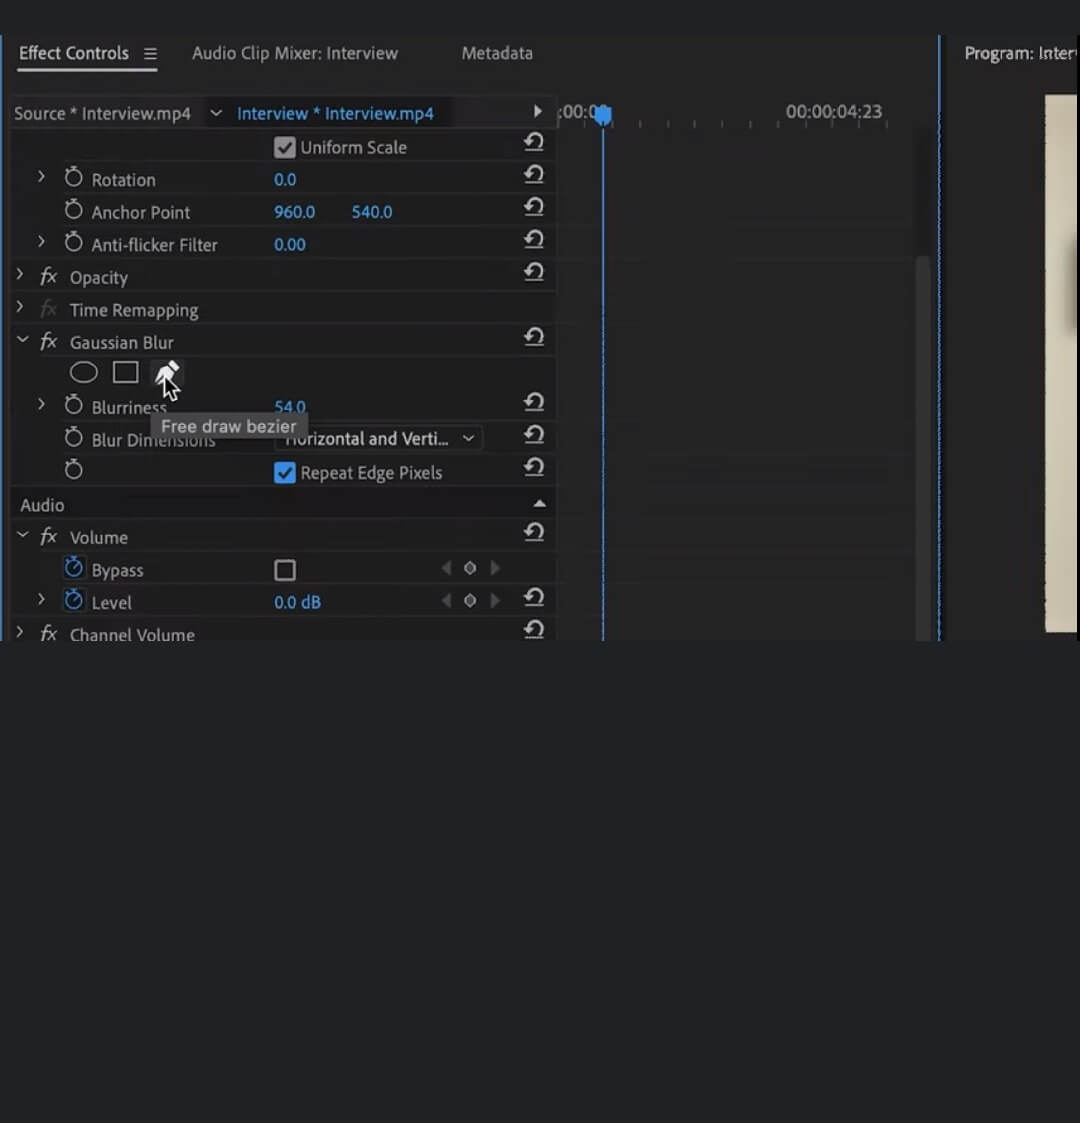
Step 6: Select Inverted
After making all the changes, you need to press the Inverted button option. You can see now that your face has been blurred.
Also Read:
How to Blur Video Background in Lightroom >>
Part 3. How to Blur Moving Objects with iPhone/Android App
Whether you're an Android user or an iPhone user, you can easily blur out moving objects from your videos with app.Let's talk about how to do it.
1. Skitch [For iOS]
Skitch is a fascinating app for iOS users to blur out moving objects. It possesses a Pixelete feature, allowing you to blur a part of the video.
Importantly, Skitch doesn't offer a challenging interface for its users but a pretty easy and smooth one. Using this tool, you can blur out your objects or faces with few steps.
Steps of Blurring Out Objects with Skitch.
Step 1: Import a file
After launching Skitch on iOS, you need to select a photo or video you want to edit
Step 2: Select the down button
Now, you'll need to press the down button at the right of your screen.
Step 3: Use Pixelate
In this phase, you'll need to use the Pixelate button to highlight the object you want to blur.

Step 4: Adjust your content.
After applying the blur effect, you can add effect features to your file. You can add essential features like emoji, text, and other stuff to make your wonderful.
2. Blur Video and Image [For Android]
Using this magnificent editor, you can add blur effects to any photo or video you want. It offers a pretty simple interface, making it a perfect option for Android users.
You can utilize its terrific features to adjust the size and duration of the blur effect you're going to add.
Steps for Blur Out a Moving Object with Android App
Step 1: Install Software
To blur out moving objects, you need to acquire Blur Video and Image services by downloading them.
Step 2: Import a file
After installing it, you need to upload a particular video clip from your gallery to add blur effects.
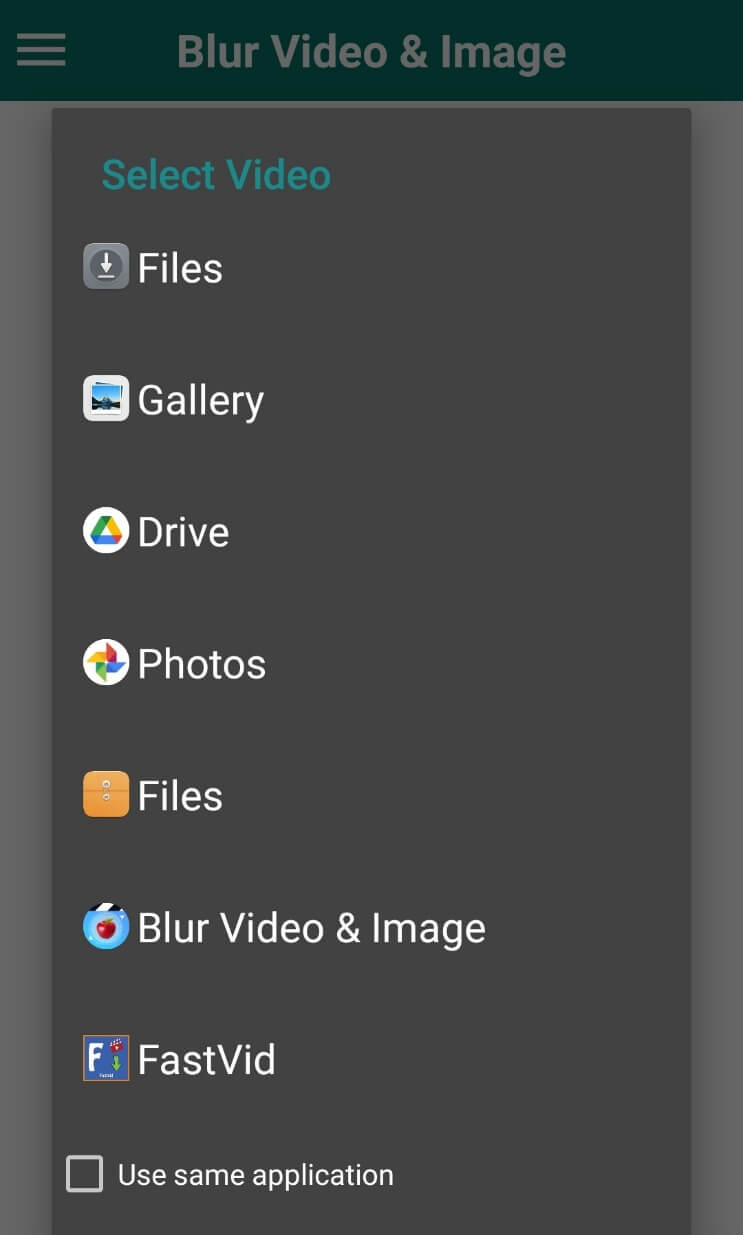
Step 3: Blur out the moving object.
You need to select a block image you need to place in the object you want to blur. And you also need to adjust the duration in which that moving object comes.

Step 4: Download your File
After blurring out a particular object, you can download the video file by clicking on the Save button if you're satisfied with the proceedings.
Part 4. Why Do You Need Blur Moving Objects?
Many people ask why people would want to blur out objects and faces in their videos.
There can be some unforeseen reasons behind blurring out objects from videos, but some are more common.
Let's explore them.
1. For Privacy Purposes
Sometimes, people want to blur out their faces on a particular video to hide their identity. They don't want to appear in public because it can create colossal fuss and trouble for them.
The majority of the people hide their faces on a business video because that particular video is supposed to run on the news channels. Blurring out faces will help them to avoid appearing in front of the public.
2. For Copyright Issues
If you're using someone's video and he gave you the authority to use his video for commercial purposes but at the condition of blurring out his face from the video.
Similarly, an owner of the video can also ask you to hide some objects from the video. Generally, it's not ethical to use someone's content for your private purposes, but some people grant you the authority to utilize their content by hiding some stuff.
Conclusion
Do you want to become a content creator?Despite the availability of some modern video editors, life hasn't been an easy one for content creators to select an appropriate video editor for them.
Luckily, the emergence of iMyFone Filme has made their job easy by providing some flawless features. The best thing about Filme is its support towards pro content creators and newbies. Filme will support motion blur effect in the next version.
You can easily explore its advanced and professional features; however, you'll need to acquire its premium version to use the most advanced features.
Features
Multiple Editing Modes
You'll get countless editing modes with iMyFone Filme. It offers you to add GIFs, pictures, and anything you want to your content. Whether it's a crop tool or trim tool, iMyFone makes sure to provide you with reliable output.
Basic Effects
Adding effects can make your content look special. However, the selection of picking appropriate effect features takes a few of your doings. However, iMyFone Filme makes your job pretty simple by offering scintillating features. With offering gorgeous animations, iMyFone allows you to apply some great themes to your video.
Sublime Transition
IMyFone offers the best possible transition effects for its users. You'll find its transitions appealing, engaging, and captivating.
Many YouTube content creators have endorsed the ability of iMyFone Filme to provide commendable changes. You'd have known that appealing transitions can change the dimension of your content.


