AVS and Movavi are the video editing tools that make it possible for you to add blur effects to your video in a few easy and simple steps.
Without further ado, let's get started and discuss practical steps and how to blur a part of the video and blur face in the video.
Part 1. Blur Faces in AVS Video Editor

AVS video editor is free software that comes up with video editing features that allow you to blur the video. Before we introduce how to blur video with AVS video editor,AVS video editor is an excellent video editor, but i would recommend iMyFone Filme to blur video, you can blur video in iMyFone Filme with few clicks in 5 seconds. Download iMyFone Filme below.
Steps for Blur Video with AVS Video Editor
Step 1: First of all, it is important to note that AVS blur video editors apply the basic blur effect to the entire video or image. For this purpose open the tool, open the main window and choose the Blur effect from the video editing option.
Step 2: Click on Add Or Replace Video Effect to see the display of effect on the timeline. You can see hundreds of different effects and it also allows you to drag and drop the effects to the timeline.
Step 3: After choosing the effect you will see the zoom slider. move the zoom slider in such a way that it sets the effect application area. By proceeding with this option you can confirm the boundaries and can also preview it.
Step 4: Remember that the AVS blur video editor makes it possible for you to get access to hundreds of different effects. So whenever you choose the effect, adjust effect properties accordingly.
Step 5: After completing all the adjustments and addition of blurred effects, playback the file to see if the desired result is achieved. In the end, click on the OK button to save all the changes.
In this way, you can use the AVS blur video editor to apply the blur effect to the video.
Part 2. Movavi Video Editor Face Blur
If you want to draw faces in the video on Windows 10 on Mac, then proceeding with the Movavi blur video editor will be a great option. Let's understand in a few easy and practical steps
Steps for How to Blur Your Face in Video Using Movavi
Step 1: Although Movavi blur video editor Plus is also available, you can enjoy the video face blurring option for free. The first step is to download and install the free version.
Step 2: Open the main window and import the video by clicking on the New Video option in the timeline for which you want to blur the face.
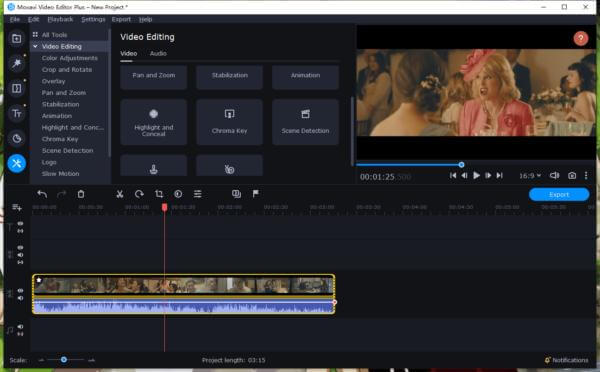
Step 3: On the top left of the screen, you will see the option of More Tools from where you can go to the Highlight and Conceal. Click on this option and choose blur shape and effect.
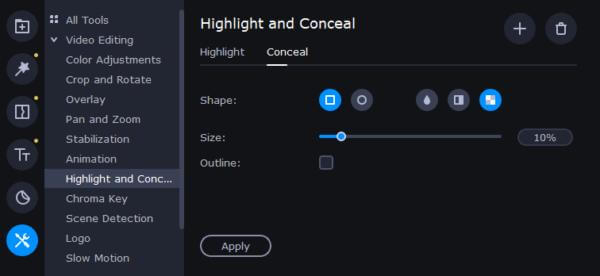
Step 4: After checking and clicking on the blurred face in the video, export the video and download it with the blur effect.
Part 3. OpenShot Video Editor Blur Tools
OpenShot is a free blur video editor blur tool that not only allows all the basic video editing but also makes it possible for you to learn one or more faces in the video. It is a particularly useful tool when you want to conceal the faces of more than one person.
How You Can Use OpenShot to Blur Faces in the Video
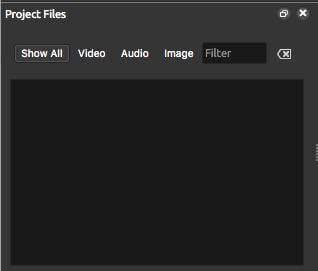
Step 1: Download this tool to your system and go to the Openshot interface. Here you will see the option to add new project files. Import the video clip from your computer by clicking on this option.
Step 2: Now choose the shape graphic, find the blur option, and scale the video accordingly.
Step 3: You'll also see the preview option on the timeline clicking on this option will open a New Preview Window where the circle graphical and the shape of the graphic will be shown overlaid on top of the video.
Step 4: If you are satisfied with the result of the blurring, open the File menu and Export Video. make sure to name the video so that it will save in the browser that name. Check if the blurred effect is being shown in the rendered file. If you are not happy with the final results, you can always edit the same video in the editor again and export it again to your desktop.
This video editor works perfectly on the desktop and video will only take a few seconds to minutes to download to your PC.
Also Read:
How to Blur Video Background in Lightroom >>
How to Add Motion Blur Effect >>
Part 4. Best Video Editor Blur Tool on Windows/Mac-iMyFone Filme
iMyFone Filme is a great blur video editing tool that allows users to proceed with video editing blurring and trimming without any cost. It has a lot of advanced video editing features that are available for free. It allows you to import, crop, split, rotate, blur, edit and zoom videos. It has wonderful video editing features that can make you a pro without the help of anyone.
Pros
 100% free.
 Beginner-friendly.
 Allows advanced video editing.
 24/7 customer support.
 Simple and easy interface.
 The perfect tool for professionals.
 Allows you to adjust the speed of the videos.
 Compatible with Windows 10, 8.1, 8, 7.
 Available for offline use once downloaded.
Cons
![]() You will need a strong internet connection to download this software to your PC.
You will need a strong internet connection to download this software to your PC.
Blur Faces in a Few Easy and Simple Steps with Filme
Step 1: Download iMyFone Filme to your device and install it on your system. The installation will start from downloading the.exe file and then installing it to your computer.
Step 2: Go to the New Project option and choose the video in which you want to blur the face, background, or any other portion of the video.
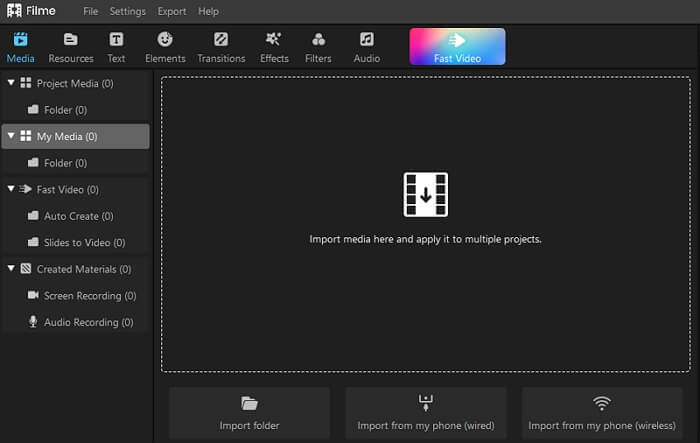
Step 3: Now that you have added the video to the timeline, move to the settings and choose the background or face blur option.
You will see plenty of different video editing options where you can also see the face and background blur options. Choose the relevant one.
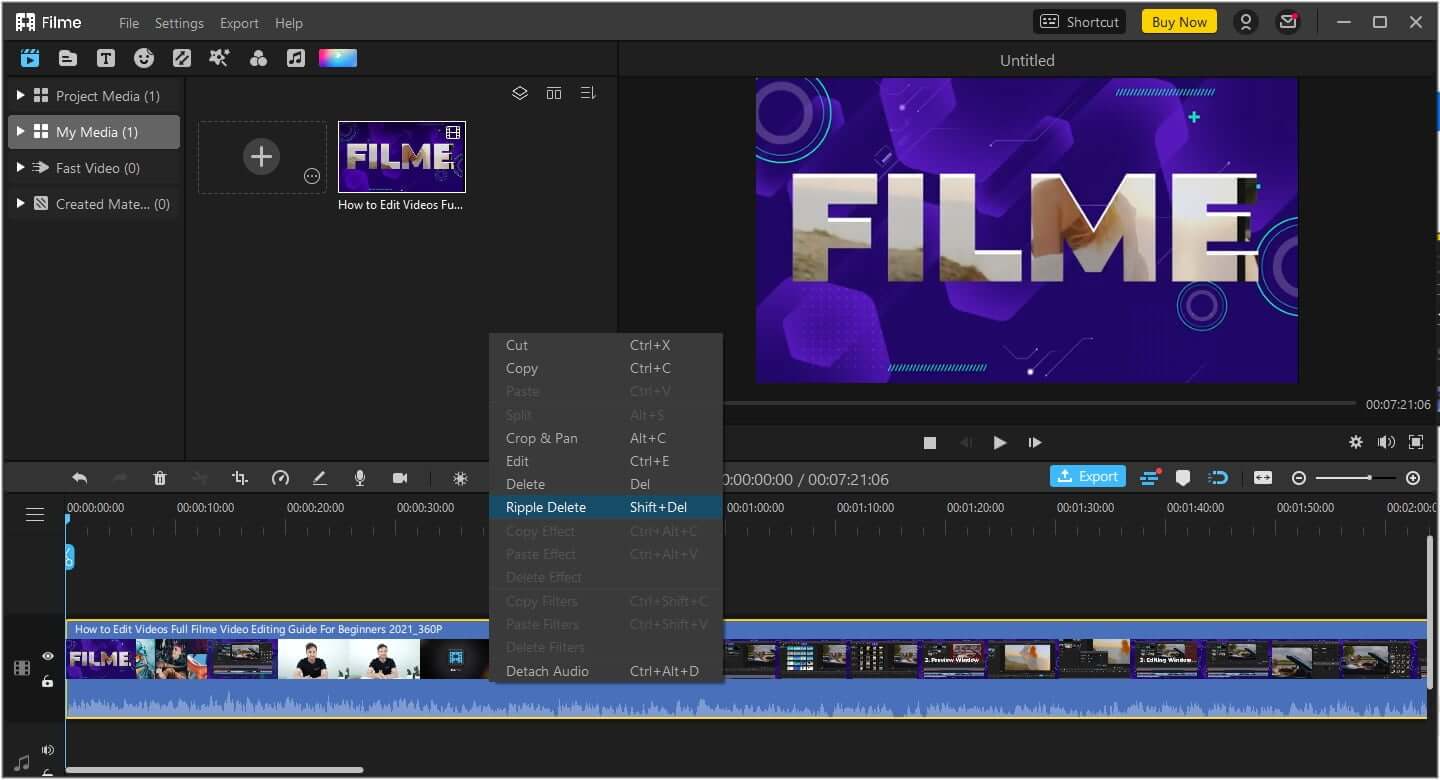
Step 4: Click edit and change blurriness properties.Now, after you click edit option,you can change blurriness properties.you decide whether to blur out your face or only a part of your video. Various blur options are available. You should choose your favorite blur and proceed with adjustments.
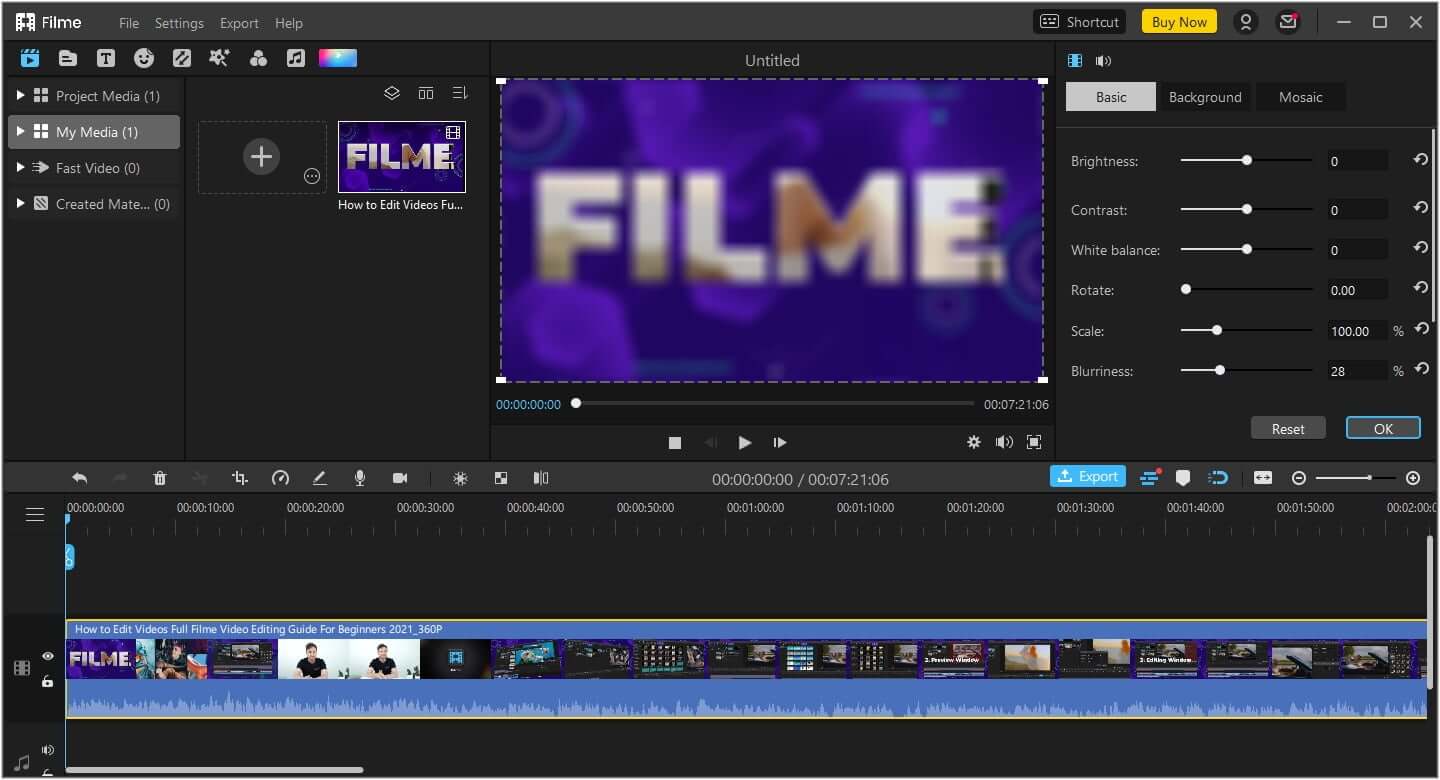
Step 5: After successfully blurring the face of the video, click on the Export button and Download this video. The blurred video can directly be downloaded into your device from where it can be shared anywhere you want.
Part 5. FAQs about Blur Faces Video Editor
Q. Which is the Best Video Editor for Blur?
A. There are many free and paid online powerful video editors available on the internet such as AVS, Movavi, etc. However, iMyFone Filme is the best video editor for blurring faces and backgrounds in the video. It has various video editing features and comes up with a lot of blur options. It can even detect the face line automatically and recognize the background.
Q. Is it Possible to Blur Faces on YouTube?
A. If you want to post a video on YouTube and want to blur a face, you can utilize the built-in blur video editing feature. For this purpose, you will have to sign in to your YouTube account, upload the original video for which you want to proceed with blurring, and go to face blurring options in the editor.
Q. Does Movavi Video Editor Allow You to Blur Faces in Videos?
A. Yes, Movavi is one of the powerful video editing tools that allows you to blur a face or background in your videos. However the editing and blurring possibilities with this software are quite limited, so you will need to upgrade to a premium version to enjoy plenty of professional video effects including advanced blurring features such as Gaussian and Motion Blur.
Conclusion
There are various online video editing software systems on the Internet that are available for free and allows the users to proceed with basic editing including blurring. However, most free software lack advanced video editing features and they do not have a wide range of blur effects. If you are looking for a tool with all the advanced features that are available 100% free, you should proceed with iMyFone Filme. It is a reliable tool with an easy and simple interface.
By the way, have you ever used a video editing tool? How was your experience? Make a quick comment right now and share your experiences with us.
iMyFone Filme Key Features:
Effects: Filme looks like a typical video editor. It has a timeline, an effects library and a preview window. The effects library has 172 effects. 43 of them are filters, and the remaining 129 are GIFs of various themes.
Transitions: There are 112 video transitions. Video transitions are effects that enable smooth transitions from one video clip to the next. 25 of 112 transitions are designed specifically for slideshows.
Text: There are 45 text types in Filme. You can find texts for titles, subtitles, end titles and titles that appear on the lower third of the screen. Some of these texts are animated.
Audio: The library also contains 51 audio clips that you can use in your slideshow. The audio clips belong to different genres, and you get 28 sound effects.


