Do you want to add a photo face or Reddit or blur the video before uploading it to YouTube, Instagram, and Snapchat, or any other social media or video-sharing platform? then you should know about various tools and applications that can help you with this process. If you know how to blur part of a YouTube Snapchat Instagram video or simply blur the face in any video you can become a video editor. It is particularly helpful for businesses, individual YouTubers, and Instagrammers who produce video content daily and need privacy tools. Now they can blur video on their own as this article will guide them on how to blur the face in the video and add a blur effect.
Without further ado, let's get started.
Part 1. How to Blur Youtube/Snapchat/Instagram Video Using iMyFone Filme
iMyFone Filme is the latest video editing software of iMyFone. It’s an beginner-friendly video editor that offers basic to high level video editing tasks. It is suitable for editing video for family and friends, for sharing on social media and for business.You can add blur effect to video in Filme 3.5.5 version. Download iMyFone Filme and try the new blur effect now.
Blur Faces in a Few Easy and Simple Steps with Filme
Step 1: Download iMyFone Filme to your device and install it on your system.
Step 2: Click on the New Project option and choose the YouTube, Instagram, or Snapchat video from your gallery and import it to the software.
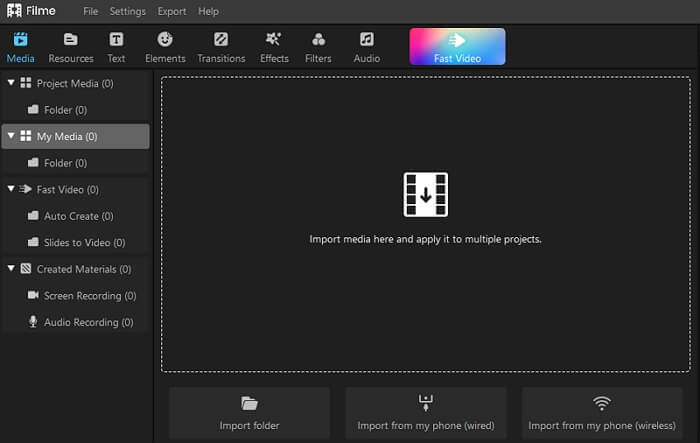
Step 3: Drag this YouTube, Snapchat, or Instagram video to the timeline. Now go to the settings and choose the background or face blur option.
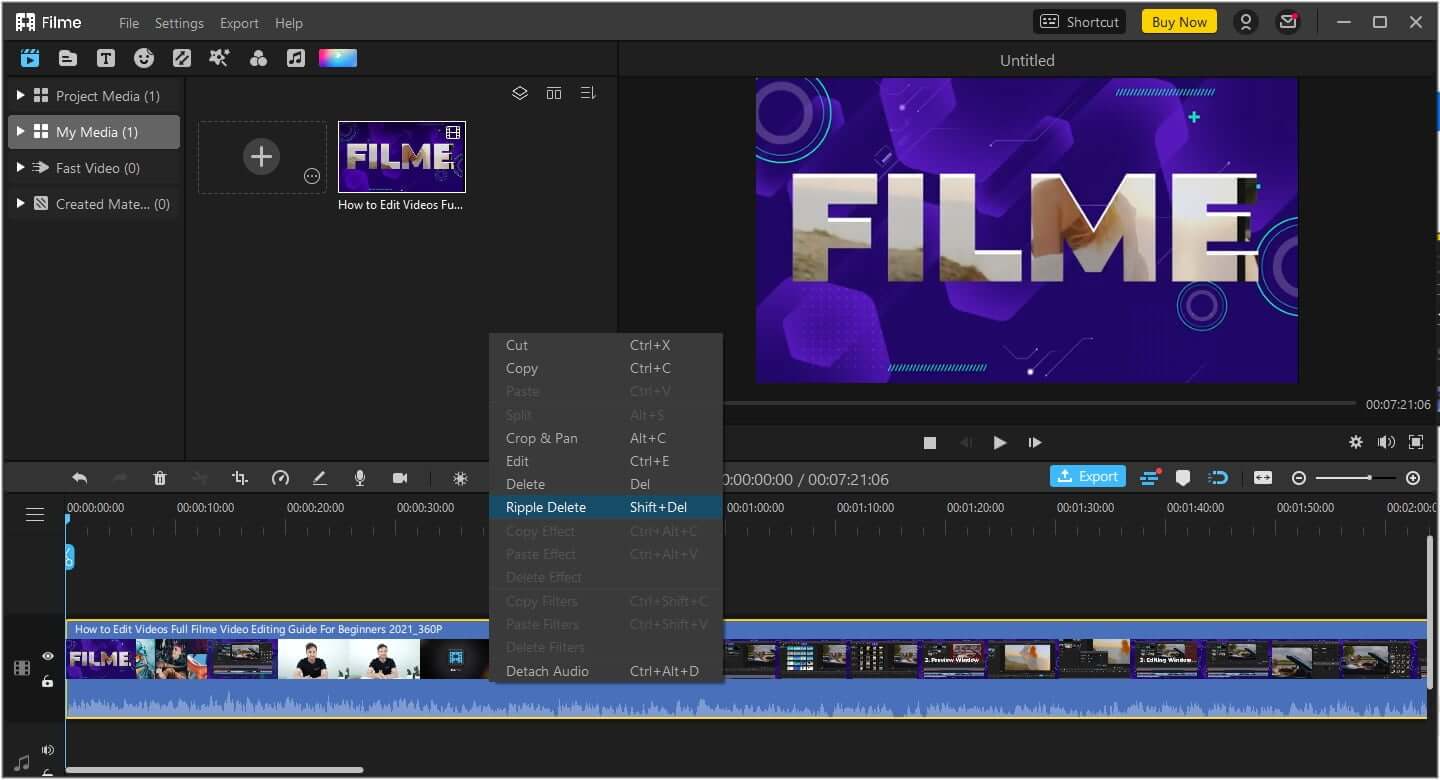
Step 4: Click edit and change blurriness properties.
Now, after you click edit option,you can change blurriness properties.you decide whether to blur out your face or only a part of your video. Various blur options are available. You should choose your favorite blur and proceed with adjustments.
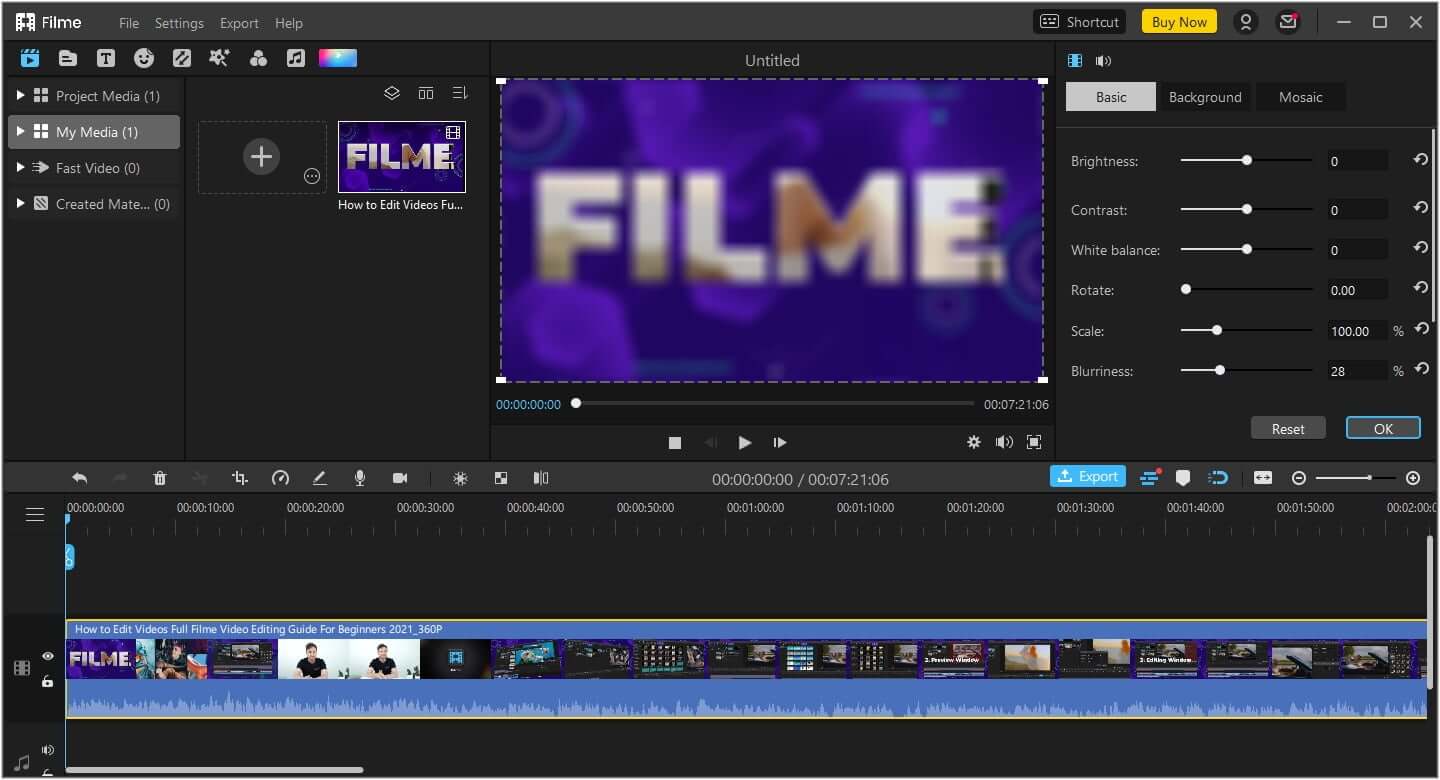
Step 5: After successfully blurring the background of the YouTube, Instagram, or Snapchat video, click on the Export button and Download this video successfully. After downloading the blurred video, you can directly upload it to video-sharing or social media platforms.
Part 2. How to Add Face Blur Effect in YouTube
Video editors know how to add face blurs to YouTube videos. It is simple if you know the basics so let's start.
Steps for Blur Faces in YouTube
Step 1: First of all, you have to prepare the face. For this purpose, all the elements should be removed and the background of the photo should be transparent. You can easily do so by using online photo editing software.
Step 2: Now download the edited photo in PNG format. Make sure to keep the export resolution up to 100 dots per inch.
Step 3: Open the video project in YouTube which you want to integrate the photo of the face. Import your photo there and choose the location of the video where the face should appear.
Step 4: Here you can also "Add Anchor Points" which make it possible to move the face photo along with the certain point or scene in the video. The region of the face that will appear within the anchor points will determine the face Blur.
So by uploading the video to the Video Project and adding face into it, you can successfully proceed with the addition of face in the video.
Part 3. How to Add Custom Blur in YouTube Studio
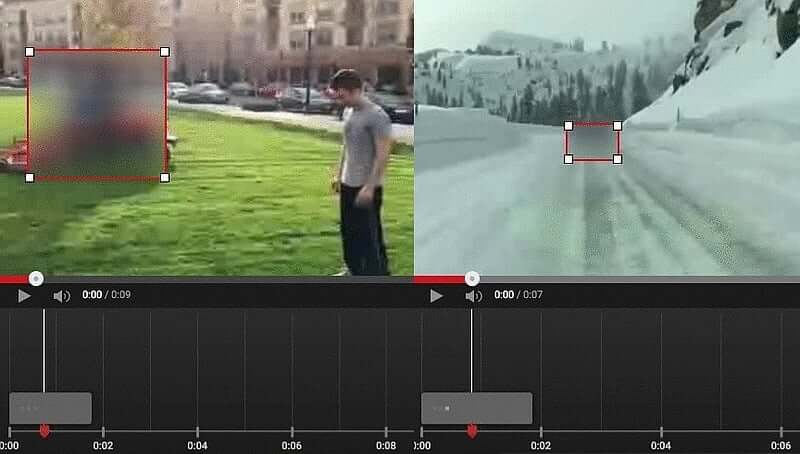
If you want to adjust the blur in the YouTube video, you have to sign in to the YouTube studio. All the YouTubers have an account on YouTube studio which is the place where YouTubers see all the statistics and data related to their private and public video content.
Steps for Add Custom Blur in YouTube Studio
Step 1: Open the browser and sign in to YouTube studio. on the main interface, you will see the Content option on the left-hand menu. choose this option.
Step 2: After clicking on the content option, you will be asked to click on the video that you want to edit. Choose the video and click on the Editor option on the left-hand menu.
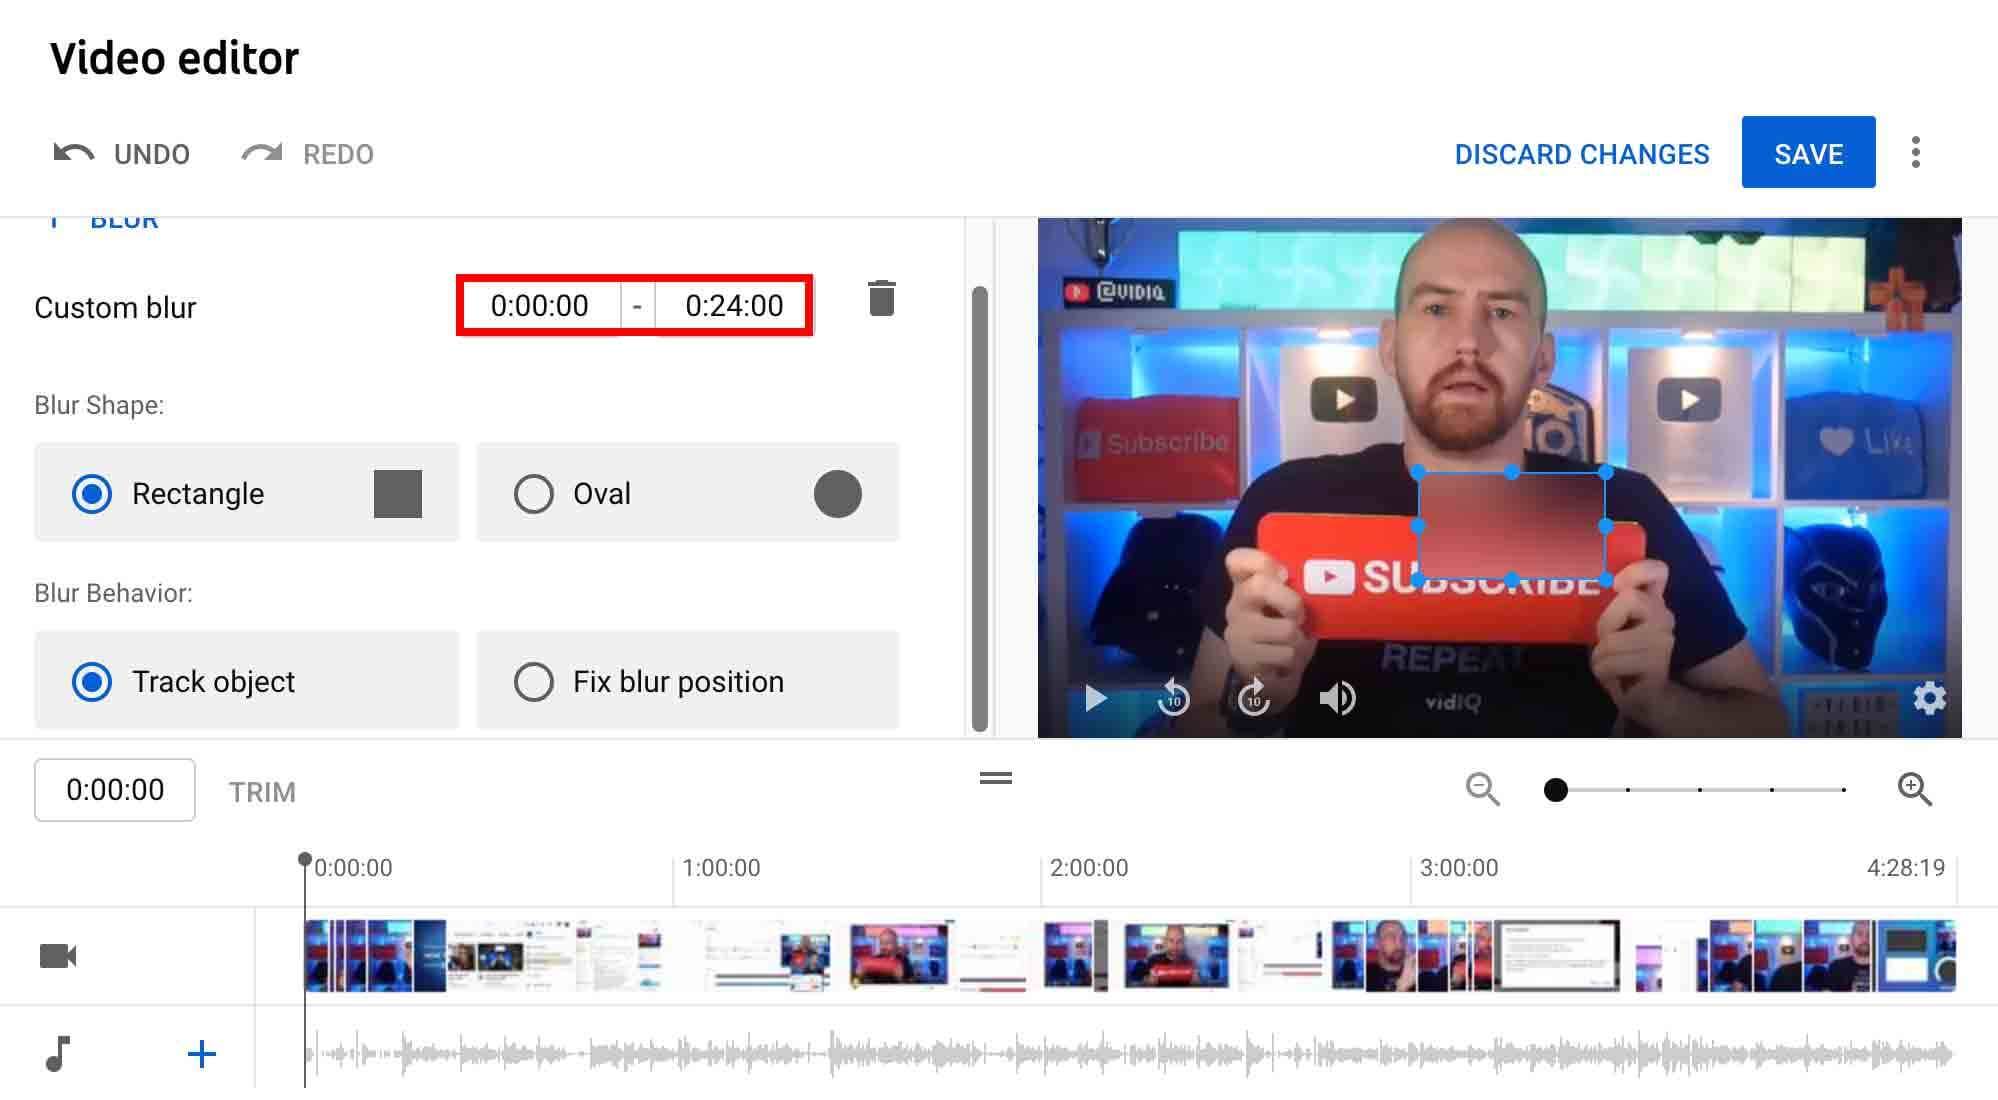
Step 3: In the Editor, you will see the option to blur parts of your video. Select this option and go to Custom Blur. by clicking and dragging on the box you will be able to adjust the blur and choose your blur customization.
Step 4: After all the adjustments you will see the option to save the video. Do it by clicking on the Save option at the bottom. After saving the edited video, download it and upload it again to see the changes that you made.
Custom Blur is a very useful feature of YouTube because it not only allows you to blur a particular part of your video but also makes it possible to move the blur box to different places, change the blur shape, blur multiple areas and resize the blur area.
Also Read:
How to Blur Video Background in Lightroom >>
Part 4. 4 Tips for Video Blurring
1. Go Through All the Options
If you want to add the face blur into the video, make sure to go through all the face blurring options. do not hesitate to reach out to the customer support or expert professionals for or understanding all the available video editing options including the face blurring.
2. Download the Offline Software
Always download the video editing software for professional usage. Sometimes when you do not have an active internet connection or you want to proceed without any pause, it is better to use the offline software that works efficiently even without internet connection.
3. Use Advanced Video Editing Software for Blurring
Use a software that has a lot of video editing options such as adding blur effect, video trimming, transitions, cropping, rotation, and much more. Very few free software systems provide high quality video blurring and editing options; one such example is of iMyFone Filme.
4. Make Sure to Preview the Video
Preview every change during the video by using the instant preview option. It is no secret that the core purpose of blurring anything in the video is retaining privacy. What is the use of blurring when you face blooper due to lack of previewing. It may result in exposing your sensitive information so it is better to preview every change so that you will get to know whether or not everything is working according to your unique video editing and blurring needs.
Conclusion
In this video editing and blurring guide, we have provided in-depth knowledge on how to blur faces in video or blur part of the video. It is particularly helpful when you cannot afford to hire a video editor and also retain your privacy in the videos by blurring certain portions. The given tools and tricks make it super simple and easy for beginners to proceed with video blurring without paying even a single penny. We recommend using iMyFone Filme as it has highly advanced features for video editing and blurring the background. You can also add blur effects to this tool along with other video editing and blurring options. Filme will also support motion blur effect in the next version.
iMyFone Filme is a 100% free video editing tool that allows you to import, crop, split, rotate, blur, edit and zoom videos. It has wonderful video editing features that can make you a pro without the help of anyone. Let's have a look at some of the major video editing features of iMyFone Filme so you will get to know what you can do with this amazing tool.
Pros
 100% free.
 Beginner-friendly.
 Allows advanced video editing.
 24/7 customer support.
 Simple and easy interface.
 The perfect tool for professionals.
 Allows you to adjust the speed of the videos.
 Compatible with Windows 10, 8.1, 8, 7.
 Available for offline use once downloaded.
Cons
![]() You will need a strong internet connection to download this software to your PC.
You will need a strong internet connection to download this software to your PC.
iMyFone Filme Key Features:
-
Effects: Filme looks like a typical video editor. It has a timeline, an effects library and a preview window. The effects library has 172 effects. 43 of them are filters, and the remaining 129 are GIFs of various themes.
-
Transitions: There are 112 video transitions. Video transitions are effects that enable smooth transitions from one video clip to the next. 25 of 112 transitions are designed specifically for slideshows.
-
Text: There are 45 text types in Filme. You can find texts for titles, subtitles, end titles and titles that appear on the lower third of the screen. Some of these texts are animated.
-
Audio: The library also contains 51 audio clips that you can use in your slideshow. The audio clips belong to different genres, and you get 28 sound effects.


