To make your content more engaging and exciting, you'll need to apply some new tricks to your video. For instance, you can apply new video effects such as transition and Picture-in-Picture effects. Or better yet, you can also gracefully use the Cinematic Black Bar in your video.
You'd have seen the black effect at the bottom and top of the videos in the movies or YouTube. Besides adding a bit of a flavor, this effect can also make your content relevant. You can easily apply this effect using tools like Premiere Pro.
Let us talk about how to add the effect of the black Bar into your video in Premiere Pro.
Part 1. How to Add Cinematic Black Bars in Premiere Pro
Applying the cinematic black bars effect to your video can have positive consequences on your video.
Many content creators opt to use this effect in more comprehensive videos when the screen doesn't seem to have an appropriate dimension. The cinematic black Bar helps the content creators to make the video relevant.
Another scenario when adding a cinematic black Bar becomes an essential where video seems large for the screen. In this scenario, the cinematic black bar effect reduces your video's size to fit your video's frame. It is pretty easy to apply the Black Bars effect using Premiere Pro. Here's the quick guide to applying the Cinematic Black bar effect to your video.
Step By Step Guide with Premiere Pro
Step 1: Launch Adobe Premiere Pro
Search out for Premiere Pro and download it from the official website. Next, you need to launch the Premiere Pro program in the first place.
Step 2: Register with your ID
After launching the program, you'll see the registration option there. Now, you need to decide which version of Premiere you'd like to acquire. It offers a premium version at reasonable rates. In addition, you can also get its free trial for seven days.
Step 3: Import a clip
After setting up the account, you'll need to import any music or wedding video to Premiere Pro.
Step 4: Select the New Layer icon
After putting the video to the timeline, you'll need to press the New Layer icon after navigating the Essential Graphics panel.
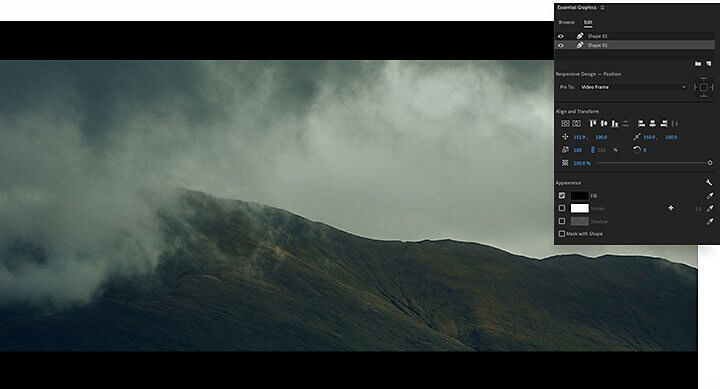
Step 5: Hit the Rectangle option
Now, you need to move towards the dropdown shapes list and press the '' Rectangle'' option from there.
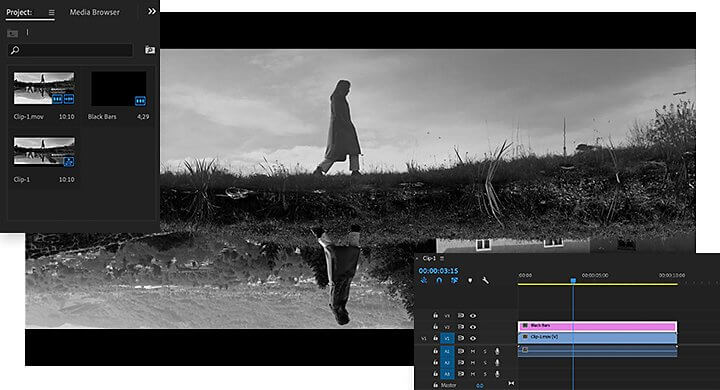
Step 6: Change the color
Navigate to the Appearance tab and press the Fill button to alter the color to black.
Step 7: Select the Selection arrow
To adjust the size and shape of your Bar, you'll need to press the Selection arrow.
Step 8: Click on Duplicate
Now, you need to move to Essential Graphics and right-click on the black bar layer. Next, you need to choose a Duplicate for creating a matching bar.
Step 9: Drag the edges
It would help if you pushed the edge to make them appear for the video's duration.
Step 10: Adjust the area
All you need to do is adjust some specific areas that need to be reframed to retain key content.
Step 11: Export the file
After serving your purpose, download the file by tapping the export button option.
Part 2. Best Alternative Video Editor to Add Black Bar to Video - iMyFone Filme
Sometimes, many content creators couldn't find a way to select appropriate video editing tools to create worthy content for their social media. It happens to almost everyone because you'll find thousands of video editing software pretending to be the best. Meanwhile, only a few provide you with the services you always look for.
However, you can try out iMyFone Filme without any doubt due to its remarkable popularity and scintillating features. Using this tool, you can make your video content look prestigious.
To make your video memorable, you'll need to try out the Filme's feature. Luckily, there is no need to acquire prior knowledge to edit your video. Filme's easy-to-use interface makes everything easier.
Using iMyFone Filme, you can add transitions, picture-in-Picture effects, and cinematic black bars into your video.
Steps Using iMyFone Filme
Step 1: Launch iMyFone Filme
Search iMyFone Filme on your web browser and navigate to its official website for downloading it. Later, you need to open the Filme program to start editing your video.
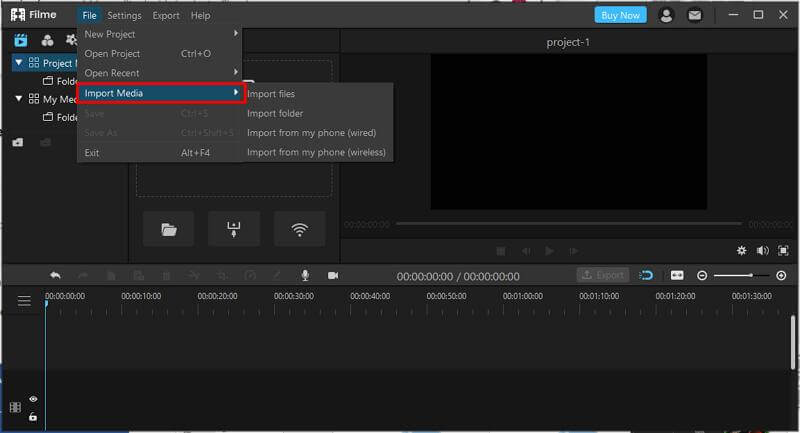
Step 2: Drag the file to timeline
Navigate to the titles tab after dragging the video you've imported to Filme's timeline. After adding a befitting title, you'll need to open the'' Advanced Edit'' option.

Step 3: Add black background
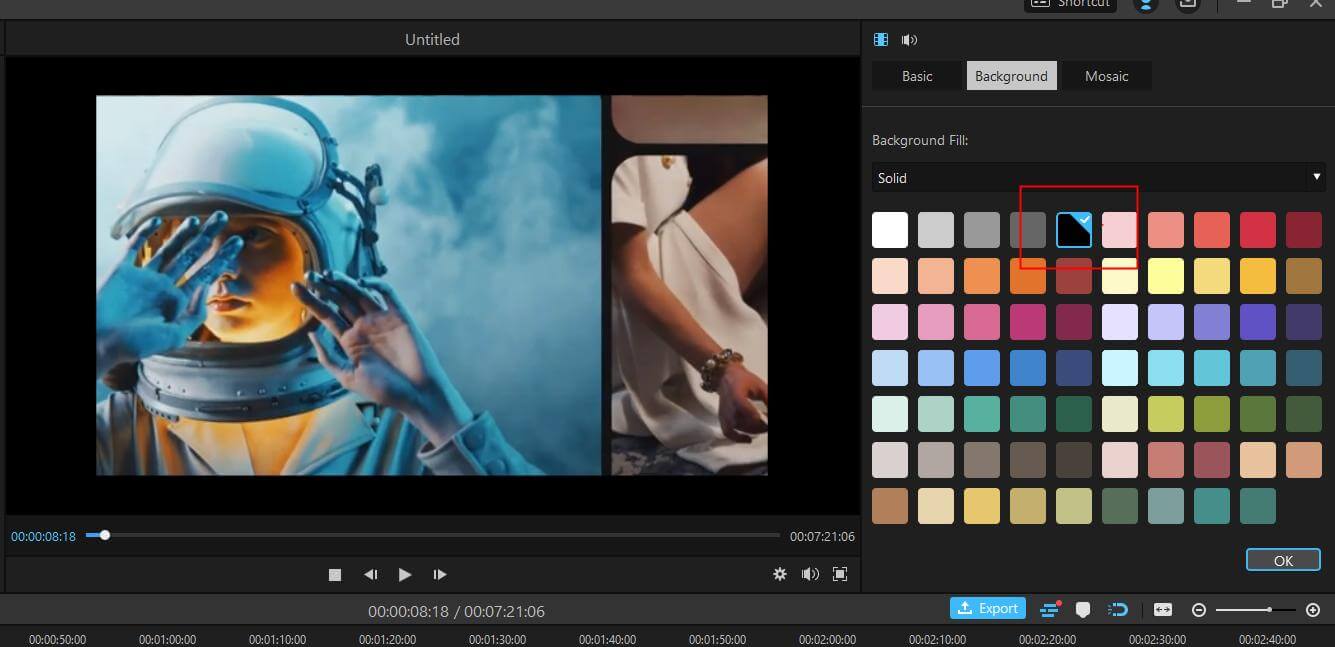
Choose the background fill, and change background color to black. After selecting the "Advanced" edit option, you'll see many options appearing afterward. You need to choose the'' shapes'' icon from those available options. Next, you need to select a rectangle shape.
Step 4: Customize the shape
In this phase, you need to apply two rectangle shape options to the bottom and top of your video. Later, you can adjust the width and length of the shape to make it relevant.
You can also alter the color of the shape by selecting a color option on your left. After you're done with it, hit the OK button.
Features
Audio
Audio is a time-based media storage form for music/sound. Audio and Video Codecs are audio and digital video recordings that can be lossless compressed and uncompressed depending on desired content.
Using iMyFone Filme, you can explore the audio feature by recording your voice and sharing it with your social media friends.
Multitrack Audio
Mixing up multi-audio layers is known as multi-track audio. It is the combination of merging multiple video and audio files into a single video.
It is mainly used for demonstrations and software training programs. You can play more than eight audio tracks at the same time.
Filme offers a majestic multi-track feature that can help you generate more engaging content.
By using Filme Video Maker, you can imagine yourself in a recording studio's mixing room.
Crop Tool
If you want to resize and crop your video, you can add ken burns effects using iMyFone Filme
Select any aspect ratio (16:9,4:3,1:1,9:16)etc., and you can simply press the Alt+C shortcut key or Crop Tool option to crop your video. iMyFone Filme provides this innovative facility.
Split Tool
If you want to split the desired part of your video, you can serve your purpose by pressing the Alt+S shortcut key or Split Tool option.
Adjust Speed
If you want to slow down the playback speed of the video to make the scene more pleasant and if you're going to speed up the video's playback to construct an exciting time interval, you can explore Filme's feature of adjusting speed. You can adjust your speed by pressing the Ctrl+R shortcut key or the Speed option.
Part 3. FAQs about how to add black bars to video
1. What is the other name of Cinematic black bars?
The cinematic black bars effect may sound pretty dramatic, but it possesses another name, letterbox. It is an effect of transferring your widescreen video clip to a standard format video.
However, when adding this effect, you need to maintain the video's aspect ratio. Otherwise, your video may, at times, become irrelevant and scratchy.
When you talk about its advantages, this cinematic effect helps the movie makers to adapt the video to different resolution screens.
In short, the effect of the black Bar has opened up a lot of opportunities in the digital marketing field.
2. Which software is best to add the effect of the black Bar to video?
Since adding the effect of the black Bar is not that straightforward, which you'd have thought, searching for a reliable video helps.
It will help if you look for an editor that could offer you a manageable and understandable interface. Notably, many people opt to look for Premiere Pro, considering its reputation and role in video editing for a few years.
And also, there is no harm in choosing Premiere because everyone can select whichever video editor they like. But, at the same, many people complain about the expensive premium version of Premiere Pro.
Since many people couldn't afford the premium of Adobe Premiere Pro, iMyFone Filme appears as a better option.
Apart from offering outstanding services, the premium version of Filme is available at pretty cheap rates.
Conclusion
Adding a cinematic black bar effect to a video changes the whole dimension of your video. However, some people may find adding this effect tricky, but you'll not face this issue using Premiere Pro.
This tool provides a negotiable interface that makes things pretty slick for you. However, if you don't like adding cinematic black bars effect in Premiere, there is another option available in the shape of iMyFone Filme.
Filme is a versatile tool that can fascinate you with its breathtaking features. Besides adding black bars effect courageously, iMyFone Filme also helps you to explore some other terrific options as well.
For instance, it allows you to record your voice in real-time and add appropriate sound effects to your audio.


 Youtube Videos
 Anime Character
 TikTok Videos
 Celebrity AI Voices
 Advertisement
 Podcast
 Video Games
 IVR Voices
 E-leaning


 [New Released] Try amzing


