Videos can be blurry if the person recording the video is not keeping his hand stable. It is one of the least considered factors for video blur. Due to continuous movement, video can be a little distorted or unfocused. Fortunately, certain apps can stabilize the video and make the video clear.
Making the video less blurry is not a complex task. Many apps provide the solution to stabilize the video. An example of such an app is iMovie that is specifically for Mac users. It is a simple tool that stabilizes the video and also enables the user to make other changes to it. We will discuss iMovie in detail.
Besides Mac, there are plenty of tools for smartphones (iOS and Android). We will demonstrate a few tools for smartphones as well and tell you how you can stabilize your video easily. So, let us get into the tools and techniques that can help you make your videos less blurry.
Part 1. How to Make Clear Video with iMyFone Filme
iMyFone Filme is the right video editor if you want a pixel-perfect video. It is a beginner-friendly video editor that can deal with high-quality videos of up to 4K. You can import high-quality videos and edit them, and finally, you can export them in the desired format. You can choose the required settings for the video to match the requirements of the social media platforms.
The best part is that using Filme is quite easy. You can edit your video like a pro, even if you have no experience in video editing. You can add effects, text, images, filters, stickers, backgrounds, songs, sound effects, and everything you need. It can help you make catchy videos that can make your videos stand out from the crowd.
Filme gives more attention to the quality of the video. It takes care of the resolution and quality, so you don't need to worry about these things. The quality of your video will never be compromised.
Steps to Make Clear Videos with iMyFone Filme
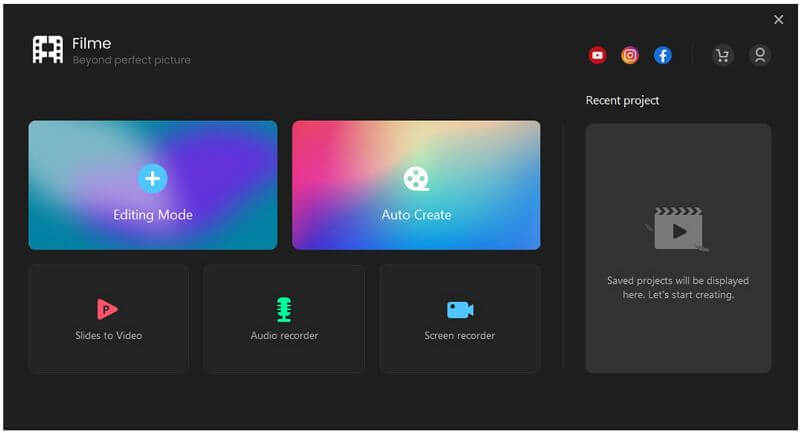
Step 1: Open Filme on your computer and click on "Editing Mode". This mode is for video editing.
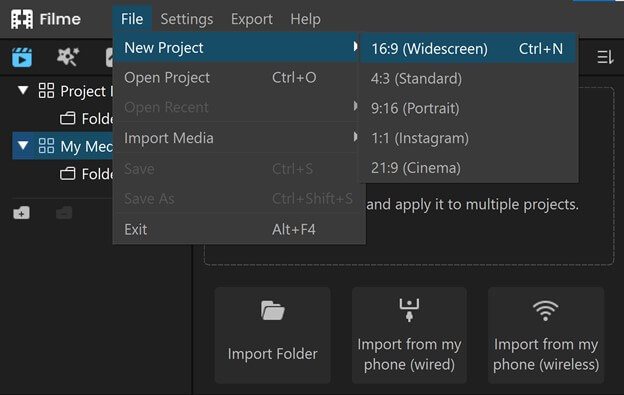
Step 2: Go to the File menu and create a new project. While creating a project, you need to select an aspect ratio. You can select it according to the video and the platform where you will upload it.
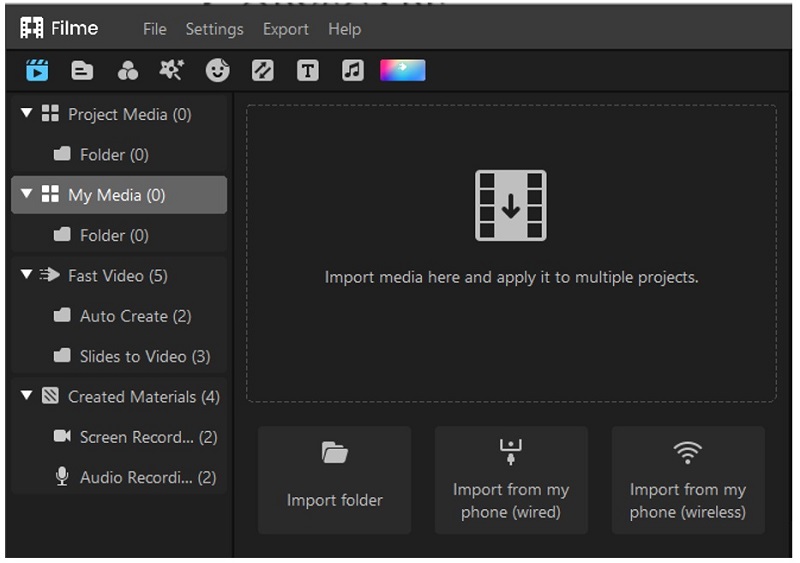
Step 3: From the "Media" menu, import the video and audio files you need to create the video.
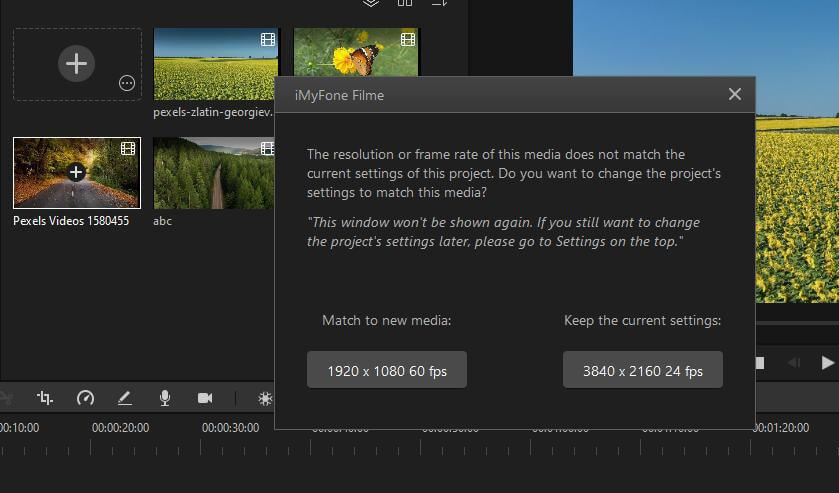
Step 4: After importing the files, you need to drag them to the timeline. If there is already a video on the timeline, the next video should be according to its resolution. Thus, Filme allows you to keep the resolution or match it according to the video that is already present on the timeline.
Step 5: Edit your video as you like. You will have the basic tools over the timeline. For more editing options, double-click on the video, and you will see the options on the right of the video. You can also add effects, filters, text, transitions, music, stickers, sound effects, images, and other things to the video. Filme has a huge library, so you can select anything you like.

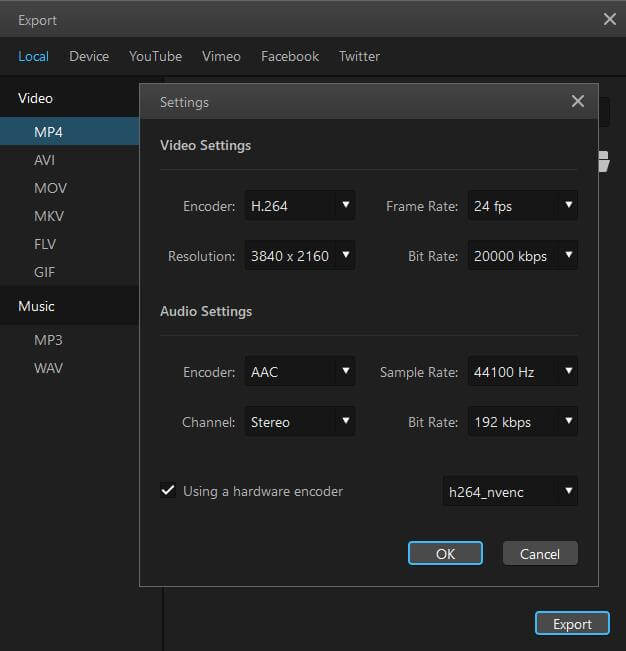
Step 6: Click on the "Export" button. Now, you need to select the quality of the video. Click on the Settings icon, and you will have many options related to the video and audio. Select the codecs, frame rate, sample rate, bitrate, and resolution. Export the video to the desired location.
Part 2. How to Make Video Clear with iMovie on Mac
iMovie is a complete video editing tool that allows users to improve their videos. It has tons of features and tools, and one of them is the stabilizing feature. This exceptional feature of iMovie makes it different and better from other video editors.
Video stabilization is the only way that makes a video clear and less blurry, and iMovie has this feature. Unfortunately, iMovie is only for macOS and does not entertain Windows users. If you are a Windows user, then you will need another video editing tool to stabilize your video.
Recording a video with full stability and without any movement in the camera is near to impossible. It is a fact that everyone admits, so it becomes nearly impossible to bring perfection. Videos recorded using a phone or camera are always a little shaky. iMovie has the stability feature that will stabilize and smoothen your shaky videos.
You just need to download iMovie on your Mac or iOS device, as it is available on both. Here we are demonstrating a few steps that you can use to stabilize your video using iMovie on Mac. Just follow the steps below to make your videos less shaky, less blurry, and clear.
Steps to Make Videos Less Blurry Using iMovie Mac
Step 1: Download and install iMovie on your Mac. Open the app and select any shaky video that you want to stabilize. The stabilization feature not only stabilizes the video but also corrects image distortion. This distortion is mainly due to the fast movement of the camera. iMovie will take care of it.
Step 2: After the video is imported, you must place the video in the editing timeline. Otherwise, the stabilization effect will not work. Make sure that the right clip is selected.
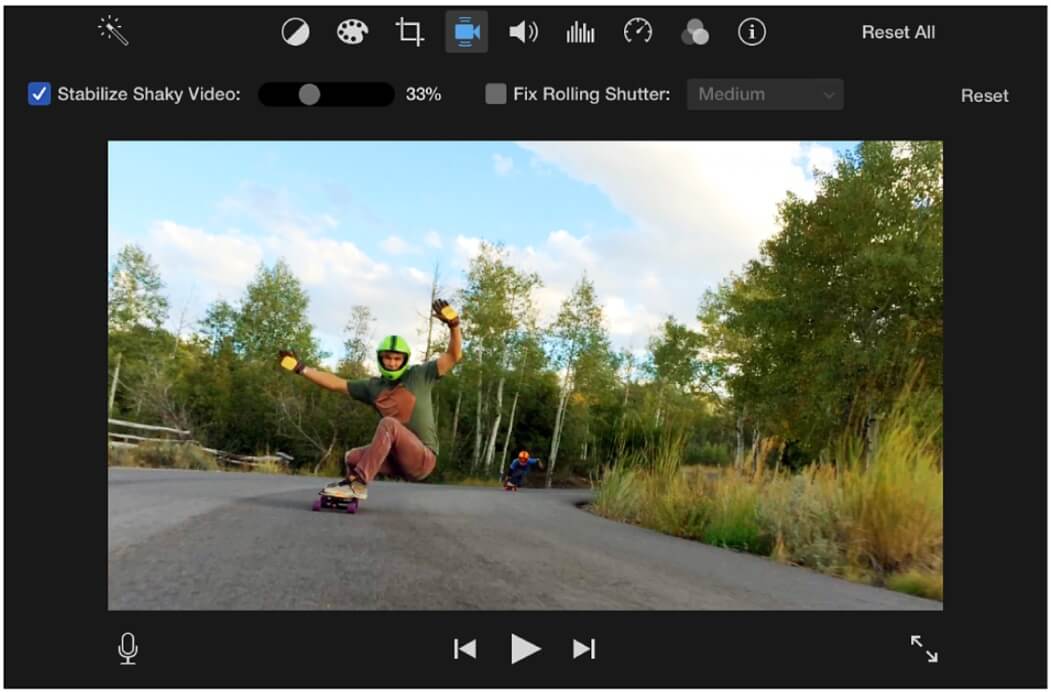
Step 3: After selecting the shaky/blurry area, you will see a lot of editing options. On top of the right side of the tab, you will see the "Adjustment" menu. The fourth icon from the left, which is a small camera, is the Stabilization icon. Click on "Stabilization" and wait for the video to analyze and process. It will take a few seconds.

Step 4: On the adjustment bar, you will see the slider of "Stabilize Shaky Video". You can increase or decrease the amount (strength) of stabilization. When stabilization is done, you can preview the video.
Step 5: When you are satisfied with your corrected video, you can save or export the video to your desired resolution.
Part 3. App to Make the Video Not Blurry on iPhone/Android
There are many stabilization tools when it comes to PC and Mac. Fortunately, the developers have designed video editing tools for smartphones that allow the user to clear blurry videos. Moreover, these tools have other effects and transitions to increase the attractiveness of the video.
We will discuss two different tools, one for iOS and one for Android. There are many applications available that have stabilization tools, but most of them are paid. Let us get into the apps that can help you clear your shaky videos.
1) Google Photos (Android)
Yes, you've read it right. Google photos is also a video editing tool. If you don't get a video editing feature with your Google Photos, then try updating your app. Google Photos is one of the simplest apps that have stabilization features. You can stabilize only parts of the video with it.
Video stabilization is pretty easy with Google Photo. Just follow these steps to remove shakiness from your video and make it clear.
Step 1: Most Android phones have pre-installed Google Photos. Update the app before getting on with video editing. But if you don't have it on your phone, then you can go to the Play Store and download it. Open the app and select the video that you want to edit with Google Photos.

Step 2: After uploading the video, you will see an "Edit" option at the bottom of your screen. Click on it, and it will display multiple video editing options. You can also crop and select the frame of the video that you want to stabilize. After selecting the area, click on "Video Stabilization". It will take a few seconds to stabilize the video.

Step 3: You can also adjust the setting to make your video even clearer. After adjustments, you can simply save a copy by clicking on the button on the lower right side.

2) LumaFusion (iOS)
LumaFusion is a paid iOS tool that you can download on your iPhone and use its stabilization feature to remove shakiness from your video. Let us see some steps on how you can make your video clear with the use of LumaFusion.
Step 1: Open the App Store and download LumaFusion. Once you have installed the app, open it and select any shaky video that you want to stabilize.
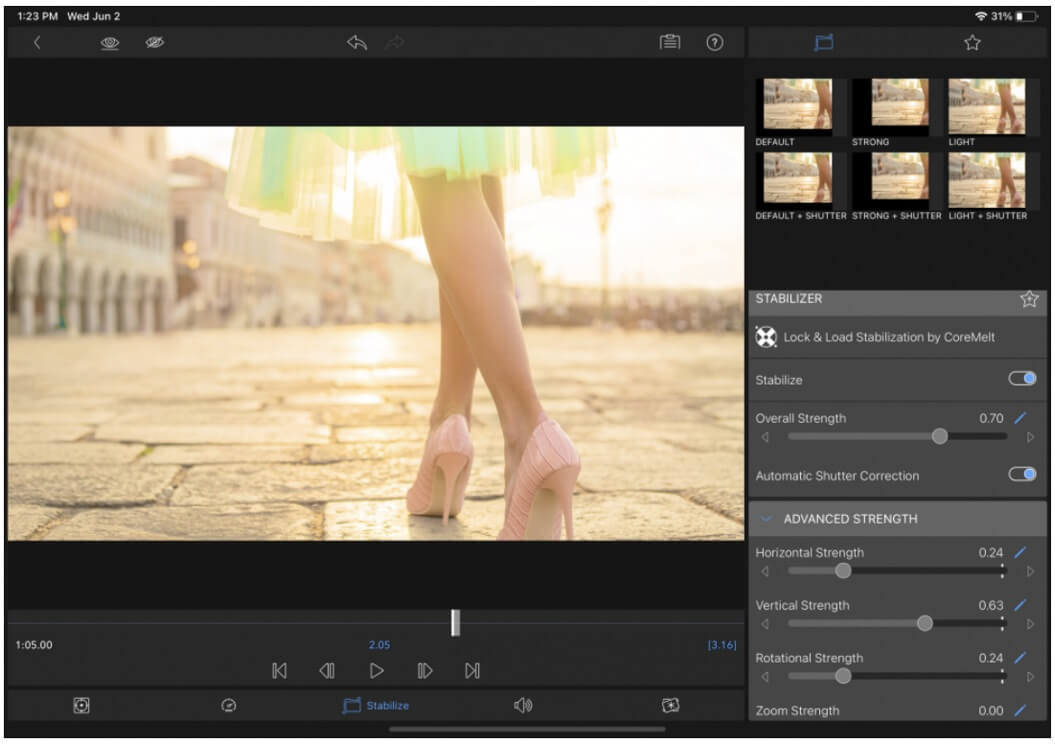
Step 2: With LumaFusion, you just need a single tap to stabilize your video. You just need to double-tap on your clip. It will open the "Effects Panel". In this panel, you will see an option of "Lock and Load Stabilizer". You can even adjust the stabilization slider to increase or decrease its strength.
Step 3: You should always remember that stabilization is not magic and cannot fix blurry video. But it can do wonders to shaky videos. You can also add other editing effects to your videos. Once you are done, you can simply export the video according to your requirement.
Also Read:
How to Blur Video Background in Lightroom >>
Conclusion
This was a simple yet quick demonstration of how you can clear your blurry videos. The shakiness of the video can be removed by using the above tools. There are different tools for video stabilization for every platform. For example, we have illustrated iMovie and iMyFone Filme for PC. Just like that, you can also use the stabilization effect with your smartphones. It will clear and make your videos less blurry with just a touch. Filme will support motion blur effect in the next version.
iMyFone Filme is an amazing video editor for creating pixel-perfect videos. It can handle high-quality videos up to 4K. It takes care of the video quality and resolution, which is why you get optimal quality. Moreover, you can adjust the video settings according to your requirements. Thus, the uploaded video will never be blurred.


