Gimp is a professional editing tool that will help you to remove objects from any image. Let us see how we can remove any sort of object from a photo using GIMP. You can also use iMyFone MarkGo to remove watermark from video and image easily in 1 click.
Comparison Between GIMP and MarkGo to Remove Object
| Dimension | MarkGo | GIMP |
|---|---|---|
| Ease of Use | It is a very simple and easy tool for beginners. | GIMP is relatively a complex tool that one needs to understand before using it. |
| Time Consumption | Your work will be done in few minutes. | It requires more time to remove an object, with the layer addition technique. |
| Background Blend | It uses automated tools that blend the background with the removal of the tool by itself. | GIMP is a complete manual tool and helps you to blend in the background by yourself. |
| Modes of Use | It focuses on watermark removing with 1 click. | It offer a few more mode. But it's more complex to use to remove watermark. |
GIMP and iMyFone MarkGo are both completely different tools. We are using both of these to remove an object or multiple objects from a photo, but the result is a little different. The difference between the end result is due to multiple factors. Let us see what makes them different.
Part 1: Step To Removing Object from A Photo in GIMP
GIMP is a free image editing tool. You can make your images more than perfect by using this tool. It has stunning effects, filters, layers, and different modes.
It is a little complex for someone who is new to picture editing. If you are also new, don't worry. We will show you the easy steps to remove the object from a photo in GIMP.
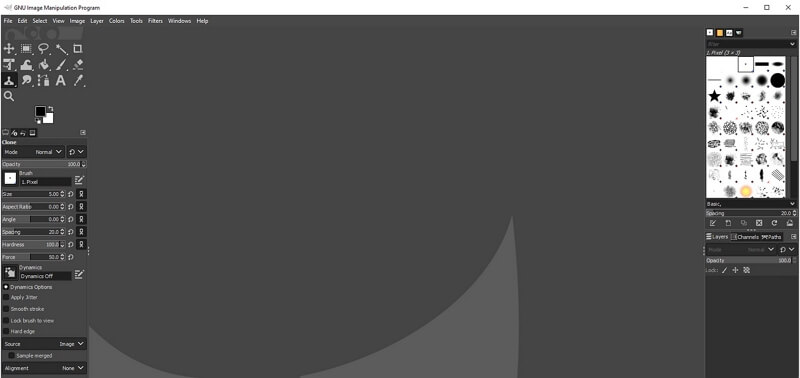
Step 1: If you don't have GIMP installed, go to their website and download it. Install the editing tool and open it. The interface should look like this.
Step 2: Browse or choose the image from which you want to remove the object.
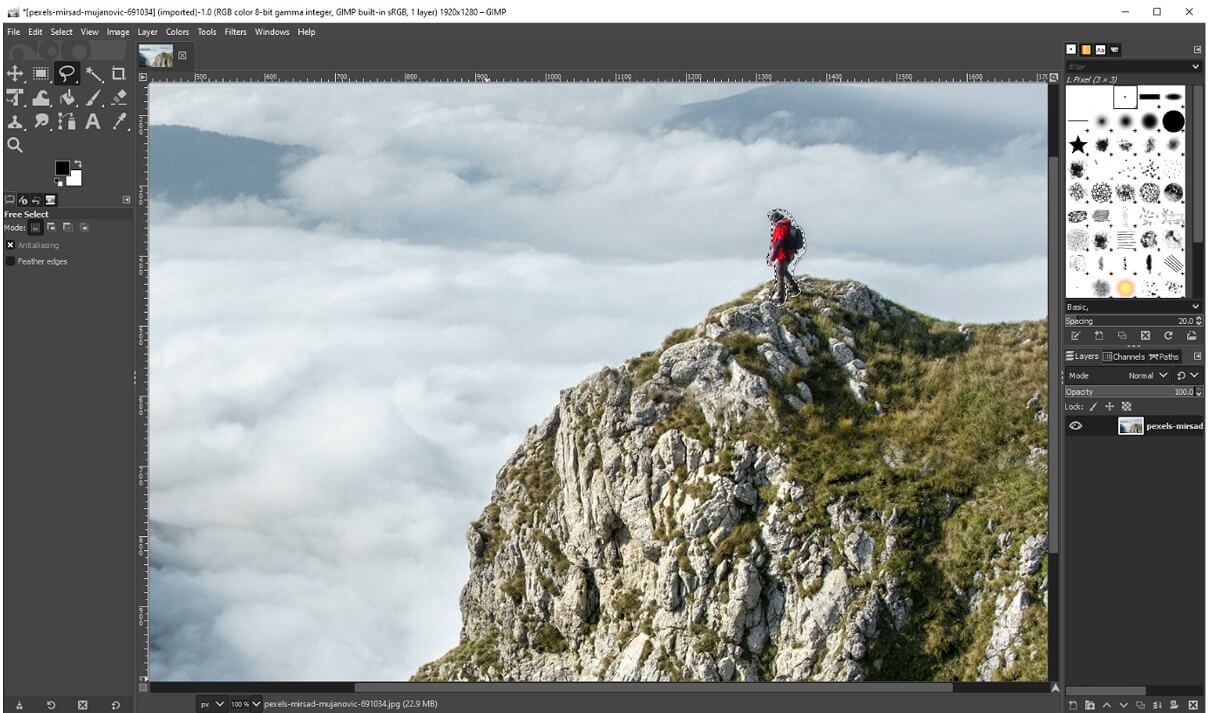
Step 3: To remove an object, you need to select the "free select" tool. Using this tool, outline the object that you want to remove from the photo.
Step 4: We are using the layer method to remove the object. So, to add a layer, you need to make a duplicate of your photo. On the bottom right, you will see the option of "duplicate layer". Click on it to add a similar layer to the editing tool.
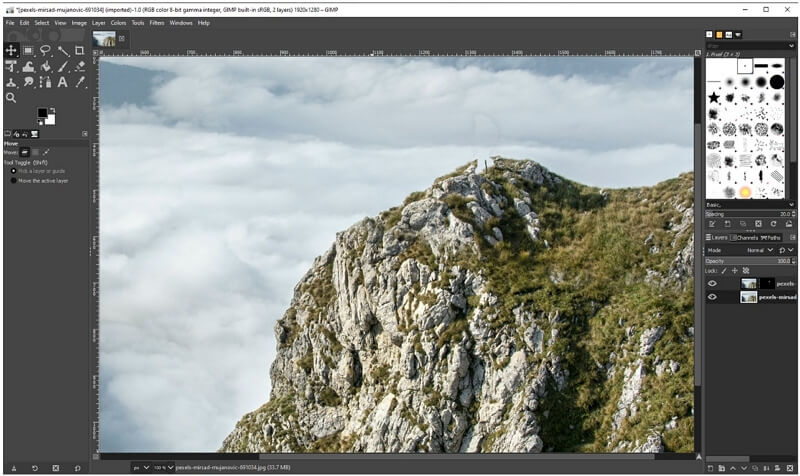
Step 5: Now that duplicate is added, go to the right toolbar and select "move tool". Drag the upper layer by a few inches so that your selected object is no longer in the selected area.
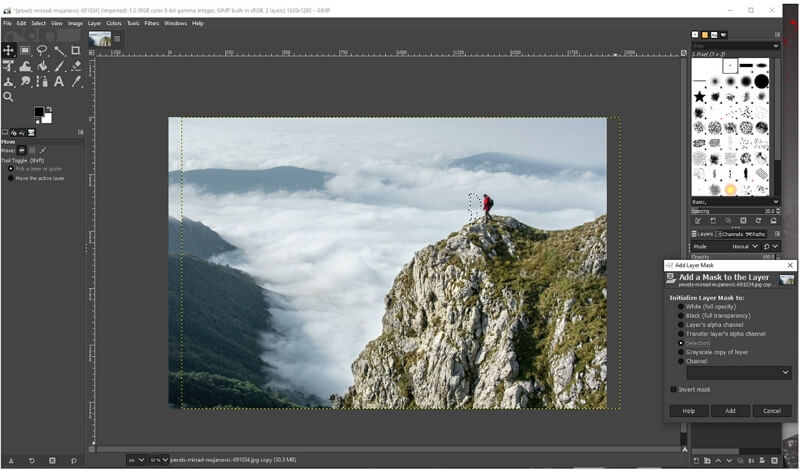
Step 6: Click on the first photo and right-click on it to see options. In those options, you will see "Add layer mask", click on it. Choose "selection" and click on "Add".
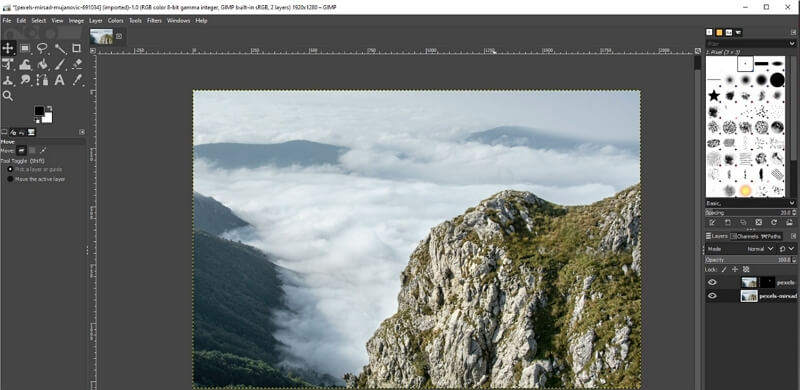
Step 7: Now, your photo should look like the image below. We can clearly see that it requires some finishing touches. To blend in the gaps, we will use the "clone" tool.
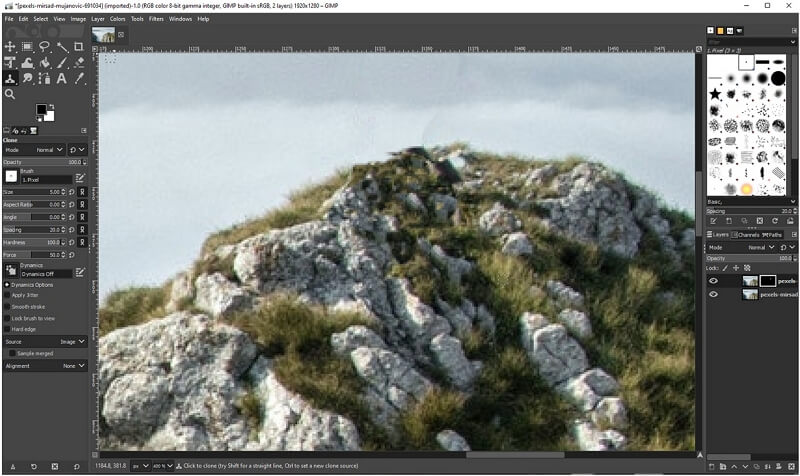
Step 8: Click on the "Clone" tool and select the nearest and similar area of the object that you removed. Just copy and paste on the erased area to blend it in the background.
Step 9: To finish editing the photo, go to the right toolbar and click on "Alpha channel lock". It will lock your layer and make sure no transparency is painted on the layer. Later on, save the image by pressing "CTRL+S".
Part 2. 1 Click to Erase Object from Photo – iMyFone MarkGo
Besides GIMP, another tool that you can use to remove objects from photos is iMyFone MarkGo. It is a straightforward tool and requires only a few steps. Basically, it is designed for watermark addition and removal. We can also use it to remove an object from a photo. It can also bacth watermark photos up to 100 pieces.
Follow these simple steps to remove the object from a photo.

Step 1: Download iMyFone MarkGo and install it. After installation, open the software. You will see four options. We want to remove the object from the photo, so we will click on "Remove Watermark from Photo".

Step 2: You will see "Add photo" in the center of your screen. Click on it to import the photo from which you want to remove the object.

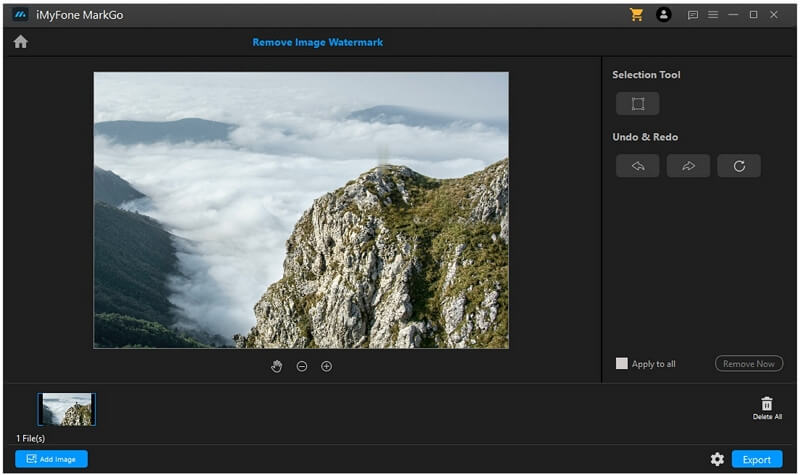
Step 3: Now that the photo is imported, a "selection tool" square will appear on the photo. With the help of this selection tool, select the object that you want to remove from the photo.
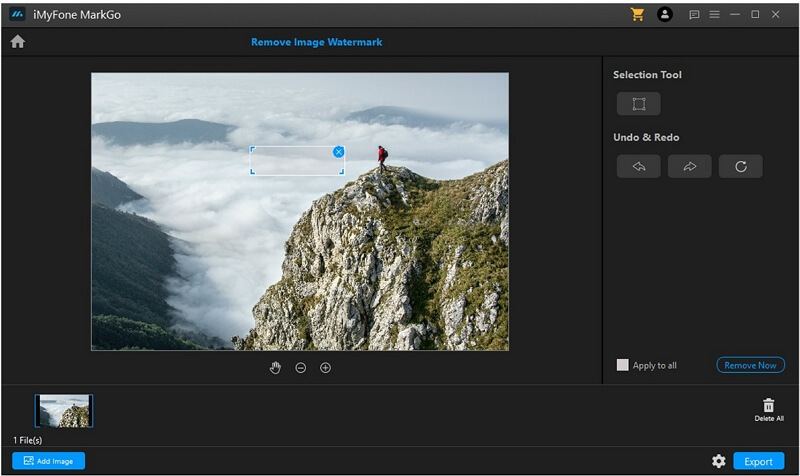
Step 4: After selecting the specific area of the object, on the bottom right of your screen, you will see the option of "Remove Now". Click on it to remove the area object/area from your photo.
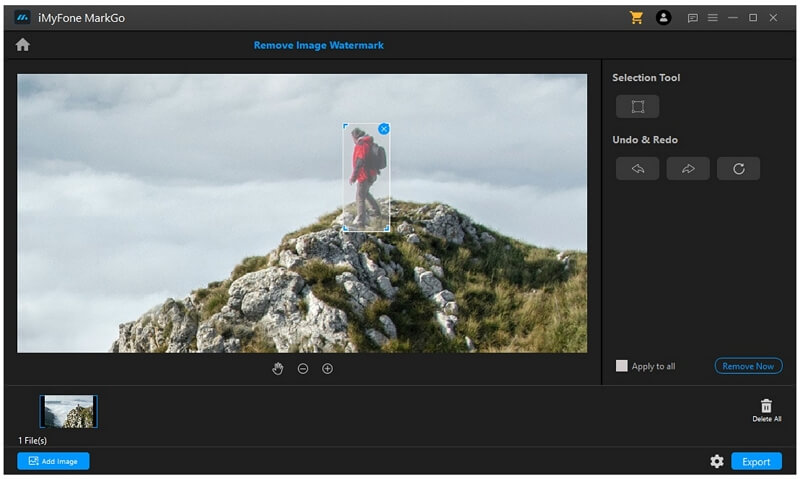
Step 5: Now, this is the final image of the removed object from your photo. There will be a little blurry effect in the area, but the object will no longer be in the image. You can save the image by exporting it to your desired destination.
Also Read:
How to Remove Object from Photos >>
Remove Audio Adobe Premiere >>
Conclusion
We have discussed how you can remove the object from a photo using GIMP and iMyFone MarkGo both. Both have their own pros and cons, as discussed. However, we recommend MarkGo as it is a simple tool that can remove watermarks from videos and audios in no time. You can also use its batch removal features to remove watermarks from a pile of images. You can trust MarkGo for the optimal quality of your images.


