This is the time of content creation, and you need to have the best tools. Audacity is a digital audio editing tool that can help you edit the audio of any video by detaching it. This guide will elaborate on how to remove audio Adobe Premiere way. If you think it is difficult for you to use Premiere Pro, try Filme which is so much easier to remove audio and do some other editings.
Remove Audio from Video with Premiere Pro [Step-by-Step]
You can now easily extract or remove audio Adobe Premiere way. Read on below to see how you can extract audio through simple steps.
1. Launching Adobe Premiere
Kick start your digital audio editing process by launching Adobe Premiere on your device. First, you will need to install it to get to the launching.
2. Create New Project

As soon as the app is launched, you will then get the option to create a new project. To do so, simply press "New Project," which is present on the Start screen. You can also do it by heading to File, then to New, and then to Project. Here, you will have to name the Project and choose where you wish to save it.
3. Import Media
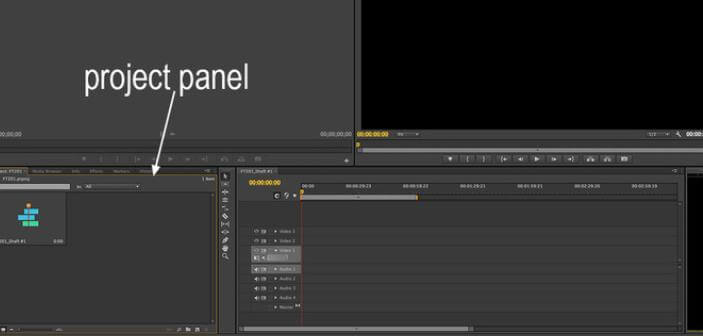
This is where your audio extraction begins. Go to File, and select Import from Media Browser. Now, you will have to click right and pick Import. Drag your required File from the Media Browser into the panel for Project. Also, drag it into the timeline.
4. Extract Audio

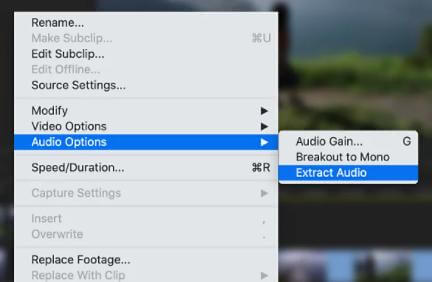
Once you have your File imported, you can extract audio two ways. You can do it directly or separate the sound from the video and then remove it. To do it directly, press the "Extract Audio" feature, and a new clip will be generated. The app will add "Extracted" to the name to keep it clear. You can also do it the other way by selecting the clip, editing it, and then export it from File > Export it > Media.
5. Pick Format and Save
You will be asked to pick a format such as WAV, MP3, etc., and save it in your desired location at the end of the process.
Pros:
 Easy keyboard shortcuts
 Different formats for importing
Cons:
![]() Confusing menu
Confusing menu
![]() Long export times
Long export times
Easier Way to Remove Audio – Filme
While Adobe Premiere is an option, the process to remove audio can be a bit complicated. Individuals looking for a more refined app to take over their digital audio editing tools can shift over to Filme. It is the go-to app for content creators, equipped with tons of features and a wide range of editing options.
Watch this video to see how to separate audio from video easily:
With Filme, you can edit the audio you detached and add other audios as well after removing. With Filme, you can avail the voice changer feature to change the voice of the audio. Here's how you can separate audio using Filme.
1. Download iMyFone Filme
Go to the official iMyFone Filme website and downslide the application from there. You can download it for your laptop, PC, or mobile device. Among others, it's compatible with Windows 7,8,8.1 and 10. It can also work with Mac.
2. Launch the Software
Once the application has been successfully installed on your device, you can then begin the editing process. To do so, simply Launch the downloaded version. This will open up the tool for you.
3. Upload Video
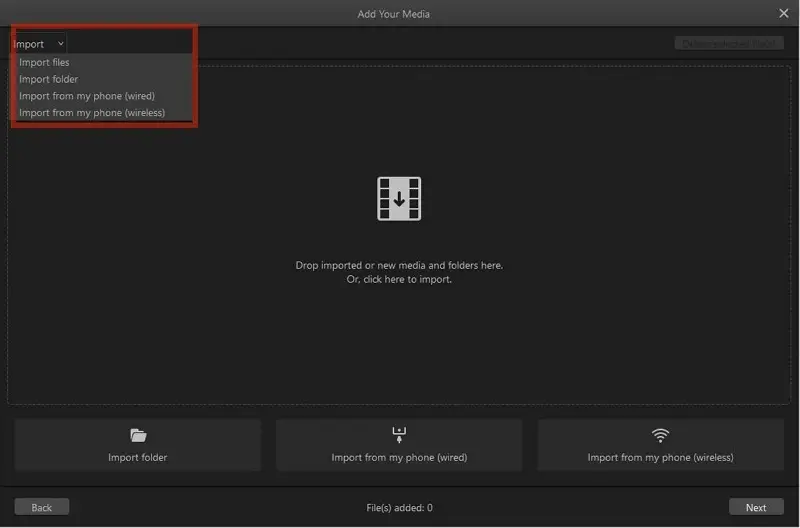
The next step is where you upload the video from which you wish to detach or remove the audio. Go to the location where you have saved the file on your device and upload it on Filme. This is a pretty straightforward step.

4. Detach Audio
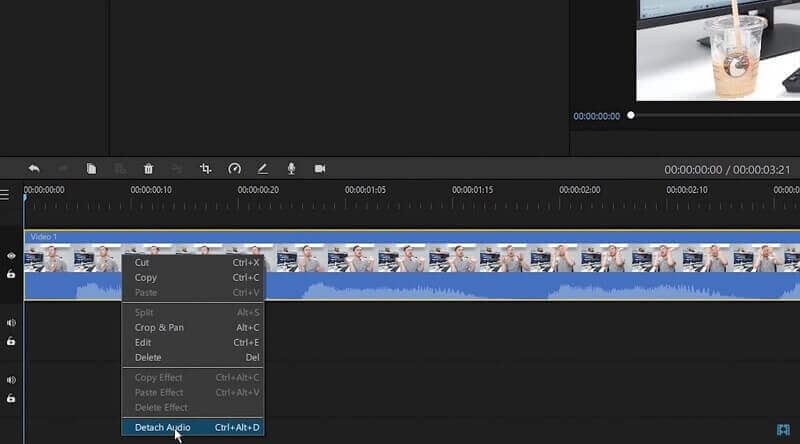
Now that you have your desired video, open right-click on it and select "Detach Audio." This feature works perfectly if you wish to remove audio, do soundtrack editing or feel like using the built-in Filme voice changer app. You can also try out other features.

5. Save Audio File
And voila, you're done! The audio has been successfully removed, and you can save it in any format you like. Select the location where you wish to keep it, and you're good to go.
Adobe Premiere vs Filme
There is a lot of confusion on the internet about whether one should use Adobe for removing audio from videos or do it with Filme. We also have written a review for it: Adobe Premiere Pro Review >>
To make the process easier, we have a brief comparison for you.
1. Interface
Adobe Premiere comes with a fancy user interface that might be hard for beginners to understand, while Filme has a user-friendly interface with all the advanced features available.
2. Price
Adobe Premiere Pro can also be a wrong choice for anyone who doesn't want to spend tons just for a primary audio detaching feature. The lack of flexible paying and subscription plans ends up in trouble for potential users. On the other hand, Filme is available at highly affordable rates and subscription plans that won't break your bank.
3. Format Support
Moreover, while it is true that Adobe comes with a variety of importing options, importing is still an issue as not all formats work without glitches. Some such as MKV files have compatibility issues. Hence there is a need for higher flexibility. Filme can tackle both importing and exporting files in a matter of seconds in a wide variety of formats.
4. User experience
Adobe is a pretty heavy software that often results in lags and bug crashes. Meanwhile, with a light interface and all the necessary tools, Filme is light on the device and is perfect for an uninterrupted editing session.
Also Read:
Final Words
And there you have its folks! This brief guide elaborated how you can remove audio Adobe Premiere way and with the help of Filme as well. Filme is a must-have for all those who wish to extract audio from their videos with better features and ease of use. You can also try Windows Movie Maker to remove audio.


