If you are a CS:GO lover, then you will love to have fun with other players and with your audience. Voice changing can increase the joy and fun of the gameplay, and it is the main reason gamers like to change their voices. For all the CS:GO players out there, this article is going to show you how to use Clownfish voice changer on CS:GO in an easy way.

Part 1: Basic Information of Clownfish Voice Changer [Latest]
1) What is Clownfish Voice Changer?
Clownfish Voice Changer is a desktop application designed for changing or distorting a person's voice into different voices and effects. The major reasons that make it stand out from all voice changers are Music players and Sound Players that help people to customize playlists and enhance audio control and built-in sound control management.

It is very light software with a clear and clean interface. Its interface is straightforward and can easily be understood by beginners. Moreover, the steps of connecting Clownfish Voice Changer with any other platform like CG:GO, Discord, and other applications are very simple and effortless. It offers different parameters that can be customized to change your sound and tweak the filters that are already present.
2) Voice Effects of Clownfish Voice Changer
Clownfish Voice Changer has a variety of different effects that can change a voice into different sounds. It offers almost 14+ voice effects that can be used to record different sounds or to change voice during video calls, audio calls, or games. Other than the preset effects, users can also choose more than one effect to mix it for making different sounds and voices.
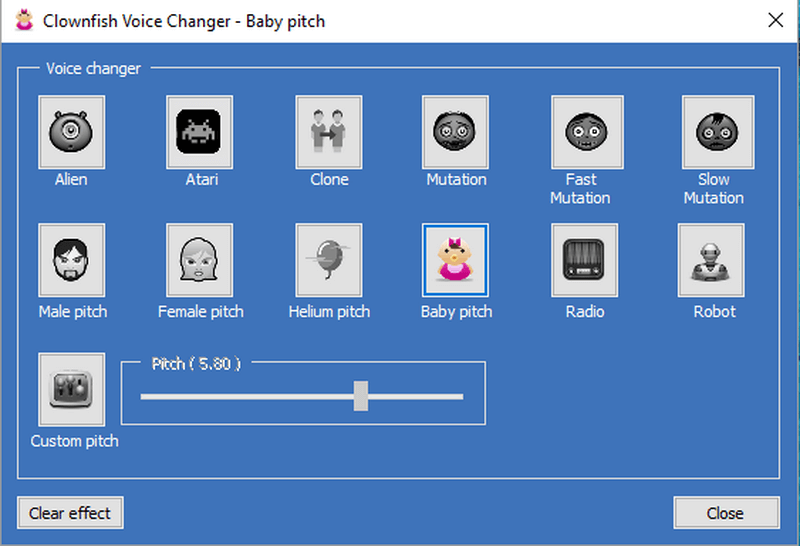
Alien
Atari
Female Pitch
Male Pitch
Helium Pitch
Clone
Mutation
Baby Pitch
Radio
Robot
Custom Pitch
Silence
Fast Mutation
Slow Mutation
Mixer
3) Does Clownfish Voice Changer Work on CG:GO?
Yes, Clownfish Voice Changer can seamlessly work with CG:GO. Other than that, it is also supported by different platforms like Discord, Steam, Skype, ooVoo, TeamSpeak, Mumble, Jisti, Ekiga, Ventrilo, and Hangouts. Just install it, go to the microphone settings and connect with it. It can be used for both recording altered voices and enjoying them during games or calls.
Part 2: How to Use Clownfish Voice Changer on CS:GO?
There is nothing difficult in using Clownfish Voice Changeron CS:GO. This software is compatible with all apps that utilize microphones. So, it provides very satisfactory results on CS:GO.
If you are having problems with audio quality or microphone after installing this voice changer, then the problem will be in your microphone settings. Make sure to check the microphone settings correctly before using Clownfish Voice Changer.
Steps on How to Setup Clownfish Voice Changer
Let's have a look at the complete procedure on how you can download, install, and use this voice changer on your device with CS:GO.
Step 1: Download and Install
Firstly, you need to download the software from this link . After following this link, you will see many options to download this software. Just click on what suits your demands and requirements.
Now, go to the folder where you have saved the downloaded setup of Clownfish on your device. Open the file and install it by following the Next button and then click on Finish when the installation is completed.
Step 2: Adjust Settings
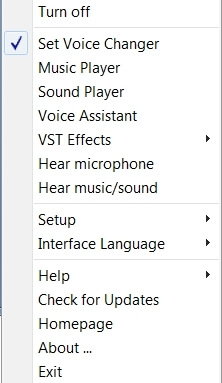
The way of its activation is different from other voice changers. If your voice changer is active, the icon will appear in orange, and if the voice changer is not active, that icon will be displayed colorless or black. Now, right-click on the icon from the system tray to get the menu. From that menu list, you can do whatever you want to do with the Clownfish display or settings. You can turn it on/off and select other options.
Step 3: Set Voice Changer
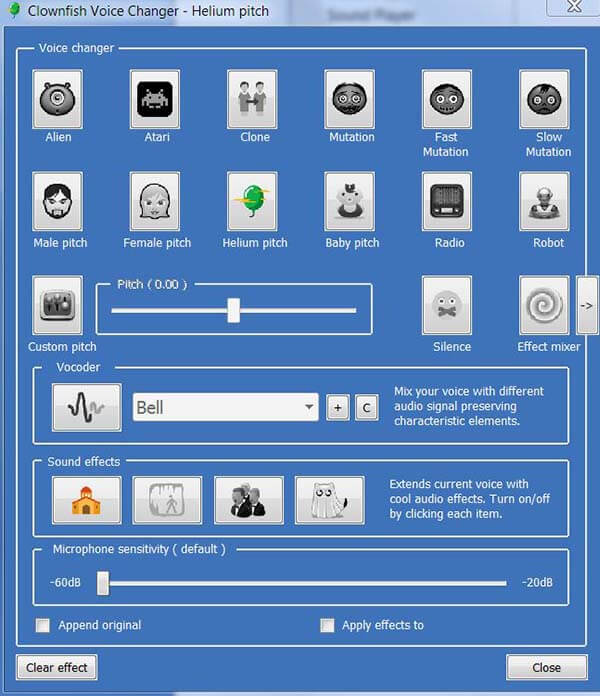
From the menu, click on the second option, Set Voice Changer, to get the display box of different voice effects. A display box will appear on the screen where you can choose and apply any voice effect just by clicking on that effect. You will see almost 14 different voice effects there. Moreover, you can not only select different effects, but you can also mix different effects to get a different sound than the effects. You can express your creativity. There is also a Pitch box at the center of the screen; just drag the pitch bar to customize your voice's pitch.
On this display box, you will see the Vocoder section, where you can mix your voice with different media from your device. Below it, there is a Sound Effects section where you can turn on and off different effects by clicking on them. The third section is Microphone sensitivity which ranges from -60dB to -20dB. Here you can customize and set the microphone sensitivity according to your desire.
At last, there is also a Clear Effect button through which you can remove all effects from your voice to make it original. It can even be used during games and calls.
Step 4: System Settings
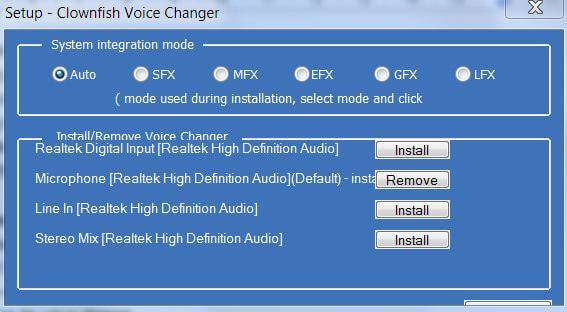
If you are not comfortable with the default input settings, then set everything according to your desire. Just click go to Setup > System Integration. Here you will get a System Integration Mode from where you can select any option according to your satisfaction. If you want to use other audio capture devices, just click on the install options on this display box.
From the same menu bar, you can select the third option, Music Player, to get the display box for music player settings. Here you can add the URL of any sound from the internet which you want to add to your playlist. Moreover, you can also set the order of music according to your desired sequence.
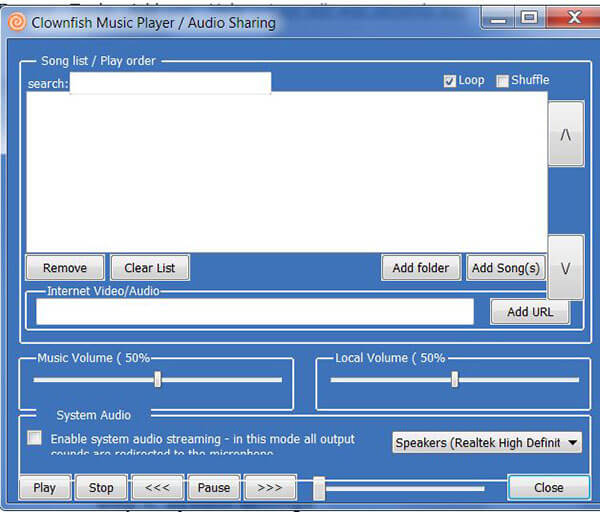
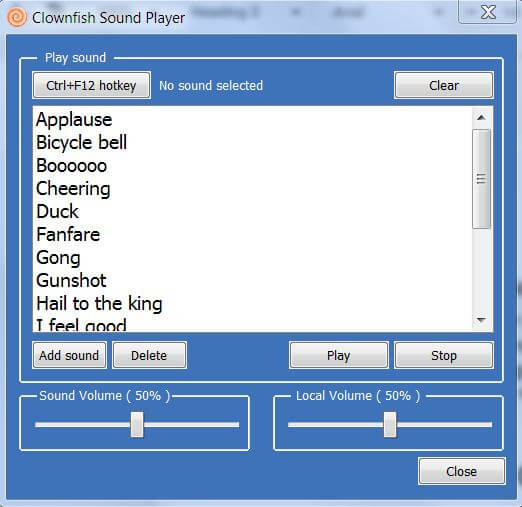
The fourth option is Sound Player, which is used to add and select the sounds of the user's requirements. In this box, you can clear, play, stop, and adjust sound and local volume.
The fifth option on the menu is Voice Assistant, through which you can change your written text into the speech of your desired voice.
The next three options are VST Effects, Hera Microphone,and Hear sound
You will also see an Interface Languagebutton through which you can change the language of the interface according to your choice. There are many built-in languages available in Clownfish Voice Changer.
At last, you will get the options likeHomepage, Help, Check for updates, and Exit.
How to Connect Clownfish Voice Changer with CS:GO
In order to use the Clownfish voice changer on CS:GO, you will need to customize its input audio settings. For this purpose, follow the steps below.
Step 1: Open CS:GO on your device and go to the friend's chat portion.
Step 2: At the top right corner of this portion, you will see an icon of settings. Click on this icon and then click on Voice from the left side of the setting box.
Step 3: In this box, you will be able to get the Select Input Device option. Select your input device here to connect the game with a voice changer. Moreover, there will also be options to select output devices and input/output volumes.
That's it! Now, you are ready to enjoy the modified voice through Clownfish in your game to amaze your friends.
Part 3: Best Alternative to Clownfish Voice Changer for CG:GO
As you can see, the steps of setting up Clownfish Voice Changer on CG:GO are complex. You need an easier tool. Now, let's discuss the best alternative to Clownfish Voice Changer. You can see many voice changers on the market which are free of cost and easy to use, but iMyFone MagicMic is the best among them. Now, let's have a look at the voice-changing features of iMyFone MagicMic.
Features of iMyFone MagicMic:
- 1) 20+ Voice Effects: iMyFone MagicMic offers a wide range of voice effects that can change your real voice into other selected voice effects. Change Your Voice in Real-time on CS:GO and Other Popular Gaming Apps: MagicMic voice changer allows you to change your voice in real-time on CS:GO.
- 2) 190+ Sound Effects: iMyFone MagicMic also enables users to add various sound effects when gaming or livestreams, including Animals, Atmosphoere, Nature, People, Daliy or Fantasy related sound effects.
- 3) Supports All Versions of Windows: MagicMic Voice Changer works on all versions of Windows, including Windows 7/ 8/ 8.1/ 10 and 11.
- 4) User-friendly Interface: This voice changer is easy to use for beginners with intuitive interface. You can changer your voice in just one-click.
Steps to Use MagicMic Voice Changer on CS:GO
Step 1: First of all, go to the iMyFone's website and download MagicMic on your computer. And then launch the tool and configure it on your PC.
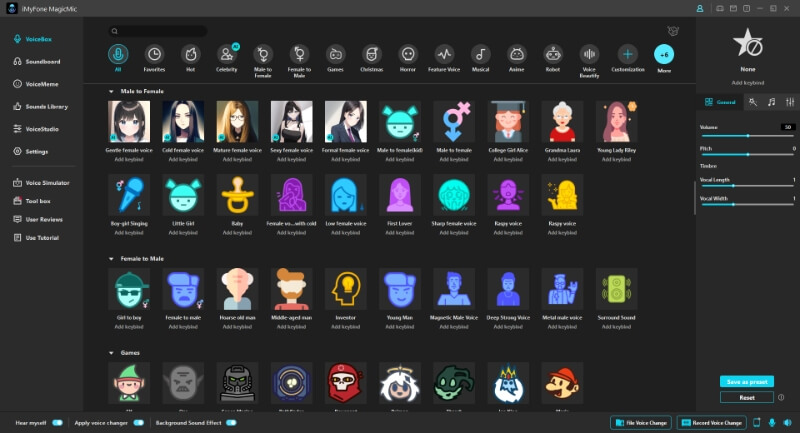
Step 2: Select Voice Changer Virtual Audio Device (WDM) as audio input in the chatting app that you use for your games (Steam, Discord…).
Step 3: After that, you can select the voices from MagicMic that you want to use in the game and change your voice with ease!
Final Words
We have discussed how you can use Clownfish Voice Changer for CS:GO and everything about it. It is an amazing voice changer, but if you are looking for a better option, you can use iMyFone MagicMic. It is a very powerful tool that can change the voice in real-time. You can use MagicMic voice changer for any purpose, including CS:GO. Just try it out now for free!


