To begin with, what are lower third templates? Basically, they can be defined as the text and/or graphical elements that are put on the bottom of the screen and are aimed at providing more information to the viewers. A lower third is a text title or graphic overlay placed in the lower region of the screen. In television production terms, lower thirds are placed in the "title-safe area," the part of the screen in which you can safely place graphics without them getting cropped. With that in mind, let us dive in how to add lower thirds in Premiere Pro using free lower thirds template.
Part 1. How to Add Lower Thirds Template in Premiere Pro
When creating a film or any other video, the lower thirds play a huge role. Whether you are a video editor or even a graphic designer, you will certainly need them at some point, mostly to ensure that your viewers gets some essential information regarding specific scenes. Now, lower thirds can be found in Adobe Premiere Pro. It's actually one of the video editor tools you can use to put lower thirds on your videos, and here is a step by step process on how to do it:
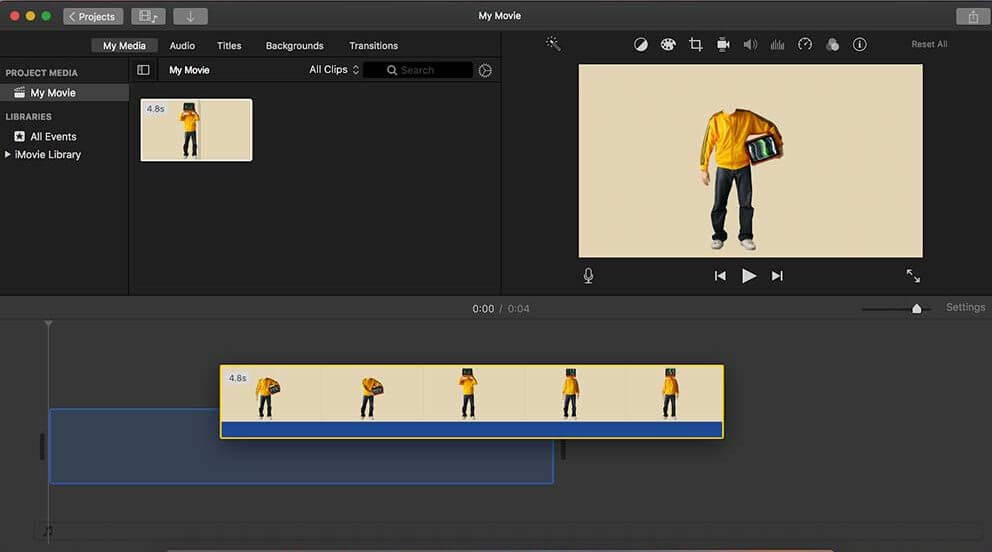
Step 1: first thing you should do is open up Adobe Premiere Pro of course. Then add a next text layer by pressing the short key CTRL and T. Then, select that entire layer in your timeline and then to the Essential Graphics panel, which is in the window menu.
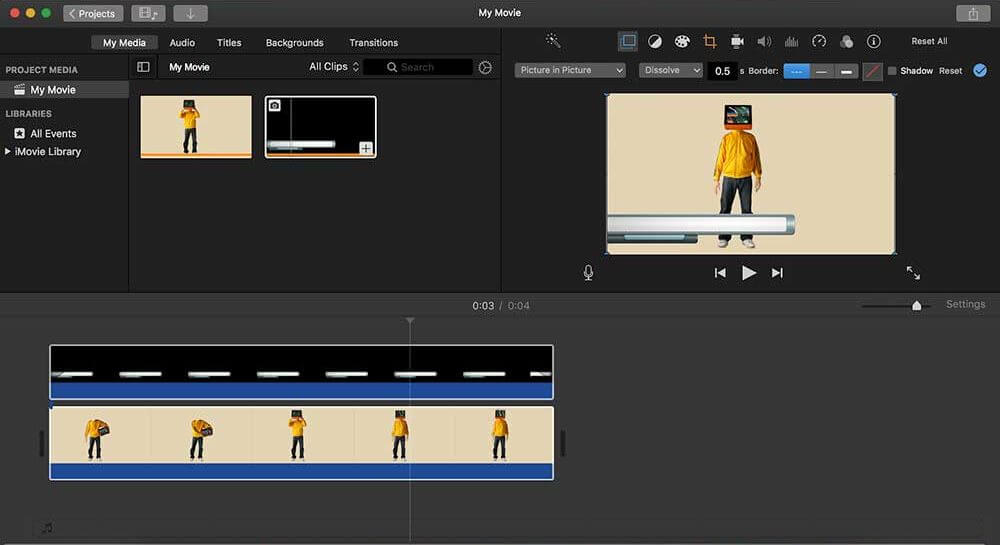
Step 2: Essential Graphics Panel - Here, your abilities are limitless and you can then create an endless amount of possibilities. You can add titles, shapes, even video or photo files as it is also possible to place your effects in there, group certain layers since it works with layers. What this means is that the top effect affects everything underneath and the upper shape or text layer is shown on top of the ones that are below so, in case you want to apply a certain effect to only one layer then it is possible to group both.
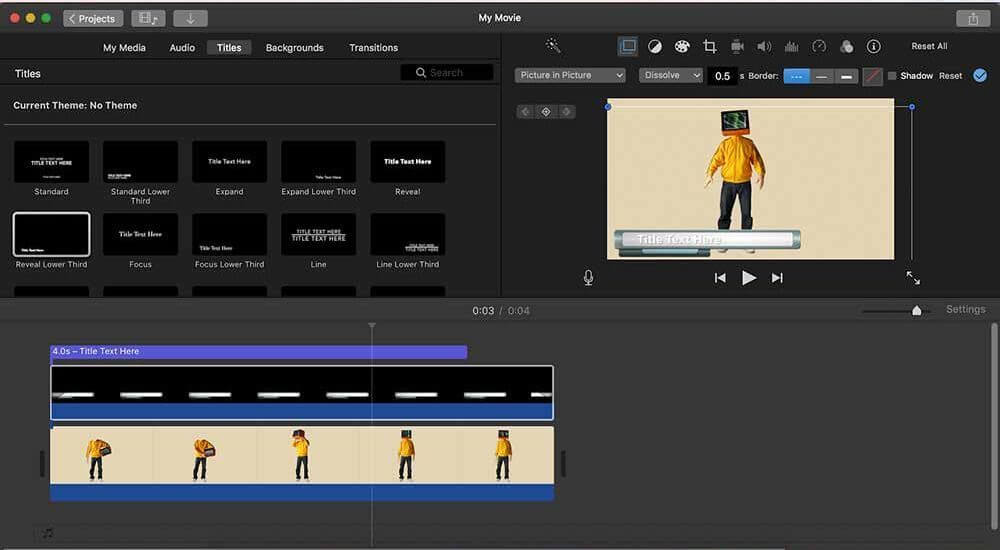
Step 3: Safety Margins - From the program monitor, it's possible to activate the safe margins, and it's possible to position your lower third wherever you want, this will show you two boxes. Make sure that your lower thirds are always visible by placing them in the inner box. This makes sure that your lower third will be visible in case your audience watches your video on a screen that doesn't have a proper resolution or scales.
Part 2. Best Alternative Video Editor to Add Lower Thirds - iMyFone Filme
When it comes to adding lower thirds to your videos, other than Premiere Pro, another tool that you can use is iMyFone Filme. With an easy to use interface, one that even beginners can easily navigate, there is no doubt it is the best alternative. Now, here is how you can use Filme to add lower thirds to your video:
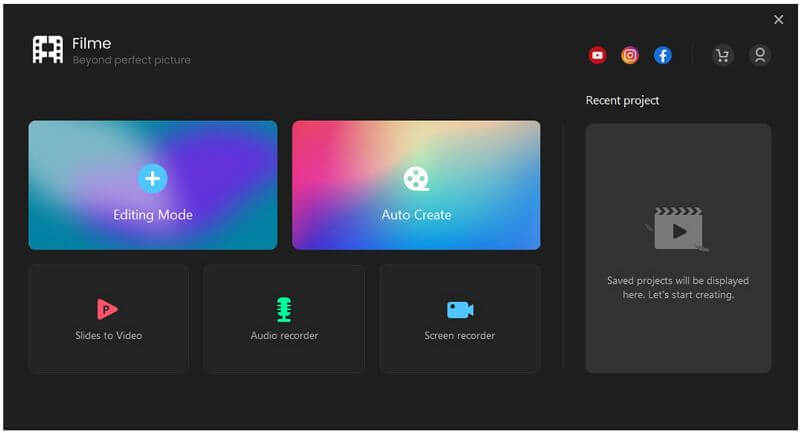
Step 1: for starters, you got to download Filme to your device. Then launch it.
Step 2: once it opens, upload the file that you are looking to edit by hitting the Import menu on the interface. And then drag and drop it to the tool's timeline where all the editing will occur.
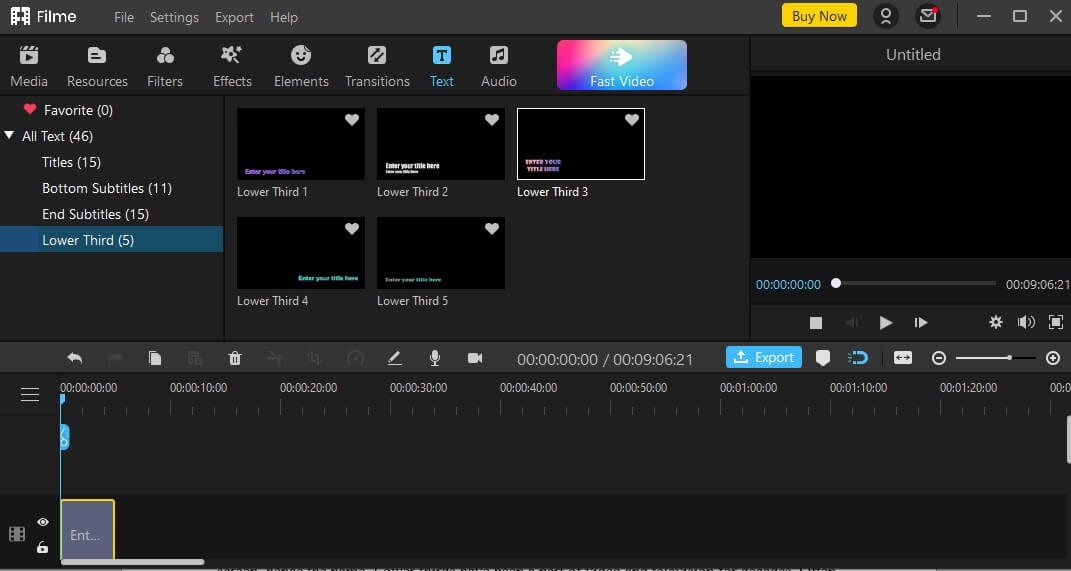
Step 3: after that, click the Text function, which you will find at the top of your screen, and several effects will appear on your screen, and lower thirds will be one of them. So, click on lower thirds, and then select your preferred lower third style, and click the '+' sign on the effect to add it to the timeline
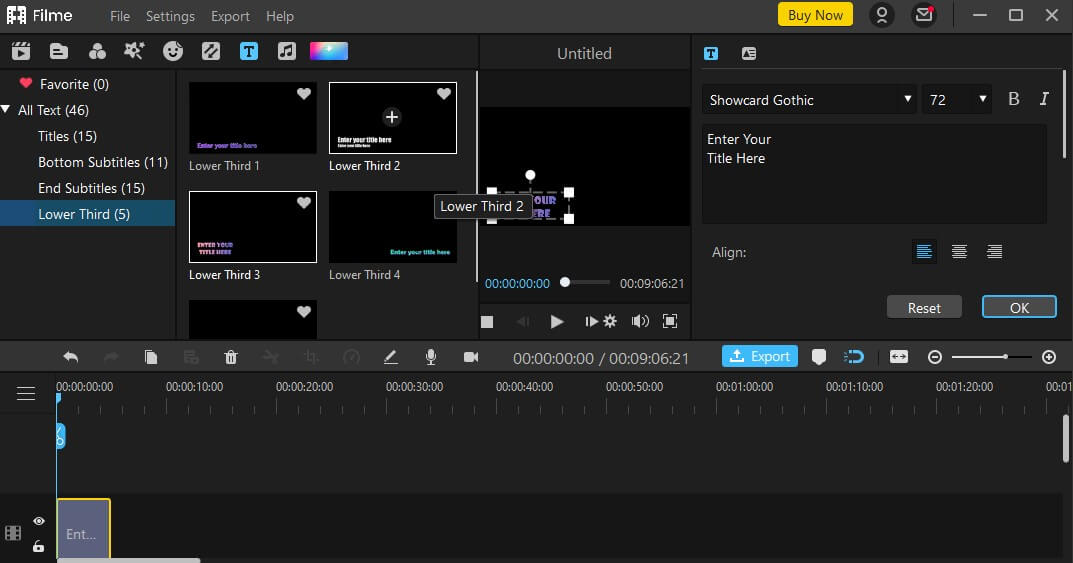
Step 4: you can the Double-click on the lower third on the timeline, and an edit window will appear, allowing to adjust a number of elements including the alignment, size, color, opacity, and anything else you want. After adjustments, click on OK.
Once you're done with all the editing, save the file to your device, by clicking the Export function.
Part 3. Free Lower Thirds Template Download
Lower Thirds are text that includes graphics to create the context for the video that we see on Television and video all the time. They mostly appear on the left side of the screen. Lower thirds have been a part of video and television for decades. You see them mostly in news bulletins as they are used to give tip information about an event or someone. They can be made in different sizes, fonts, ranges, and transitions depending on the assignment/audience they are targeted to reach. They come in different colors and sizes.
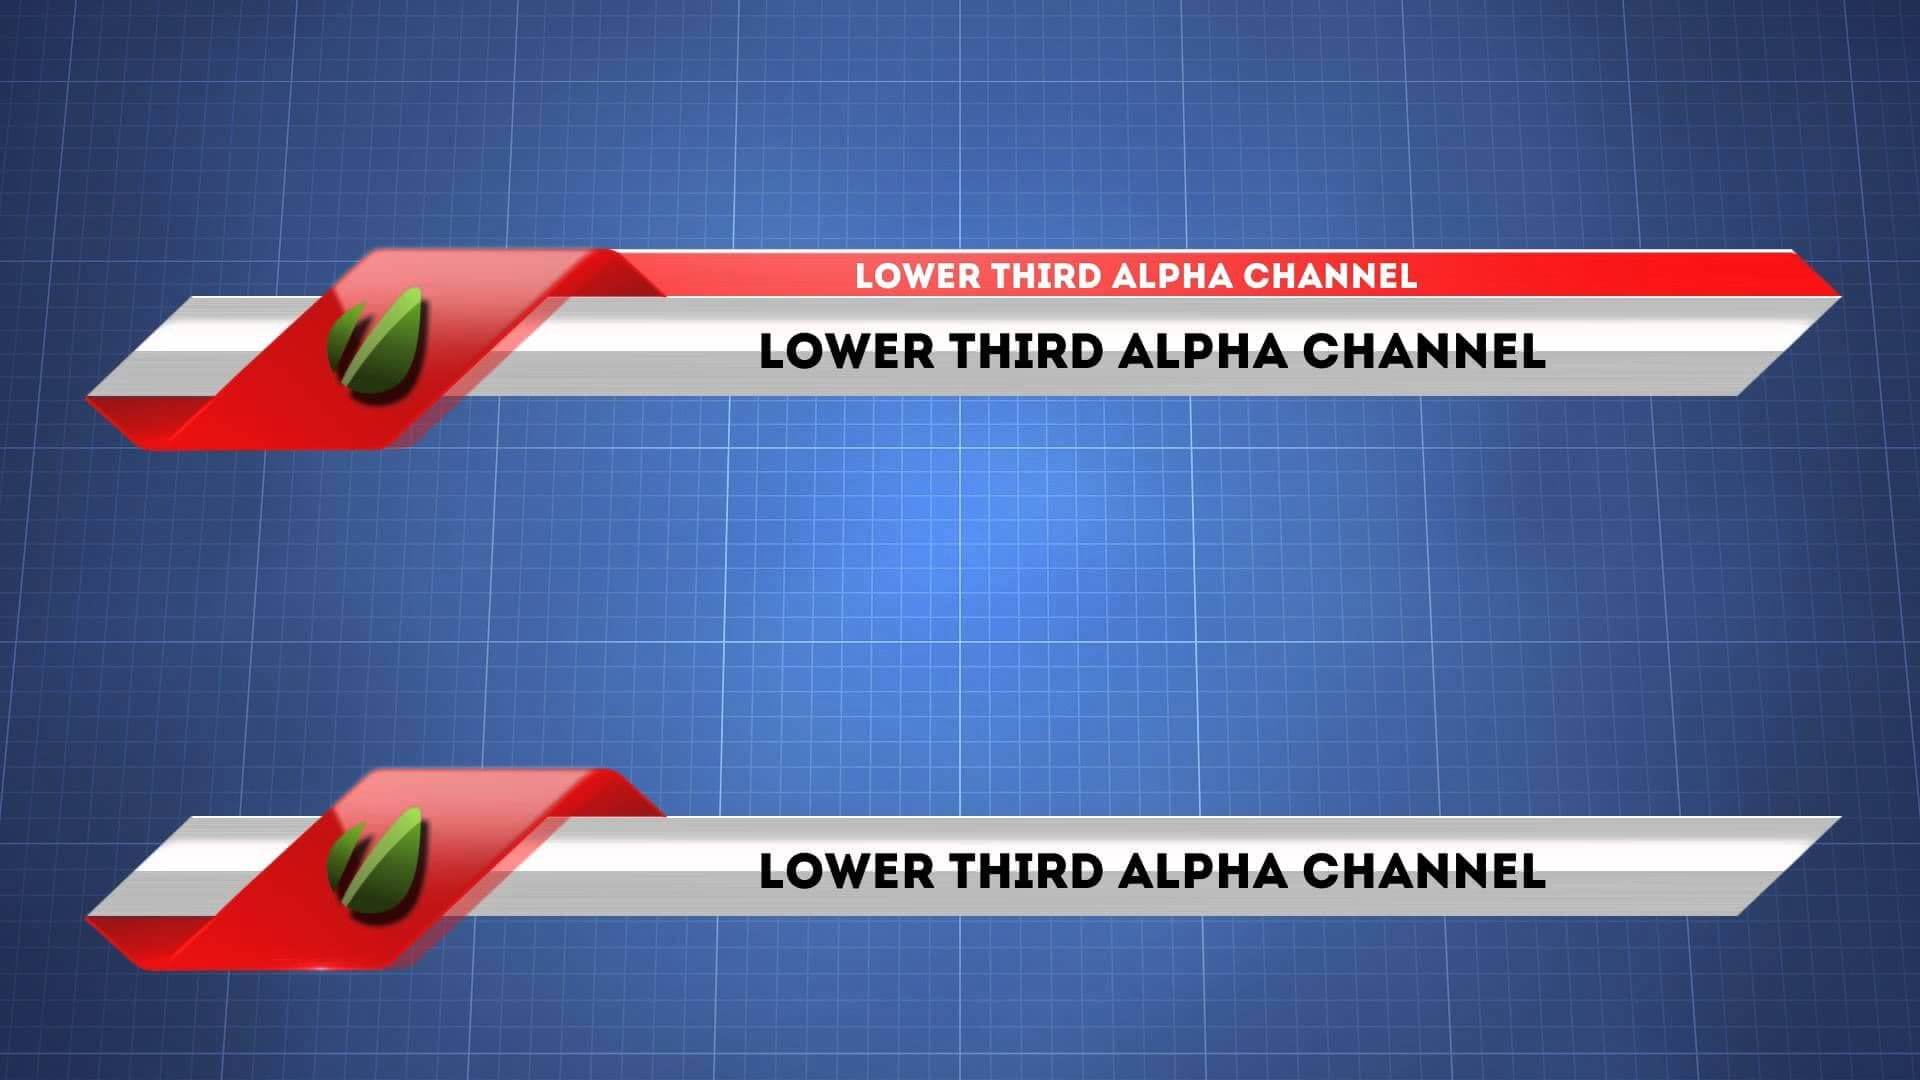
They utilize various fonts and transitions and range from simple to extremely complex. Lower thirds are a necessary evil to use as they are meant to provide exciting information while not causing distraction from the contents of the video. Below are examples of some of them,
Videezy Lower Thirds
Videezy contains features like multiple licensing options including, SD, HD, 4K, and Ultra HD. This makes it highly reliable, effective, and convenient for you. It also has a simple search and use library making its stock footage simple to apply in any after-effect project. It is important to note that it stocks videos that simplify everything you need for your presentation or project.
Simple Lower Thirds Templates
These free lower thirds templates focus on keeping things as simple as possible since they contain SD, HD, 4K, and Ultra HD options. They mainly focus on providing space for longer names. They also are easy to modify and move natively in Premiere as they are mostly positioned on the lower left-hand corner, but you can put them anywhere that Premiere will allow you to.
Lower Thirds Premiere Pro Templates
This lower thirds template set is simple to download files and has a variety of uniquely animated options for your next film project. It is among the few templates that No plugins are required for download or use. It also has this Modern, attractive design that adds a stylish look to your presenting. It is simple and easy to implement on slideshows, TV, or internet advertisements.
Part 4. Tips for Add Lower Thirds to Video
Given how important lower thirds are in video editing, it all makes sense to try and understand how exactly you can add them to your videos. Or better yet, what should you keep in when adding the lower third titles on your videos. Here are the top tips:
1. The Font Type
For starters, it's crucial that you select a font that is readable and perfectly matches with the video's theme. From the many fonts available, ensure that the one you choose is one that the viewers will get fast, and also matches the type of video you are producing.
2. Minimize the Amount of Text
You need to ensure that you don't overload your viewers with writings on your video, as it tends to disengage them, and most of the time, they just ignore it. So, you need to ensure that your messages are precise and straight to the point. Also, you got to remember that the text ought to act as a supporting lead to your video, so, if it overrides it, then there is no point of having the text in the first place. So, be very careful.
3. Brand Color and Elements
Lower thirds gives you an opportunity to align your viewers to your story and brand. And so, consider using colors, design elements, and brand colors, to properly represent your brand out there.
4. Lower Thirds Should be Added on Title Safe
With all the devices out there, plus the many video player dimensions, it is crucial that you ensure the lower third can be easily seen without any problem on any setup. One way to ensure that this happens is by following the title safe area whenever you are creating your lower thirds. So, no matter what, make sure that any aspect of the lower third falls under the title safe area.
Conclusion
Let's summarize by saying that even with all the video editing software out there, not all of them are reliable. If you are looking for the best free movie editing software, then you simply cannot go wrong by choosing Filme. Other than being a free movie editing software, the tool has much to offer. It comes with numerous free effects, transitions, and music to spice up your movie editing experience. You can make high-quality videos, premium music videos, and much more with the help of the software's built-in editing tools.
Its Fast Video mode is excellent for anyone looking to edit a movie quickly as it allows you to use the software's built-in, refined templates in real-time to complete your video editing project on time. There are many other features of this software and they are all easy to understand and use.


 Don't Click
 I just knew you will click it, LOL!
 Sent ! Please Check Email


 Youtube Videos
 Anime Character
 TikTok Videos
 Celebrity AI Voices
 Advertisement
 Podcast
 Video Games
 IVR Voices
 E-leaning


