While making professional videos, it is essential to manage the audio with the visuals for a seamless production. Hence, you need audio control tools to control the audio and adjust it according to the scene requirements. Audio fading is one such method of slowly transitioning the volume down and muting the sound.
Adobe Premiere is the best video editing software used by professionals. It provides various audio adjustment features so that you can enhance your production quality.
This article discusses the three top audio fading features and learns how to fade out audio in Premiere.
How to Fade In/Out Audio in Premiere
With the launch of Premiere Pro CC, Adobe has offered an excellent platform for video creation and editing. It allows you to edit the audio and introduce the fading effect manually. Manual audio fading allows more control over the audio, and you can be more creative with the overall content too!
Let's take a look at how you can use these transitions to fade in or fade out any audio in Premiere:
Step 1: Download and launch Adobe Premiere CC on your device.
Step 2: Open the audio or video whose sound you want to fade.
Step 3: Click on the audio track that appears in the timeline and expand it vertically.
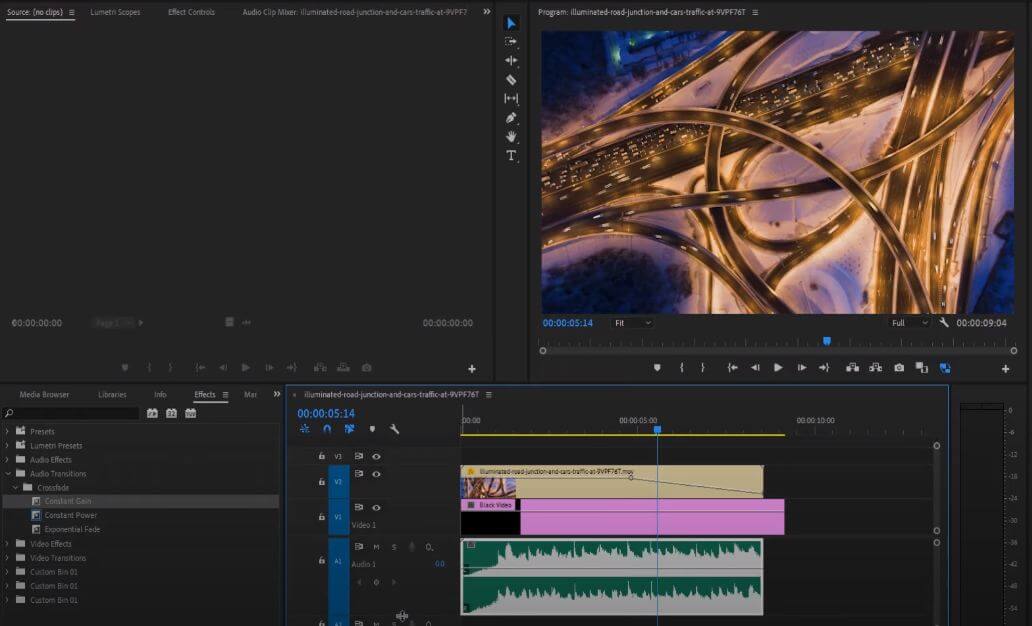
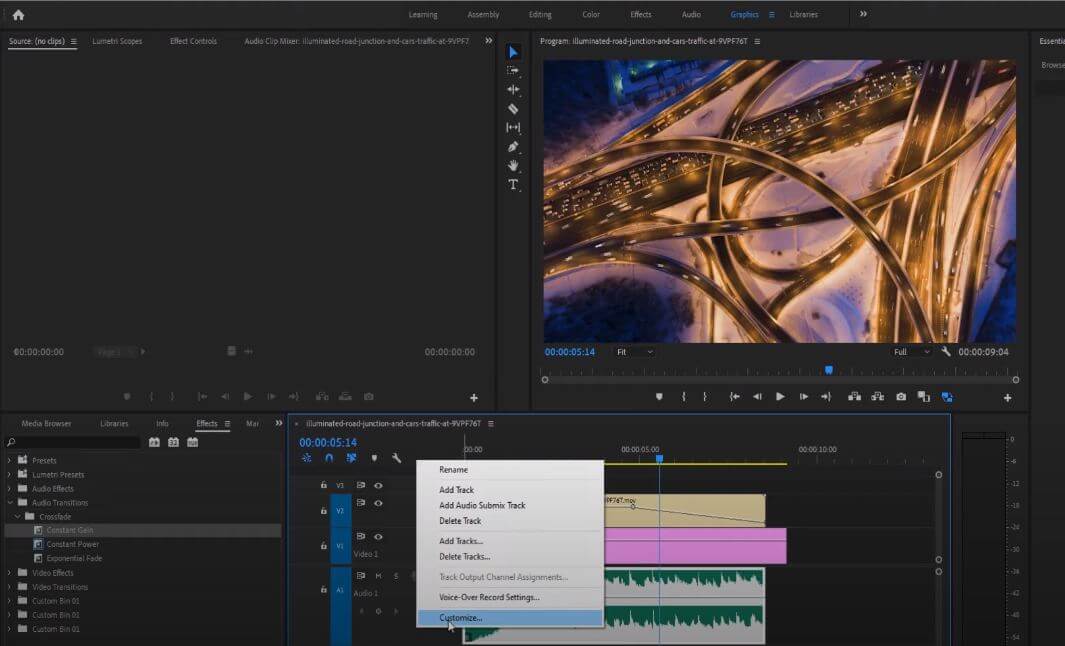
Step 4: Upon expanding the audio track, "<- <> ->" buttons will appear on the left, before the track. You can also right-click the track and tap customize to find these options.
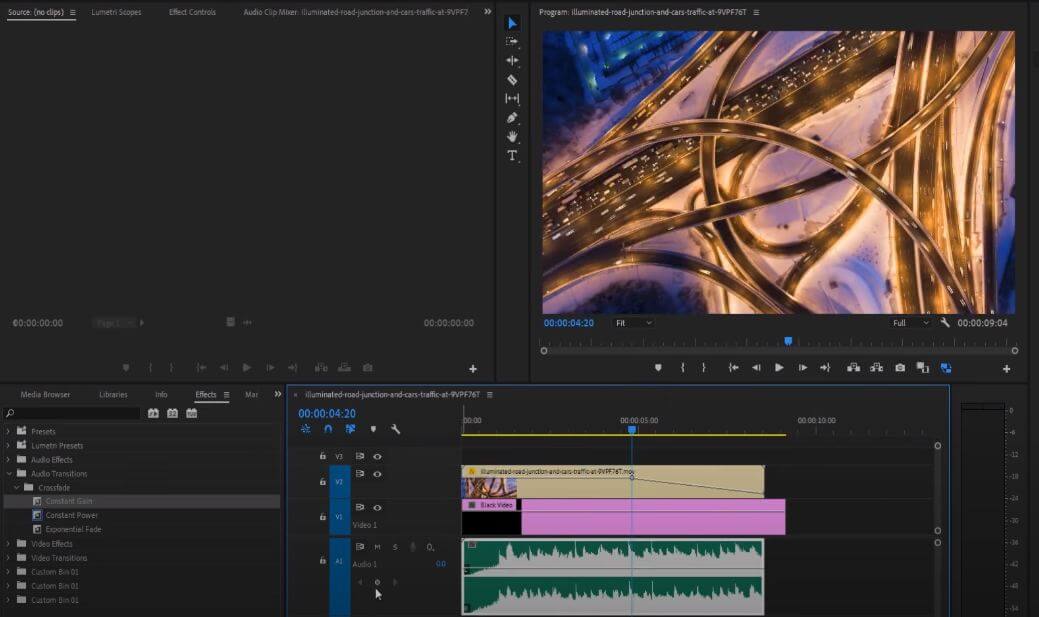
Step 5: Now, place the pointer on the track where you want the fade effect and click on the Add or Remove Keyframe "<>" button. Alternatively, click on Ctrl/cmd + Click.
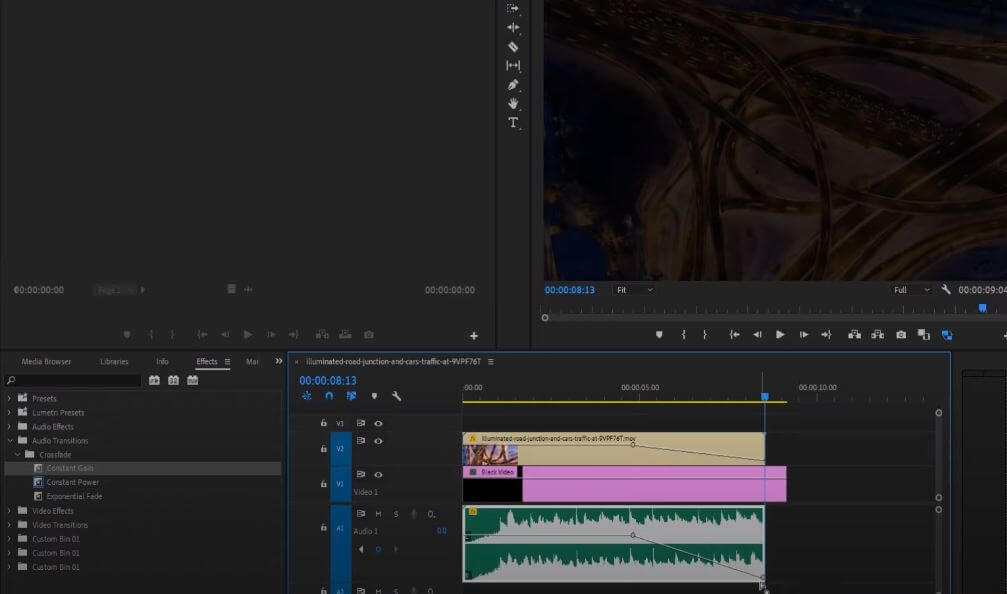
Step 6: Now, add another keyframe to the place where you want to expand the fading effect.
Step 7: You can add multiple keyframes to adjust the sound. Click the keyframe in the last and drag it down to fade the audio out.b You can also use it at the start of the audio to fade it in.
If you're looking for a quicker way to fade in/out audio, then you can use the automated fade effects offered in Premiere Pro CC. These effects are known as Crossfades and work as amazing audio transitions.
Also Read:
How to Add Text to a Video in Adobe Premiere Pro >>
Adobe Premiere Elements Review >>
Constant Gain Crossafade
The constant gain feature creates a quick fade in and fades out in the audio, aka a constant audio transition. The incoming audio clip fades in while the outgoing fades out at an equal rate.
Here's how you can use it to modify your audio:
Step 1: Go to Effects > Audio Transitions > CrossFade select Constant Gain from the options.
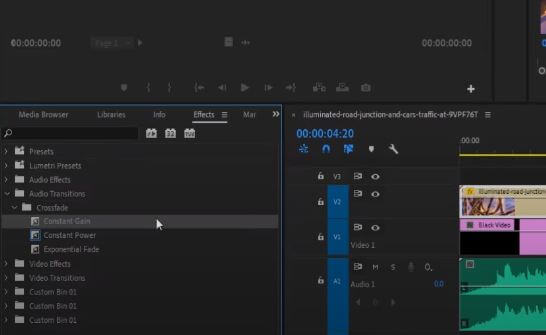
Step 2: Drag and Drop it on the audio track. When attached to the end, it will fade audio out. You can click on it adjust it from where you want the transition to begin, and you're good to go!
Constant Power Crossfade
Constant power is the default fade effect in Premiere and gives a smooth transition between two audios. The audio intensity increases at the start and slows down towards the end, giving a perfect soft audio fade.
To use constant power crossfade, follow the steps below:
Step 1: Go to Effects> Audio Transitions > CrossFade > Constant Power.
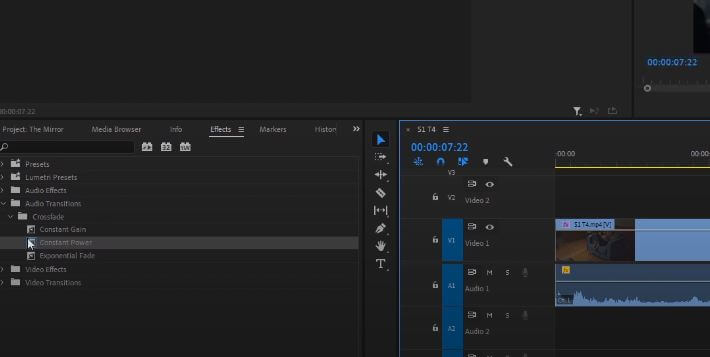
Step 2: Drag and drop the effect onto the Edit between the clips. You can put it to the left, right, or middle for an equal balance between the fading sound. You can also extend or shrink the transition and cover the parts of the tracks you want. A seamless fade in and fade out will be made as a scene moves on the next.
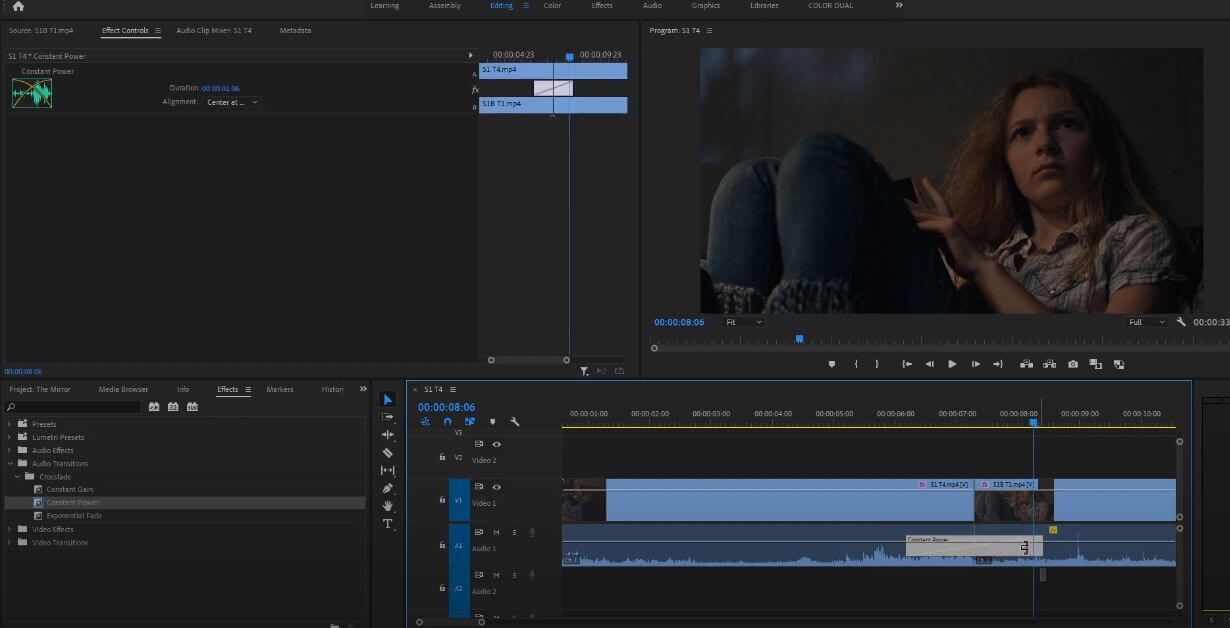
Exponential Fade Crossfade
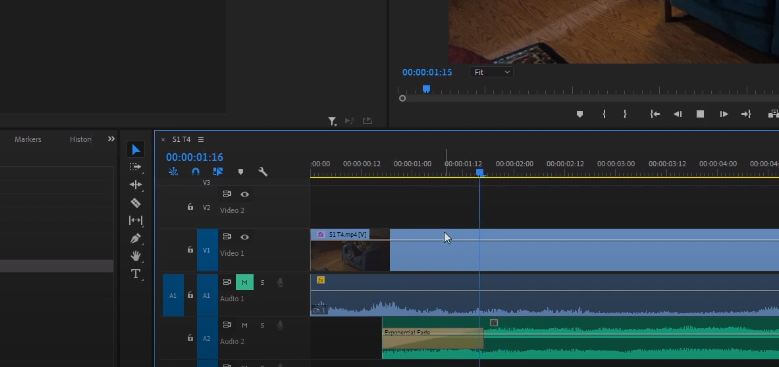
The exponential fade sets the audio at an exponential curve, meaning that the audio becomes slow at the start and increases faster and faster, reaching the end. The hit makes an intense scene and can be used for horror sounds or beat drops. Thus, the Exponential fade makes the best Adobe Premiere fade-out audio.
You can add an exponential fade using the following steps:
Step 1: Go to Effects>Audio Transitions>Crossfade>Exponential Fade.
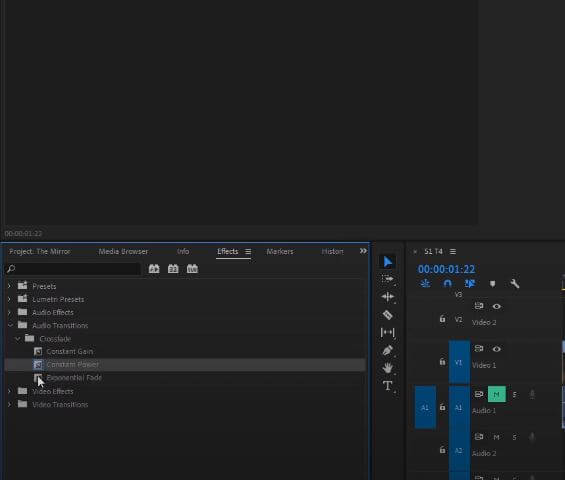
Step 2: Drag and place the exponential fade towards the end of the video as it fades out the audio and creates a perfect ending. You can stretch the effect to adjust the timing of the fade, and you're done!
Easiest Way to Fade Audio- iMyFone Filme
Using AdobePremiere can be challenging, and learning to use the interface requires time. If you're looking for an alternative method that lets you fade in and fade out audio, then iMyFone Filme will be your best mate!
Filme is a popular video and audio editing software known for being user-friendly and providing advanced features to create professional content.
Some key audio editing features that Filme offers are:
-
Background music addition
-
Audio adjustment and fade in/out options
-
Trim/cut audio clips
-
Modify audio speed
-
Multiple audio formats
-
Preview between editing
Watch this video to learn how to fade audio in iMyFone Filme:
Why use Filme?
Filme is a great application for beginners providing a professional editing experience. It offers a free version for users that allows them to test some of the cool features of the software. It lets you edit videos and audios to turn to make your creation worthwhile.
Let's take a look at how to fade audio using iMyFone Filme in a few easy steps:
Step 1: Download and launch the Filme software.
Step 2: Import an audio or a video to the Media Library and drag it to the timeline.

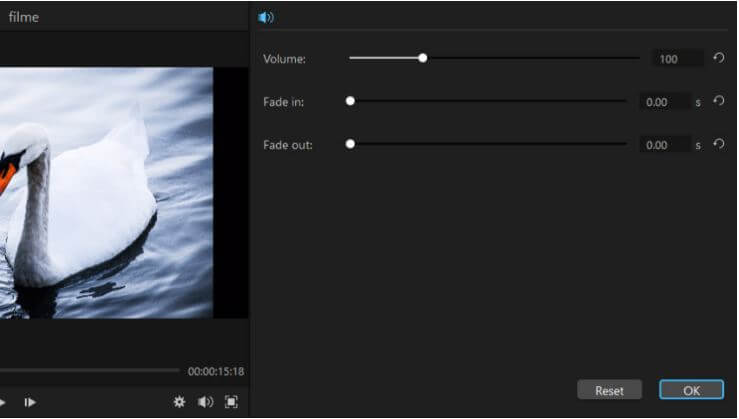
Step 3: Double-click on the audio track in the timeline or right-click and select Edit. The Audio Editing Panel will appear. Here you will find the fade in and fade out options. You can adjust the length of the effect by adjusting the slider in the timeline. In the panel, you can manually enter the value or slide the bar to adjust the intensity of the fade effect.
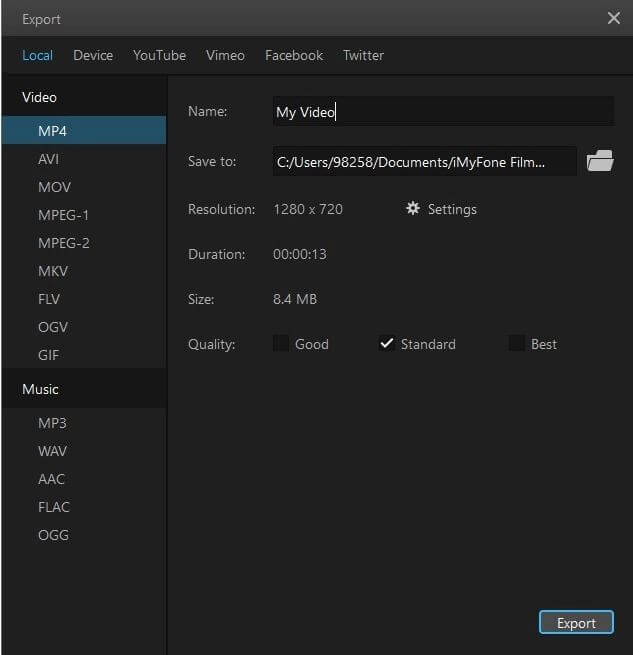
Step 4: After you're done experimenting with the fade effect, you can export it in the audio format you like.
Conclusion
The fade effect can make or break your production. Hence, it is essential to use suitable software to adjust the fade in/out effect in your audio. While Adobe Premiere serves as a top-notch software, it may not be easy for beginners to understand. We recommend using the Filme software as it allows users to edit audio and produce quality results in no time.


