Based on the quality of the backdrop, a picture might seem worse or better. Therefore it operates for both items and basic images, including an element. Software is required to get rid of or alter the black background.
Please don't freak out when you don't understand how to do it. There seem to be a variety of offline and online solutions which may assist you in removing a black background from a photograph. Choosing the approach that works best for you would be up to you. This article will show you How to Remove Black Background from Images using two different methods. For this reason, let's go into the specifics and learn more.
Tips
Hunting for a tool to cut out black background from images for free? Why not try a professional bg remover iMyFone MagicPic to remove backgrounds 100% Auto with AI-powered Technology within 5 secs in 1 click. Juts try it out free below!Method 1. Remove Black Background Free Using AI
iMyFone MagicPic
iMyFone MagicPic, a software tool that would answer every picture editor's issues, is MagicPic. This software is less complicated than Photoshop and other similar programs. It only takes one click to get it to function.
Simply one click is all it takes to erase an image's backdrop in MagicPic. It's easy to use and doesn't need a lot of technical knowledge. Features such as a user-friendly design and one-click removal and replacement of picture backgrounds are among the most notable aspects of the program.

Additionally, the trendy and beautiful background images provided make it much easier to change your image background and make it more fascinating. A trial version of the uninstaller is available to see whether it works for you.
Step 1: Launch the iMyFone MagicPic software
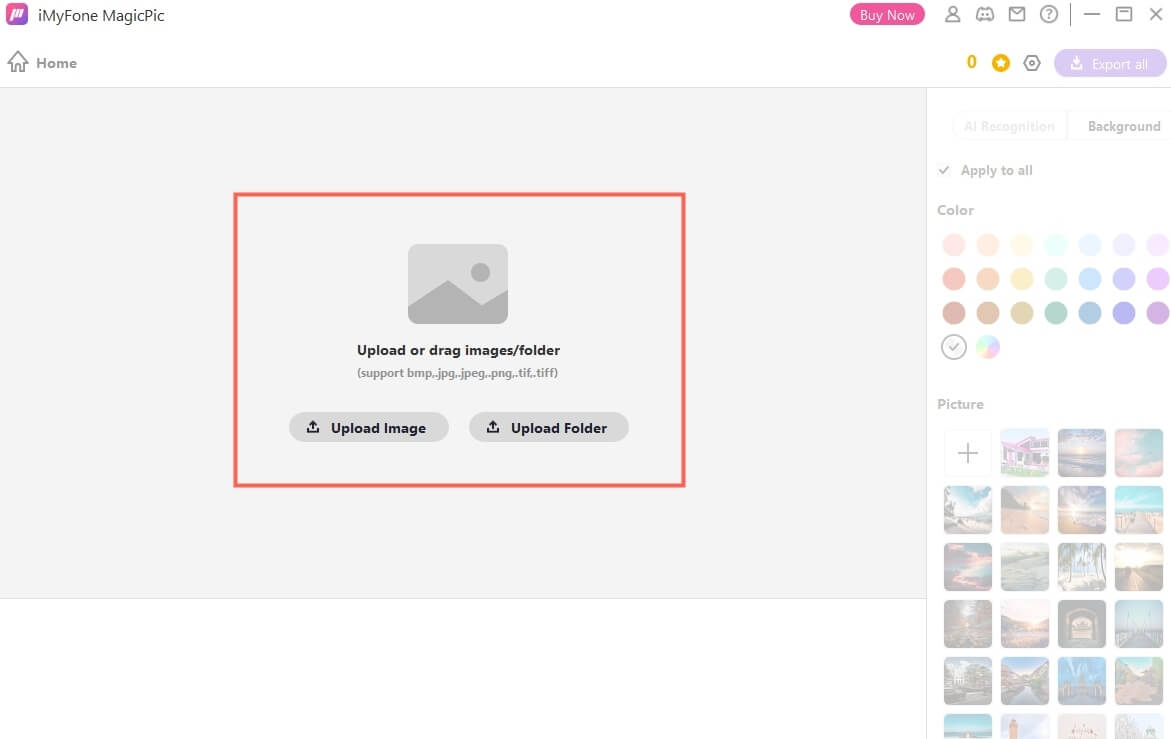
Download and launch this software once it has been installed. You'll find a variety of possibilities, and you can pick any of these functions based on your needs.

Step 2: Upload the image you want to edit
It supports uploading images with various formats, like bmp, jpg, jpeg, png, tif, tiff.

Step 3: AI auto-remove black background from the image
After importing the picture, the backdrop would be immediately deleted automatically. If some part of the background hasn't been removed completely due to the complexity of the image, you can remove it manually by directly erasing it using brush.

Step 4: Export and Save
Upon removing the backdrop, you can click Export to save the picture.
Key Features:
-
AI auto-remove image background seamlessly.
-
AI change image background into solid color or any new backdrop you want.
-
1000+ images bulk background removal.
-
Unlimited custom backgrounds are allowed to upload.
-
Easy to navigate and use.
Method 2. Get Rid of Black Watermark in Photoshop
A watermark is a symbol, phrase, or design carved into a picture for copyright protection. It's a great way to keep your product safe while still promoting it. A watermark may not always be a distraction, but you should consider if it's worth keeping if it does.
We may apply and remove watermarks using Adobe Photoshop. Photoshop watermark removal is the topic of today's article.
Watermark removal in Photoshop may be done as follows:
Step 1: Launch Photoshop
Launch Photoshop and the picture you wish to remove the watermark from to separate it.
Step 2: Zoom in on the Picture
By clicking CTRL & +, you may zoom in on a picture region with a watermark using Magic Wand Tool.
Step 3: Use the Magic Wand Tool
You may erase the watermark by using the Magic Wand Tool to pick off the affected region.

(Note: To widen the choice, you'll need to have a 5px margin around the chosen region, so add a few pixels from the bottom of the selection).
Step 4: Modify on Watermark Area
Choose the watermark region you want to extend, then choose Modify >> Expand.
Step 5: Change the Expand Selection
Click OK to close the freshly formed dialog box and change the Expand Selection setting to 5 pixels. We will utilize Photoshop's Content-Aware Fill function to eliminate the undesired item.
Step 6: Click on Content-Aware Fill
Select Content-Aware Fill from the Edit menu.
Bonus Tip: How to Remove Black Background in Premiere Pro
Assets in Premiere Pro offer an excellent means to enhance your production. They encompass various elements and layers that contribute to crafting a rich scene. Graphics such as explosions, falling snow, or text graphics serve as prime examples.
Unfortunately, these assets often lack transparency upon acquisition. Consequently, when added to your scene, they impose a black background that obscures a significant portion of your shot. In this tutorial, I will demonstrate how to eliminate this black background within Premiere Pro CC.

Remove black background in Premiere Pro Simple and Fast[step-by-step guide]
Step #1: Import the assets into Premiere Pro & Click on it.
Step #2:Select "Blend Mode" under "Effect Controls"
Step #3:Change the blend mode to Screen, then you will find the black background has magically gone.
Part 4. FAQs - How to Remove Black Background for Free
1. How Do I Get Rid of a Black Background?
It is possible to remove a blackish background from a picture in three simple steps when the picture had a black background, to begin with:
Step 1: Click Background Remover & Upload your picture in MagicPic.
Step 2: AI auto-remove the background.
Step 3: Download the image with transparent background.
2. How to Remove the Black Background from Media?
To remove the black background from media, follow these simple steps:
Step 1: The photo you wish to remove the backdrop should be selected.
Step 2: Remove the Background from a photograph by selecting Picture Format > Remove Background or Format > Remove background.
Step 3: The standard background region will be highlighted in magenta to indicate that it would be removed, whereas the forefront would maintain its original coloration to indicate that it will not be removed.
3. How Do I Remove a Black Background from a PNG?
You can obtain all you need to capture and modify photographs on your Windows or Mac computer.
Step 1: Add the picture into the editor by clicking on it. Then, in the taskbar, hit the Fill button and select Transparent from the drop-down menu.
Step 2: To eliminate background regions, adjust your criterion and select the places you wish to be removed.
Step 3: Now, you'll save your picture as a PNG (Portable Network Graphics).
4. How Do I Remove Black Background from a Picture On My Phone?
To remove the black background from a picture on your phone, follow these steps:
Step 1: On your Android smartphone, open PhotoRoom. Using your phone's camera, choose a photo.
Step 2: The software would then scan the picture and eliminate the background on its own accord.
Step 3: Tap on the Background symbol to create a new one. For a solid color backdrop, use the Fill button.
5. How Do I Make My Black Background Transparent for Free?
MagicPic may be used to make your picture transparent or to eliminate the backdrop from it. Select Background Remover and uplaod an image file. Next, powerful AI will automatically remove the image background.
6. How Do I Remove a Black Background from a logo?
MagicPic would help to effortlessly remove black background from a logo, and all you need to do is to click "Background Remover", and upload your image, and then AI will detect the black background and erase it.
Conclusion
This was everything that concludes our article on 'How to Remove Black Background from Image.' It's alright to give our pictures a better background when sharing or uploading. Black backgrounds often make the pictures come out to be dull and not-so-pretty.
Thus, we decided to compile this guide to help readers understand how they can get rid of the black backgrounds from their pictures. In the end, out of the two methods we have covered here, we would highly suggest using iMyFoneMagicPic because of its simplicity and easy-to-use nature.


