Adobe Lightroom is a powerful application used for image editing. It is a popular software program used by professionals as it can take image editing to the next level. You can make your images more appealing and mesmerizing.
Apart from all features, Lightroom also has a built-in watermark tool. Photographers and graphics editors use this watermark tool to prevent content theft or send the file to any client for review. This built-in tool is amazing and can help you add watermarks to your images.
In this article, we will tell you how to add watermark in Lightroom. We will explain the step-by-step method so that you can add a watermark without any hassle. If you think Lightroom is a bit complicated and you need a better and simpler tool, then we will also share an alternative tool that you can use to add a watermark. Let's get into it without further delay.
Part 1. Better Alternative Lightroom - iMyFone MarkGo
Lightroom is a photo editing tool, so it is not meant for adding a watermark. It provides a built-in feature, but it has some restrictions. The placement of the watermark is predefined; there are nine positions only. Moreover, it is a bit of a complicated tool for beginners, and it takes a lot of time to add one watermark.
iMyFone MarkGo is a better alternative to Lightroom. First, it is specially created for the watermark, so it has everything you need. The best thing about it is that you can add a watermark to multiple images simultaneously. The watermark can be applied to all images you have imported in MarkGo. It saves you a lot of time. Furthermore, you can adjust the watermark as you like.
Tips
Hunting for a tool to add watermark on video in batch efficiently? Why not try iMyFone MarkGo, a professional watermark tool that helps you add watermark for your video in batch within 5 secs in 1 click.

MarkGo is a simple tool that beginners can also use. Experts can save time and apply watermarks to bulk images. It is just the perfect solution for adding and removing a watermark.
MarkGo
Watch the video tutorial to learn more about MarkGo
Step 1: Open MarkGo on your computer. It can be used for adding and removing a watermark. You can use it for both videos and images. There will be four options, click on Add Watermark to Image.

Step 2: It will open the watermark editor. Click on Add Image in the middle of the screen. Select the image from your device and open it.
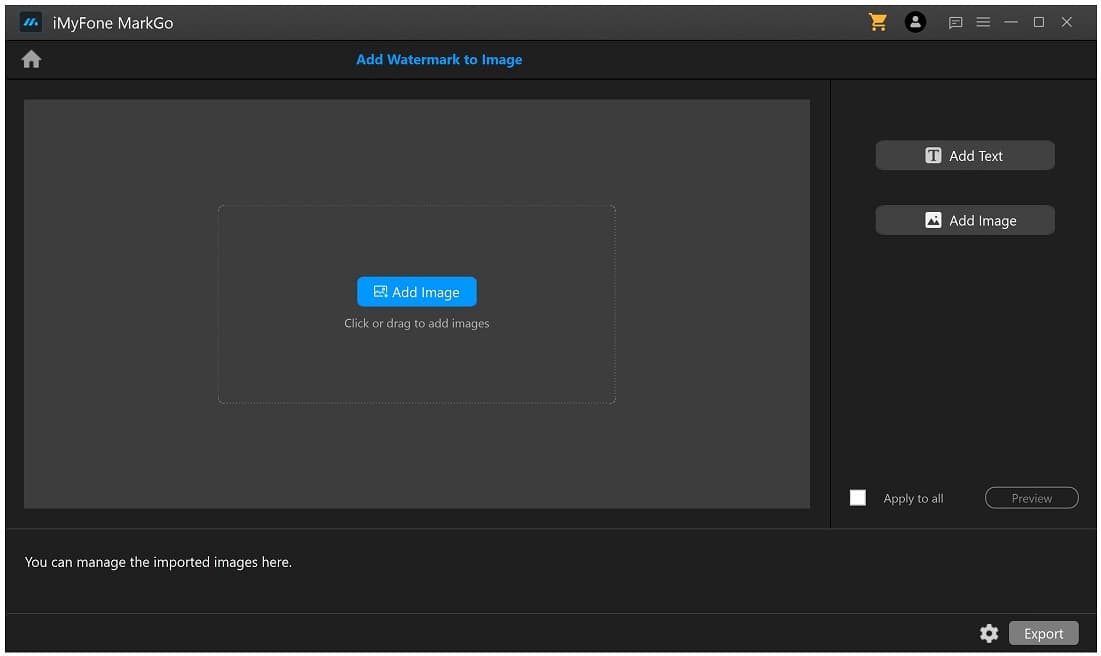
Step 3 (For Image Watermark): Click on Add Image. Now, you need to select the watermark image that does not have a background. Select any file from your computer.
Step 3 (For Text Watermark): Click on Add Text, and you will have the text box over the picture. Double-click on the text box and edit the text.
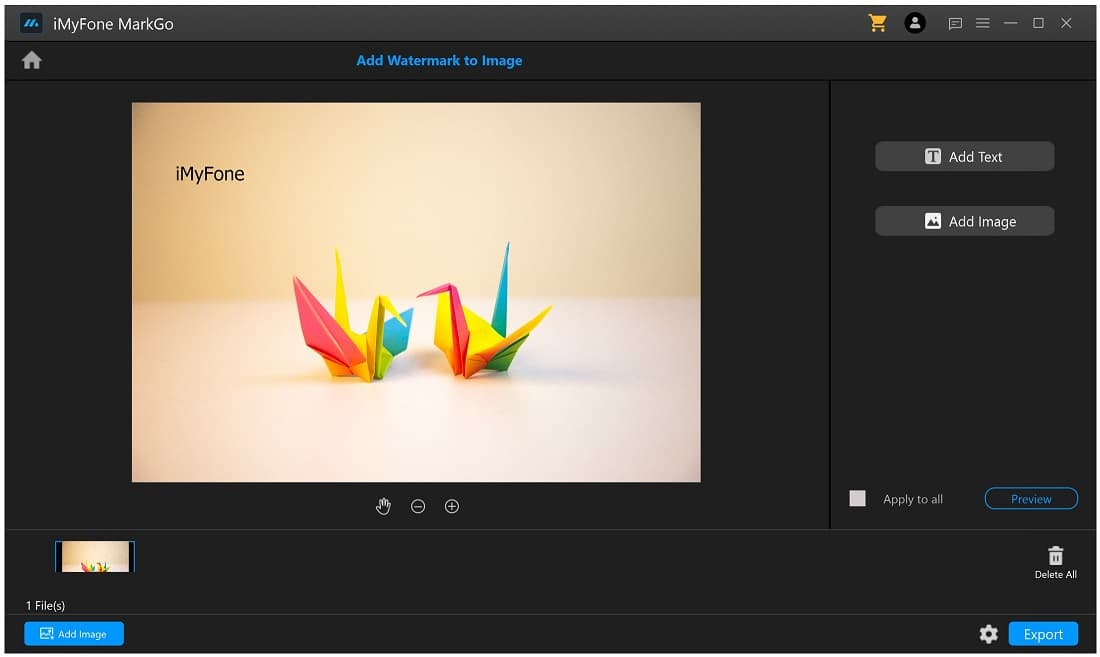
Step 4: After adding a watermark, you need to adjust it. In MarkGo, you can freely move the watermark wherever you want. You can also adjust its size as you need. Just drag its corners to adjust the size.
Step 5: Click on the Preview button to see the final image. If you have multiple images, you can click on Apply to all to apply the watermark on all images. Finally, click on the Export button.
iMyFone MarkGo
Start to Remove Watermarks from Videos and Images Now.

Part 2. How to Add Watermark in Lightroom
Adding a watermark in Lightroom is pretty easy, and it can be done in two ways. You can add a text watermark or graphic watermark. We will guide you on both and explain the step-by-step methods to make everything easy. After you already add watermark to video/photo,you can try some online watermark remover.
Note: For a graphic watermark, you need a watermark image without a background.
1. Create Text Watermark in Lightroom
Step 1: Open Lightroom on your PC. You will have a blank canvas. You need to import the image to add a watermark to it. At the bottom left, you will see the Import button; click on it. Go to the directory where you have stored the image. By default, all files of the folder are selected, so click on Uncheck All. Select the image and click on the Import button at the bottom right corner.
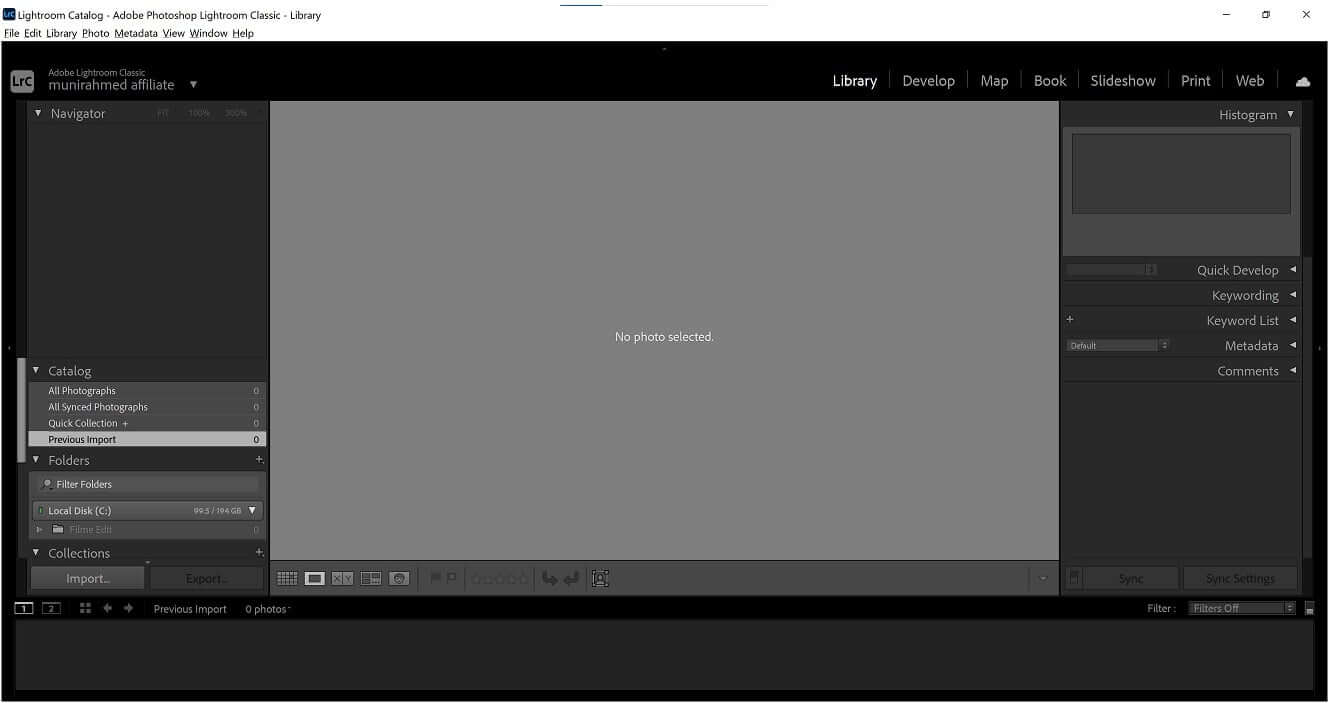
Step 2: After importing the image, you will see it in the library. Double-click on the image to open it. Go to File and click on Export.

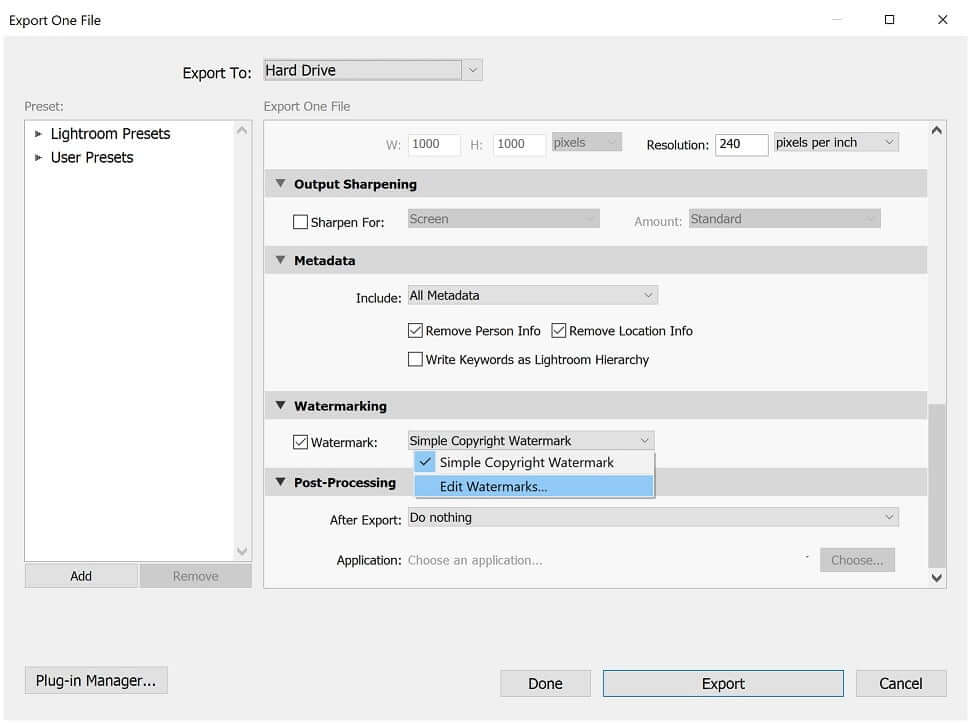
Step 3: You will see the export window. Drag down and search for the watermark option. You will see a radio button on the watermark; click on it to add the watermark. Now, click on the down arrowhead and click on Edit Watermarks.
Step 4: You will have the Watermark Editor. By default, it will have the text watermark style. You will also see the watermark on the image. The watermark will be your computer's name. You can edit the text and write whatever you like. You can also drag the text on the image to change its position.
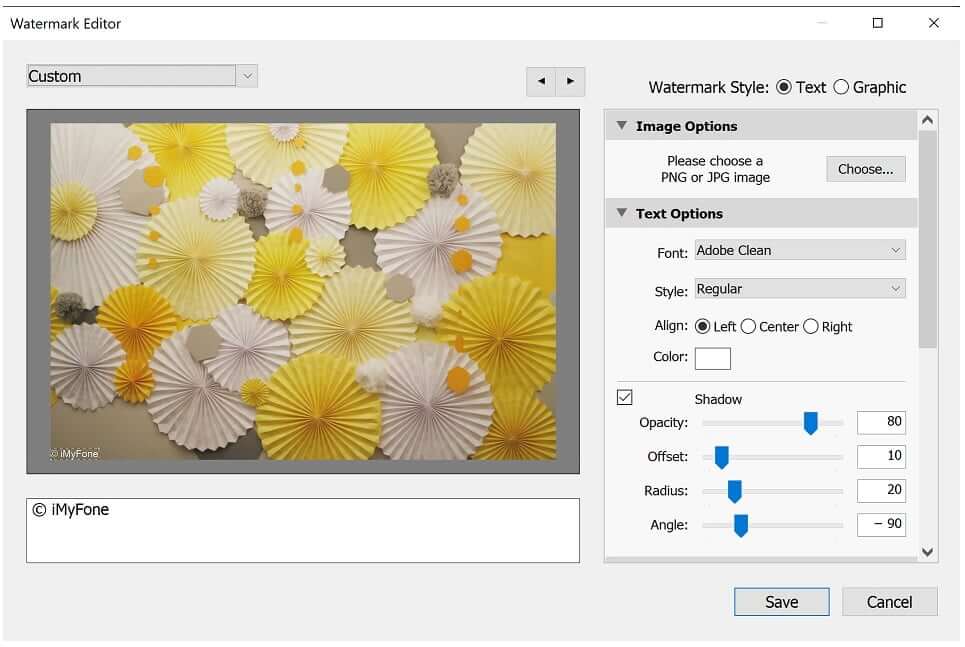
Step 5: On the right of the Watermark Editor, you will have all the tools. You can adjust opacity, offset, angle, size, and other settings. After all, click on Save. You can also save the watermark as a preset.
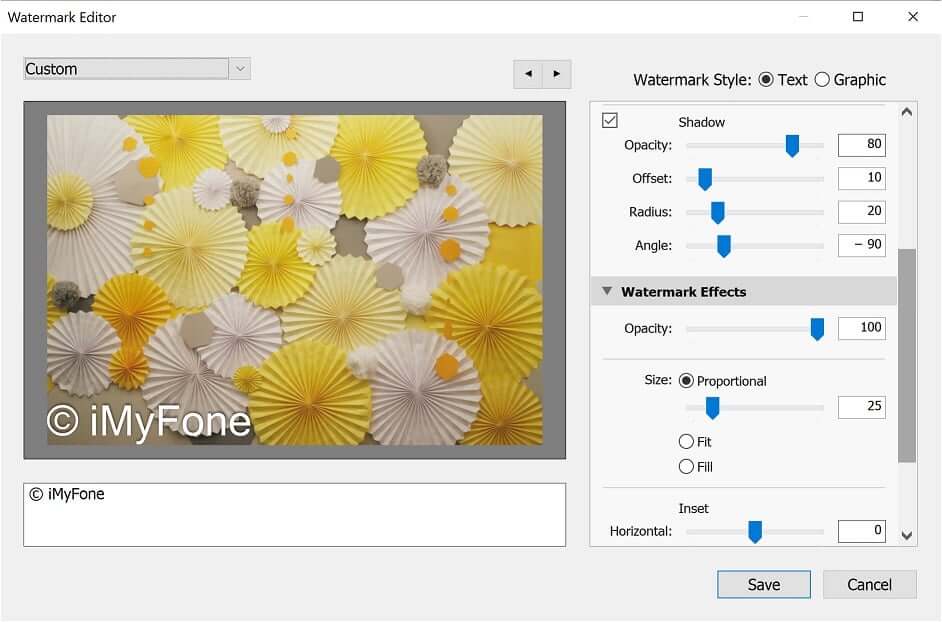
Step 6: Finally, click on Export to save the file on your computer. Go to the folder, and you will see the image with the watermark.

2. Add Graphics Watermark in Lightroom
Step 1: Open Lightroom and click on the Import button at the bottom left corner. Now, you need to import the image file from your computer. Go to the folder and click on Uncheck All. Select the file and click on Import.

Step 2: In the Library tab, you will see the image you have imported—double-click on it for further editing.
Step 3: Go to the File menu and click on Export. In the export window, you will see the Watermark option. Check the option and click on the down arrowhead. Click on Edit Watermarks.

Step 4: You will have the watermark editor. You will see a text watermark by default. At the top right of the watermark editor window, click on Graphic. Choose a graphic watermark from your computer. Keep in mind that there should not be any background in the watermark image.
Step 5: You will have the watermark over the image. Now, you can adjust the position, size, opacity, and other settings. When you are done, click on Save. Create a preset of the watermark if you want.

Step 6: Click on the Export button to export the file to your computer.
Part 3. FAQ About Adding Watermark in Lightroom
1. Can You Change the Color of Watermark in Lightroom?
No, there is no option to change the color of the watermark. You can just apply the simple text to your images. The built-in watermark tool is suitable to add watermarks to the photos that you have taken or edited.
2. Does Lightroom Support the Addition of a Watermark to a Batch?
No. You cannot add a watermark to multiple images in one go. For this purpose, MarkGo is the best tool. You can easily add a watermark to all the imported images. Just add a watermark to an image and apply it to all images. This is quite simple and timesaving.
3. Why Can't You Move the Watermark Anywhere on the Image in Lightroom?
Lightroom has nine predefined locations to place the watermark. Thus, you cannot place the watermark wherever you like. However, in MarkGo, you can drag the watermark and position it wherever you want.
4. What is the Watermark Preset in Lightroom?
You can save your watermark settings by creating a preset. After adding a watermark to the image, Lightroom will ask you to save it as a preset. You can use this preset later whenever you want. It will help you apply the same watermark to other images.
Conclusion
Lightroom is a professional image editor for sure. It can make your images pixel perfect. It also has a built-in watermark tool to add watermark to video. We have explained how to add watermark in Lightroom. You can follow the step-by-step method. The tool helps in saving the work of creators from theft. However, it has some issues. First, it is not for a beginner, and it takes time to add or remove a watermark. Moreover, if you want to add a watermark to different images, you will need better software. If you are using mobile phone,you can download some watermark remover app on iphone.
It is recommended to use MarkGo as it is a professional watermark editor. You can add or remove a watermark without any hassle. The tool is suitable for adding watermarks to images and videos and removing background quickly. Within one click, your watermark will be applied with perfection. You can also apply a watermark to all files imported in MarkGo. Thus, it is a better alternative to Adobe Lightroom.
iMyFone MarkGo
Start to Remove Watermarks from Videos and Images Now.


