

 Don't Click
 I just knew you will click it, LOL!
 Sent ! Please Check Email

 Youtube Videos
 Anime Character
 TikTok Videos
 Celebrity AI Voices
 Advertisement
 Podcast
 Video Games
 IVR Voices
 E-leaning


How to screen record on Chrome? If you are searching about this, then you landed on the right page. It's also a truth these days this feature is becoming essential. But you have to download a third-party app to take advantage of this feature. Fortunately, Chrome comes with a built-in screen recording feature that makes everything so smooth.
Moreover, you don't need extra tools and software to do the job. Yes, the chrome screen recording feature is available in your quick setting panel. So, let's start to learn free screen recording on Chrome.

Part 1: How to Screen record on Chrome - with desktop software
Screen recording on Chrome can be helpful and accessible. However, sometimes you need to download tools to record.
iMyFone Filme - Win & Mac
iMyFone Filme is a fantastic software that helps you create slideshows and craft videos regardless of any prior knowledge in video editing. iMyFone Filme comes with excellent preinstalled tools and features such as speed, crop, cut, trim, split, adjust and rotate. Other features include transitions, filters, titles, audios, animation, text options, picture-in-picture effect, and much more. You can add several layouts and the instant preview feature allows you to preview the video any time you want. Moreover, it can support over 50 audio and 50 video formats. Along with video creation, you can record the screen of your MAC Chrome and save it to the device storage.
How to use it:
Step 1: Go to iMyFone's official page and download Filme onto your computer.
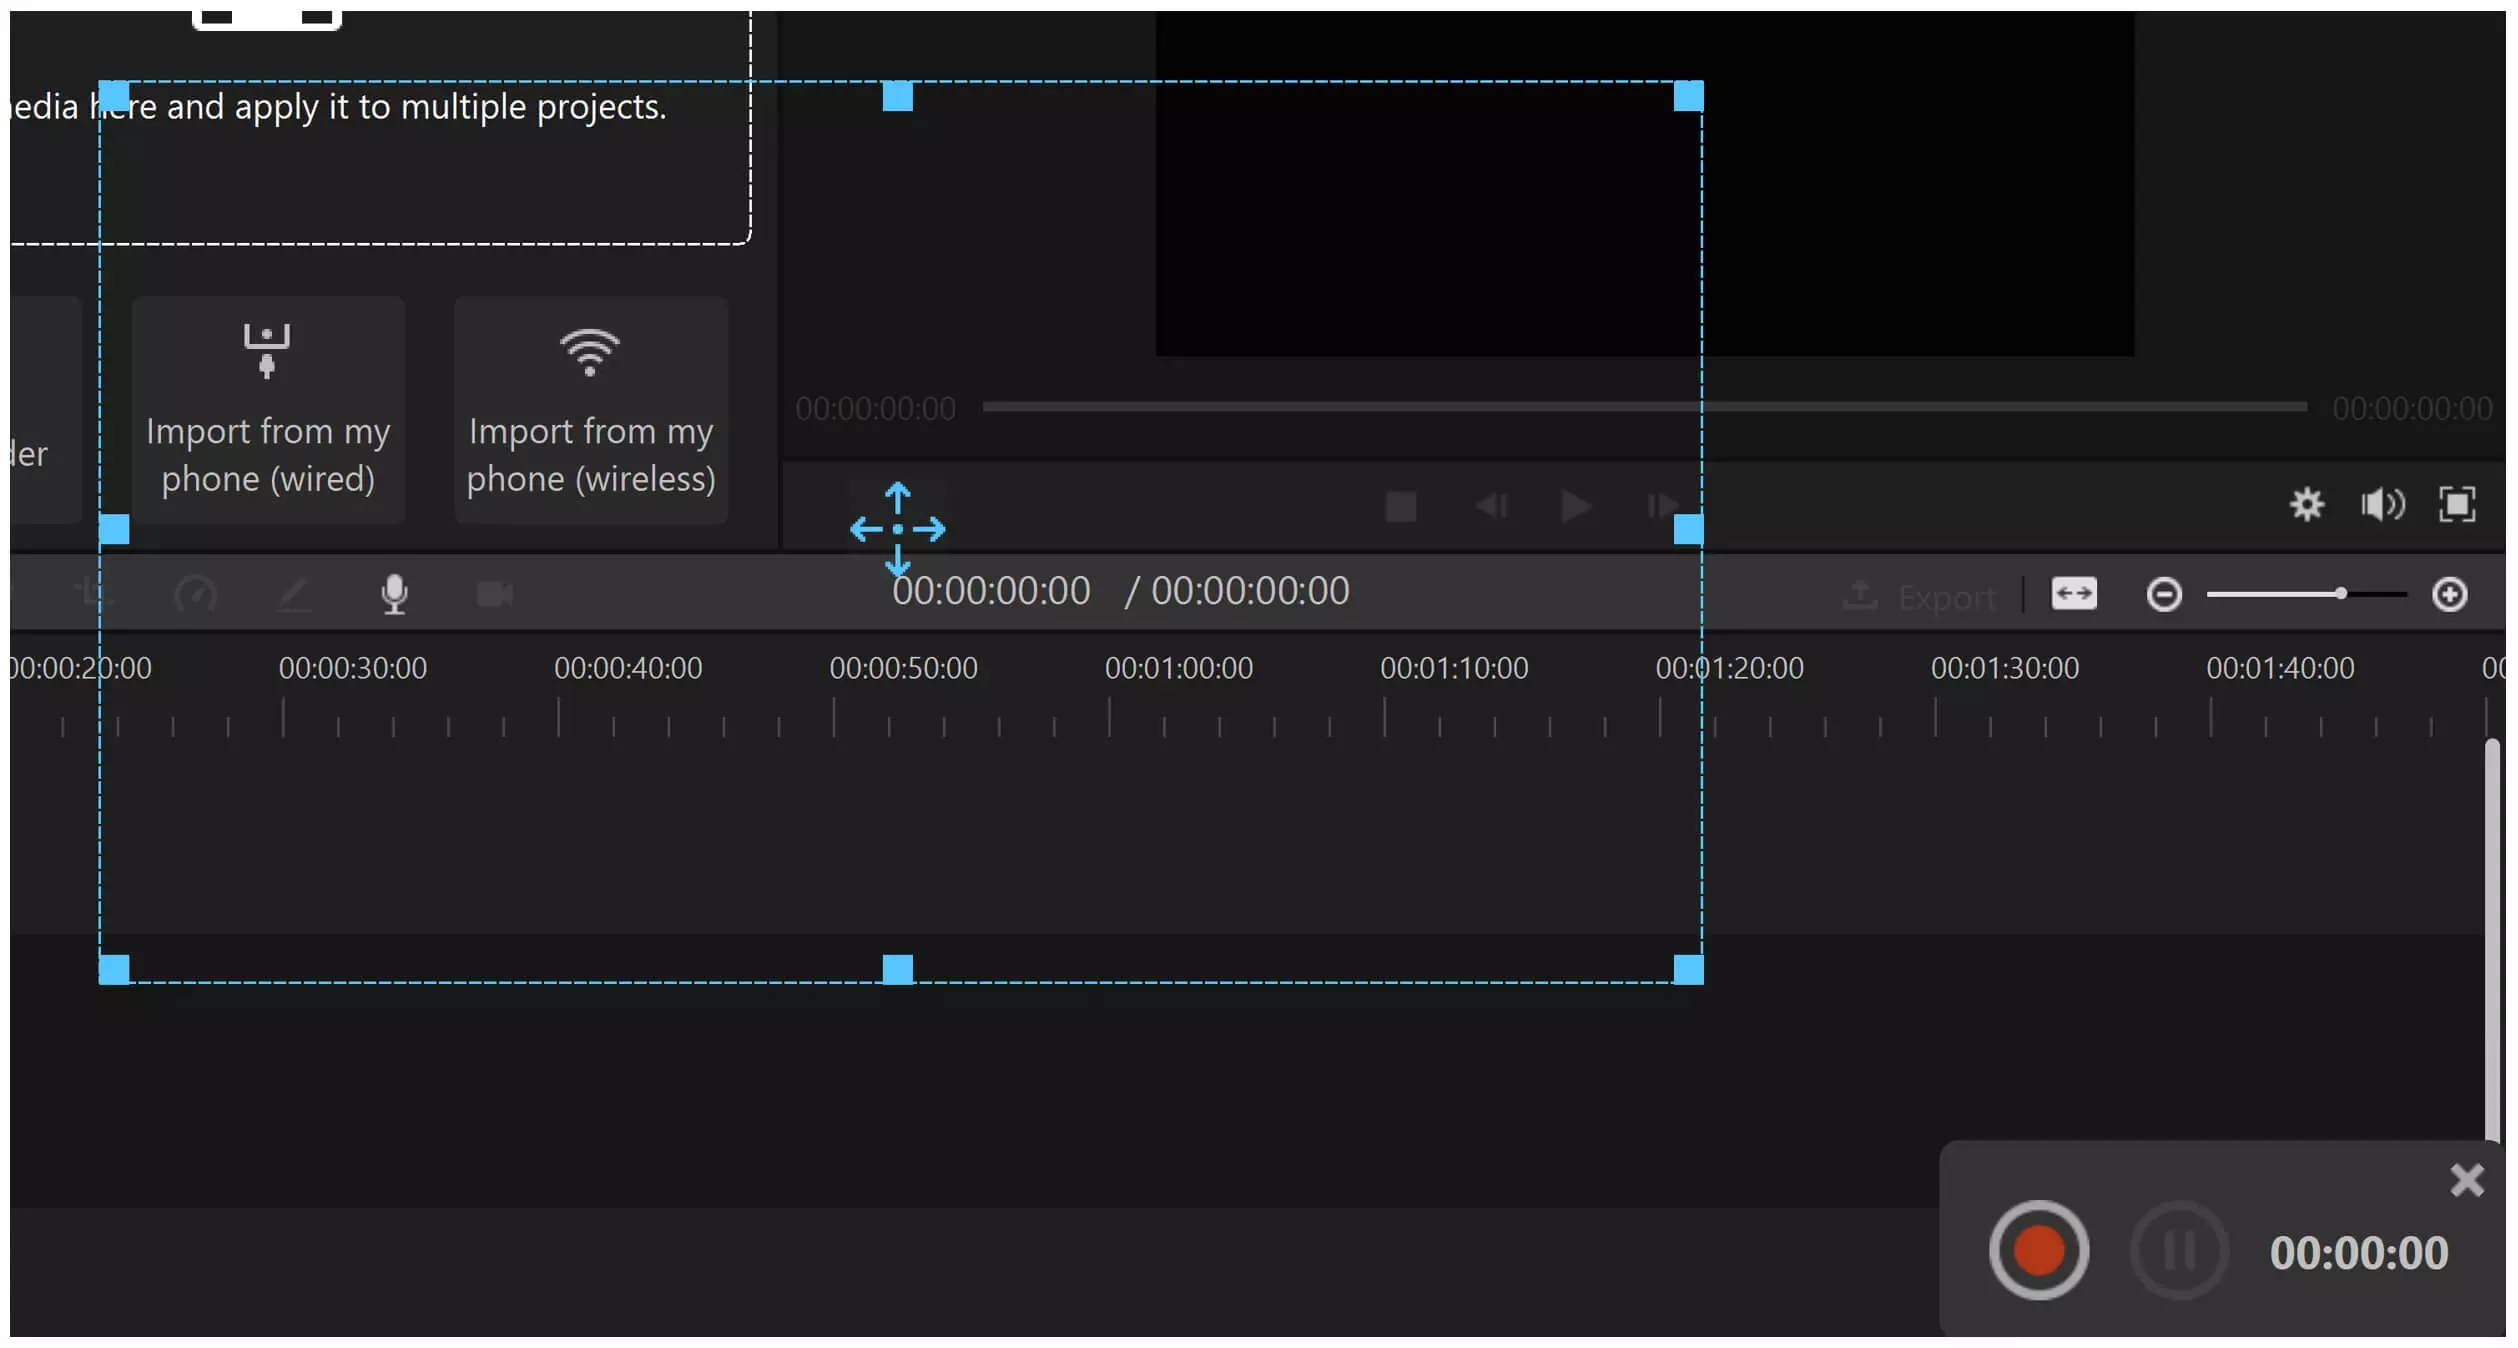
Step 2: Launch Filme video editor and then you will see the screen record icon on the timeline interface.
Step 3: When you click on the screen record icon, you will see the screen record window pops up. You can resize the window and it depends on which part of the screen you would like to record on your desktop.
Step 4: When you finished the recording, the recorded clip will be automatically imported to the Project Media of Filme. Drag the video to the timeline for further editing.
QuickTime Player- Mac
QuickTime Player is a preinstalled application in Apple devices. It is used to edit, play, record, and share audio and video files on MAC. QuickTime Player can also record your MAC chrome screen. With its powerful recording feature, you can create short tutorials and training videos for educational and social media purposes.
How to use it:
Step 1: Search for QuickTime Player in the Launchpad and open it.
Step 2: Once the QuickTime Player is open, click on "File.' Now select "New Screen Recording."
Step 3: Now you will see a downward-facing arrow next to the "Record button." By pressing it, you will the following recording options on your MAC Chrome:
Options: Select the option "Show Mouse Click In Recording" if you want a circled precursor during the recording of the MAC screen of Chrome.
Microphone: Select "Built-in Microscope" to record the screen with sound. Select "None" to record the screen without sound.
Step 4: Now select the "Record" button.
Click on the screen to record the complete screen of your MAC Chrome.
Drag a part of your MAC Chrome screen you want to record.
Step 5: To stop the recording, you will find a "stop" button present on the Menu Bar present on the left side of the "WIFI" button.
Step 6: For saving the screen recording, press "File" in 'Menu Bar" and select "Save," and name the screen recording.

Also Read:
Guide to Record iPhone and iPad using QuickTime >>
How to Change Video Speed on Quicktime Player >>
Part 2: How to Screen Record on Chrome with Google Chrome Extension:
In Google Chrome, a video can be recorded from the camera, or it can be captured from the screen using a google chrome extension. The video source could be from any specific tab or the entire webpage. The audio source in the video could be retrieved from the system's audio, microphone, or even the video could not have any audio at all. When the start button is pressed, the extension brings a pop-up. However, this pop-up's main aim is for recording screen, and it shows on top of the screen and starts showing the timer.
Nimbus screen video recorder
Nimbus Screen Video Recorder is an impressive screen recorder used to capture the screen, whether it is the entire web page or any part. It comes in handy when the user wants to screen record any tab of the web browser. It is accessible on various platforms by multiple users. After the screen is recorded or screenshots have been taken, it allows the user to annotate them and edit them. The primary purpose of the extension is the screencast feature that allows the user's current tab or web to be recorded. The Nimbus extension is equipped with multiple editing tools that enable trimming or cropping of the content. The extension can also convert the recorded content into gif or mp4 format. Sharing and uploading the screenshots and screencasts is also easy with the help of extensions.
training videos for educational and social media purposes.How to use it:
Step 1: Click on the Nimbus icon on the top right corner and select record video from the drop-down menu.
Step 2: Lists of options appear from which you have to select the device you want to record audio.
Step 3: If you are interested in recording the audio from the microphone, selecting the "Record Mic Sound" option, which is by default. On the other hand, you can choose "Record Tab Sound" if you want to record the current tab audio.
Step 4: If you want to do recording from the webcam, you have to enable the "Record Webcam" option.
Step 5: In video settings, you can select video settings.
Step 6: Lastly, you can select the "Record Video" option to start the video capturing.

OpenVid
Opened is a chrome extension that allows the user to watch various videos without letting ads causing any disturbance. It does not host any ads, and all the content is advertisement-free. The extension established a safe environment for the user to keep its device secure from malware and ads and let the user stream in peace without any worry. The Open video extension has its own media player. This media player includes some excellent features.
Hotkeys can be used to navigate through different features of the video player. It provides a download option for every video. You also have the option of adding subtitles to the video.
How to use it:
Step 1: Launch Chrome.
Step 2: Download the Openvid Chrome extension.
Step 3: Open opentest. Co and create an account.
Step 4: Open the website you want to record.
Step 5: Select the Openvid extension: When it turns red, it means you are recording a video of the site with audio.
Step 6: Select the circle in the lower left of the browser to turn on your webcam.

Part 3: How to Screen Record on Chrome with online tools:
The online tool is a google chrome extension for screen recording are cable for recording audio and video. They are just used to capture screen audio and video. Moreover, many online tools allow the user to record their entire window or just a tab with or without audio. The whole recording could be downloaded through the online tool as a whole or in chunks. The video can also be download in different formats such as gif or mp4 etc. The online tool also allows the user to share the recorded video across the web and upload it.
Covideo
Covideo can be used to track, send and capture customized videos. These customized tend to improve sales opportunities and response rates. They also increase the chances of getting more deals. It helps to comprehend and advance the understanding of the user with the help of the video. It provides the user with a free screen recording demo to experience its features in a limited environment. You can try it free for a limited period. It is most commonly used to send, track and record video emails. You can track your success. It ultimately allows you to customize your message and how you approach someone.
How to use it:
Step 1: Start by downloading the Covideo screen recording google chrome extension from the chrome store. The icon will appear on the toolbar. Open it.
Step 2: Choose the "Screen" option if you want to record the screen only. Select "both" if you're going to record audio, your screen, and webcam.
Step 3: Now press the "Record" button and also choose the specific part to record. You have an option of selecting the entire screen or a part of it for recording.
Step 4: After this selection, press the "share" button, a countdown of 3 seconds will appear, and your screen is now recording.
Step 5: Record the screen in a 30-minute file, and you can press "Stop Sharing" when finished.
Step 6: Now it will show two options, "delete" and "upload."

Apowersoft Online Screen Recorder:
Apowersoft Online Screen Recorder is an intelligent google chrome extension for screen recording that does not require the user to download anything; instead, it is a free screen recording on Chrome online-based tool. You don't have to get into any fuss and can easily record the screen by just opening the online website and start recording. It allows easy downloading, sharing, and uploading of the recorded video. The user can export the video in his preferred format, whether it is MP4, WMN or MPEG, etc. Record all kinds of actions on your screen, including self-demonstration, video stream, live chat, and more.
How to use it:
Step 1: Firstly, visit the site free online screen recorder and press "start recording." You will need to download a launcher if you are using it for the first time.
Step 2: A recording frame will appear on the toolbar, and you can customize your screen settings.
Step 3: Select the "Region" mode and start recording by pressing a red "Rec" button and press OK.
Step 4: You can operate a webcam and screen recording by pressing the camera icon. Furthermore, click the blue button to pause and green to save the video.
Step 5: The video preview will display. Now by just pressing the save option on the toolbar, you can save it on your system.
Conclusion:
After learning everything about screen records on Chrome, it's clear that technology has made things more accessible than ever. For instance, you can use the Filme for editing and as a third-party tool. It is available for mac and windows. Thus, you can visit the main website to download this high-end app. Here you will get everything that you need to make your computer editing strong. So, use these unique features to unleash the creativity that is in your mind.


