DaVinci Resolve is a splendid and advanced video editor. It is one of the most popular professional-grade video editors that experts love to use. Its features and tools are more than amazing. However, it is a bit complicated for beginners. Therefore, we will guide you step-by-step to mirror, flip, and animate your videos using DaVinci Resolve. Moreover, we will also introduce a beginner-friendly tool if you are looking for a simple and easy video editor. Let's start.
Horizontal and Vertical Flip in DaVinci Resolve
Step 1: Open DaVinci
Open DaVinci on your computer. In the first window, you will see some old projects that you can open. If you want to create a new project, click on New Project. Enter the name of the project and click on Create.
Step 2: Import the Video
Go to File>Import and click on Media. You can also use the keyboard shortcut "Ctrl+I". Select a video from your computer and import it. You will see the imported video in the media pool. Now, drag the video to the timeline.
Step 3: Flip the Video
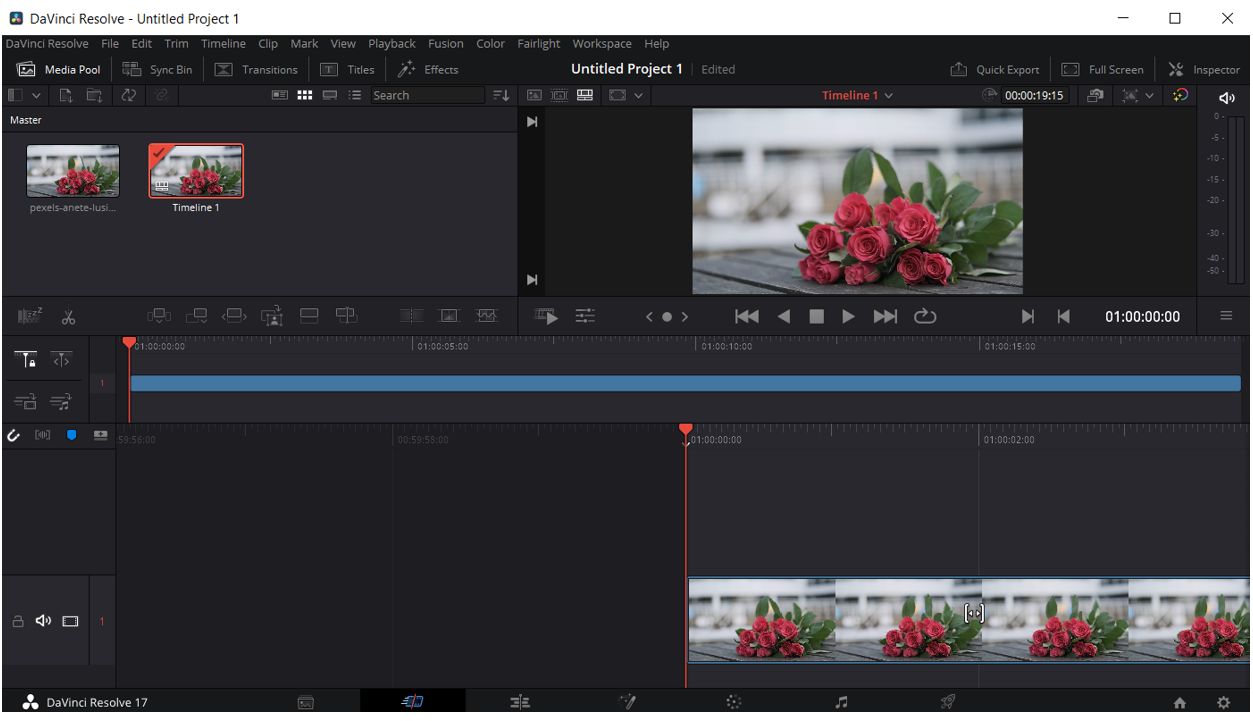
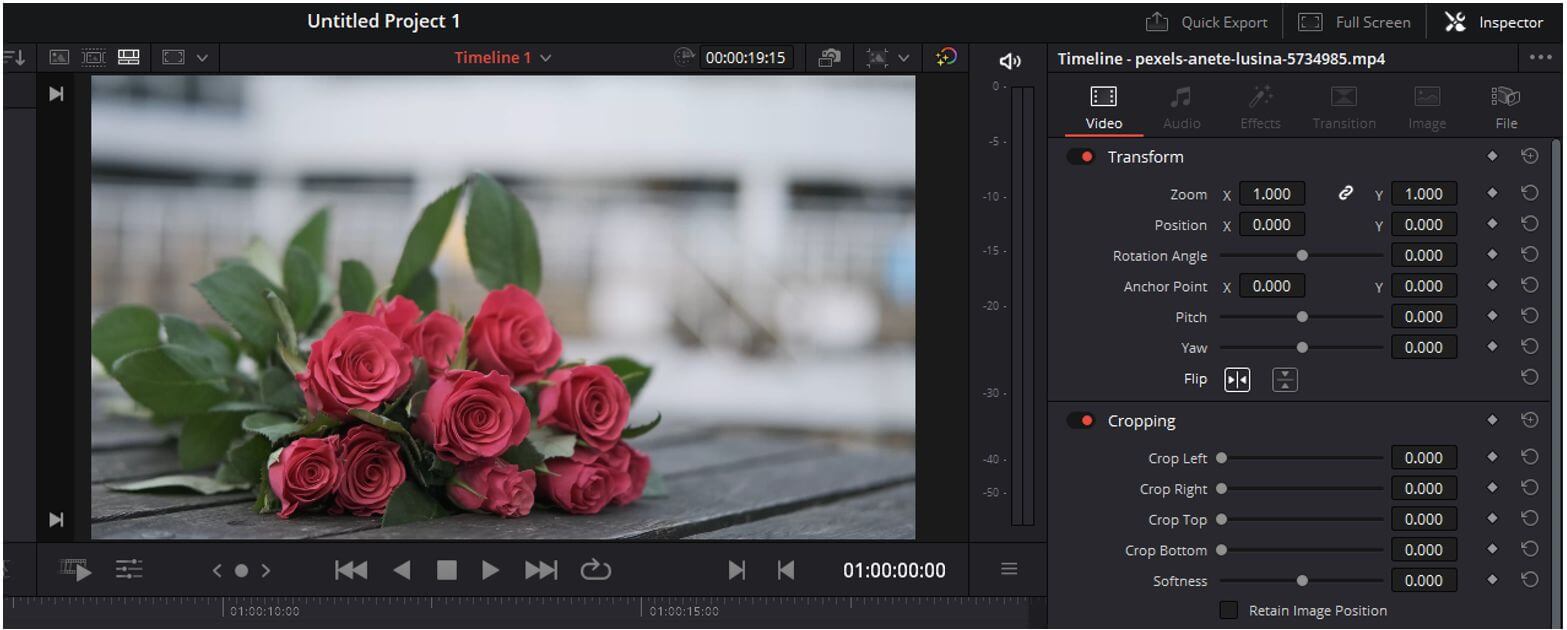
The flip setting is available in the Inspector panel. On the top right corner of the screen, you will see the Inspector button; click on it to flip the video. You will see the panel on the right. Look for the Flip option. There will be horizontal flip and vertical flip. Click on any of the flips you like.
Step 4: Edit the Video
You can make further changes to the video if you want. DaVinci is a complete video editor that can be used to make your videos more appealing. You can use its tool to make everything pixel-perfect.
Step 5: Export the Video
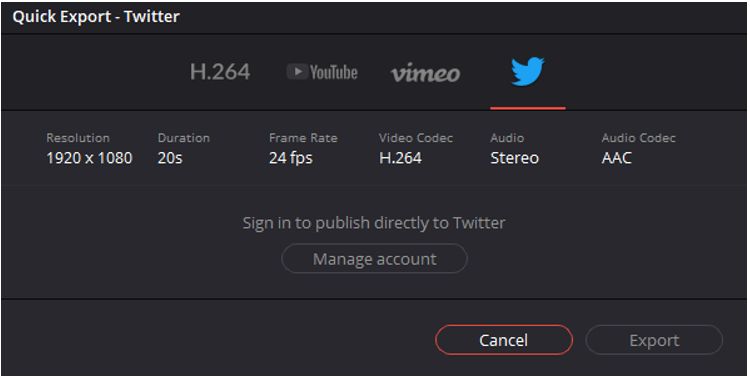
Go to File and click on Quick Export. Select the video settings you like and click on Export.
Top 5 Video Flippers to Flip a Video and Photo Online Fast in 2021 >>
How to Flip a Selfie Video? [Online/ Win/ Mac/ Android/ iPhone] >>
6 Easy Ways to Rotate Video on iPhone >>
Rotate a Video in DaVinci Resolve
Step 1: Create a New Project
Open DaVinci Resolve. First, you need to create a new project to edit the video. On the home screen, you will see the New Project button. Click on the button to create a new project. Enter the name and click on Create.
Step 2: Import Video
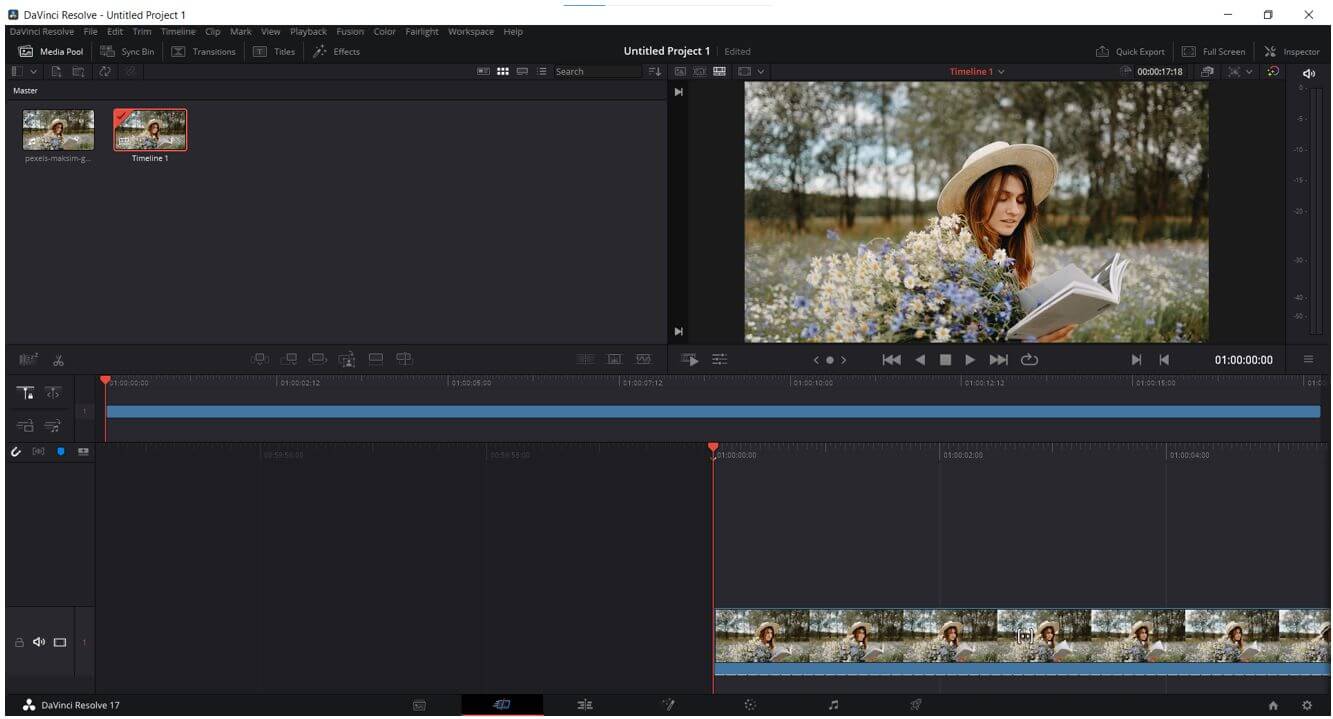
You need to import the video to the project. The easiest way is to open the video in a file explorer and drag it to the media pool. The video will be added to the project. Now, drag it to the timeline.
Step 3: Rotate VIdeo
You need to go to the Inspector Panel. Click on the button on the top right corner of the screen. It will open a new panel under the button. There will be many options, and you need to look for the Rotation Angle. You can use it to rotate the video. You can either move the slider or enter the value. The additional feature is the anchor point. You can change the anchor point for the X and Y axis to rotate the video as you like.
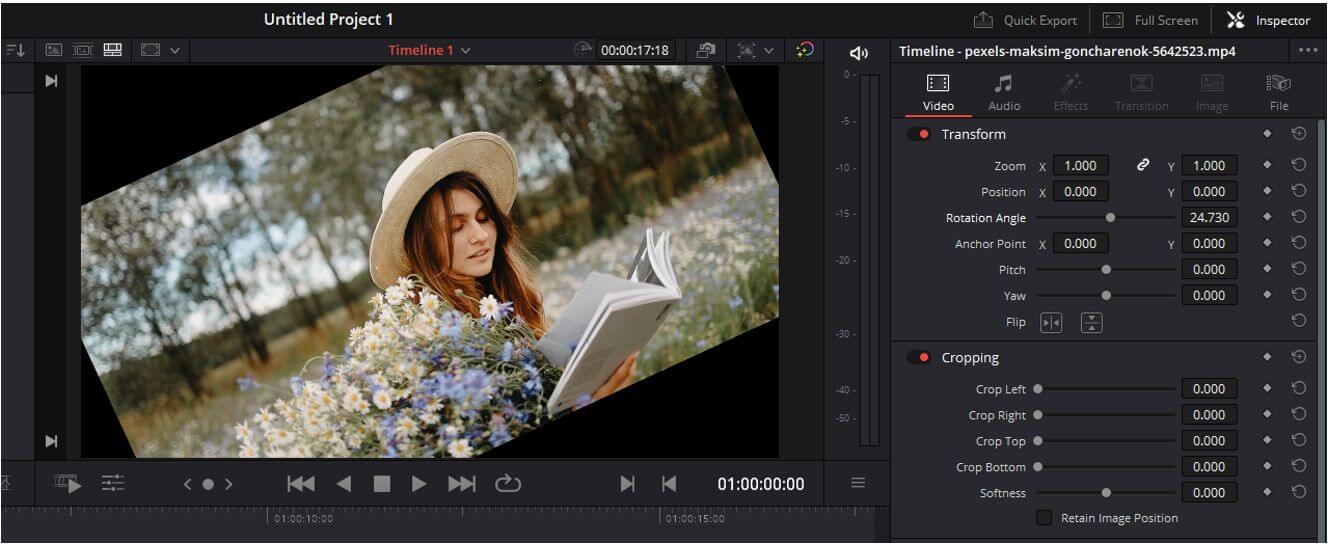
Step 4: Edit the Video
If you want to make other changes to the video, such as adding music, effects, or images, you can do at this stage. You can do almost anything using DaVinci.
Step 5: Export the Video
After editing, you are ready to export the video. Go to File and click on Quick Export. Export the video with any setting you like.
Reverse a Video in DaVinci Resolve
Step 1: Create a New Project
Open DaVinci Resolve on your computer and create a new project. You will see the New Project button on the main screen. Click on the button. It will ask you to enter the name of the project.
Step 2: Import Media
Open File Explorer. Go to the folder where you have saved the video. You need to drag this video and drop it to the media pool. Now, drag the video to the timeline for further editing.
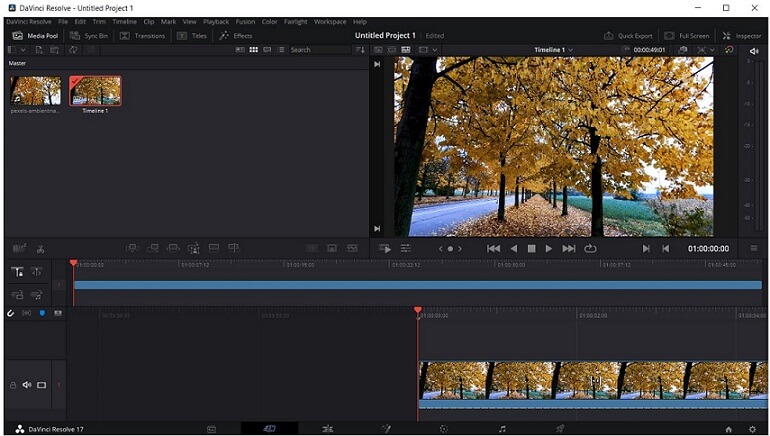
Step 3: Retime Controls
By default, you will be on the Cut page, but you need to go to the Edit page to reverse the video. Click on the Edit page at the bottom. Right-click on the video on the timeline. You will see many options. Click on Retime Controls. You can also use the keyboard shortcut "Ctrl+R".
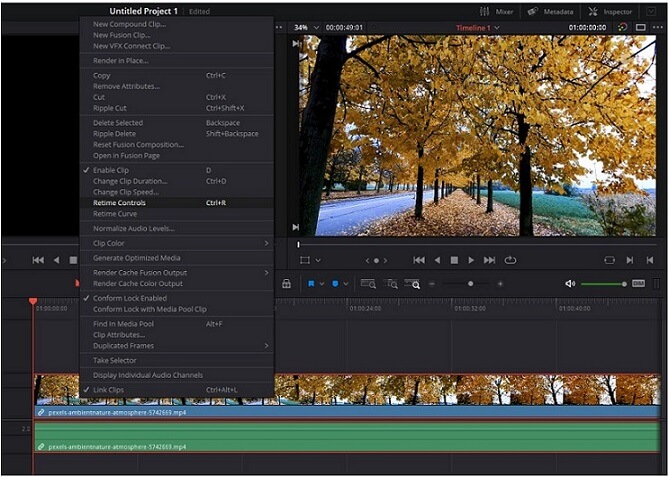
Step 4: Reverse Segment
The video track on the timeline will change a bit. You will see the speed change option on it. There will be a 100% at the bottom center of the track. Click on its down arrowhead. Now, click on Reverse Segment. It will reverse the video instantly.

Step 5: Editing
You can make other changes to the video. You can go to Cut, Fusion, Color, and other pages to edit your video.
Step 6: Export the File
When you are ready, go to File and click on Quick Export. You will see a new dialogue box. Select the format you like and export the video.
Animate your Videos in DaVinci Resolve
Step 1: Create a New Project
Open DaVinci Resolve and create a new project. You will have the New Project button at the bottom of the home window. Enter the name of the project and click on Create.
Step 2: Select Media
Import the video to the project. You can either drag the video to the media pool or go to File>Import and click on Media. Select the video to which you want to animate.
Step 3: Add Effects
Now, you are ready to add animations to your video. On the cut page, you will see the Effects option on the top. Click on it, and you will have a list of effects. Select any effect for the video and drop it on the video track on the timeline. It will be added to the video.
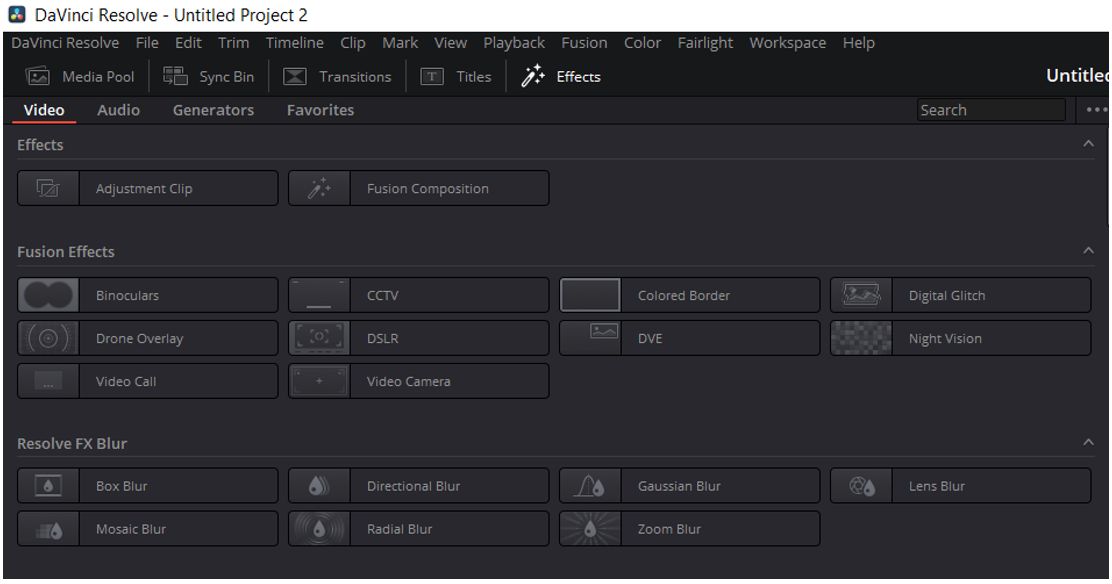
Step 4: Edit the Effect
Go to the Edit page and click on Inspector to open the panel. Click on the Effects tab to edit the effect. You will have many options, so you can adjust the effect as you like.
Step 5: Export the Video
You are ready to export the video. If you want to make other changes, you can do so at this stage. After all, go to File and click on Quick Export. Export the video in the format you like.
Is DaVinci Resolve PERFECT for Beginners?
DaVinci Resolve is an advanced and professional-grade video editor. It has tons of tools that are perfect for any type of editing. However, DaVinci is quite complicated. First of all, the interface is very complex, and beginners usually get confused after opening the video editor. It has tons of tools on the interface, and there are multiple pages. Therefore, beginners need to learn before using it. They need to spend considerable time learning how to use the video editor and its tools. Thus, DaVinci is not suitable for beginners.
For beginners, we recommend iMyFone Filme. It is a simple and user-friendly video editor that anyone can use without any prior experience. Beginners can edit their videos professionally and make them appealing and eye-catching without any hassle.
How to Flip a Video using iMyFone Filme: The Easiest Way-iMyFone Filme (Win & Mac)
iMyFone Filme
iMyFone Filme is the perfect software for beginners and those who have little experience. It is the simplest tool on the market and can help you make amazing and breathtaking videos within a few clicks. It is specially designed for beginners, and it has a self-explanatory and simple interface.
Filme is an all-in-one tool that can be used to create any type of video. Whether you need to create social media videos, short clips, video resumes, video presentations, getting/invitation cards, slideshows, or anything you can think of, it is the perfect tool. It is a versatile tool that will make your videos more engaging.
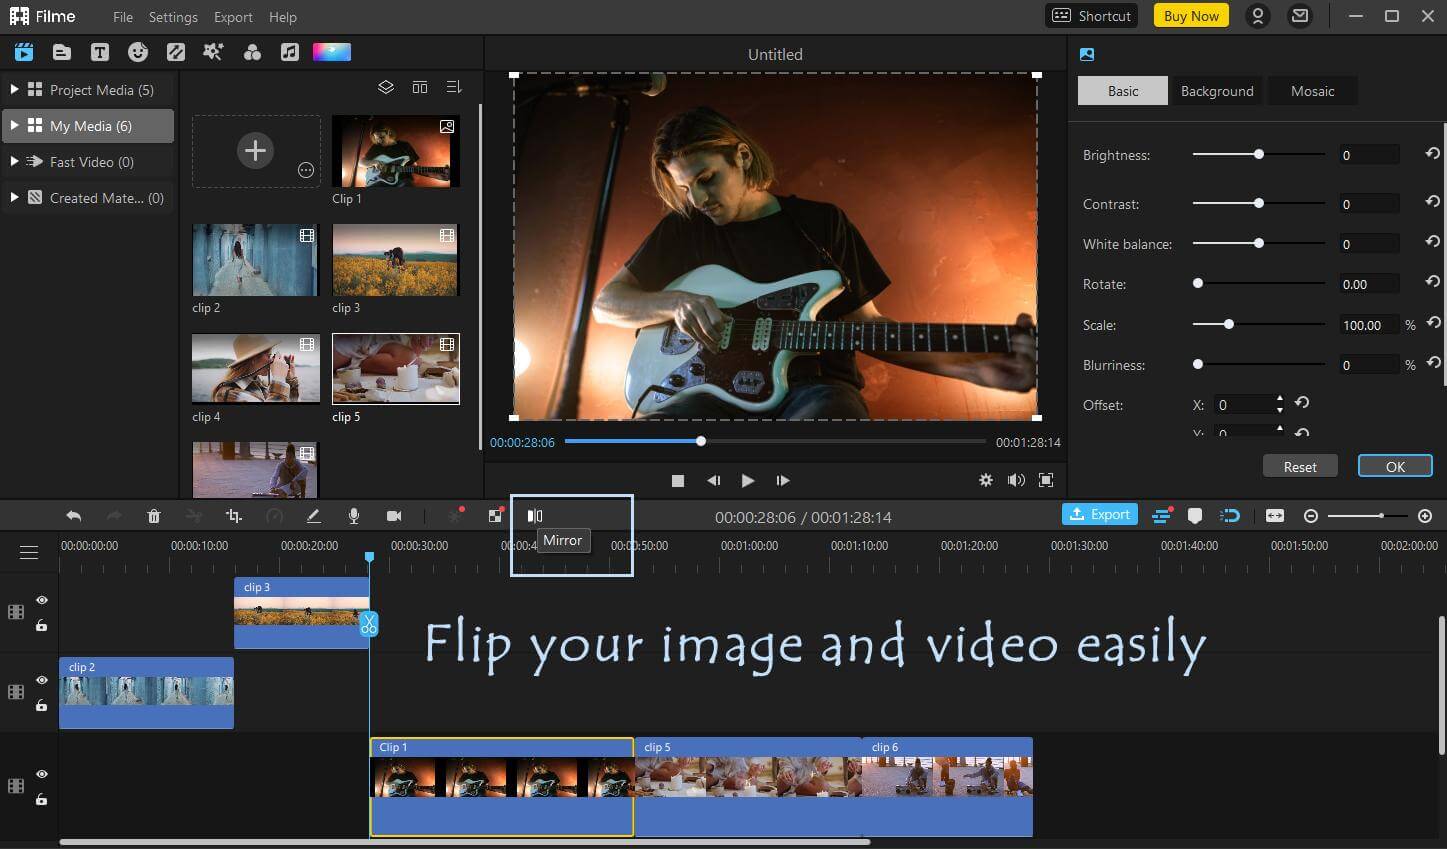
Key Features:
-
Filme has all the basic and advanced tools for video editing. You can split, trim, change speed, adjust color, freeze a frame, apply blur on objects/faces, rotate, flip, and make other changes to your videos.
-
There are dozens of animated templates that users can use to create mesmerizing and eye-catching videos and slideshows. You just need to select a suitable template, and there are templates for different purposes.
-
There are libraries for effects, transitions, stickers, filters, and text styles. Filme has everything you need, and you just need to drag and drop the item you need.
-
Filme allows you to export the video file according to your requirements. You can set the aspect ratio, resolution, frame rate, bit rate, and other things. You can also upload your videos to different social media platforms.
Step 1: Create a New Project
Open Filme and click on Editing Mode to open the video editor. Now, you need to create a new project. Click on File>New Project and select an aspect ratio.
Step 2: Import the Video
From the media menu, you can import all your files to Filme. Click to open the file browser and select the video you need to flip and rotate. After adding the video to the project, drag it to the timeline.
Step 3: Flip and Rotate the Video
Select the video track, and you will see some options and tools above the timeline. Click on the Mirror button to flip the video. It will flip your video horizontally.
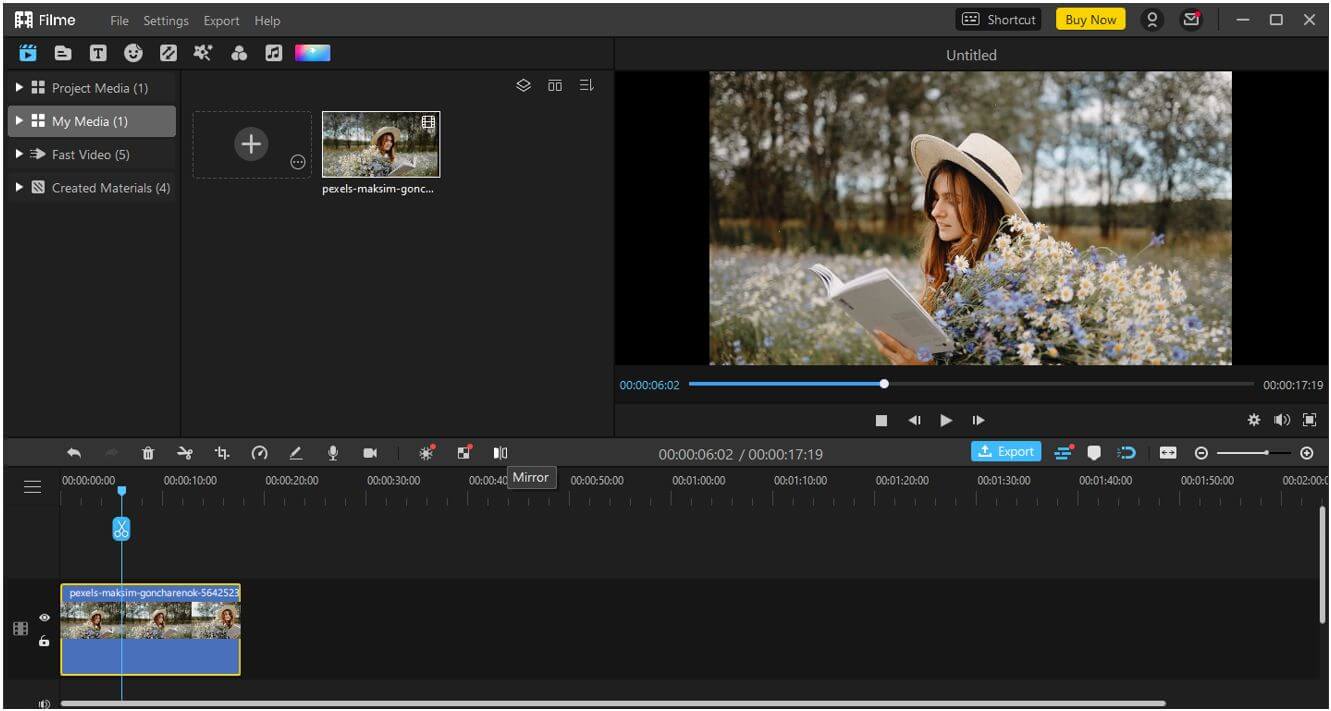
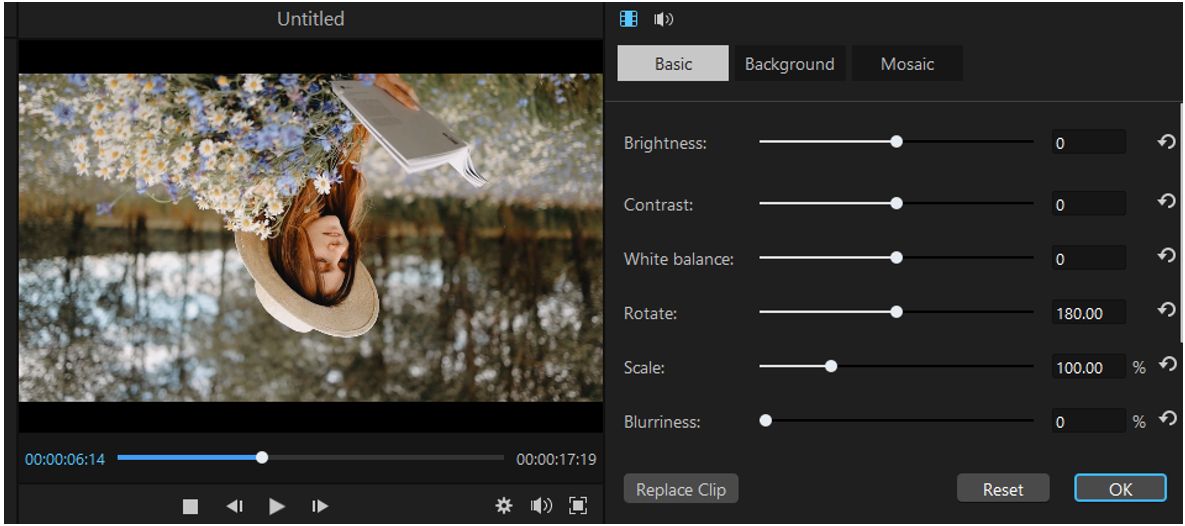
For the vertical flip, you need to rotate the mirrored video. Click on the Edit button over the timeline. You will have a new panel on the right, and you can rotate your video from there.
Step 4: Export the Video
The last step is to export the video. You need to click on the Export button to open the export window. Select the settings you like and export the video.


