Zoom is the first choice for video communications. It is being used in almost every sector or industry for education, conferences, webinars, live meetings, discussions, and calls. It is considered a reliable and best way to communicate with others through video.Video communication is preferred nowadays, but the user is mostly worried about the background. Whether you are in a formal or informal meeting, the background plays an important role. The background in the video must be suitable and up to mark. If it is a business meeting, interview, or formal meetup, then the user needs to care more about it.
Unfortunately, not everyone has an awe-inspiring and proper background to show in the video. Therefore, the users get worried about it. It badly affects the confidence level. Thus, the best way to deal with it is to make the background blur. By applying the blur effect on Zoom, your background won't be visible. Moreover, you can also use a virtual background to make the video more attractive.
In this article, we will share how you can blur the office background in Zoom meetings. We will share the step-by-step procedure so that you can do it with ease. We will also share an amazing video editor that can help you create awe-inspiring and catchy videos along with the blur effect.
Part 1. How to Blur Office Background in Zoom Meeting
Zoom meetings are mostly for formal meetings, and people use them in their offices to communicate with clients, customers, partners, and colleagues. Sometimes the office background is not suitable, or there could be anything in the background that you cannot share. In such cases, the best way is to blur the office background when you are having a Zoom meeting.
Zoom offers a wide range of features, and one of them is the background effect. You can edit the background instantly without using any third-party tool. Zoom has powerful background filters and effects to make the meeting as you like.
There are two types of effects available on Zoom. You will find virtual backgrounds and filters. The virtual background means there will be a different background. You will also find the blur feature here. Other than that, you can use a virtual background, such as beautiful scenery.
The background becomes completely different, but keep in mind that it is not perfect. A virtual background cannot take the place of the original background. However, the blur feature is more than amazing. It completely blurs the background so that the user cannot see anything.
Filters are also awesome. You can use their frames, color effects, digital objects, and many other things to make your videos more amazing. Moreover, you can have mustaches, beards, and eyebrows of your choice. The best part is that you can use the virtual background and filters at the same time.
We will discuss the steps to use virtual backgrounds and filters separately. Let's begin.
Steps to Make Virtual/Blurred Background in Zoom
Step 1: Open the Zoom application on your computer. If you have not downloaded it, follow this link. After opening the application, sign in to your account.
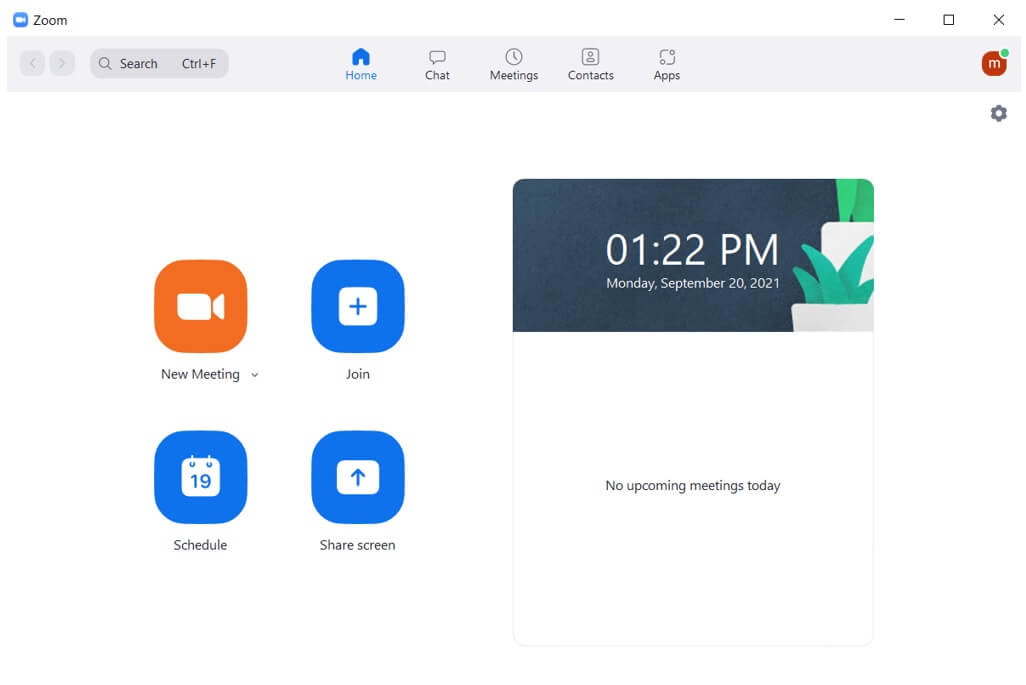
Step 2: You will see a few options on the home screen. You can schedule a meeting, create a new meeting, join a meeting, or share the screen. For now, click on New Meeting.
Step 3: The meeting will start automatically. You only need to select the audio and video. At the bottom left corner, you will see the Stop Video button. There will be a small arrowhead on the button. Click on the arrowhead. Click on Choose Virtual Background.

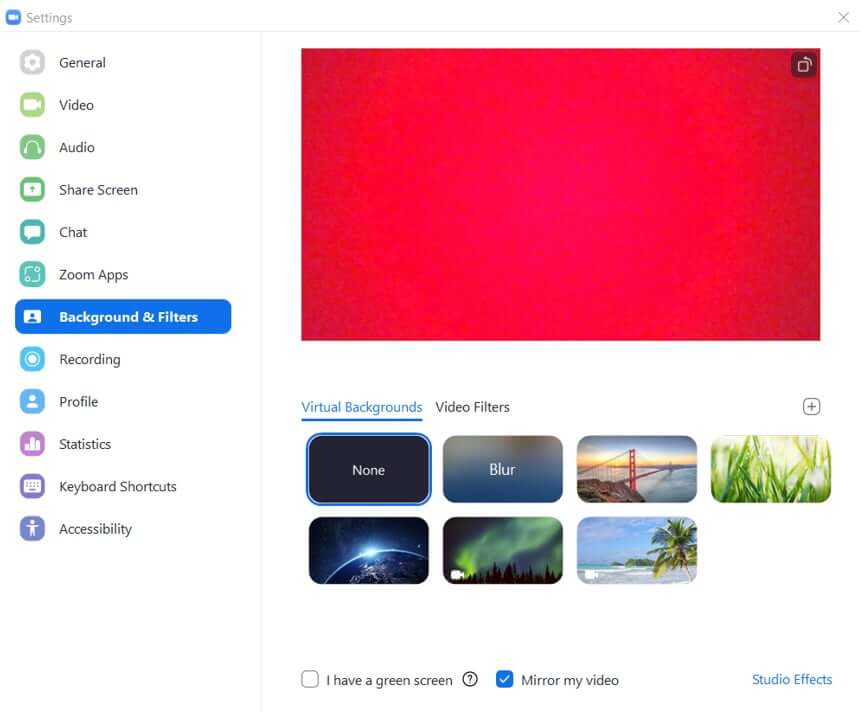
Step 4: You will see the virtual background settings. There are many options; you need to click on Blur. If you want a virtual background, you can select anyone. The background will be applied instantly. It also has a mirroring effect. You can select or deselect the option of Mirror My Video.
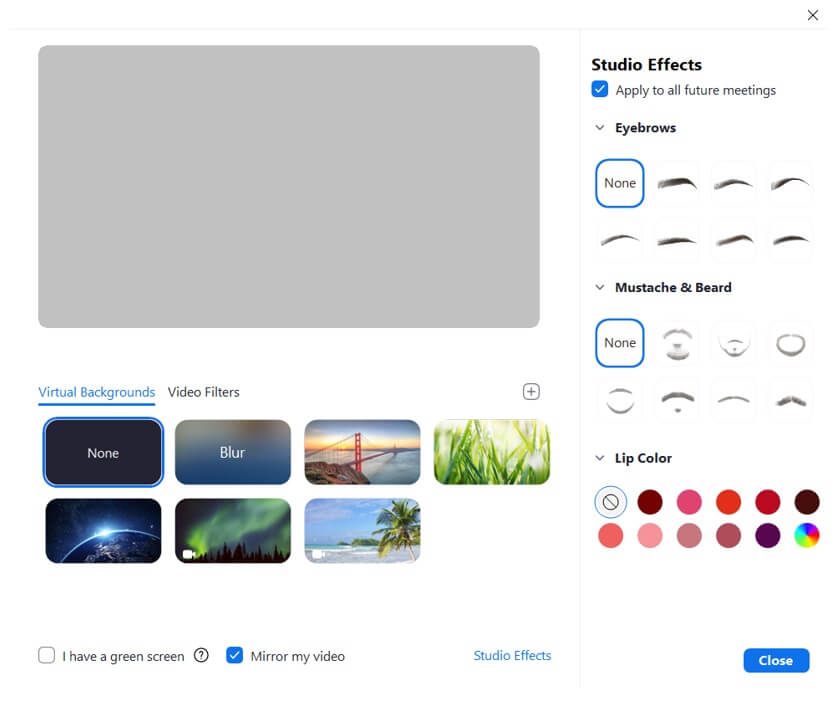
Step 5: You can also enjoy studio effects on Zoom. You can select eyebrows, beards, mustaches, and lip color. When you are done, you can close the settings window.
Step 6: Now, you can enjoy the blur/virtual background.
Steps to Apply Filters in Zoom Meetings
Step 1: Open the Zoom app on your computer. You will again see the four options. Click on Start Meeting.
Step 2: The meeting will start instantly. You are ready to apply a filter. On the bottom left corner, you will have the Stop Video button. It will have a small arrowhead; click on it and click on Choose Video Filter.

Step 3: Select the filter of your choice. There are many options available. If you want to mirror the video, you can also select that option at the bottom.
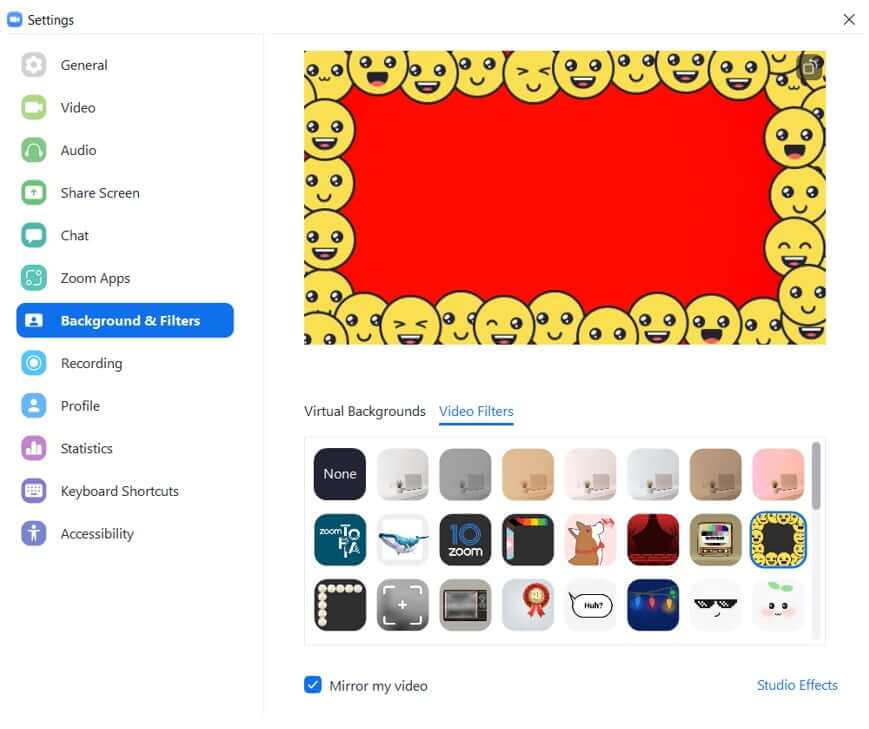
Step 4: When you are done, close the Settings window. You can now enjoy the filters as you like.
Step 5: If you want to enjoy the blurred background along with the filter, you can click on the Virtual Backgrounds tab. Select Blur, and you are done.
Part 2. Use iMyFone Filme to Make Blurred Video and Upload to Zoom Background
iMyFone Filme is a wonderful video editor with tons of exceptional features. It is a very simple and beginner-friendly tool, so it is perfect for everyone, no matter whether you are a beginner or expert. Filme does the job within a few clicks and saves you a lot of time, which is why professionals like to use it for their video projects.
You can do almost anything using Filme. It is a versatile video editor that has all the basic and advanced tools. You can edit your videos as you like and make them up to the mark. Filme not only helps you edit your videos, but it is also an audio editor, slideshow maker, video converter, PPT to video converter, voice changer, and a lot more. You can make videos for social media, business/school presentations, invitation cards, slideshows, or anything you want.
Features:
-
Filme is an all-in-one tool. You can crop, split, change color, adjust speed, free frames, and make various other changes to the video. It has all the basic tools.
-
You can add effects, transitions, mosaic, music, text, filters, or anything you like. It can help your videos stand out from the crowd by making them engaging and eye-catching.
-
Filme has a huge library of effects. You can apply them with one click. You can create a blur effect or any effect you wish.
-
There are many slideshow templates in Filme, and all of them can help you make stunning videos within a few clicks. You just need to import the images, and your animated slideshow will be ready with mesmerizing visual effects.
-
You can edit the audio of the video. You can trim, adjust speed, change voice, and make other edits. Everything is under your control. You can also add music and sound effects from the library.
-
The final video can be exported in the desired format, according to the requirements. You can post it on any social media platform, website, library, or anywhere you like.
Steps to Make Blur Background Video Using Filme
Step 1: Download Filme from this link. Then, install it on your computer; the installation process is straightforward. Open the application after installation. You will have various options; click on Editing Mode.
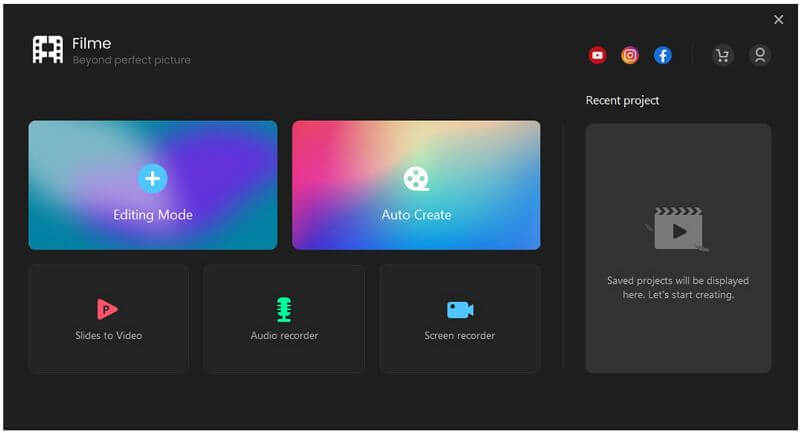
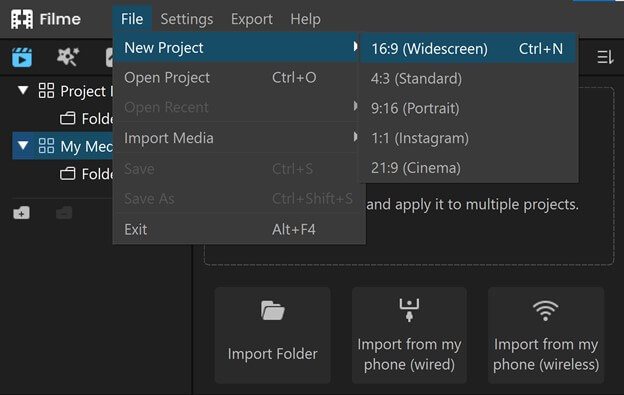
Step 2: The Editing Mode will open the video editor where you can edit your videos. You will have the window editor window. Go to File and hover over to New Project. You will have a few options of the aspect ratio; you can select anyone you like.
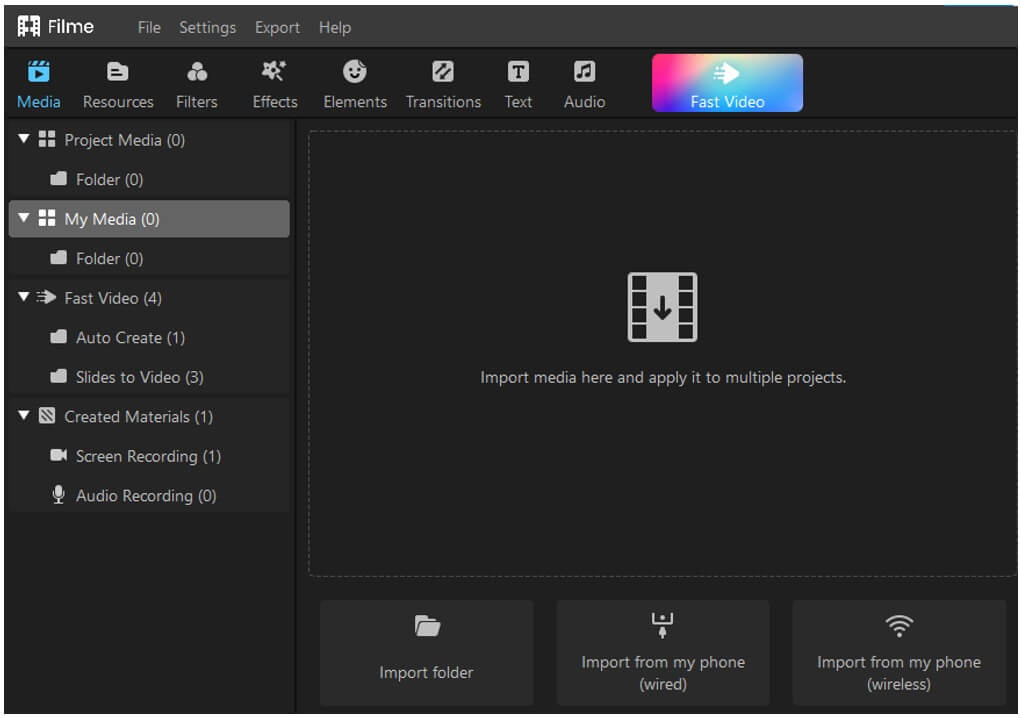
Step 3: Now, you need to import the video that you want to blur. You can import the video from your computer or your mobile. Filme has the latest wireless import feature for Androids. Go to the Media menu. Click to import the video. You can also import other files at this stage.
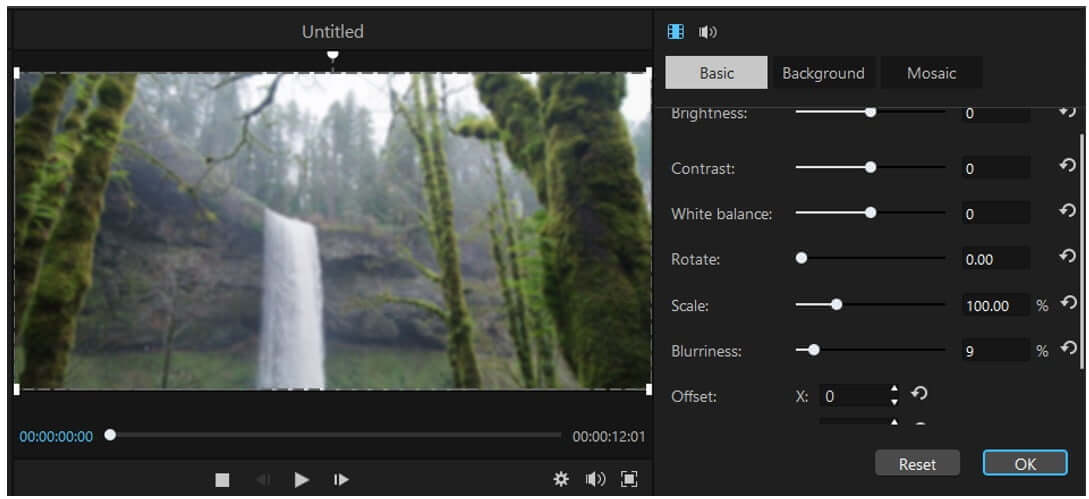
Step 4: Drag the video to the timeline for editing. Now, you can apply the effects. Double-click on the video on the timeline. You will see a new panel on the right of the video. There will be many editing options. You can adjust the blurriness setting and adjust the effect as you like. Once the effect is adjusted, click on OK.
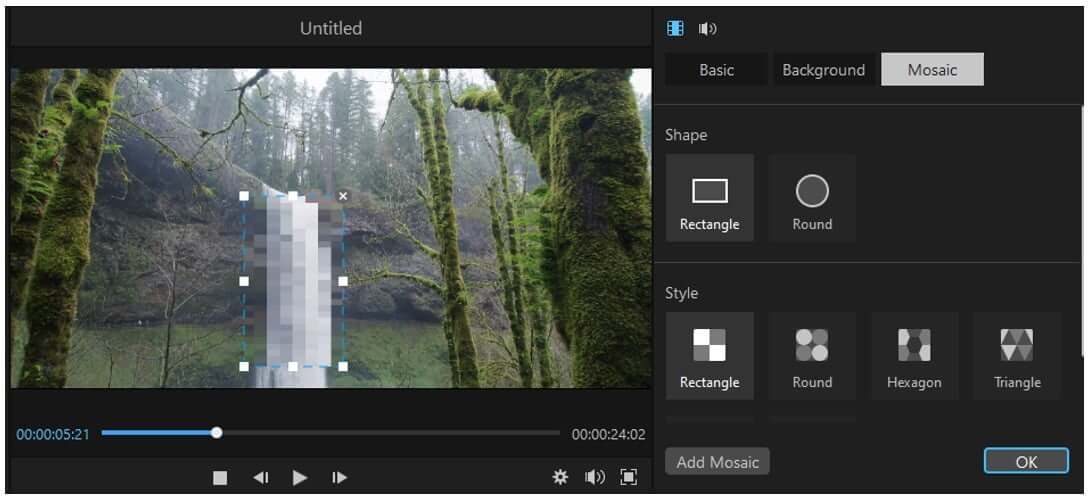
Step 5: You can also apply mosaic blur to censor a certain object or face in the video. Select the video on the timeline and click on the Mosaic button over the timeline. You will have a new panel on the right of the video. You can select the mosaic shape and style. Adjust the mosaic position and size in the video. When you are done, click on OK.
Step 6: You can select effects, filters, stickers, text, and other things from the top menus. Select anything and add it to the video to make it more appealing.
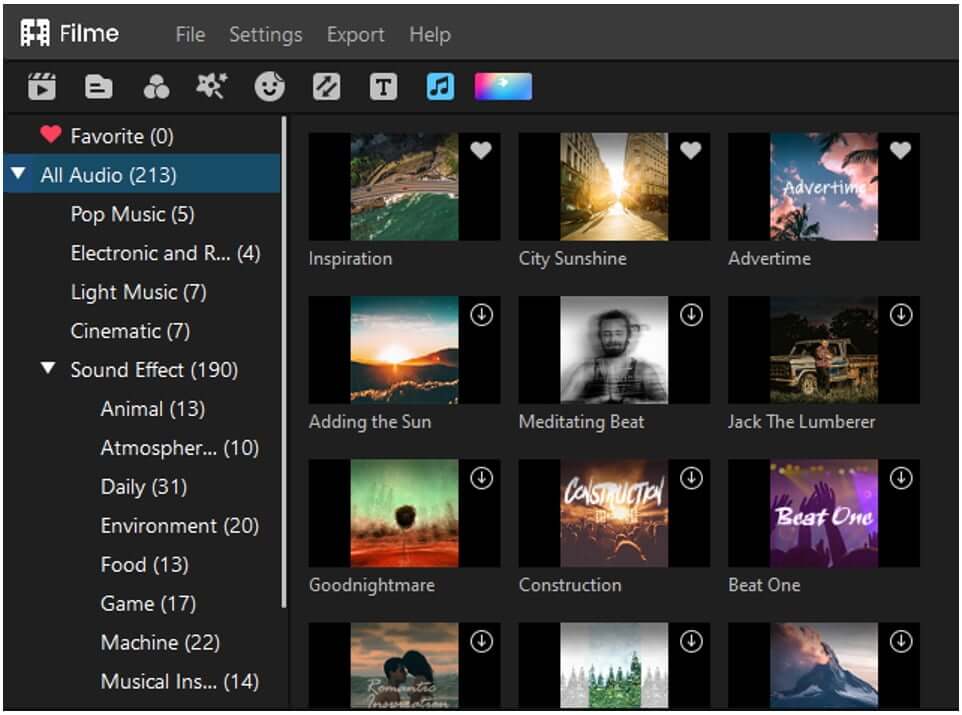
Step 7: If you want to add music or song, import the file to the project and drag it to the timeline. You can also add music and sound effects from Filme's library.
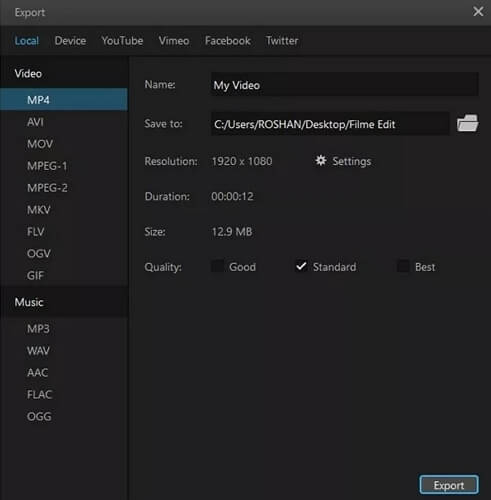
Step 8: Click on the Export button. Now, you can select the location, file container, and settings. Make everything according to the requirements. Finally, click on Export.
Part 3. Why Do You Need to Blur/Change Background in Zoom Meeting?
You need to change the background in Zoom meetings due to various reasons. Let's see some of them.
-
You might need to have a meeting from your office. If the background is good enough, you can share; otherwise, you need to blur it or change it. It is necessary as most of the meetings are formal, and it is a bad idea to have a cluttered or bad background.
-
A good background leaves a good impression on others. If you don't have a suitable background, you can use Zoom effects to make it better or hide it.
-
People also work from home, so they join meetings using Zoom. They might not have a proper background like their offices, so Zoom filters are best for them. They can hide things in their background and be confident.
-
In a formal meeting, you need to have a formal background. If you don't have one, you can use the blur effect or a virtual background.
Part 4. FAQs about How to Blur Background in Zoom
Q. Can You Blur the Background During a Meeting?
A. Yes, you can blur the background during the meeting. You can do it whenever you want. You just need to click on the three-dots icon and go to virtual backgrounds. Just click on the blur, and you will have the effect in no time.
Q. Can I Apply Background and Filter at the Same Time?
A. Yes, you can apply a background and filter at the same time. You can choose them whenever you want.
Q. Can I Remove the Blur or Virtual Background after Applying It?
A. It is possible to remove the virtual background or blur effect. Just click on the three-dots icon and click on Choose Virtual Background. Now, click on None.
Q. Can I Mirror my Video with Background Filters and Effects?
A. Yes, you can mirror your videos. Even if a virtual background or filter is applied, you can mirror the video. You will find the option in the effects or filter section.
Conclusion
We know how important the background is when it comes to video communication. Whether you are having an online class, webinar, conference, office meeting, or anything else, you need a proper background. We have solved this problem by showing you how you can blur and change the background on Zoom. You can easily follow the step-by-step procedure and make your background invisible. There is no extra tool required because all these features are available in Zoom. You just need to follow the steps, and you are done.
We have shared Filme, which is an amazing video editor that can help you create stunning videos effortlessly. You can make awe-inspiring videos even if you have no experience in video editing. It is a beginner-friendly tool that you can use to make presentations, slideshows, travel videos, video resumes, documentaries, and much more. If you want to make pixel-perfect videos without any hassle, there is nothing better than Filme.


