Are you tired of struggling to remove backgrounds from your images? Whether you're a professional photographer or just someone who wants to edit their photos for fun, finding the right background eraser for pc can be a game-changer. In this article, we'll be discussing the 6 best background erasers for Win/Mac/Online, so you can find the perfect tool for your needs.

Part 1. Background Erasers for Win
1) iMyFone MagicPic
iMyFone MagicPic is AI background removal tool that allows you to quickly and easily remove backgrounds from images. It supports bulk background removal to save your time, and offers various kinds of modes to meet your special needs, such as product cutout to obtain pictures for e-commerce, portrait mode for making passport photos effortlessly, and more. Moreover, it uses a combination of manual and automatic tools to achieve high-quality results.

Tips
Hunting for a tool to erase signature background? Why not try a professional remover iMyFone MagicPic to remove backgrounds 100% Auto with AI-powered Technology within 5 secs in 1 click. Juts try it out free below!Free Get Images with Transparent Background:
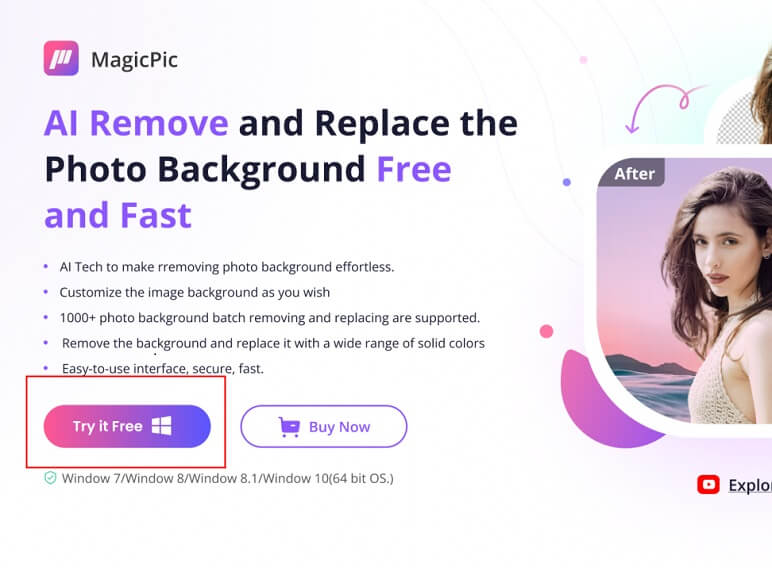
Step #1: Download and install the MagicPic software.
Step #2: Click on One Function Based on Your Needs.

Step #3: AI Auto-Remove Background Instantly.

Pros:
 Qucik and easy.
 Batch processing multiple photos.
 Supports manually details refinement to meet your unique needs.
 Huge background library with a wide range of templates.
 Supports uploading your own pic as the background.
Cons:
![]() It's a new product, not so famous in the market.
It's a new product, not so famous in the market.
You might be interested in:
How to Remove Background From Picture >>
How to Add White Background to Photo Free >>2) GIMP
GIMP is a versatile, open-source image editing software that is widely used by designers, photographers, and artists. It offers a wide range of features and tools that allow users to edit and manipulate images with ease.

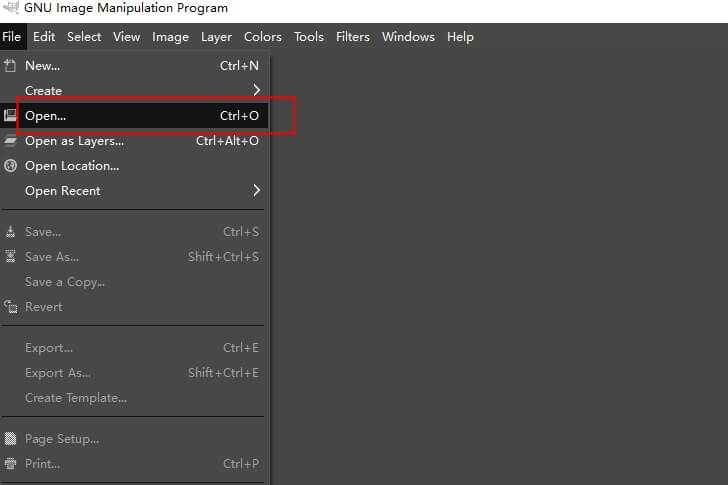
Step 1: Import Your Image
The first step in removing the background from an image with GIMP is to import your image into the software. You can do this by going to File > Open and selecting the image from your computer.
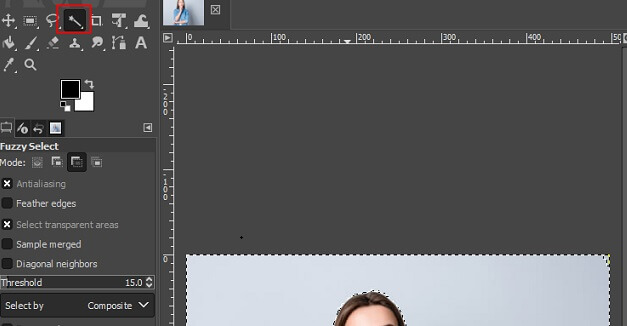
Step 2: Select the Background
The next step is to select the background that you want to remove. You can do this by using the "Fuzzy Select" tool, which is located in the toolbar on the left side of the screen. Click on the background with the tool to select it.
Step 3: Remove the Background
Once you have selected the background, you can remove it by pressing the "Delete" key on your keyboard. This will remove the selected area from the image, leaving only the foreground.

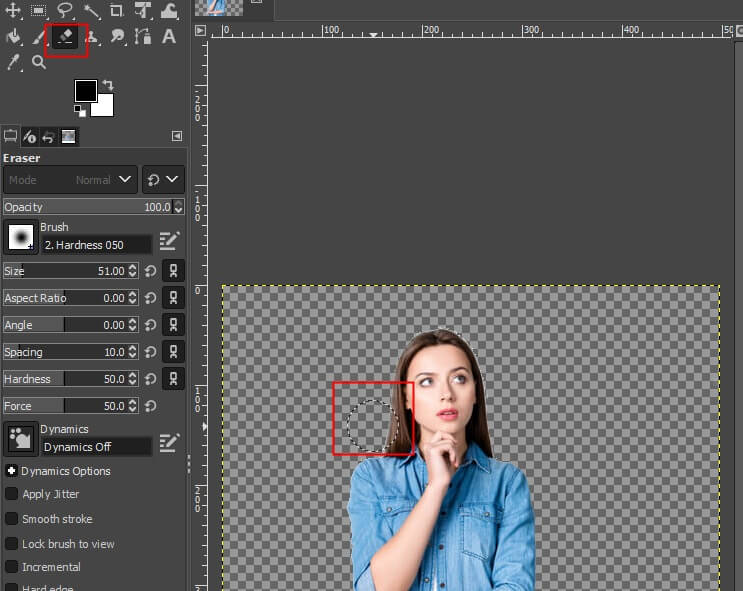
Step 4: Refine the Edges
After removing the background, you may notice that the edges of the foreground are not as smooth as you would like. To refine the edges, use the "Eraser" tool to remove any remaining background pixels. You can also use the "Smudge" tool to smooth out the edges and make them more natural-looking.
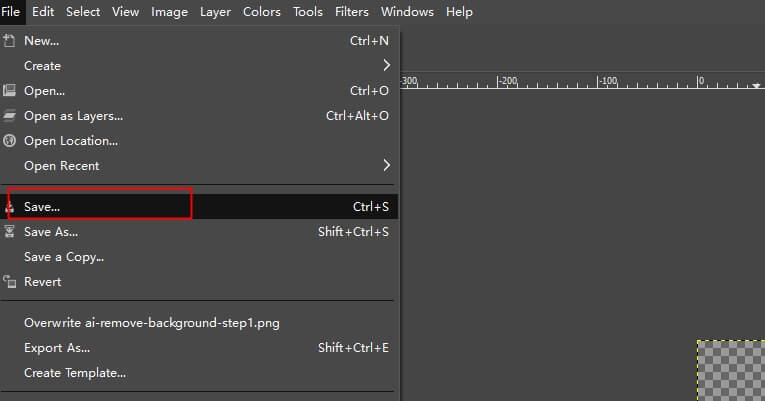
Step 5: Save the image
After refining the edges, click on “File-save” to download the image with transparent background.
Pros:
 A free and open-source software: Anyone can download and use it without having to pay for a license
 Offers
a wide range of features and tools: These features are comparable to those found in expensive, professional-grade image editing software.
 Precise control over the editing process: Users can adjust the settings and tools to achieve the desired result, making it a great choice for more complex image editing tasks.
Cons:
![]() Time-consuming: This is especially true if the image has complex edges or fine details.
Time-consuming: This is especially true if the image has complex edges or fine details.
![]() Not user-friendly: It may be difficult for beginners to use.
Not user-friendly: It may be difficult for beginners to use.
Part 2. Background Erasers for Mac
1) PREVIEW
Preview is a built-in app on Macs that allows you to remove backgrounds with just a few clicks. It's a simple and straightforward tool that's perfect for basic background removal needs.

Get background transparent:
Step #1: Download and launch the software.
Step #2:Click on Instant Alpha tool to select the area you want to remove.

Step #3:Press "Delete" to remove background.
Pros:
 It is available for both pc and mobile.
 Supports various image formats.
Cons:
![]() It needs manual work.
It needs manual work.
![]() Not easy to use, requiring learning curve.
Not easy to use, requiring learning curve.
2) Adobe Photoshop
Adobe Photoshop is a powerful photo editor that can help you achieve whatever color background look that you desire. It has advanced features that allow you to adjust the brightness, contrast, and saturation of your photos. You can also use its selection tools to isolate the background and apply the black and white effect.

How to change background color with Adobe Photoshop
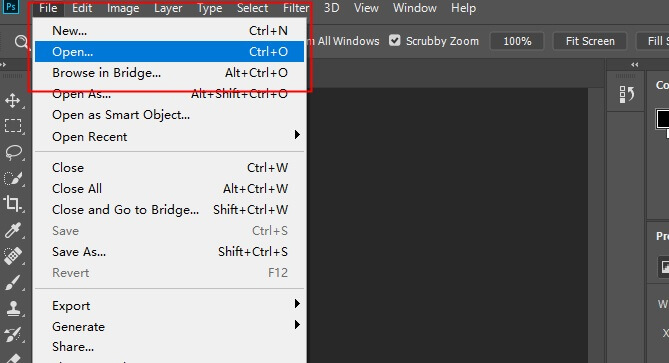
Step #1: Open your photo in Photoshop.
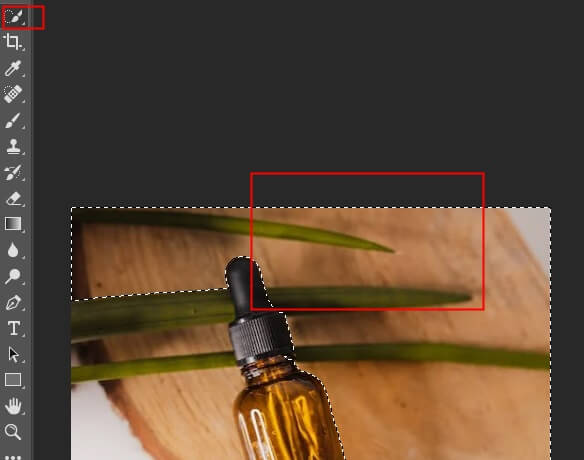
Step #2: Use "Magic Wand" tool to selct the background.
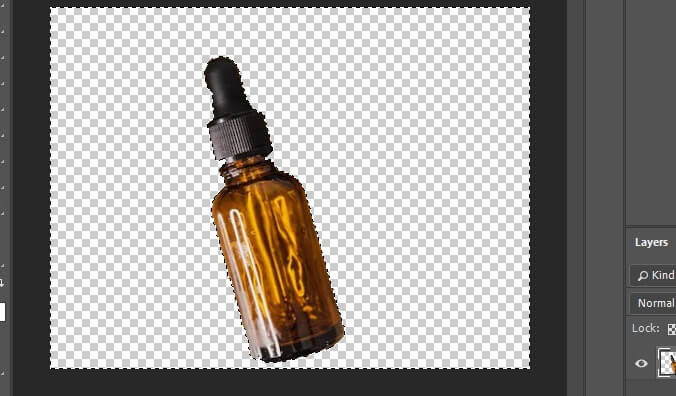
Step #3: Press "Delete" to remove the background
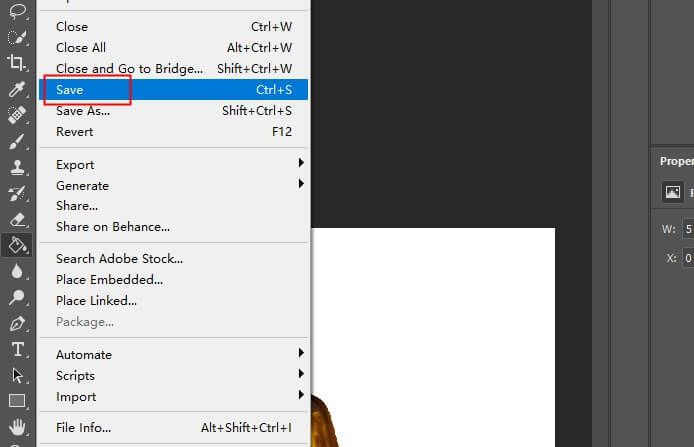
Step #4: Click on "File" > "Save" to Save the image
Pros:
 Gives you complete control over the editing process.
 Enables you to edit the image to your specific needs.
Cons:
![]() Time-consuming.
Time-consuming.
![]() Requires a lot of patience and skill to achieve a professional-looking cutout.
Requires a lot of patience and skill to achieve a professional-looking cutout.
Part 3. Background Erasers Online
1) Clipping Magic
Clipping Magic is an online tool that allows you to remove or replace the background from any photo. It uses AI technology to make the process quick and easy.
Step 1: Upload an image to the website.

Step 2: Automatically remove the background.

Pros:
 Easy to navigate.
Cons:
![]() Only can change background color.
Only can change background color.
![]() Quality of images is rated average.
Quality of images is rated average.
2) Pixlr
Pixlr is a free online photo editor that offers a range of basic editing tools, including an AI background remover. It is easy to use and provides quick results. Pixlr also offers a range of filters and effects that you can use to enhance your images after the background has been removed.

Removing Background with Pixlr:
Step #1: Click on “Remove Background” in Pixlr Website.
The first step is to choose “remove background” in Pixlr. You can do this by going to the Pixlr website and selecting "remove background" from the main menu.

Step #2: Upload Photos & Remove the Background.
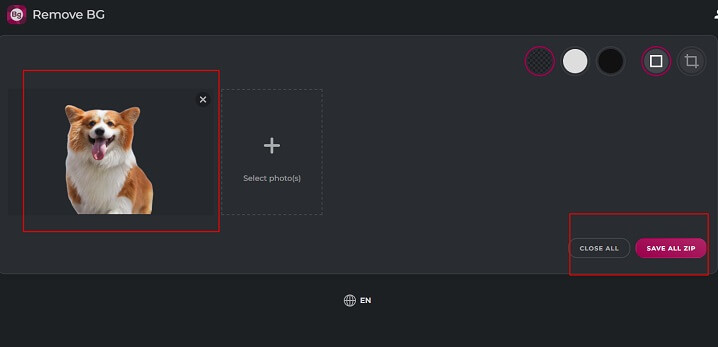
Click on “select photo” to upload images. Once your image is uploaded in Pixlr, the built-in AI will help remove the background automatically and quickly.

Step #3: Save the Image with Transparent Background.
Click on “Save All Zip” to download the image.
Pros:
 Quick and easy.
 Free to use for basic plan.
 Works with all types of images.
 Boasts other basic editing tools.
Cons:
![]() The results can only be downloaded as zip file.
The results can only be downloaded as zip file.
![]() More premium features need purchase.
More premium features need purchase.
Part 4: FAQs About Background Eraser
1. Are background erasers accurate?
Yes, these supported by AI are accurate, and they use advanced algorithms to remove the background from your images precisely. Tools that only support manual work need your professional editing skills to make it accurate.
2. Can I use background erasers for all types of images?
Yes, you can use them for all types of images, including complex ones with multiple subjects.
3. Do I need any special skills to use background erasers?
You don't need any special skills to use AI background erasers. But those that need manual work need your professional editing skills.
Wrap it Up
Overall, each of these background erasers has its pros and cons, and it's important to choose the one that best suits your needs. We've included step-by-step guides for each of these tools to help you get started with removing backgrounds from your images. With the right background eraser tool, you can take your photo editing to the next level and create stunning images that stand out from the crowd.
Which one do you prefer to use, I high;y recommend iMyFone MagicPic, since it is an elective technique that clients can use to eliminate picture foundations without any problem.


