When you do video and audio editing, you need to separate audio from the videos for certain purposes. Removing audio from the video offers you more freedom to be creative with the videos and use them in whatsoever way on your timeline. Maybe you want to mute the audio, add another audio as background music, sound effect, voice-over, or use the audio layers on some other video.Professionals also use this method to create more original scenes and make impressive b-rolls. Whatever the purpose is, the process is not that much easier.You have to learn to extract or detach the audio from the video to continue your professional editing process.
The most commonly used program by professionals is Adobe After Effects or Premiere Pro. Although Adobe After Effects is specifically made for animation purposes, you can still work with it and use some tactics to remove the sound from the video files. And regarding Adobe Premiere Pro, extracting audio from video is just a matter of understanding.
Stay tuned to learn to extract or detach the audio file from the video file using Adobe After Effects and Adobe Premiere Pro:
Part 1: How to Mute Audio from Video in Adobe After Effects?
Adobe After Effects is a digital visual effects, motion graphics, and compositing application developed by Adobe Systems and used in the post-production process of film making, video games and television production. Among other things, After Effects can be used for keying, tracking, compositing, and animation.You can use this program to layer the audios one over another, swap or mute the audio, and a lot more.Before we introduce how to mute video in after effects,i would recommend better alternative-iMyFone Filme to mute audio from video.Download iMyFone Filme now:
Steps for Extract Audio from Video in Adobe After Effects
Step 1. Create composition, then import the video file
Step 2. Add video layer in the composition
Step 3. Duplicate the video layer by pressing Ctrl+D. This will create two layers. Rename one layer as audio and the other as video
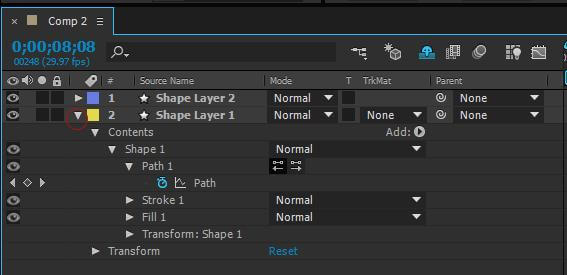
Step 4. Click on the arrowhead icon in front of the audio layer. This will open the layer properties. Click transform and then set the opacity value to 0%

Step 5. Now in the video layer, again click the arrowhead icon to open the properties. Click audio and then move the sound to negative range
Step 6. In the end, select the desired composition in the Project panel
Step 7. Go to the main menu and select composition, and then add to render queue to export the file in the desired location
Part 2: Extract Audio from Video in Adobe Premiere Pro
Adobe Premiere Pro can extract audio clips from any video file, including MP4, AVI, FLV, and MPEG. Although it is a video editor, it can work perfectly as an audio editor to extract, mute or layer audio files in whatever way you want.
Follow Given Instructions to Extract Audio from Video
Step 1. Create new project
Launch Premiere Pro on your desktop or Mac and click New Project or select File>New>Project from the main menu. When the New Project dialog box opens, name it and click Browse to save in the preferred location. Click Ok to save it.
Step 2. Import the video file
Now you need to import the video or clip into Adobe Premiere Pro. You can do this by the given way:
Click Select file and import video from the media browser
Right-click on the video file in the media browser and select import
Drag the video file from the media browser to timeline
Drag video file from media browser to the Project panel
Step 3.Extract audio from video
Two Possible Ways to Extract Audio from Video
1. Directly Extract the Audio
If you are already editing a video in Adobe Premiere and have finished the editing process, you can extract the audio with a few simple steps.
Step 1. In the Project panel, select the clip that contains audio
Step 2. Now select “Audio Options” then “Extract audio." This will create a new audio file with the extracted audio. The new file also contains "Extracted” at the end of the filename
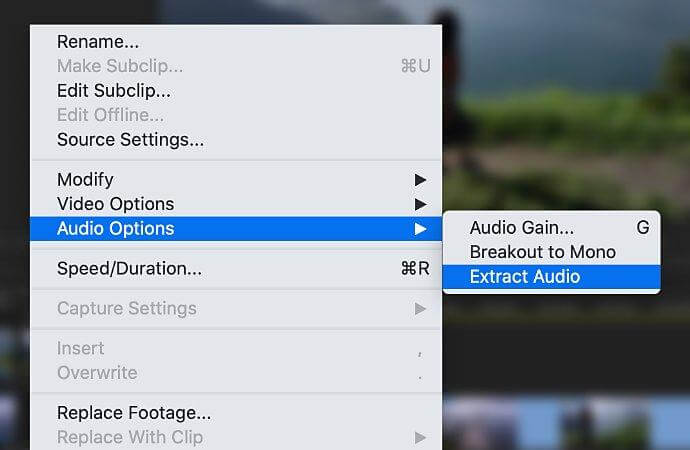
Following these simple steps, a new audio master clip file will be generated. Audio extracted in this way preserves the original audio of the clip. If you have made any source channel mappings, footage adjustments, speed, or duration adjustments in the original clip, all will be applied to the new extracted clip successfully.
2. Separate Audio from Video
If you want to separate only a part of the audio from the video, you can unlink it, edit it, and export it.
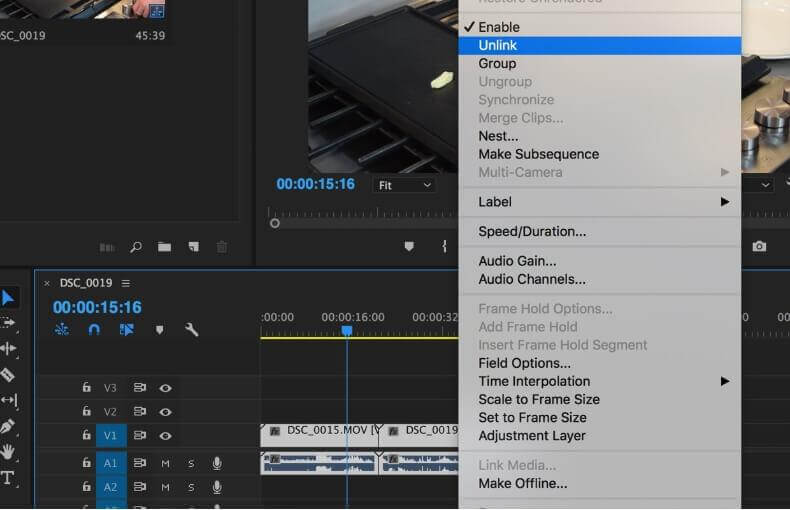
Step 1. Unlink the Clip
Any clip with both audio and video contains two tracks but is linked. As a result, when you edit one track, it is already reflected in the other track, and you need to unlink the clip. For this, right-click and select Unlink from the pop-up list.
Step 2. Edit the Clip
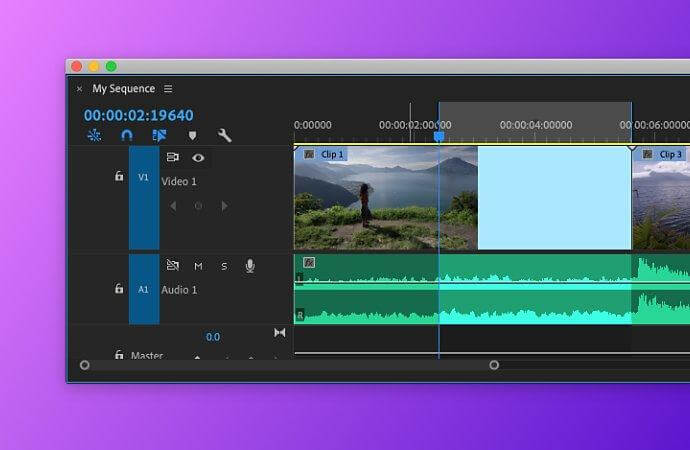
Switch the time ruler to the audio sample in the timeline panel. Now use the playhead to make In and Out points. Also, make sure that the audio track is not muted.
Step 3. Export the Audio File
To export the file, select File, then Export, and then Media. Select the audio format such as AAC, MP3, or WAV and save it in the preferred location by clicking Export.
If you are editing only part of the video, the source range will be set to Sequence In/Out. And if you want to export the entire file, set it to Entire Sequence.
Part 3: Best Video Editor to Remove Sound from Video- iMyFone Filme
Adobe After Effects and Premiere Pro are professional editing tools, and it can be challenging for you to understand them in one go. Even a person with technical know-how needs some time to get the hang of it. So, if you want a simple solution, we suggest you use iMyFone Filme.
Filme is supported by windows, mac, iOS, and Android, so you can work from any platform.As a perfect video editor, Filme can edit your videos and remove or extract the audio simultaneously. Else you want to convert video into an audio file or detach and audio from a video file, all is possible with iMyFone Filme. Moreover, you can also combine any audio and video track and add several effects to improve the audio. It also has a noise filter to improve the audio quality.iMyFone Filme also has a free trial period to understand its features before moving on to paid version.
How to Extract Audio from Video in Filme?
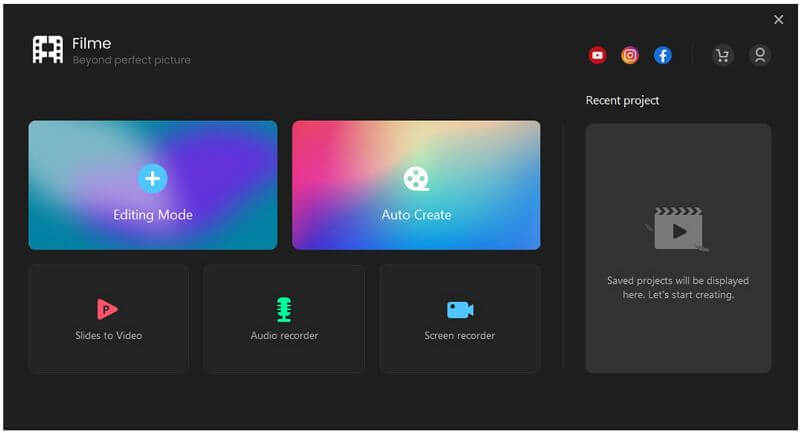
Step 1. Download Filme and open it
Step 2. Click on the editing mode on the home screen
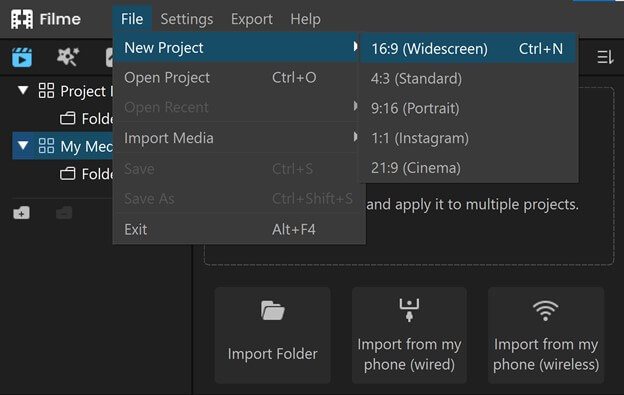
Step 3. Go to File>New Project> choose the aspect ratio
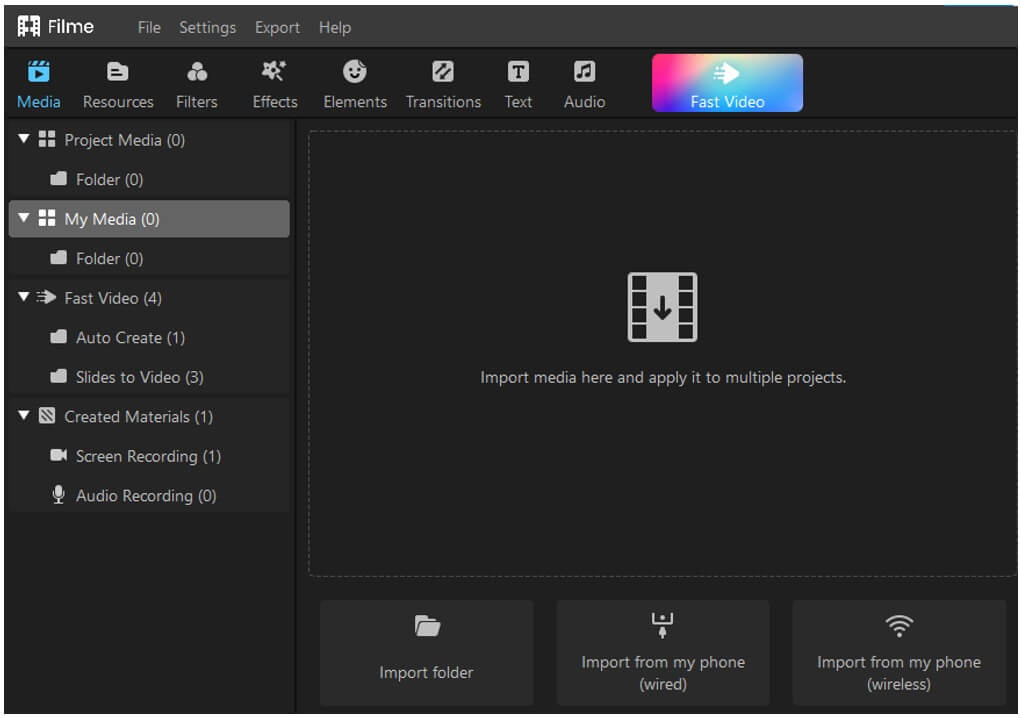
Step 4. Import the video file from the media menu and drag and drop it to the timeline
Step 5. You need to detach audio which is already attached to the video. For this, right-click the video and choose Detach audio from the options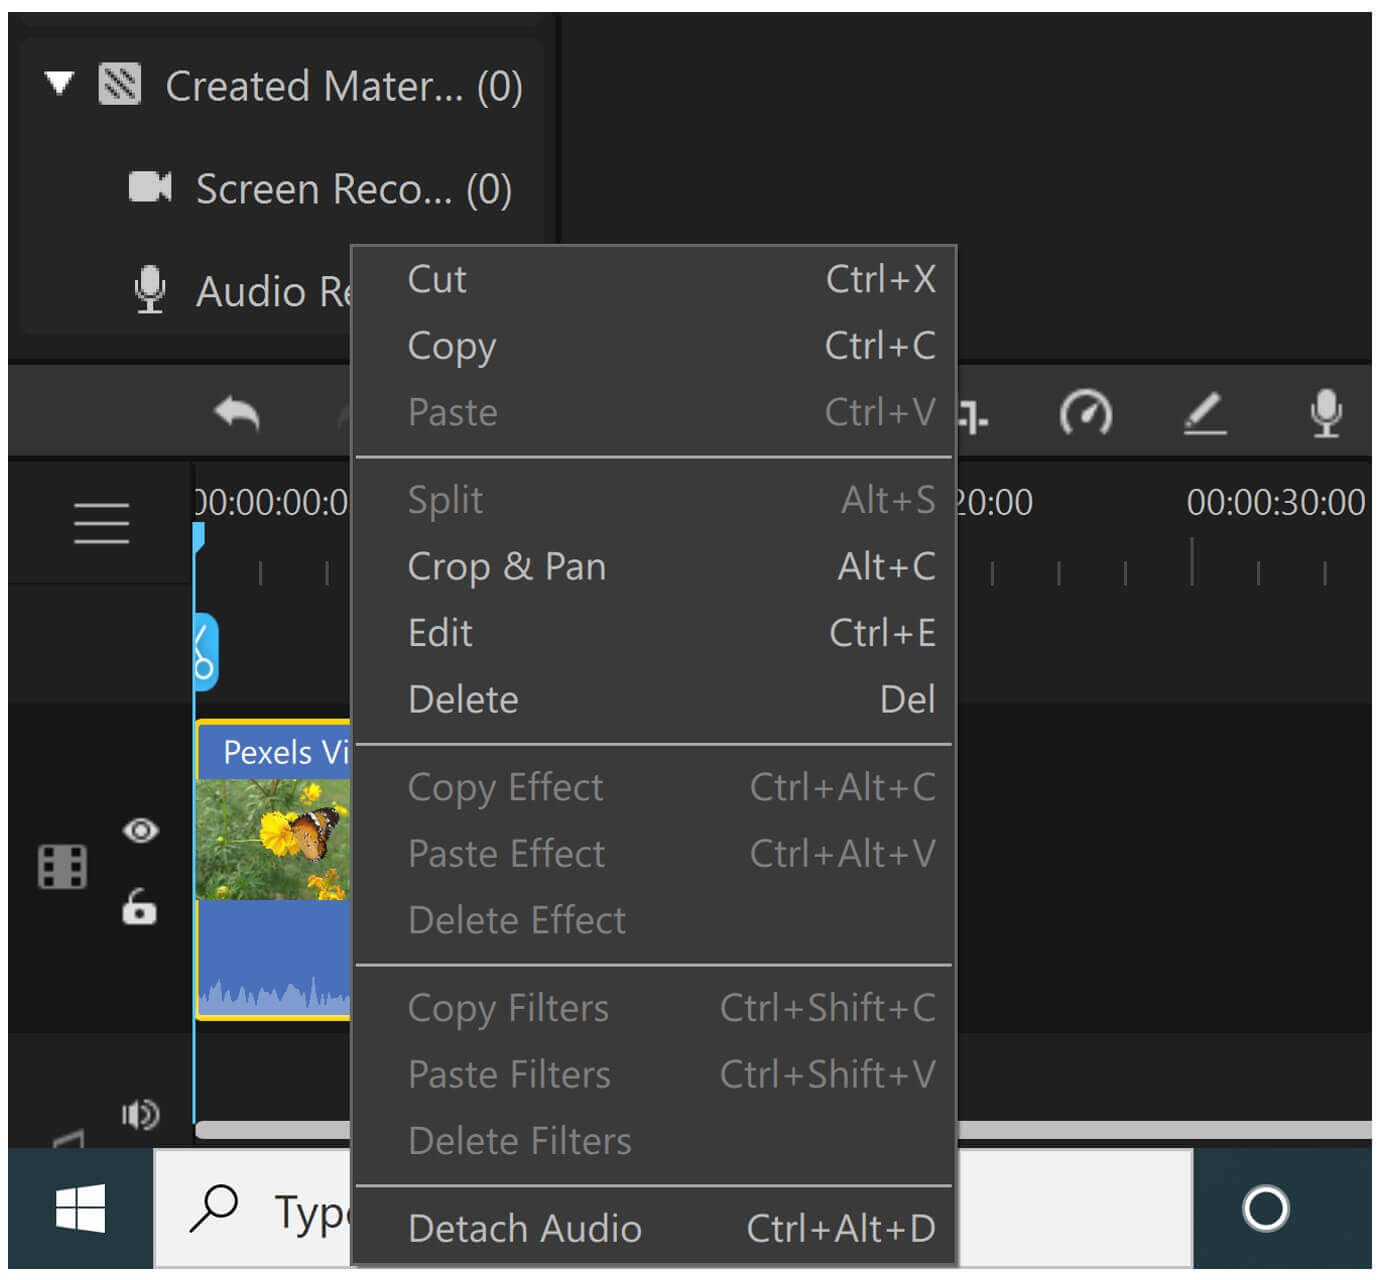
Step 6. Once you detach the audio, there will be separate audio and video tracks in the timeline. Now, select the audio and hit on the delete button, and the audio will be removed from the video
Step 7. Edit the audio if you want to and click the Export option. This will open a new pop-up window
Step 8. Select MP3 under the music section and adjust other settings. If you are unsure about other options, then leave them at default settings
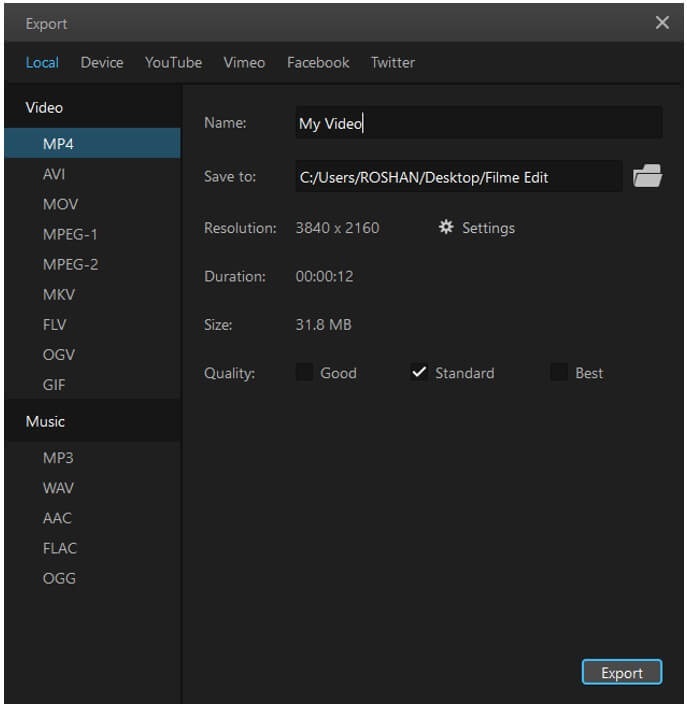
Step 9. Click on export, which will save the audio clip to your preferred location.
Conclusion
You can utilize any of the software mentioned earlier to extract audio from video. Now that you have learned all the steps to remove sound from the video, we hope you can create awesome content. Since working with professional software like adobe after effects and premiere pro is difficult, use iMyFone Filme. This innovatively designed video editor can solve your problem of working with complicated softwares. Just import the video to Filme and let it do its task.
iMyFone Filme Key Features:
Effects: Filme looks like a typical video editor. It has a timeline, an effects library and a preview window. The effects library has 172 effects. 43 of them are filters, and the remaining 129 are GIFs of various themes.
Transitions: There are 112 video transitions. Video transitions are effects that enable smooth transitions from one video clip to the next. 25 of 112 transitions are designed specifically for slideshows.
Text: There are 45 text types in Filme. You can find texts for titles, subtitles, end titles and titles that appear on the lower third of the screen. Some of these texts are animated.
Audio: The library also contains 51 audio clips that you can use in your slideshow. The audio clips belong to different genres, and you get 28 sound effects.


