Audio plays a vital role in making a video engaging for the viewer. Whether it is music, sound effect, voiceover, or song, you need to make sure it is up to the mark. If the audio is perfect, it will make your video more interesting and engaging; otherwise, it will ruin everything. Thus, you might need to delete or edit the audio with audio remover to make your video more than perfect.
While editing videos, you can edit, detach, or extract the audio from videos. You can replace the original audio with yours or make a few changes according to your needs. Everything is possible if you know the right tools and how to do it.
In this article, we will explore some video editors that can help you remove audio from video in Windows 10/11. We will discuss some compatible tools that can do the job with perfection. For your ease, we will explain the step-by-step method of mute the video. Let’s begin.
Part 1. Extract Audio from Video Windows with iMyFone Filme
iMyFone Filme is a commendable video editor with plenty of exceptional tools that can take your video editing to the next level. If you are a beginner and you want the best video editor, you should give Filme a try. It is a beginner-friendly video editor with a simple user interface. You can use it without any hassle, even if you have no experience in video editing. The best part is that Filme learning center has tons of step-by-step guides and video tutorials to make everything easier than ever.Download iMyFone Filme below now:
You can also edit audio using Filme audio remover. You can make basic changes, such as volume, trimming, splitting, and fading effects. You can also change the voice using the voice changer. Filme has a feature of detaching the audio from video. The audio is detached without compromising the quality of the audio and video. You can then use it as you like. Let’s have a look at the steps to remove sound from videos by using Filme.
Step By Step Guide Using Filme
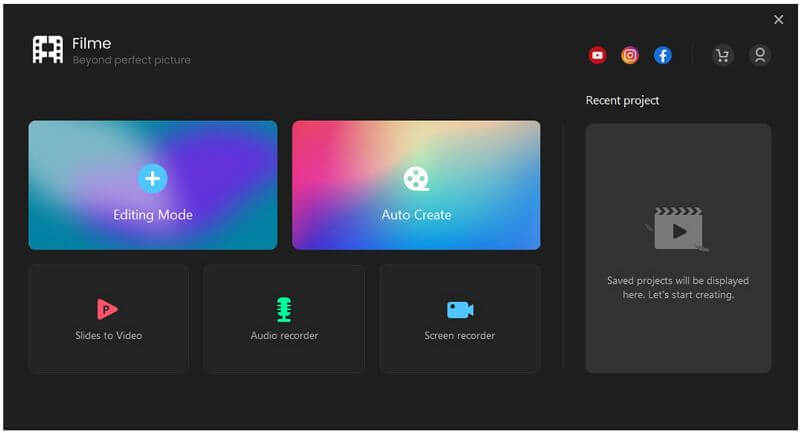
Step 1: Launch Filme on your computer. It can be used for multiple purposes. For now, you need to click on Editing Mode to enter the video editor.
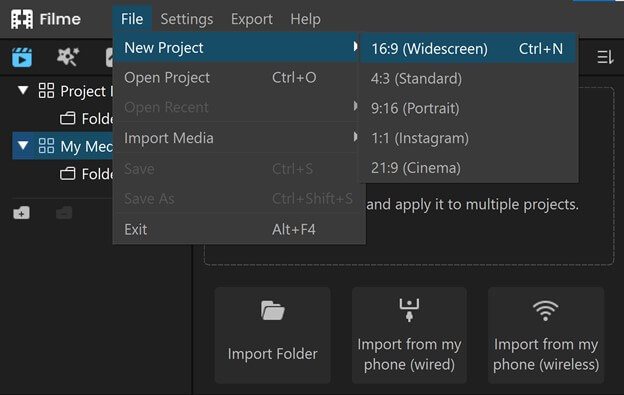
Step 2: Go to the File menu> New Project and select the aspect ratio according to the platform you will use this video. After creating a new project, you are ready to import your files.
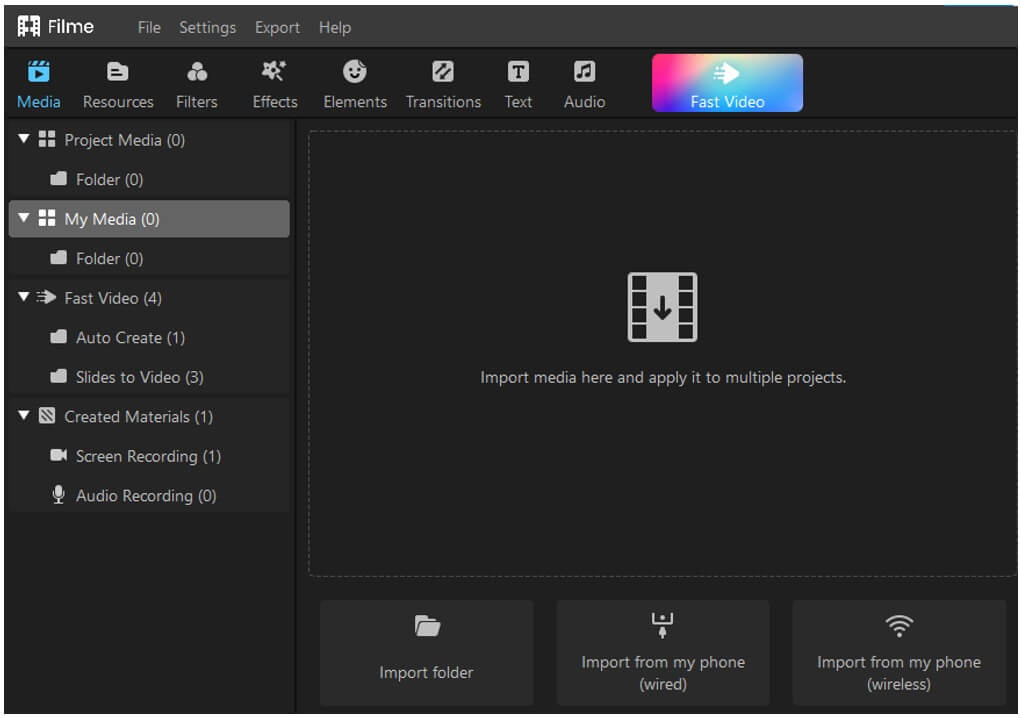
Step 3: By default, you will be in the Media menu. You can import files and folders from your computer or mobile. Filme offers wired as well as wireless import from mobile phones. Import the video from which you need to remove audio.
Step 4: You will have the video in the Project Media. Drag the video to the timeline for editing.
Step 5: You need to right-click on the video. You will have many options; click on Detach Audio. They will detach the audio from the video, and you will have it as separate audio on the timeline. You can also use the keyboard shortcut “Ctrl+Alt+D”.
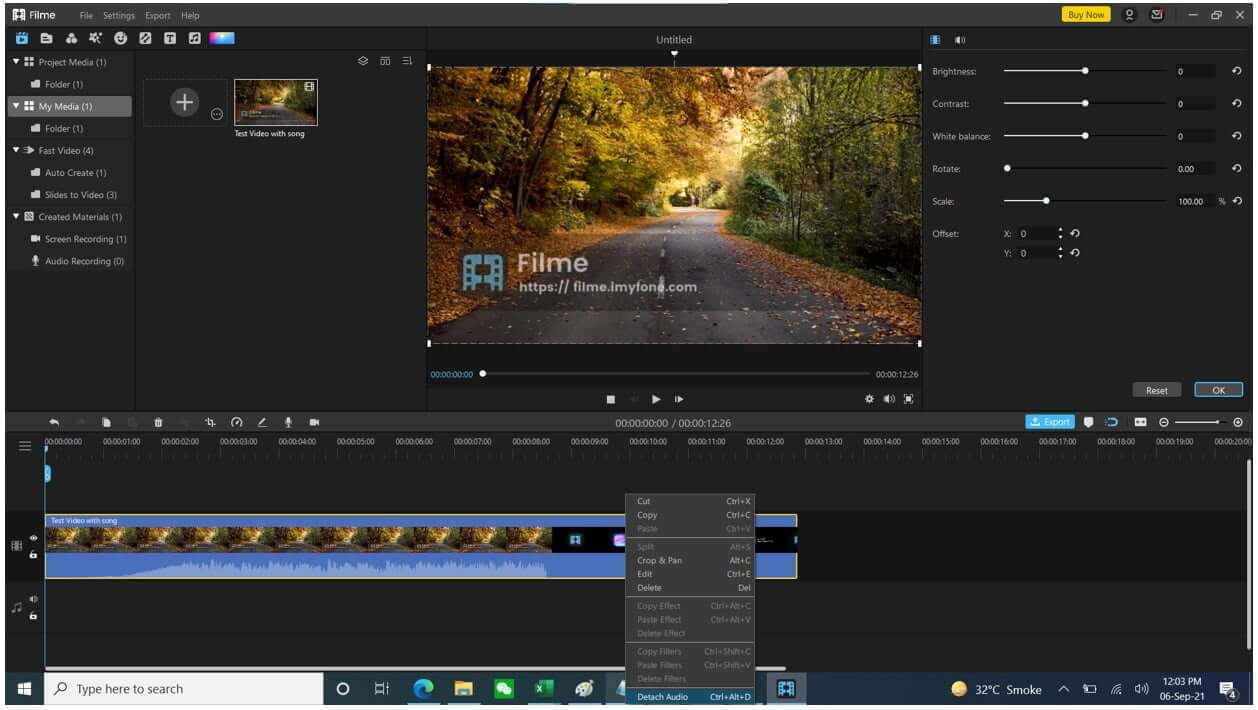
Step 6: Since you only need video, you can delete the audio. Click on the audio on the timeline and press the delete button on your keyboard.
Step 7: Now, you will have the video on the timeline. You can edit it as you like. You can trim, split, adjust speed, and make other changes using the basic tools above the timeline. You can also add effects, transitions, stickers, text, filters, or anything you like.
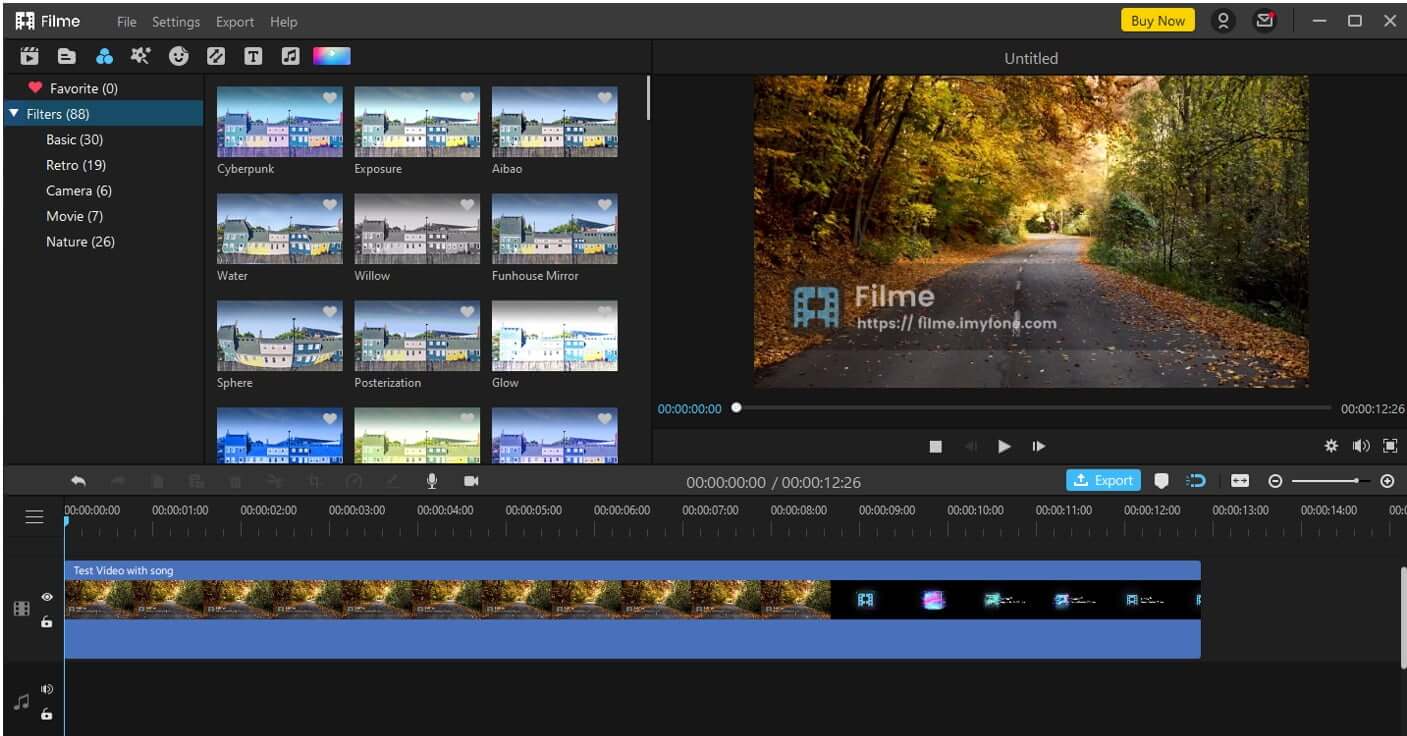
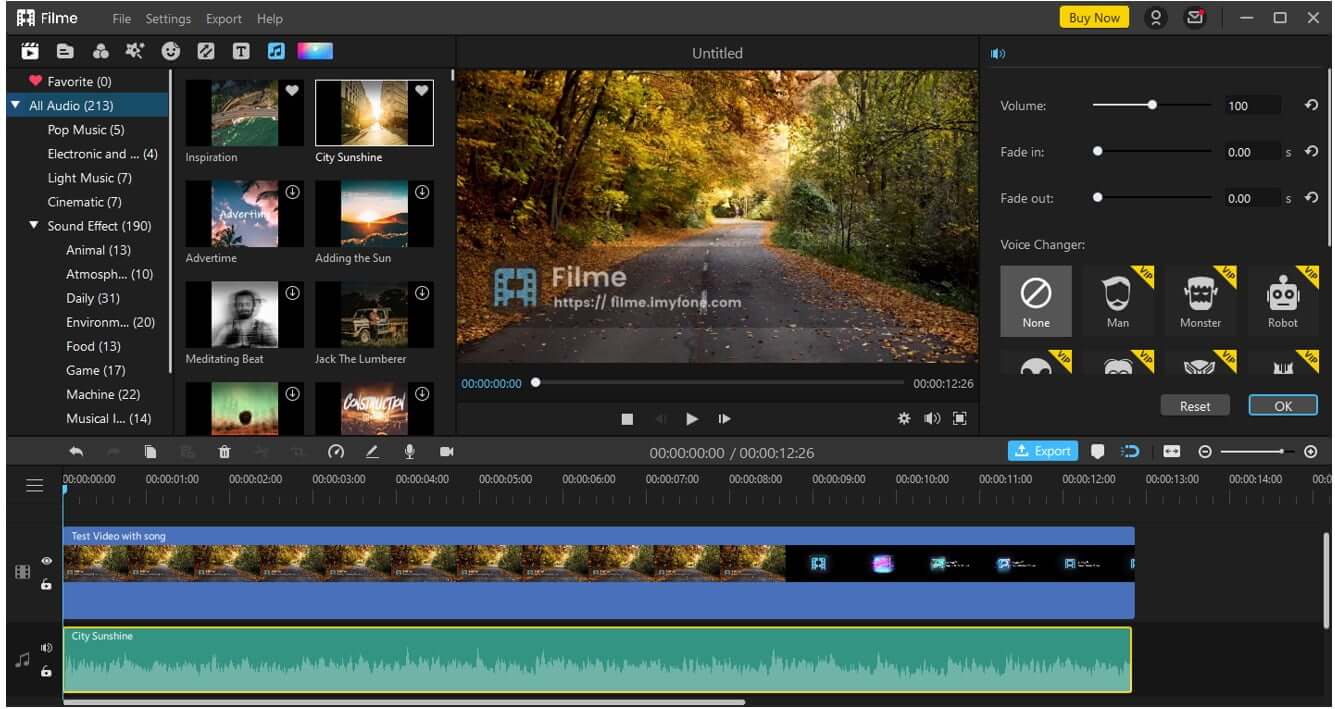
Step 8: If you want to add voiceover, music, and sound effects, you can also do that. Filme also offers a voice changer. You can change the tone of your voice and make it like a robot’s voice, an alien's voice, etc. Double-click on the audio, and you will see some editing options on the right.
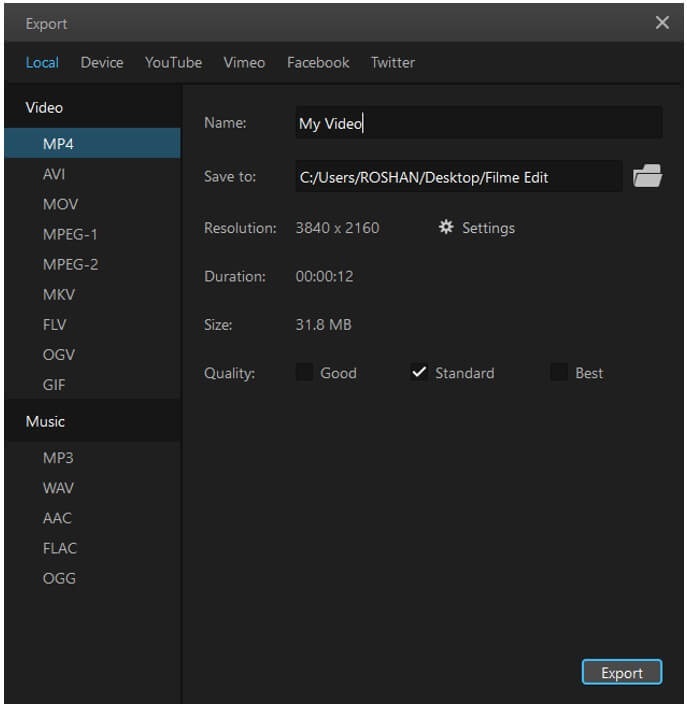
Step 9: Finally, click on the Export button. Select the desired file format for your audio and other settings. Click on Export.
Part 2. Detach Audio from Video Windows with Windows Movie Maker
Windows Movie Maker is a very popular video editor that has been used for the last two decades. It is one of the initial video editors, and everyone who has used Windows would probably be familiar with it.
Windows Movie Maker is a discontinued video editor of Windows. It was discontinued in 2014, and later, Windows introduced a new tool called Video Editor. However, some people still miss Windows Movie Maker because of its features and ease of use. Fortunately, you can easily download it from different sites and use it on Windows 10, 8.1, 8, and the older versions.
Windows Movie Maker can help you edit your videos without any hassle. You can add music, animations, text, visual effects and make basic edits to your video. The best part of the editor is that you can edit the audio with audio remover. You can trim it and adjust its volume. You can adjust speed and apply fading effects. This is why you can also detach audio from videos without any hassle. Let’s have a look at the steps.
Step By Step Guide with Windows Movie Maker
Step 1: Download Windows Movie Maker on your PC. You can search on Google and download from an authentic website. Open it after installation.
Step 2: You will be inside the video editor. In Windows Movie Maker, the right portion is for the timeline. You can drag your videos here.
Step 3: After adding the video, you are ready to extract the audio. But if you want to make any changes in the audio, you can go to the Edit menu and adjust whatever you need. You can adjust volume, speed, duration, and effects.

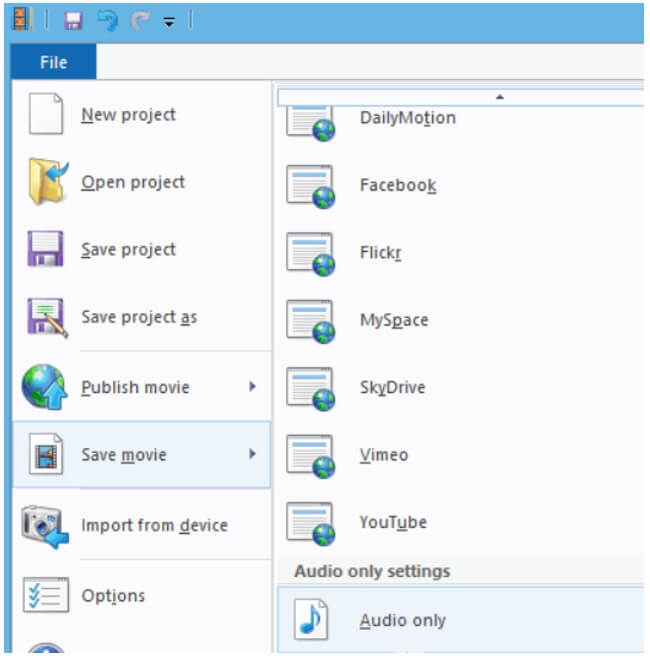
Step 4: Click on the File menu. Go to Save Movie. Scroll down and find Audio Only. Click on it and save the audio to the desired location. There are only two audio formats available, and they are MPEG4 and Windows Media Audio File.
Part 3. Mute Audio from Video Windows with Adobe Premiere Pro
Adobe Premiere is a well-known video editor, and it does not need an introduction. It is one of the best video editors on the market that professionals love to use. You can do almost any type of edit in your videos using this amazing tool, and the output will be more than amazing.
Undoubtedly, Adobe Premiere Pro is a commendable video editor; however, it is a bit complicated for beginners. You need to spend time if you want to learn everything. You can also detach your audio using Adobe Premiere Pro, and we will guide you through the step-by-step method.
Note: Adobe Premiere Pro is quite expensive and complex. If you need an easy and pocket-friendly video editor, you should go with Filme.
Step By Step Guide Using Adobe Premiere Pro
Step 1: Download and Install Adobe Premiere Pro on your PC. After installation, open it.
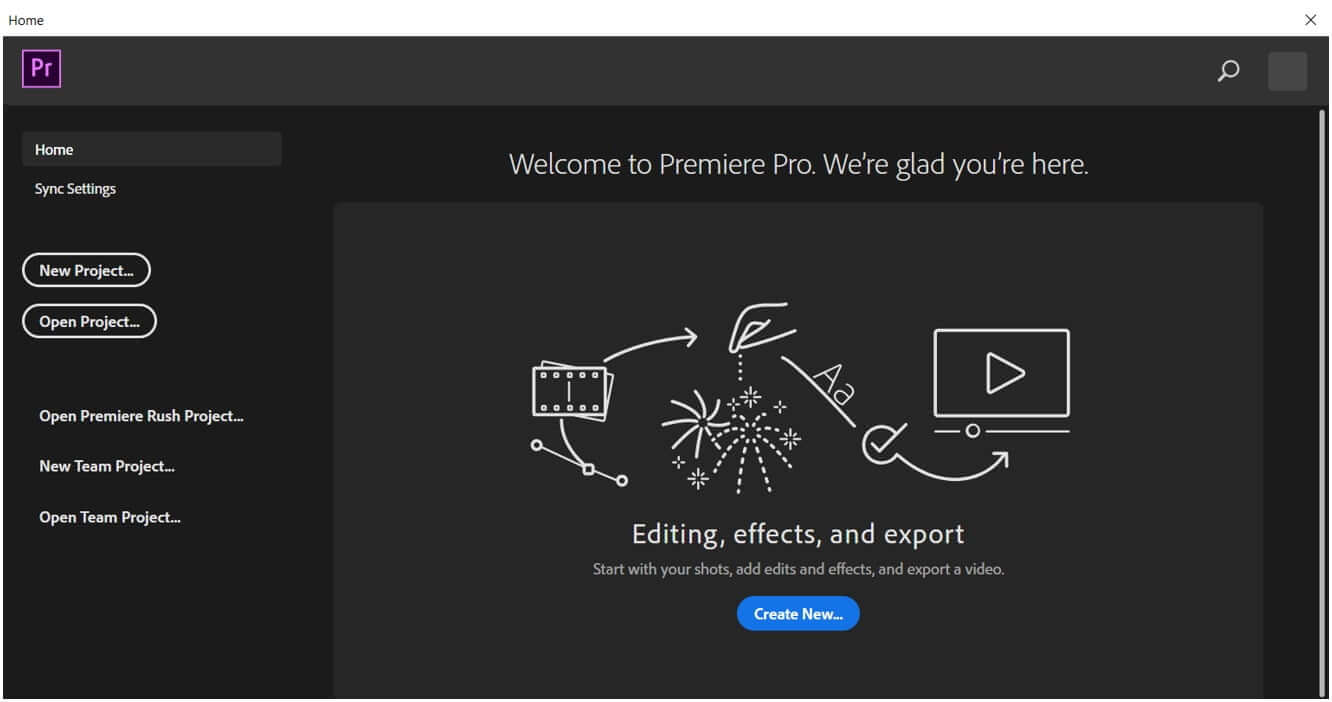
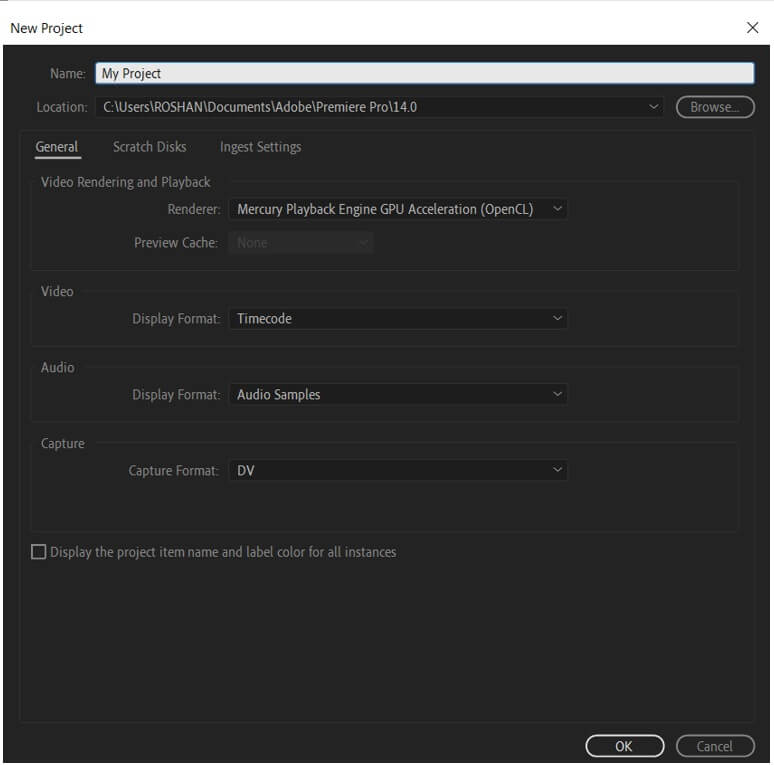
Step 2: You will see the home screen on your PC. Click on New Project to start a new one. First, name the project and select its location. Then, you can select other settings; if you are a beginner, it is better to leave the settings as they are. Click on OK.
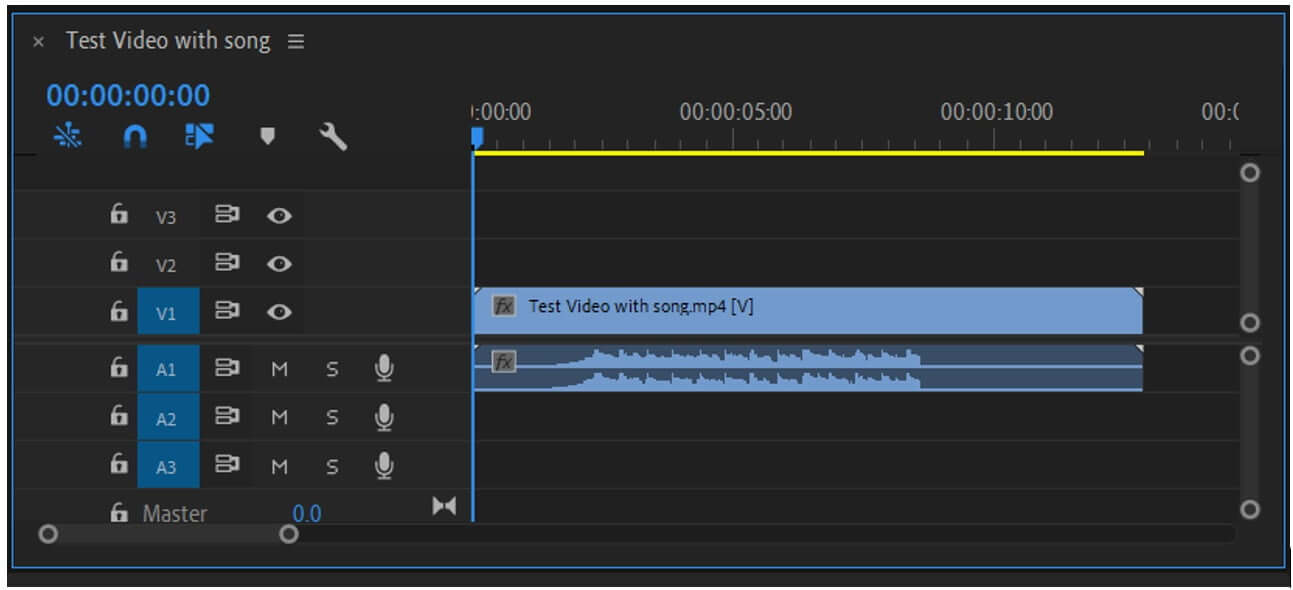
Step 3: You will see the video editor. You are now ready to edit your videos as you like. For detaching audio from video, you need to import the video. The easiest way is to drag the video file and drop it in the timeline. It will automatically create a new sequence for your video.

Step 4: At first, the audio will be attached to the video. You will see the audio profile on the timeline, but it is linked to the video. Even if you try to move it or delete it, the same will happen to the video.
For detaching the audio, you need to select the video on the timeline and click on the Linked Selection button on the left of the timeline.
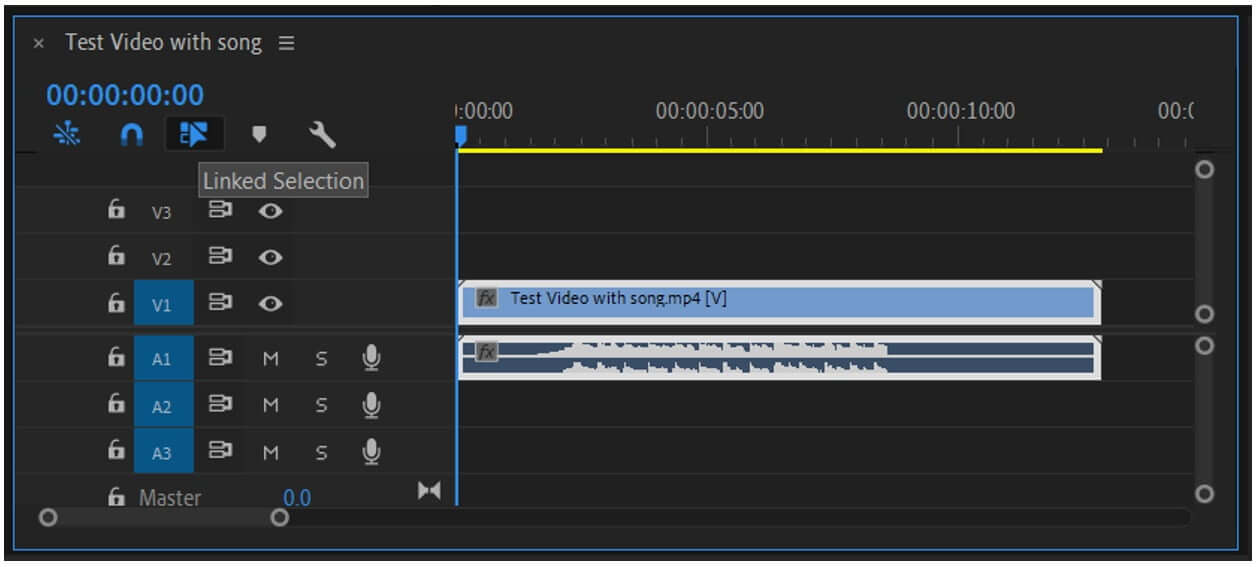
It will detach the audio from the video. You can also use a shortcut for this. For detaching the audio, press the Alt button on your keyboard and hold it. Click on the audio in the timeline and leave the button. That is all.
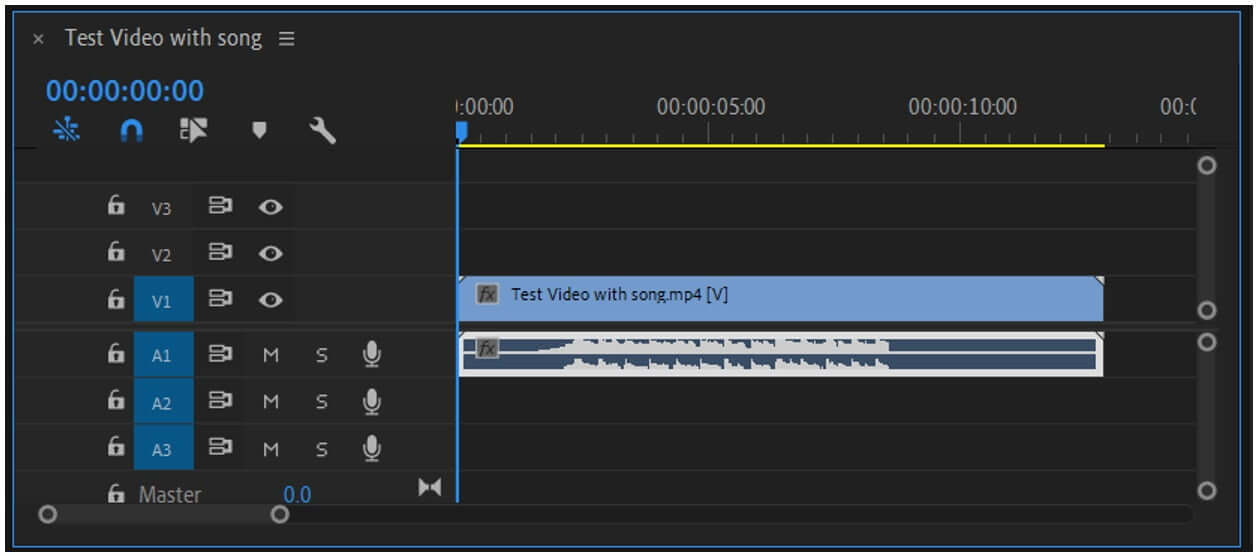
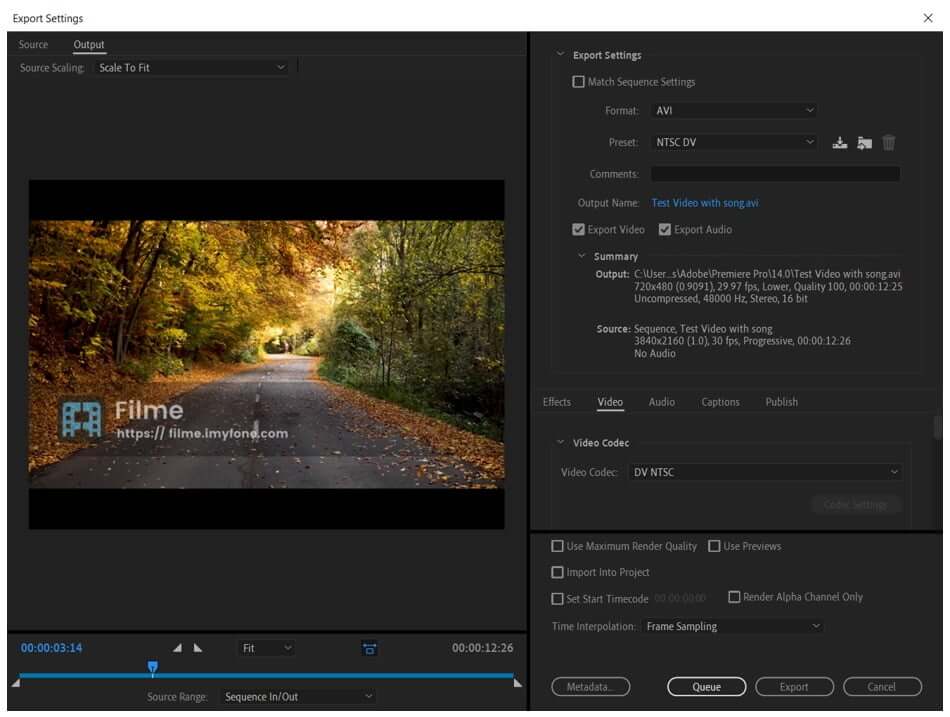
Step 5: Now, you can delete the audio or do whatever you like. Go to File>Export and click on Media. You can also use the keyboard shortcut “Ctrl+M”. Select the desired settings and click on Export.
Conclusion
Removing audio from video is quite easy, and you can do it using various video editors and tools. However, for optimum quality, you need to pick the best video editor that can mute audio without disturbing the video.
We have seen three video editors that can help you remove and detach audio from your videos. You can use them on your Windows 10/11. If you need a free tool, then you can try Windows Media Player for detaching the audio. If you want to make everything more than perfect, you can use Adobe Premiere. But it is quite tricky and expensive.
We recommend iMyFone Filme for removing audio from videos because it is a professional video editor and is perfect for beginners. Anyone can use Filme and create a stunning video using its tools. The best part is that it has audio editing tools that can detach your audio. You can also edit it as you like and make everything up to the mark. Simply put, Filme has everything you need to make a perfect video.


