Audio is an important component of any video. The right music, the right sound effects, and the right voiceover filters can have a huge impact on the viewer's experience. Most video creators don't pay much attention to the audio side of things, but that could be a big mistake. Learning how to do it right will allow you to create and publish videos that are not only visually vibrant but also aurally appealing. In this article, we'll show you how to edit audio in DaVinci Resolve along with a few tips to optimize audio for your videos. We'll also showcase an amazingly intuitive tool as an alternative to DaVince Resolve that you'll absolutely love!
Let's get started, shall we?
DaVinci Resolve Audio Editing Tips You Should Know: How to Edit Audio in DaVinci Resolve
There are several high-level audio editing tips that you should be aware of. These general tips are good for any type of audio editing, but we'll show you how to execute them in DaVinci Resolve.
Leveling Your Audio Volume
If you have multiple audio tracks containing different audio elements - voiceover, background music, sound effects, etc. - then you should bring some consistency into the volume levels. Some tracks may need to be made louder while others need to be more muted. To change the volume level of an audio track in DaVinci Resolve, you can follow one of the sets of steps outlined below:
The first method uses a simple click-drag action.
Bring your mouse to the audio track for which you want to change the volume level
Click the horizontal line representing the current audio level
Hold it and move it up or down to increase or decrease the volume of that track alone
There's also another way to do this.
Right-click the audio track
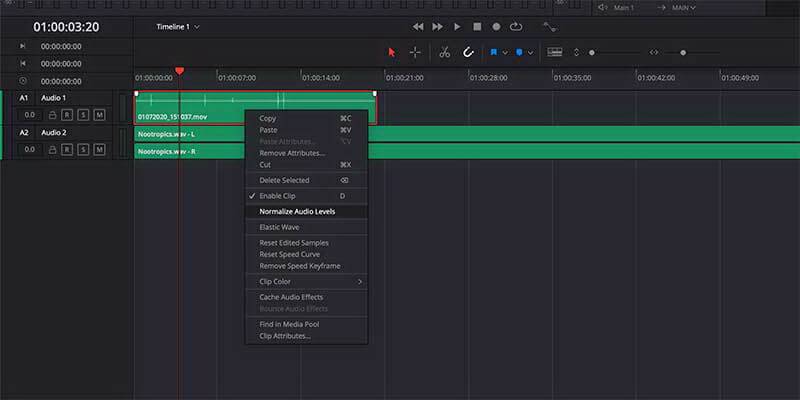
In the contextual menu, select 'Normalize Audio Levels'
Check the corresponding volume levels for each audio track - they should now be more or less the same. You can further tweak the volume of each track using the previous method.
Use Fade Instead of Hard Cuts
Fade-ins and fade-outs are usually better than having your audio split into hard cuts that start or end abruptly. The reason is that you want the audio track to gently creep in rather than hit the user's ears all of a sudden. Except for special situations, a fade is always preferred over a hard cut. Here's how to add the fade transition in DaVince Resolve:
For a transition between two audio clips on the same track, use the crossfade transition by dragging it into the place where the clips meet. Alternatively, click the T key to add a fade transition.
You can adjust the speed of the cross-fade by controlling the steepness of the fade-out and fade-in slopes.
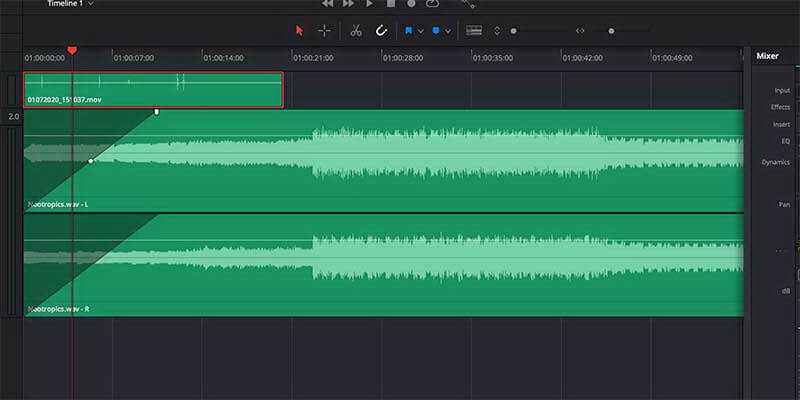
You don't need to add a fade transition to the beginning or end of an audio clip. This automatically happens when you pull the white handlebars inward to create a slope on the track. The fade-in slope should rise and the fade-out slope should drop.
Use Noise Reduction
If you're recording in a studio with full audio isolation, you won't have to worry about ambient noise. However, real-life recordings almost always have some frequencies that affect the quality and clarity of the audio so be sure to use DaVinci Resolve's noise reduction feature.
In the audio editing window, open the mixer that you see on the right part of your screen.
Look for and click on the + symbol, then select Fairlight FX, and finally, click on Noise Reduction.
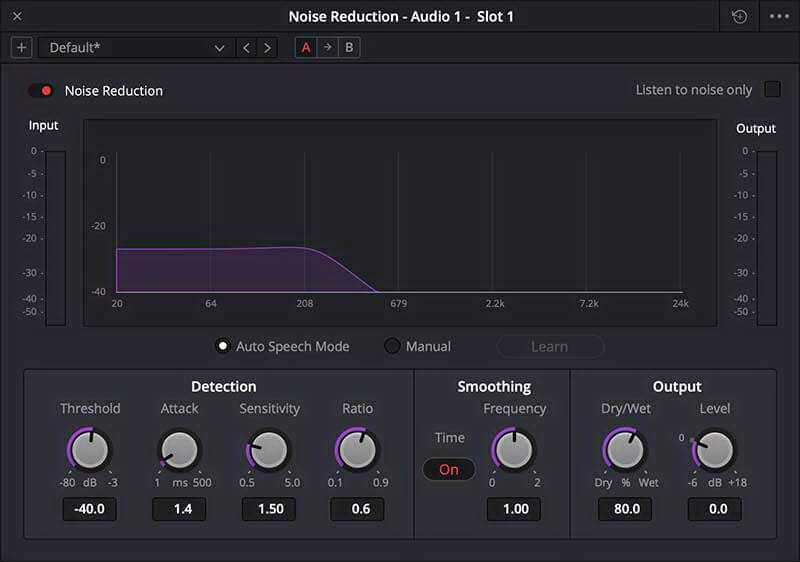
For most tracks with voice, the Auto Speech Mode should be enough to get rid of ambient sounds. If it's not enough, choose Manual and change the settings below it to achieve the lowest noise level and highlest audio clarity.
Do this for every audio track that needs to have ambient noise levels reduced.
Use Keyframe Editing
Keyframes are small sections of a track to which individual transitions and effects can be added and controled to a significant degree. In the case of audio tracks, the keyframes can be used to control volume levels or add volume changes mid-track. They allow a more granular level of audio editing, and DaVinci Resolve has the feature built into it.
To add an audio keyframe, click an audio track at a particular point while holding down the Alt or Option key.
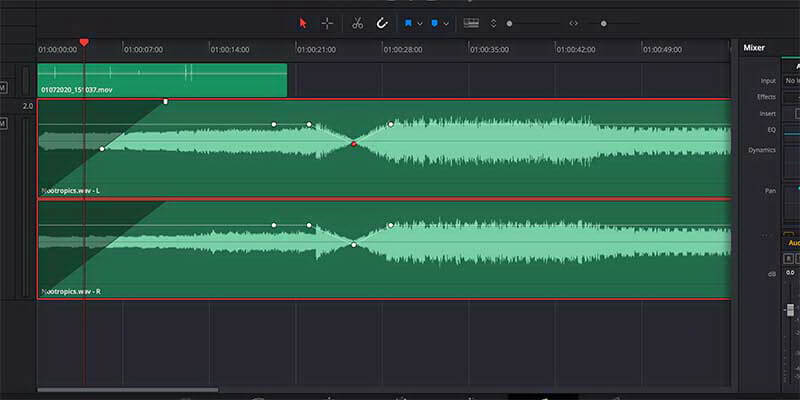
For each keyframe, set a different audio level or a fade transition. In some cases, you may want to mute the audio while a voiceover is playing; or else, you may want the music to crescendo to a climax and then play normally or fade into silence.
Get the Right Music Track
Music is a very important part of any video so don't cut corners when it comes to selecting the right background music track. There are tons of royalty-free sites that offer free music or charge a flat subscription fee to download tracks. Since DaVinci Resolve doesn't have its own repository of music, make use of such sites. For foley tracks (sound effects), you can use the integrated Sound Library.
To import an MP3 track into DaVinci Resolve, click Edit or Media.
Next, click Ctrl + i or Cmd + i to choose a file and import it.
Drag the file into the timeline and then adjust for audio-video sync. You can edit the track as shown above.
Also Read:
An Easier Way to Edit Audio - iMyFone Filme
Although DaVinci Resolve is a highly advanced video editing tool, there are several disadvantages, such as the absence of a rich audio library of royalty-free music. Moreover, editing audio and then syncing that up to the video is not a very easy task in DaVinci Resolve because of the complex interface. If you're looking for something that is as robust but much less complicated to use, look no further than iMyFone Filme.
About iMyFone Filme
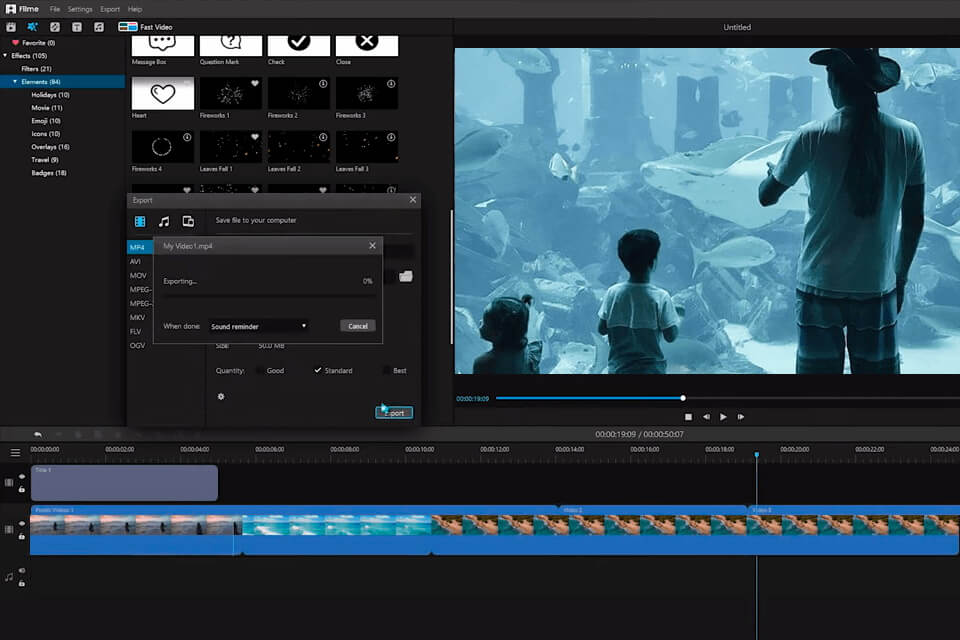
iMyFone Filme is a great tool for video editors who are looking for an intuitive interface with a lot of ready-to-use features such as effects, transitions, and even royalty-free songs and background music. Some of its key features related to audio are as follows:
Easy and convenient timeline audio editing
Quick-add fade transitions
Voice recording feature for voiceovers
Voice-changing effectsto create funny, scary, entertaining voices for your video
Apart from these functions, iMyFone Filme also comes with rich libraries of filters, effects, text animation, and other options. There's also a video slideshow creator called Fast Video Mode that lets you stitch together different visual media types and apply background music in just a few clicks of the mouse. Additionally, it offers an array of video editing tools such as trim, crop, speed control, split, and more.
How to Edit Audio in iMyFone Filme
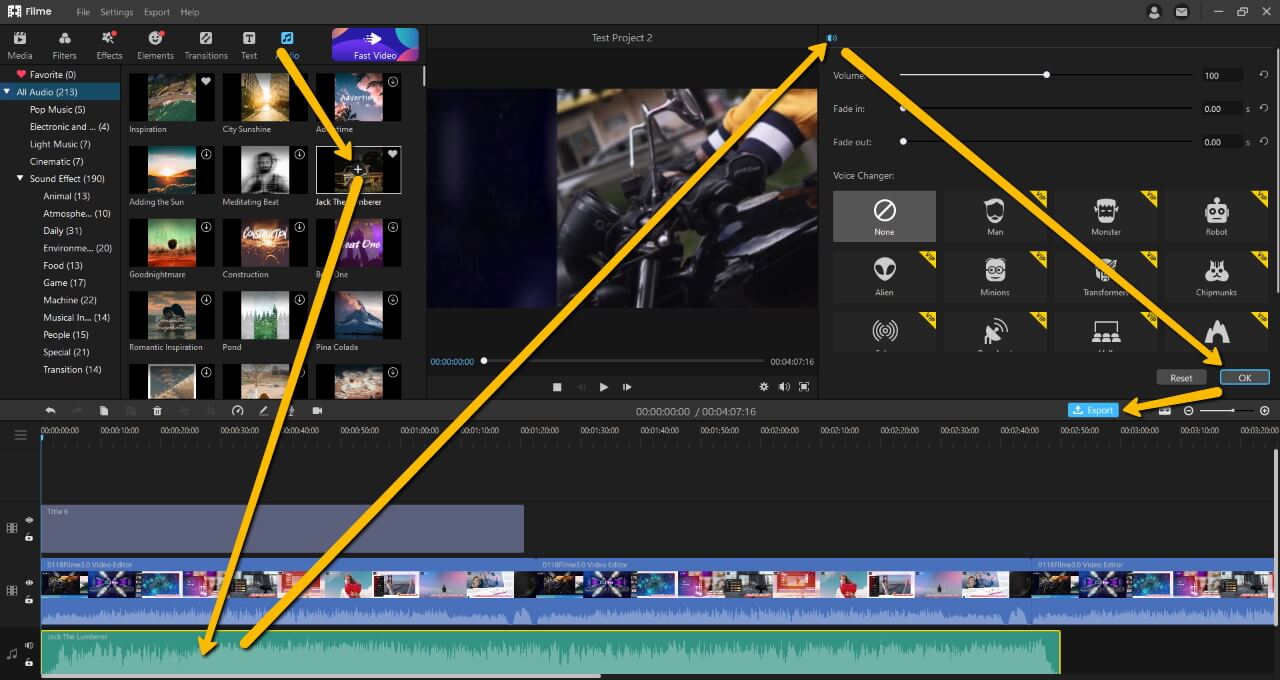
iMyFone Filme supports multi-track audio, which means you can have any number of audio tracks playing simultaneously. The editing part is easy as well, since the controls are quite intuitive and all it takes is a few clicks to get the job done. Here's the process in detail:
Launch iMyFone and start a new project.
Click Import and Import Media to bring your audio file into the Media Library. Filme supports a wide range of audio formats so all the popular ones are supported.
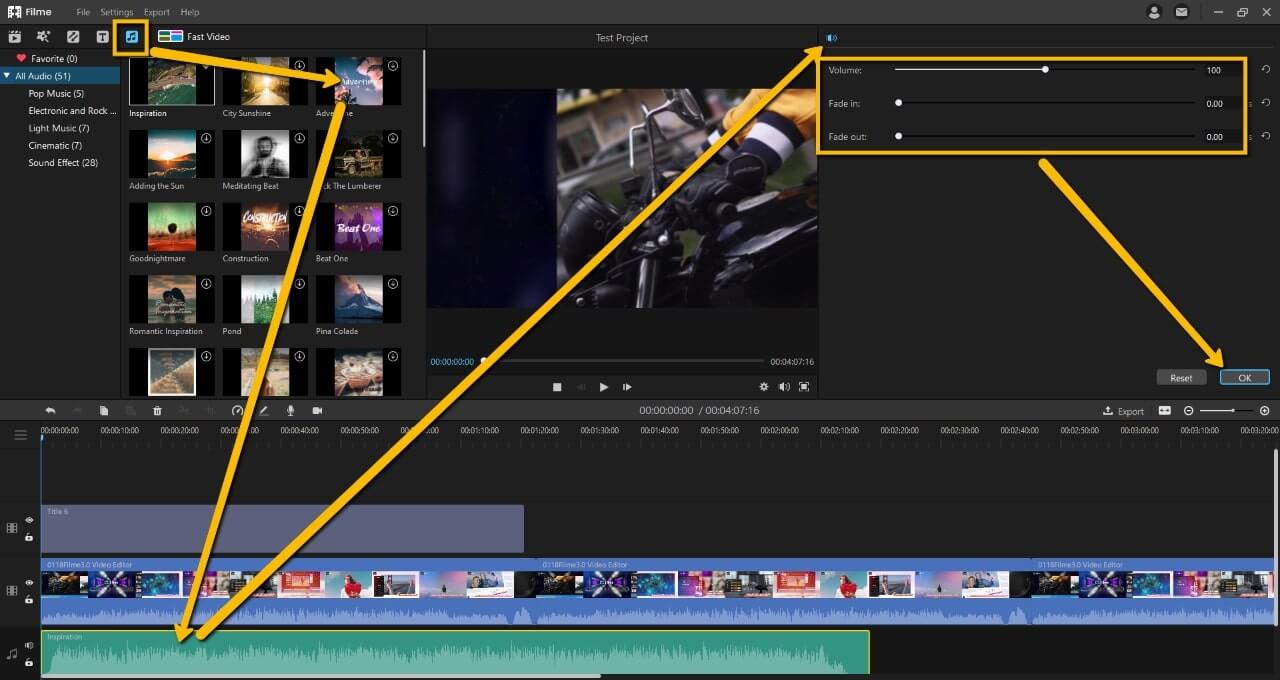
Drag the audio file into the timeline for editing.
To add music, click the music icon on the top left; select the music track and click the + symbol in the thumbnail to add it to the timeline in a new audio track.
To edit an audio track, double-click it. This will display the audio editing pane on the top right, above the timeline.
In the audio editing pane, you can control the volume level and add fade effects
When you finish editing, click Export, choose your preferred format, change any parameters that you need to, and click Export in the Export window.
Final Thoughts on What Audio to Use
Most viral videos on channels such as YouTube and TikTok have a solid audio track that viewers can really lock on to. Rather than using free music off the Internet, we recommend subscribing to a website with a large royalty-free collection. For that matter, using a robust video editor like iMyFone Filme gives you access to hundreds of tracks that can be used for various purposes. Take advantage of such benefits and make your videos not only look great but also sound great. And in addition to a wide range of music options, you also get access to one of the most intuitive video editors around.
Filme was designed with new users in mind, so there's literally no learning curve once you've installed it on your PC or Mac. You can easily import your video clips, images, and audio files from your smartphone to your computer using the Media Import feature, which works wirelessly or with a cable.


