Video editing requires time to develop skills and be a professional in this particular field. There are plenty of video editing tools available that one can use. But using and learning the correct tool is very important. There are professional video editing tools available, like Adobe Premiere Pro, to reach a professional level. It has almost all the features that one can imagine from a video editing tool. It has timeline-based editing, and along with that, you can also add keyframes to video/audio wherever you like.
Keyframes allow the user to add details to the video editing. You can add effects and transition to a specific frame and be precise about it. Keyframe is all about detailing and how video editing can be fun and complex at the same time.
If you are looking for a simple tool, then iMyFone Filme is another professional editing tool that you can use to edit your videos. Let us see how we can use both tools to edit videos.
Part 1. How to Add Keyframes to Video/Audio in Premiere Pro
Premiere Pro is an excellent video editor, but i would recommend iMyFone Filme, Filme is more cheaper than Premiere Pro.Filme is a much more comprehensive video editing tool. It supports a wide range of file types and offers all common editing tools, along with filters, transitions, animation, text, fast video mode, and much more, you can upload edited video to facebook,vimeo,youtube with single click. Filme has the best 4k HD support. Download iMyFone Filme below.
Adding a keyframe to a video allows the user to take video editing to the next level. With keyframing, you can do anything to your video. It is very effective and makes video editing easy and precise. There are two types of keyframing that you can do with Premiere Pro. One is adding a keyframe to videos, and another is adding a keyframe to an audio clip. Both types of keyframing have a different effect on the video.
Let us see what difference keyframing makes on the video and how we can add keyframes to video and audio, respectively.
1. Adding Keyframe to Video
Step 1: Install Adobe Premiere Pro on your PC. It is supported on both Windows and Mac. Open it and create a new project so that you can edit your video or audio. An editing window will open with multiple small panels.
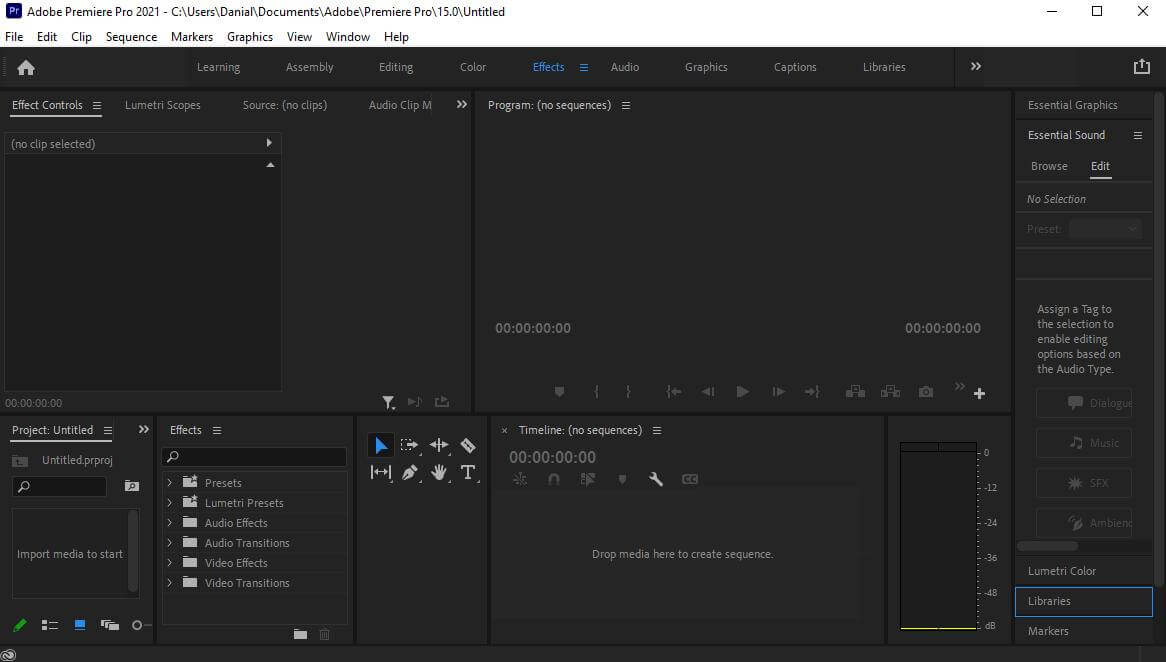
Step 2: You need to import media to edit your video or audio with Premiere Pro. Go to the import window, which is generally on the bottom left side of your editing tab. Browse the media (video and audio) that you want to make a part of your video editing.
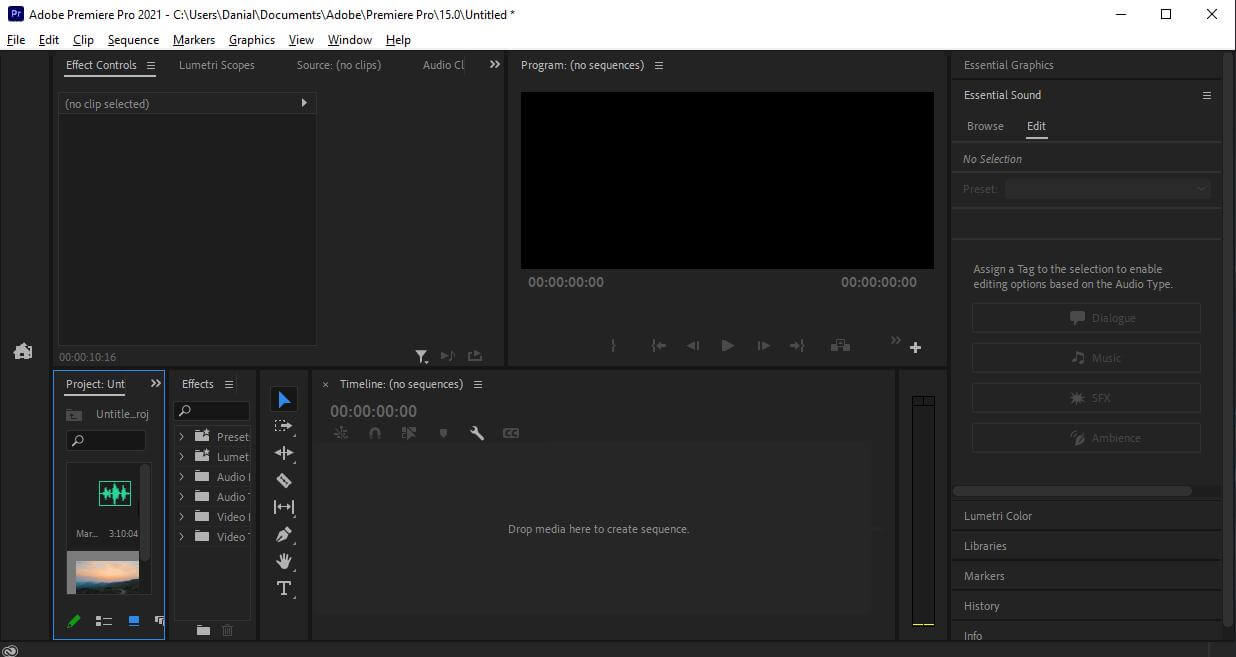
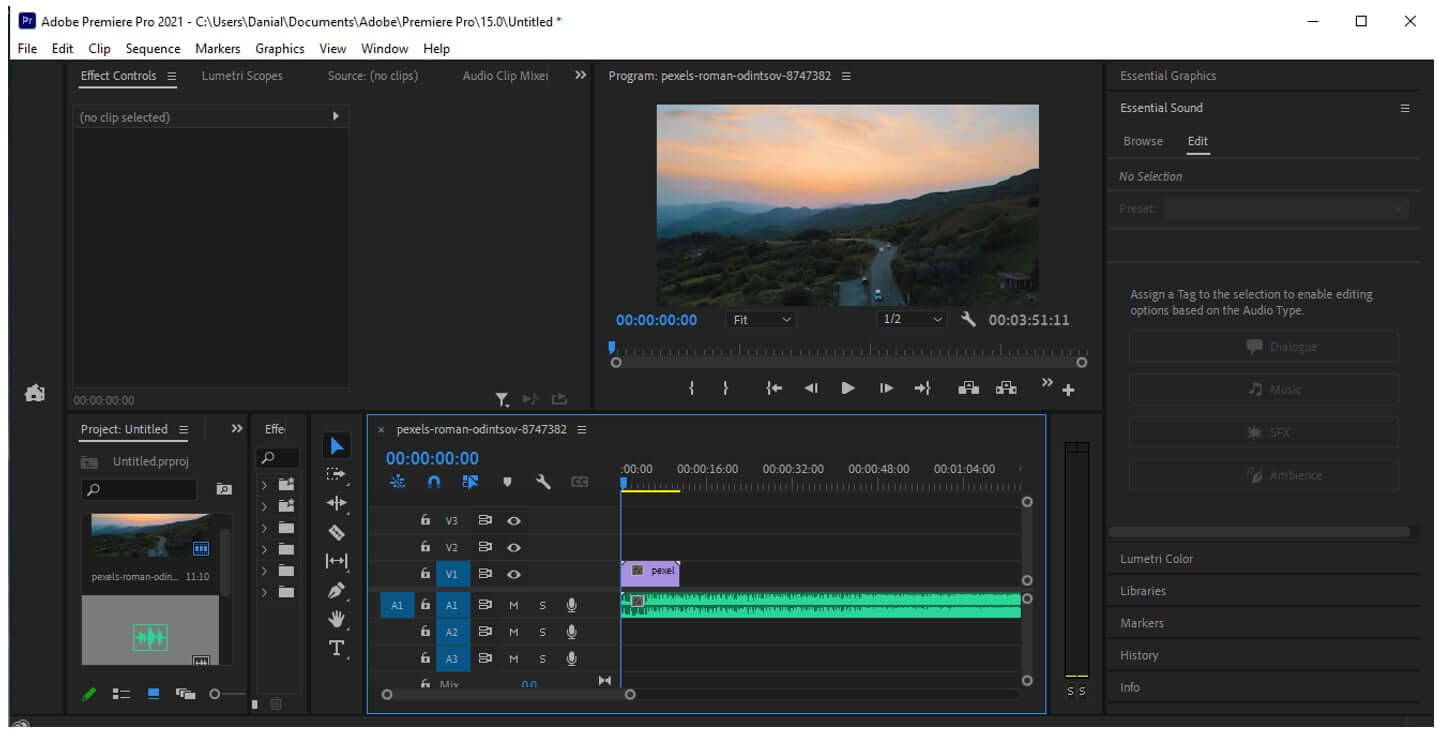
Step 3: After importing all of the media, drag the video and audio individually to the timeline. Here, on the timeline, you can easily add effects to your videos and edit them without any trouble.
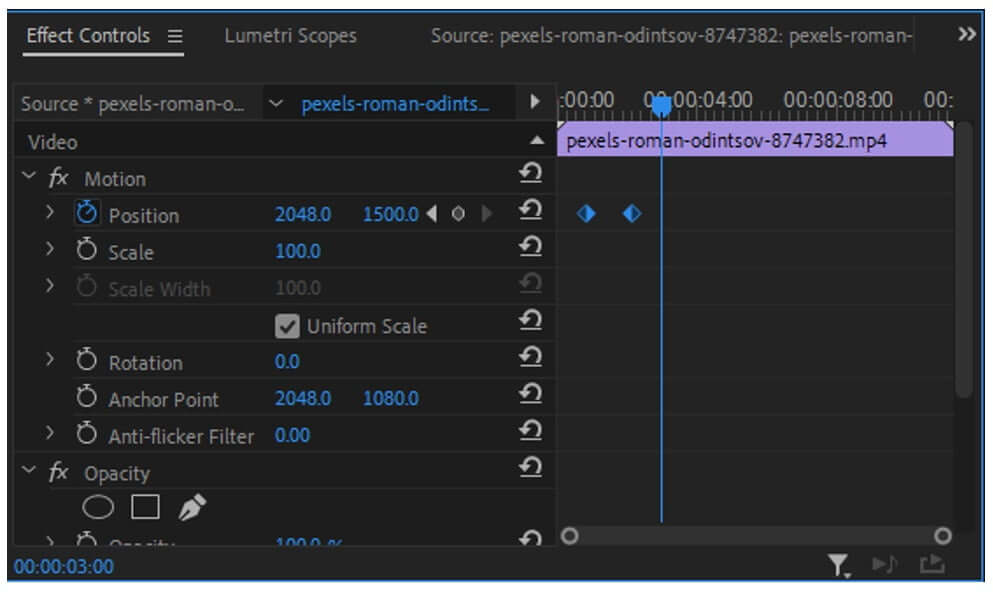
Step 4: We want to add a keyframe to a video in this part. You can simply click on the video on the timeline. As soon as you click on the video, you will see different options under the "Effects Control" window. From here, you can add as many keyframes to your video as you like.
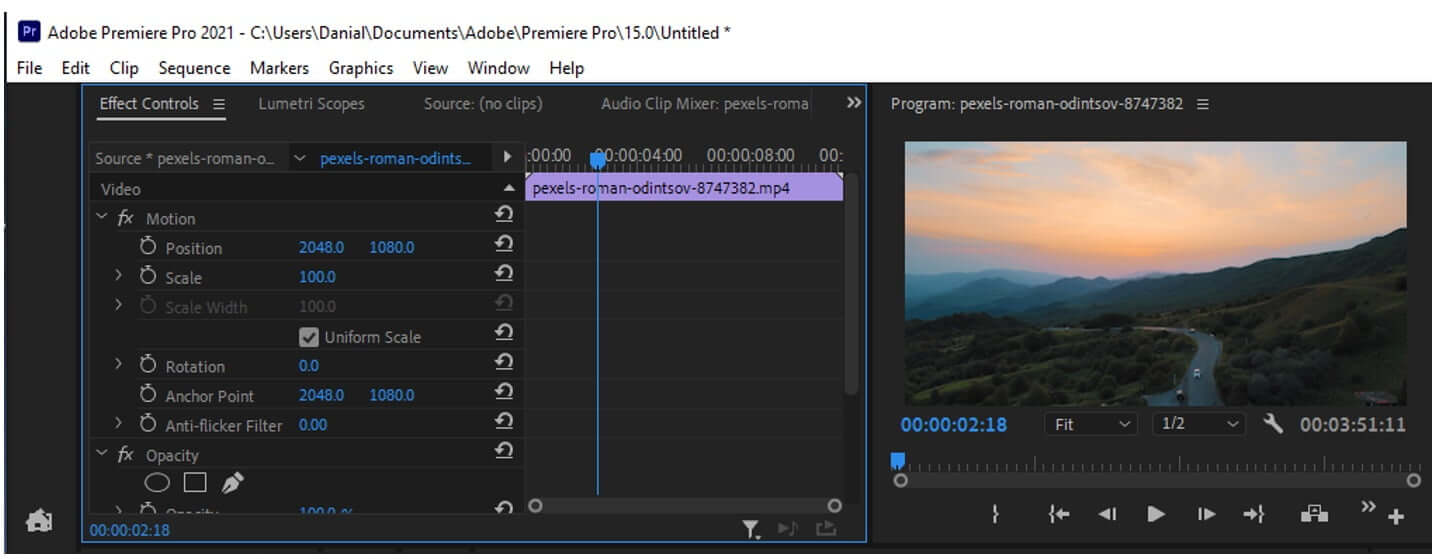
Among different subfolders of editing effects like Motion, Opacity, and Time Remapping, you will see an icon of a stopwatch. This stopwatch allows you to add and remove keyframes to your videos. Move the playhead of the video to the point where you want to add a keyframe. Decide which keyframe you want to add, whether you want to reposition the frame, adjust the height of the frame, rotate the frame, or any other because there are so many editing options for the keyframe. Make up your mind about editing, and then add the specific keyframe.
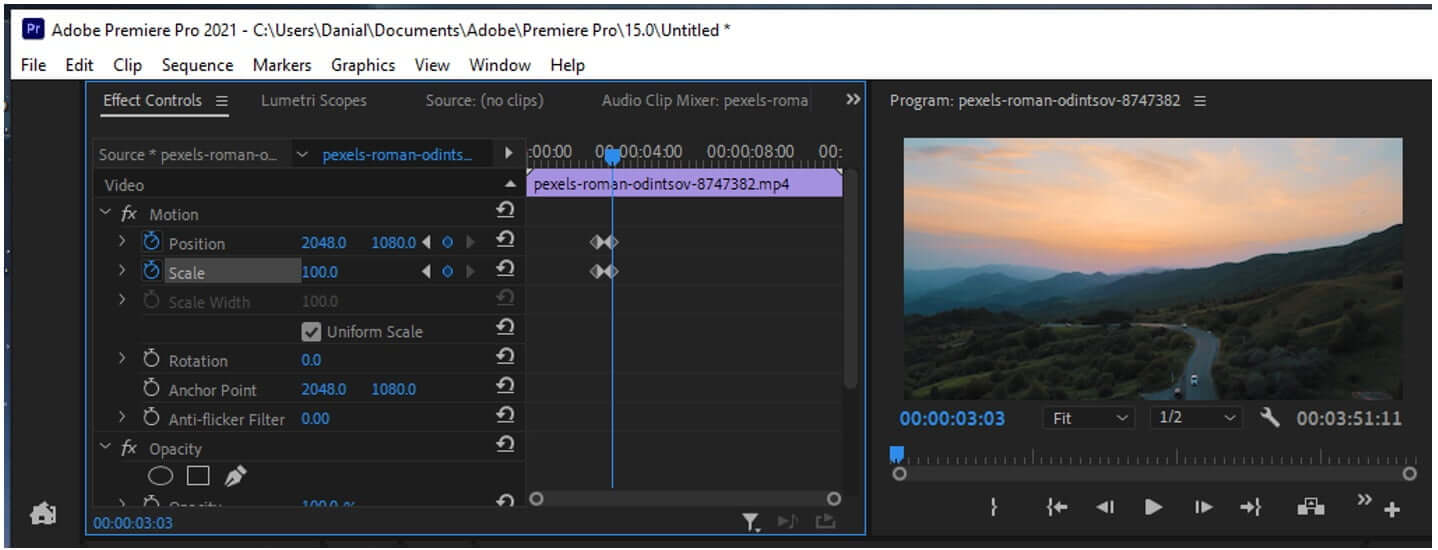
If you add a keyframe, you need to add another keyframe because from the first keyframe, the effect will start, and on the second keyframe, it will end. It is like a transitional period that starts and stops at a specific instant. Keyframe does the same thing; it allows the user to add effect in a certain frame duration.
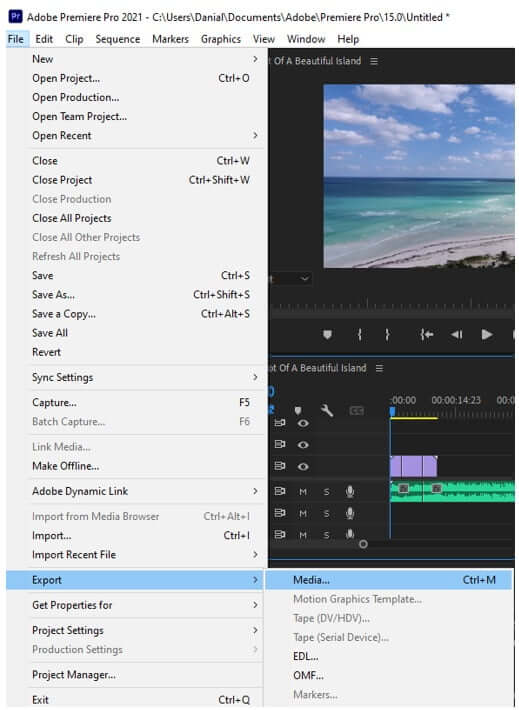
Step 5: Once you are done adding keyframes and making adjustments to your video, press "Ctrl + M" to export the video to your PC.
2. Adding Keyframe to Audio
Adding a keyframe to an audio clip is just like adding a keyframe to a video. There are only slight differences between them. You need to follow the same steps till step 3. Step 4 is a little different when it comes to adding a keyframe to audio.
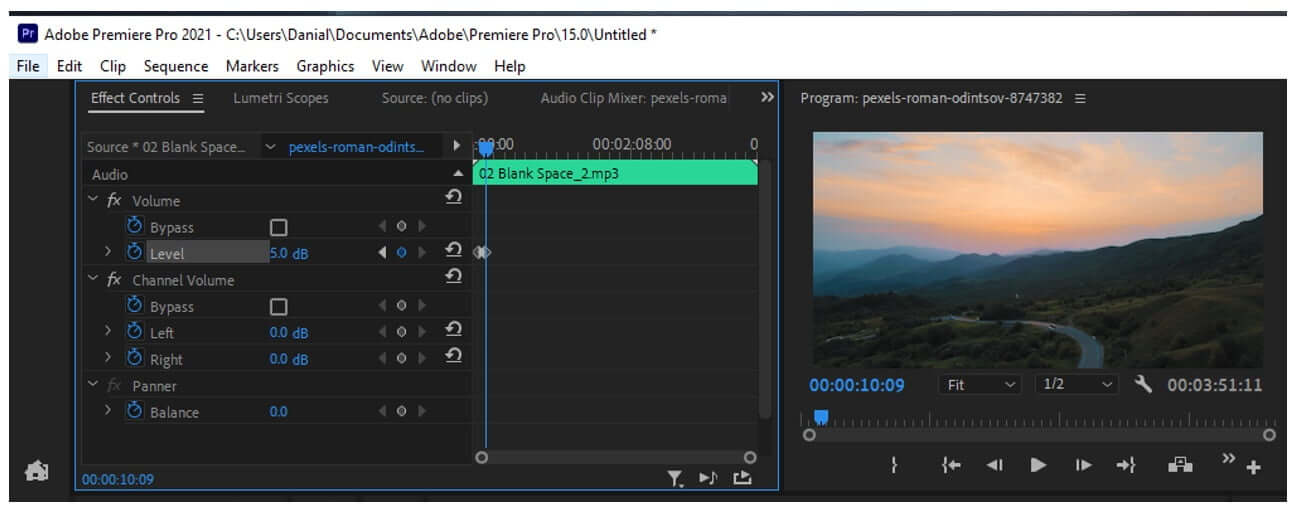
Step 4: Audio Alternative
After dragging the audio to the timeline, you can right-click on the audio, and options will display under "Effects Control". When it comes to audio, you don't have many options left to add effects to keyframes. You can only adjust volume, channel volume, and panner by adding keyframes to audio. Select the specific frame to add a keyframe and add a volume or channel volume or panner keyframe, according to the changes you want to make in your audio clip.
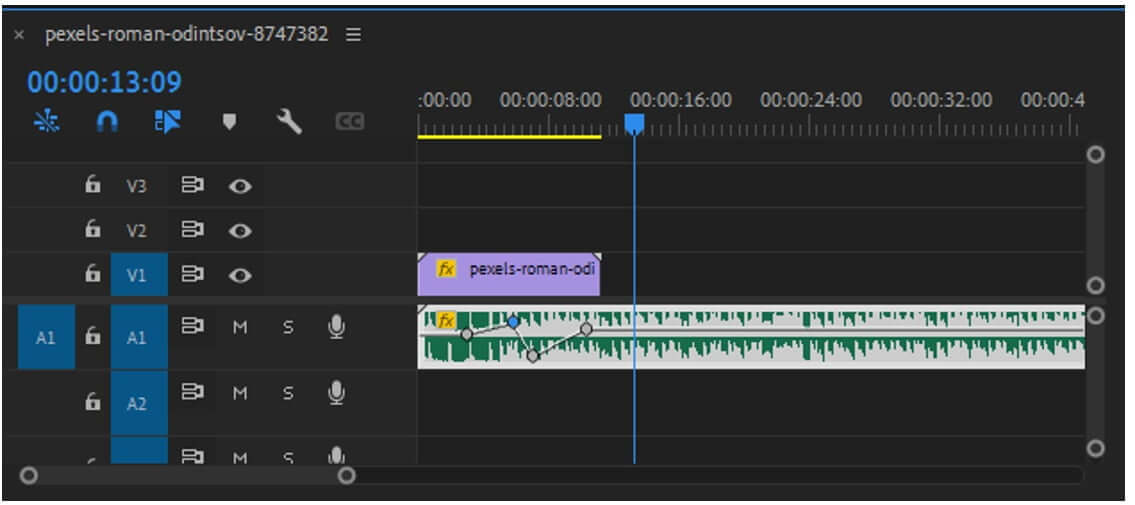
You can also add keyframes to audio by going to the timeline and selecting the frame. Press "Ctrl" and a plus icon will appear on the audio track. Right-click on the audio clip to add keyframes. You can now adjust the keyframe by hovering it up and down to increase or decrease the volume at specific instants.
Part 2. How to Hide/Remove Keyframes in Premiere Pro
You can easily hide or remove keyframes from video and audio in Premiere Pro. If you want to hide the keyframes, you can simply go to the timeline, select the media (video or audio) and then go to "Timeline Display Settings". Here you will see options of "Show video keyframes" and "Show audio keyframes". Unselect these options to hide video and audio keyframes from the timeline.
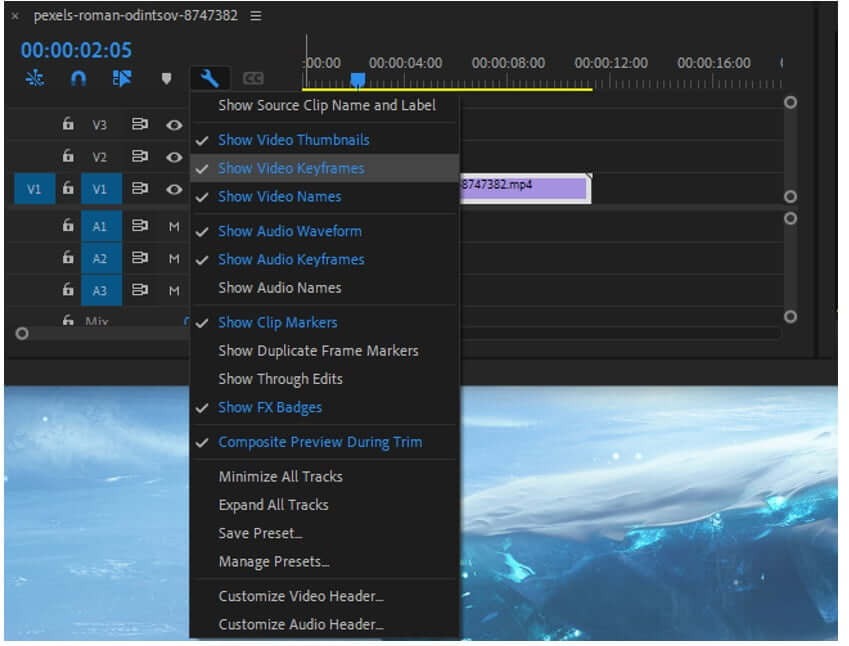
If you want to remove the keyframes, you can simply go to "Effects Control" and select all of the keyframes at once and press "Del" on your keyboard. Or you can go to the timeline and select the keyframe one by one and press the delete button. Your keyframes will be removed from video and audio.
Part 3. Best Alternative Video Editor - iMyFone Filme
iMyFone Filme is one of the best alternatives to video editing applications like Premiere Pro. It has all the features of a professional video editing tool, and it is very easy to use. Although it does not have a keyframe feature, it has multiple easy effects and transitions that you can add to your videos easily. iMyFone Filme allows the user to edit videos of resolution up to 4k. You can also export the videos in different formats as per your liking.
Let us see what makes iMyFone Filme different and a better video editor.
Steps to Edit Video Using Filme
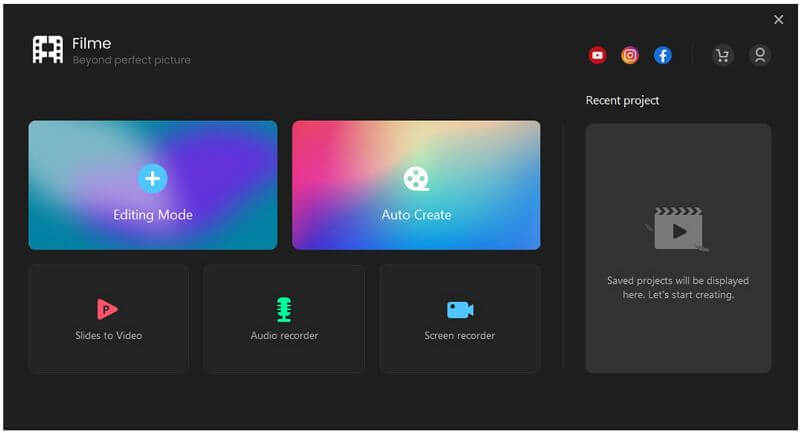
Step 1: iMyFone Filme is a compact video editor. You can download it in a few minutes if you have a good and stable internet connection. Install the app and open it. Go to "Editing Mode" where you can simply edit your videos.
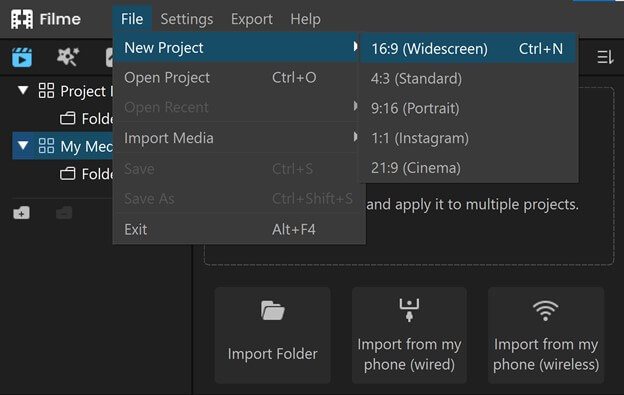
Step 2: After going into editing mode, you will see different editing options that you can apply to the video. But for that, you will need to create a new project. Go to the File menu and create a new project. Creating a project requires you to select the aspect ratio of the video—the ratio of the video window.
Step 3: Now, you can easily import all of the media that you want to edit. It can include videos, pictures, and audio as well.
iMyFone Filme has a great feature of matching the resolution of multiple videos. When you drag more than one video to the timeline, it will give you a choice whether you want to match the resolution with the previous video or keep this video's resolution.
Step 4: Drag the media down to the timeline. Just above the timeline, you can see different editing options, including speed, mirror, mosaic, freeze frame, crop and pan, and much more. These all are the editing options that you can add to your video.
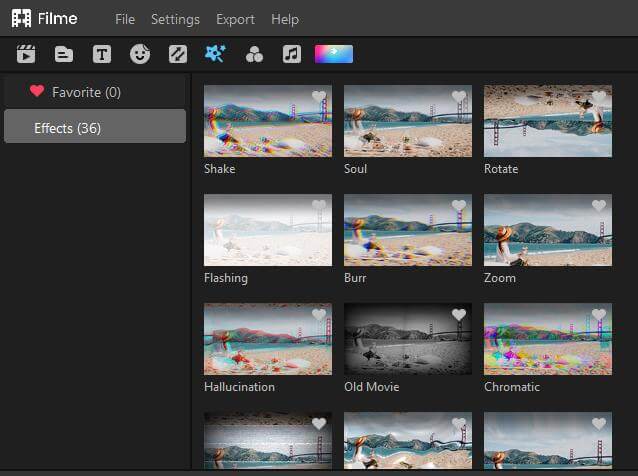
Besides these options, on top of the iMyFone Filme window, you can see effects, transitions, texts, elements, and filters tab. These tabs allow you to add these effects to your videos. You can just simply drag the effect and drop it on your video. It is very easy to add effects with iMyFone Filme.
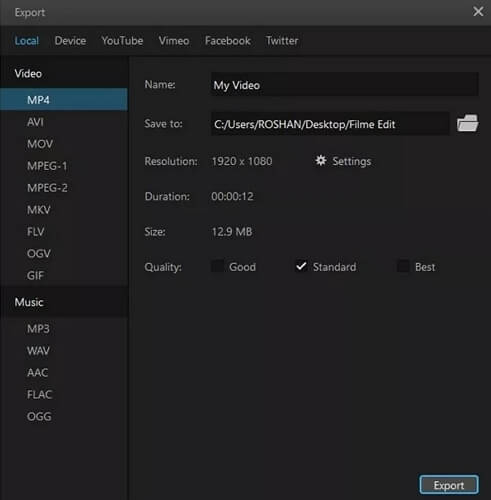
Step 5: When you are done editing with iMyFone Filme, it also gives you the option to export the video in whatever format you like. Just click on the "Export" button and choose the settings you want the video to be saved in.
Part 4. What are Keyframes and Tips for Add Keyframes?
A keyframe is an instant or location in a video or audio clip that defines the instant where a transition or effect begins or ends. It defines the information or adjustments that the editor has made while editing the video.
Tip No 1: Select the Frame Precisely
A keyframe requires a starting and ending point. It defines the tenure of the effect in the video. If you want to add a specific transition or effect to the video, make sure that you are selecting the perfect frame or instant to add a keyframe to video/audio because it should be precise to make an impact on video editing.
Tip No 2: Preview Keyframe Before Saving
It is important to check that the keyframes you added and made changes to it are perfect. You should preview the effect or transition multiple times so that there is no chance of error. It will make your work efficient and save you time.
Part 5. FAQs about How to Add/Hide Keyframes
1- How to Add Keyframes in Premiere Pro?
To add a keyframe to video/audio, you can simply select the video or audio clip. Go to the effects control window. Select the frame on the video and then click on the stopwatch icon of the option you want to adjust or change. The stopwatch will add a keyframe to your video at the instant.
2- How to Hide Keyframes in Premiere Pro?
You can simply go to the timeline, select the video or audio. Then go to timeline display settings. Depending on the media you selected, whether video or audio, unselect the option of "show video keyframes" and "show audio keyframes".
Conclusion
Keyframes are a crucial part of video editing, especially when you require effect and transition at a specific instant in your video. Although there are many video editing tools for this purpose, Premiere Pro is one of the easiest ones that you can find. You can add a keyframe by just selecting the media and going to the effects control panel. A keyframe defines a key moment in your video where you add effects and transitions.
iMyFone Filme is an alternative video editor for both Windows and Mac PC. It is a paid tool, and it is much easier and simpler than Premiere Pro. You can edit videos with it and upload your music to it. Moreover, it has multiple effects and transitions, which are just a click away. It has a wide library of audio effects, which you can also add to your video. Even if you are a beginner, you can edit videos with iMyFone Filme.


