Photo and video editing have now become easy as there are different editing tools available in the market. The blur effect is one of the most overpowered effects you can add to your photos and videos. In this section, we will talk about Gaussian blur in Photoshop, Gimp, and iMyFone MarkGo.
Method 1. Use MarkGo to Gaussian Blur Video
iMyFone MarkGo is a watermark tool that you can use for both image and video. You can add a watermark to the image and video, or you can remove the watermark from the video/image. Here, we will discuss how you can use this watermark removing tool to apply Gaussian blur to your video. It is very important to know that a single tool can be used differently. So, let us see how we can apply Gaussian blur to any video using iMyFone MarkGo. It can help you remove Biteable watermark, TikTok video watermark, etc.
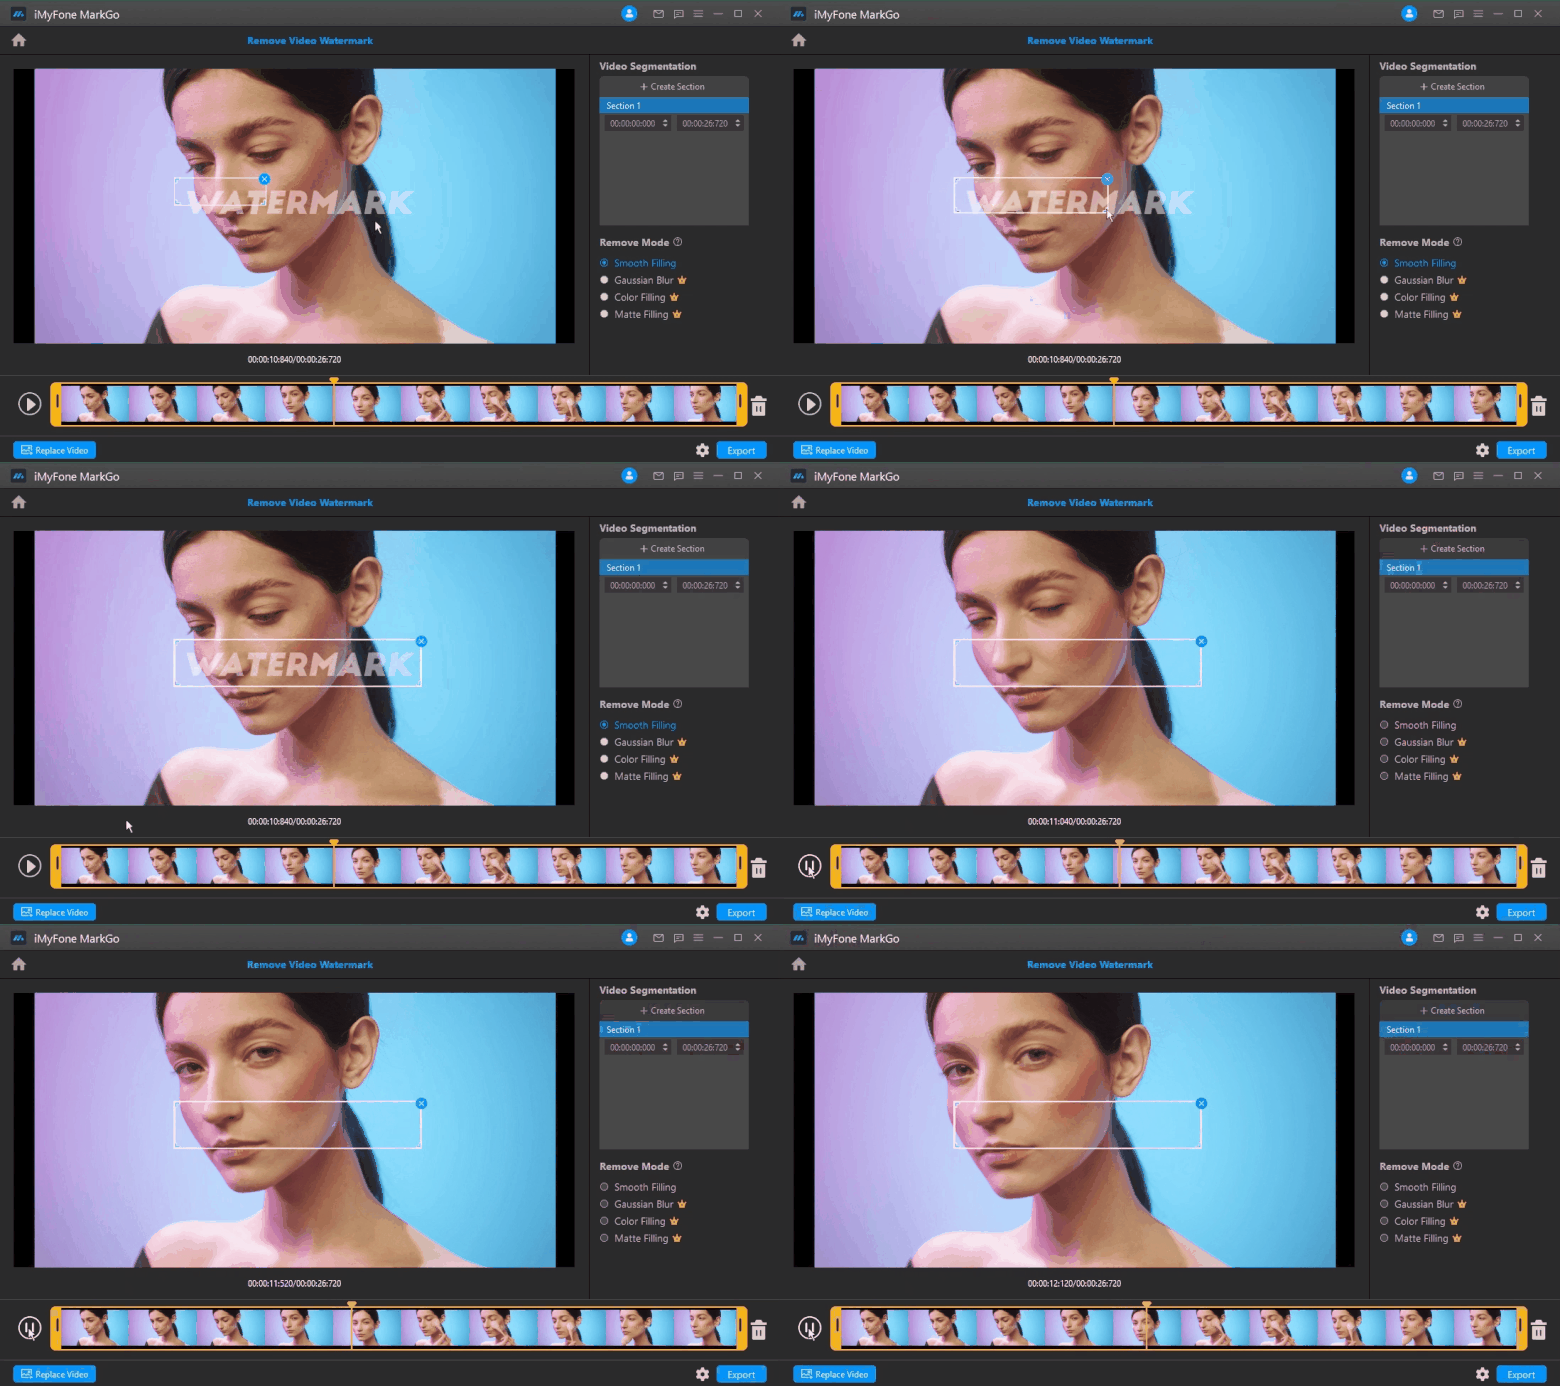
Step 1: Although MarkGo is a paid tool, you can get your hands-on on the trial version for free. It will have some limitations, but you can get the idea. Download and install MarkGo on your PC. Open it. As we want to apply Gaussian blur to the video, click on “Remove video watermark”. This watermark remover will help you to apply Gaussian blur to the video.
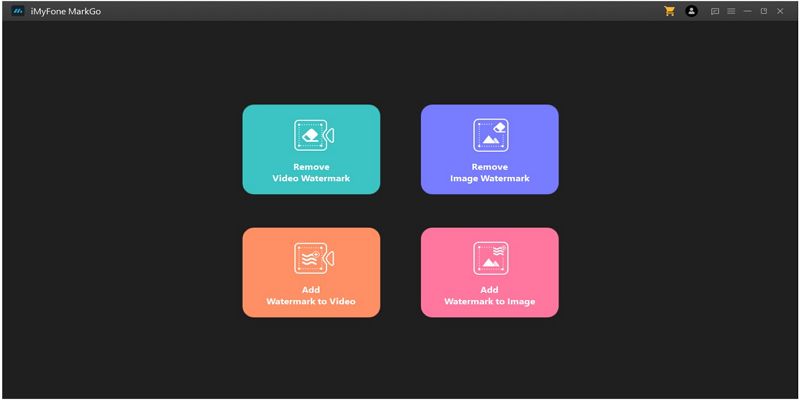
Step 2: A new window will open asking you to add the video. Browse the video to which you want to apply Gaussian blur. You can browse high-quality videos as MarkGo allows you to do that.
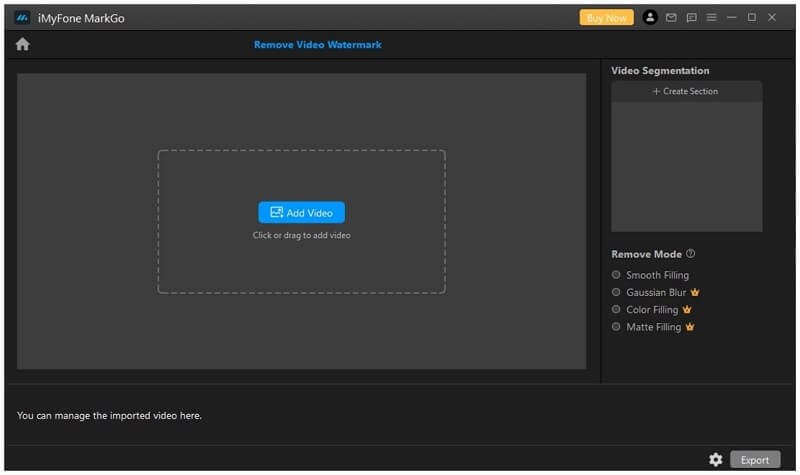
Step 3: An adjustable box will appear on the video. Take this box and select the area to which you want to apply Gaussian blur. After selecting the area to blur, you need to click on “Gaussian blur”. It is a premium feature. But it works like a charm. You can even set the timer for the blur effect.
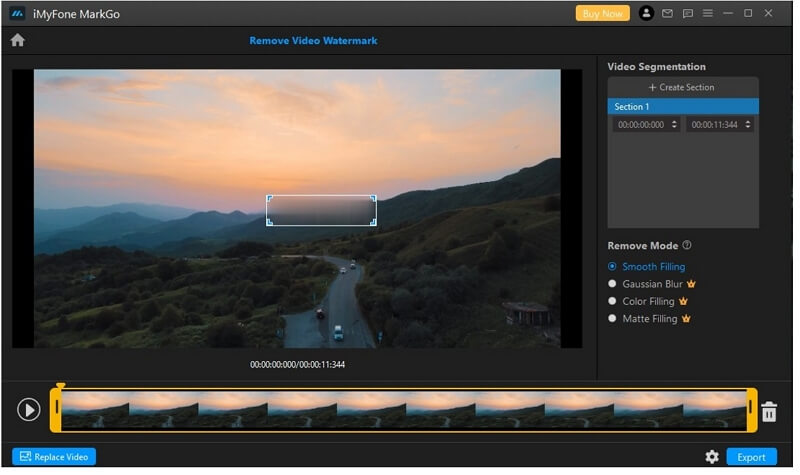
Step 4: As Gaussian blur is now added to the video, you can export it. Click on “Export”, and it will be exported to your computer.
Pros:


Cons:

Method 2. Use Gaussian Blur on GIMP
GIMP is a simple editing tool that you can easily find online. You can use it to remove objects and other unwanted parts. It has the features of a professional editing tool and is very easy to use. In this part of the article, we will discuss how to apply Gaussian blur to images using GIMP. Moreover, we will also discuss how to apply Gaussian blur only to selected areas or parts of the image. But GIMP does not allow editing videos as it is specifically made for images. Let us get straight into the steps of how we can do it.
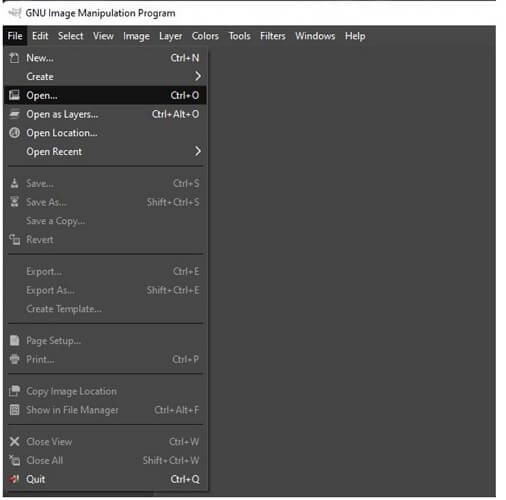
Step 1: Download and install GIMP on your computer. GIMP is not as heavy as Photoshop. So, if Photoshop runs smoothly on your computer, then GIMP will also work fine. Open GIMP and go to File > Open. Choose the picture that you want to edit and apply Gaussian blur to.
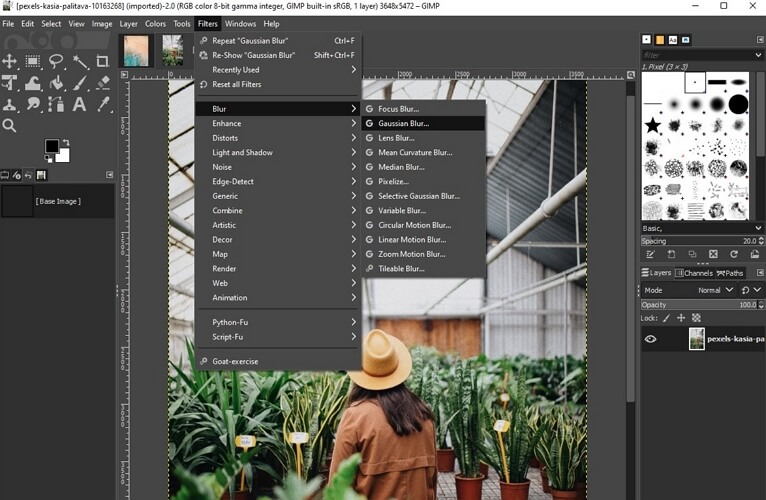
Step 2: If you want to apply Gaussian blur to the whole image, then go to Filter > Blur > Gaussian Blur. You can increase or decrease the opacity of blur by adjusting “Size X”, which is the standard deviation for the horizontal axis.
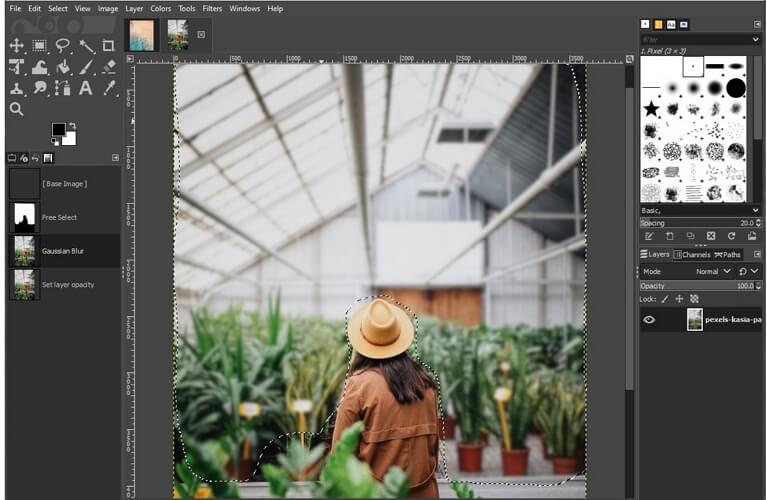
Step 3: But if you want to apply Gaussian blur to only the selected area, then you can click on “Free Select Tool”. Highlight and select the area where you want to apply Gaussian blur. After selecting the area, go to Filter > Blur > Gaussian Blur. Now, only the selected area will be blurred.
Step 4: If you like the Gaussian blur and it is according to your requirement, you export the image. Go to File > Export As and choose your preference for exporting the image.
Pros:


Cons:


Method 3. Use Gaussian Blur on Photoshop
Photoshop is unlike any other editing tool that you will find. It is the pioneer of photo editing and is evolving day by day. It has multiple professional features and effects that are not easy to learn for everyone. But today, we will discuss how you can apply gaussian blur to any image using Photoshop.
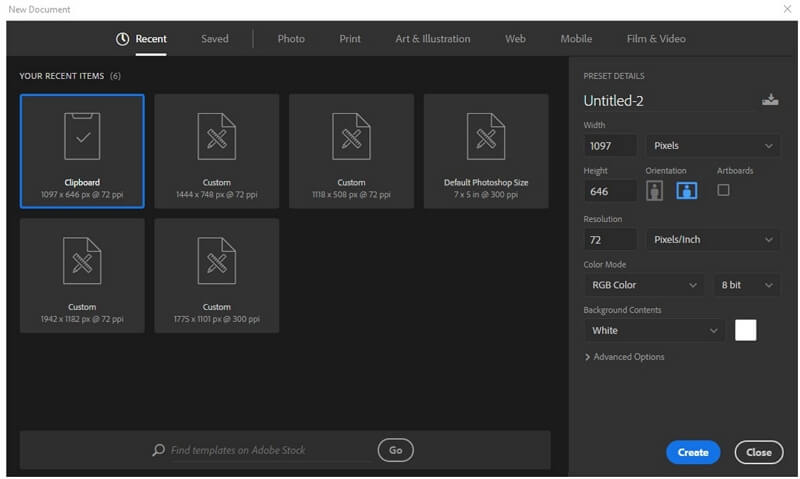
Step 1: Install Photoshop on your computer. It is compatible with both Windows and macOS operating systems. Make sure that your computer has the minimum requirements to run Photoshop easily. Open Photoshop and create a new project.
Step 2: Browse or import the photo to which you want to apply Gaussian blur.
Step 3: There are two ways in which you can apply Gaussian blur to the photo. One is that you apply Gaussian blur to the whole image. The second is that you select the subject and apply Gaussian blur to the background. You can simply go to Filter > Blur and click on Gaussian Blur. Adjust the radius as per your blur opacity requirement.
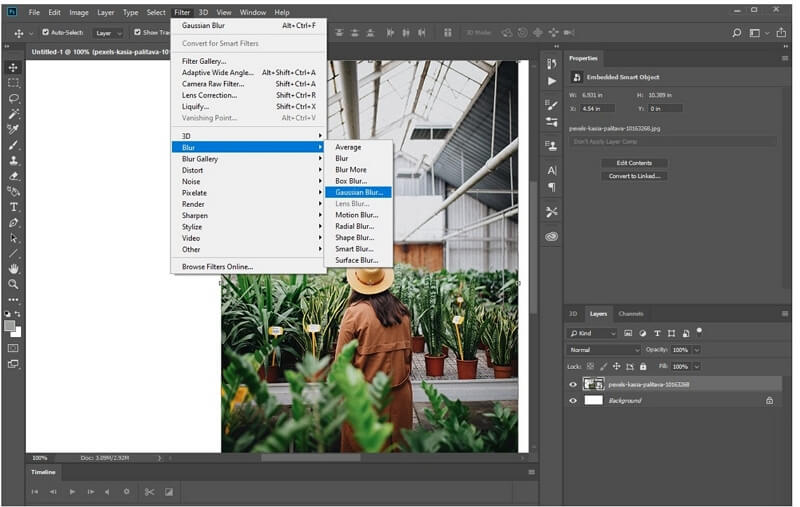
Step 4: But if you want to blur the background and not the subject, then you need to do it by layer method. First of all, create a duplicate layer. Apply Gaussian blur to the whole image first. Then, unselect the first layer and click on the “Free Select” tool. Go to the top menu bar and click on “Select Subject”. Photoshop will automatically sense and select the subject. Now, go to the previous layer and click on “Add Layer Mask”. Press “Ctrl + i” to invert the mask, the subject will be clear now, and the rest of the image will appear blurred.
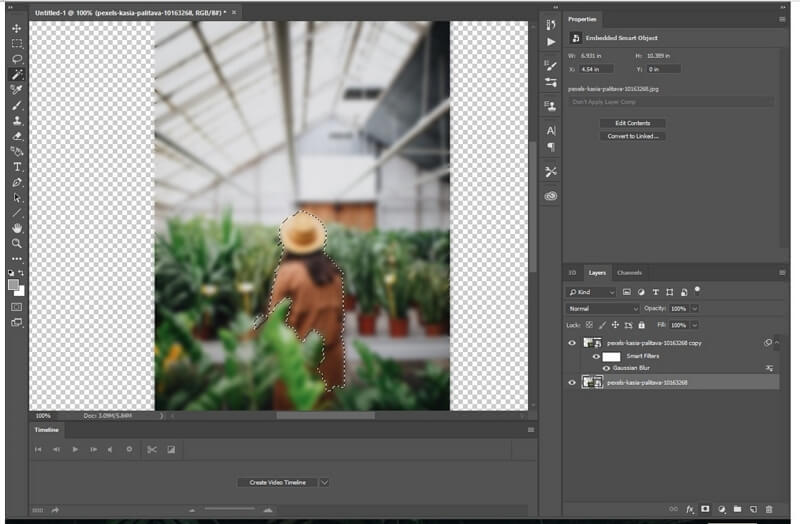
Step 5: These were two simple techniques in which you can apply Gaussian blur to any image. You can simply export the image now as per your requirement. Go to File > Export > Export As, and select your export settings.
Pros:
 Photoshop is the best tool to edit your pictures as it is packed with features.
 Applying Gaussian blur to the whole image is easy.
Cons:
![]() It is a paid tool.
It is a paid tool.
![]() Applying Gaussian blur to the background and not the subject is a little complex because you need to use the layer method.
Applying Gaussian blur to the background and not the subject is a little complex because you need to use the layer method.
Conclusion
Gaussian blur is an effect that allows the eyes to focus on the sharp subject. Applying Gaussian blur to videos is pretty easy with MarkGo. But if you want to apply Gaussian blur to images, then you can choose between Photoshop and GIMP. We have illustrated both of the tools. You can use any one of them according to your needs.


