How to Edit Videos in Filme
After importing your selected media files (video, image and audio) into the Media Library, you can begin creating your video. This tutorial will guide you through how to:
Delete Media Files in the Media Library
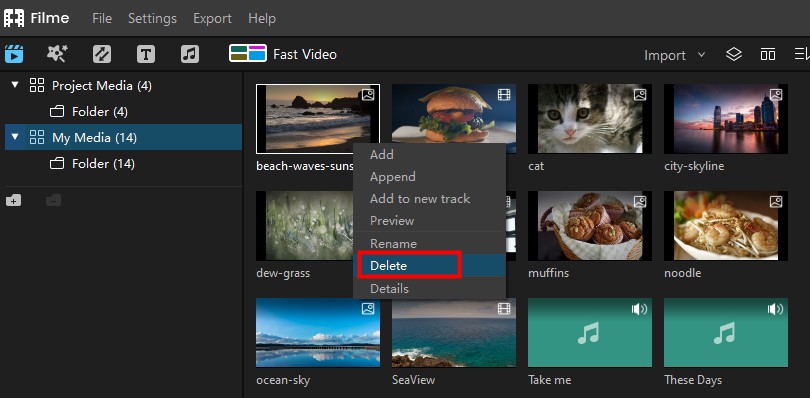
Please right click on the media file that you want to delete in the Media Library, and select "Delete" from the menu.
Note: Deleting media files in the Media Library will also delete them in the Timeline but will not delete the original files from your computer.
Add Media Files to the Timeline
Here are three ways to add media files to the Timeline:
Way 1: drag and drop the media files to the Timeline.
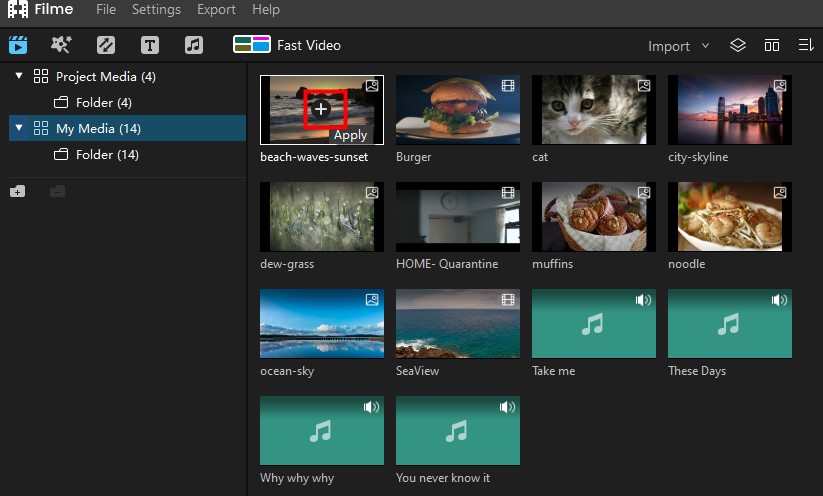
Way 2: move the curser to the media file in the Media Liabry, and click the plus icon in the middle of it.
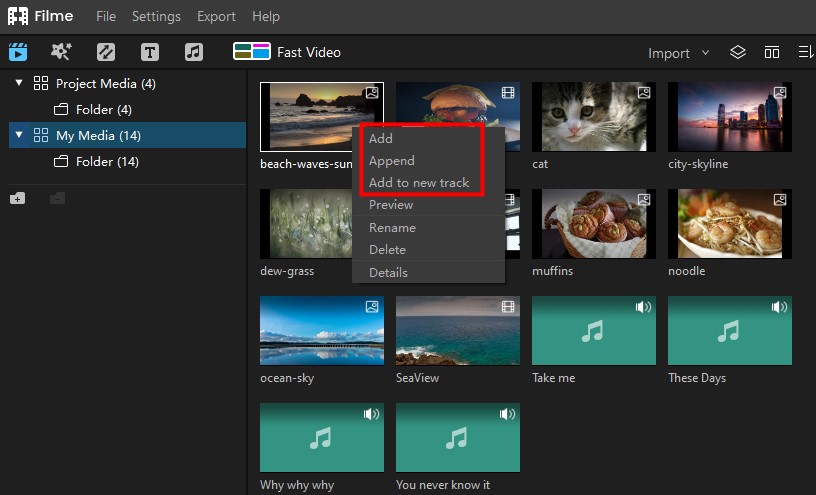
Way 3: right click on the media file that you want to add to the timeline, and here are some options:
Add: add the media file to the Timeline.
Append: add the media file to the end of the selected track.
Add to new track: add the media file to a new track which has no other media files.
Copy & Paste Media Files in the Timeline
There are two ways to copy and paste the media files in the Timeline. You can paste the copies at the end of the Timeline or insert them at where the Playhead is.
Way 1:
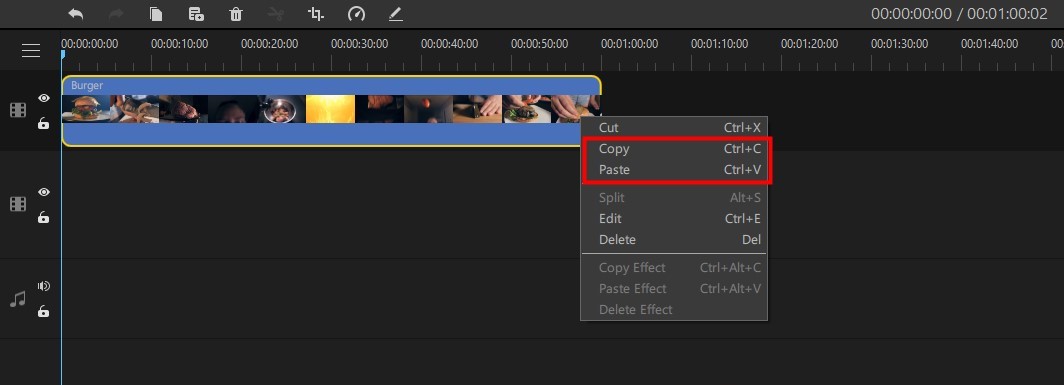
Step 1. Select the video clip you want to copy, right click on it and choose "Copy" from the
menu.
Step 2. Arrange the Playhead in the Timeline at the point where you want to paste the copy of
the clip.
Step 3. Right click and choose "Paste" from the menu.
Way 2:
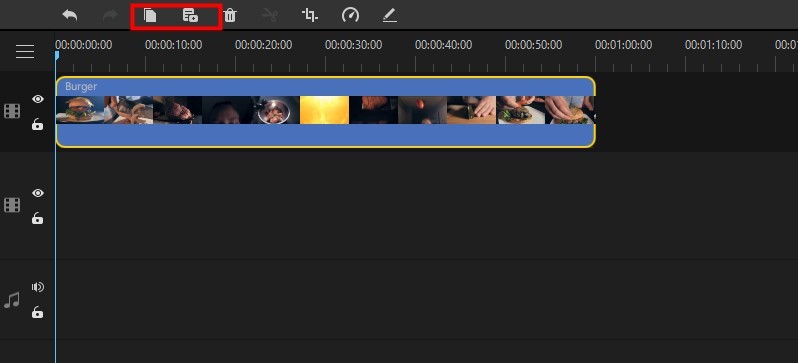
Step 1. Select the video clip you want to copy in the timeline and click the Copy icon in the
Toolbar.
Step 2. Arrange the Playhead in the Timeline at the point where you want to paste the copy.
Step 3. Click on the Paste icon in the Toolbar.
Delete Media Files in the Timeline
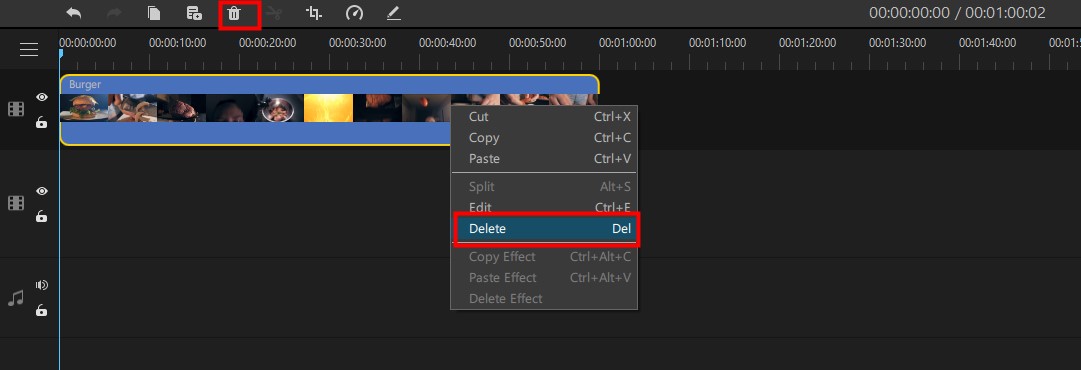
Click to select the clip in the Timeline that you would like to remove, and press on the Delete icon in the Toolbar or the Delete key on your keybord. You will have removed the clip from the Timeline.
Trim Video Clips
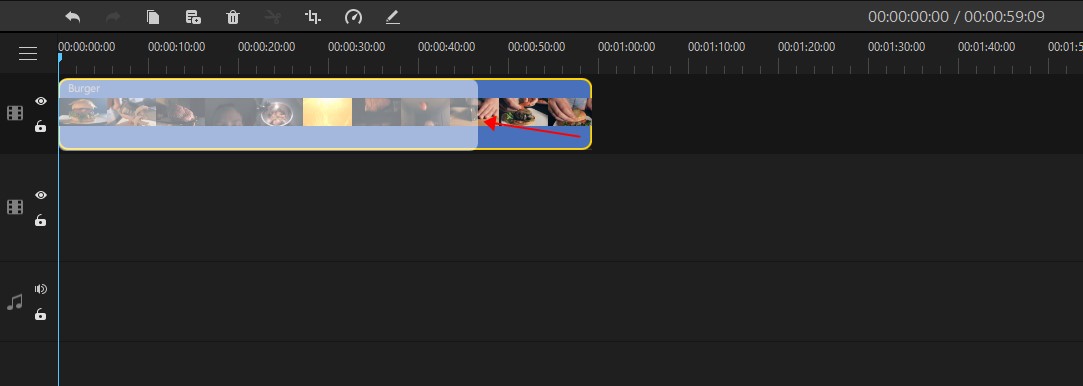
If you need to trim a clip at the beginning or end of the clip, pull the clip shorter to the point where you want to trim. You can see the duration change in the Timeline. in the Timeline.
Split Video Clips
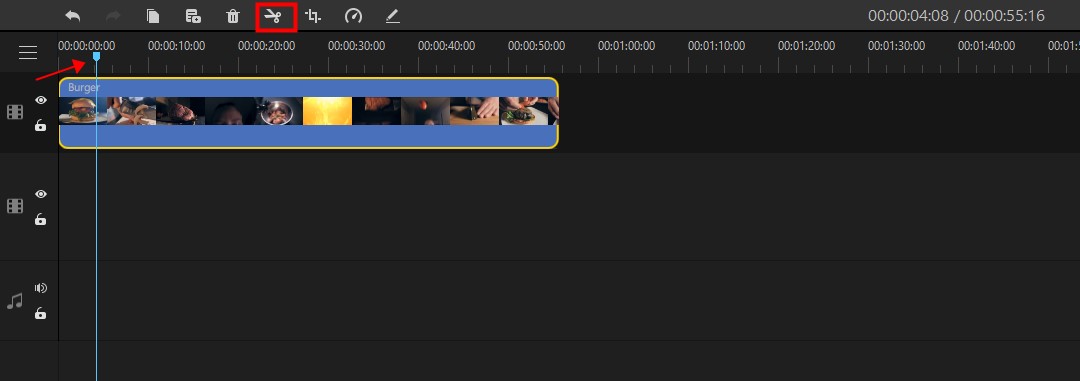
Move the Playhead to the point where you want to split and press the Split icon (theScissor) in the Toolbar, or right click and select the "Split" option, and then you will split the video clip.
Resize/Crop Video Clips
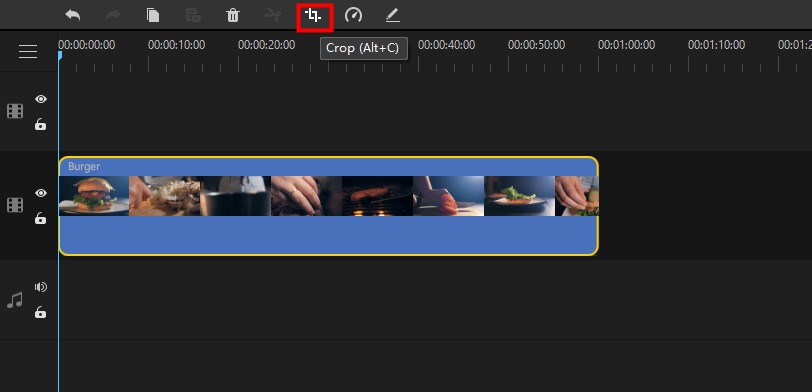
Please click to select the clip in the Timeline and click on the Crop icon in the Toolbar which will open the Crop window.
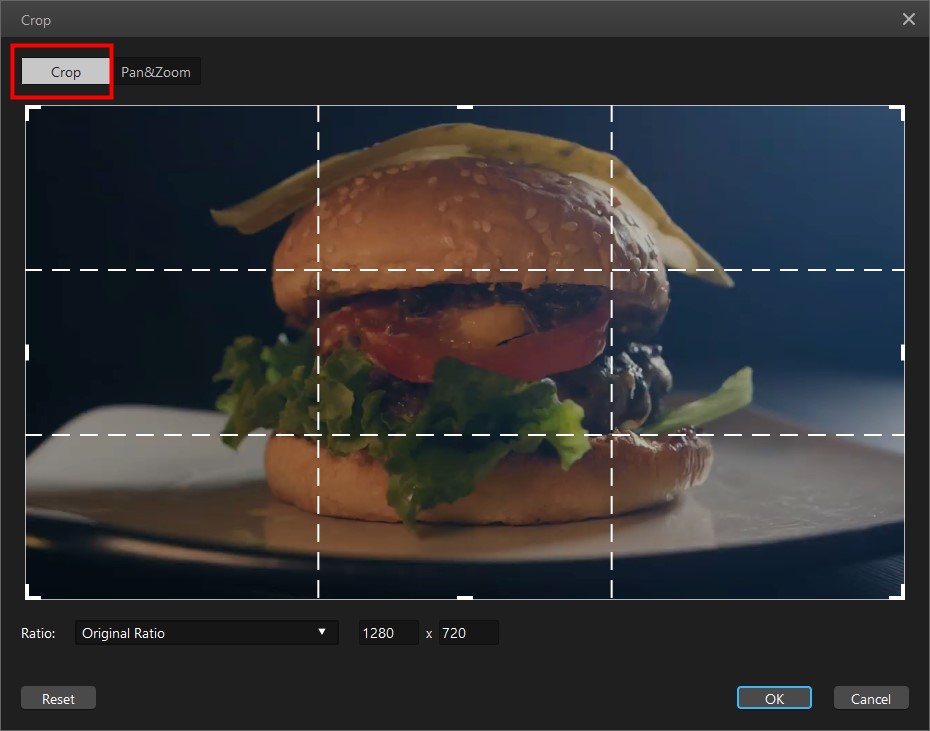
To the "Crop" part, you can move the corner of the rectangle to crop the video screen and adjust the ratio. At the bottom left of the screen, you can also select the ratio options to crop. If you choose the Custom option from the list, you can input the ratio you want in the two boxes following the drop-down list.
After cropping, please select "OK" to confirm and close the Crop window or click "Cancel" to undo the change and close the window.
To the “Pan&Zoom” part, you can set the lens drag the "Start" box and "End" box to set the lens position. You can also set the beginning and ending lens size of by setting the ratio, including selecting the ratio or manually set the size number.
After cropping, please select "OK" to confirm and close the Crop window or click "Cancel" to undo the change and close the window.

Change Video Clip Speed
To change the play speed of the clip, click to select the clip and press the Speed icon in the Toolbar. The Speed window will open. You can move the slider on the Speed bar to the right to accelerate the speed or to the left to slow down the speed. To undo the last change please press the Undo icon on the right
After you set the speed, click "OK" to confirm and close the Speed window, "Cancel" to cancel and close the window.

Adjust Brightness/Contrast/White Balance & Rotate/Scale/Offset A Video
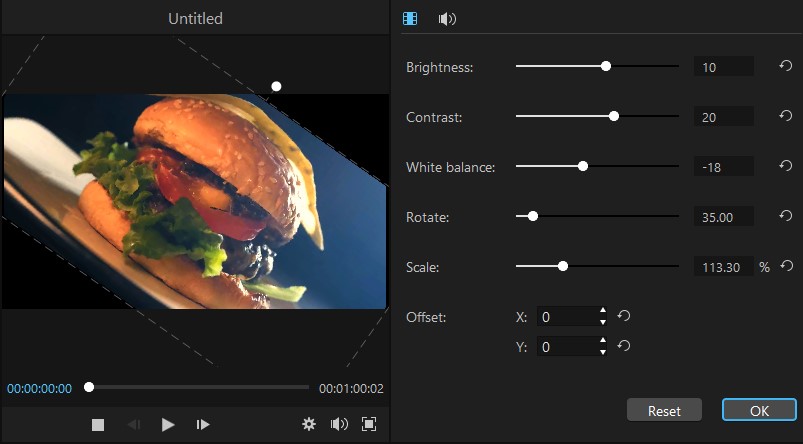
Double-click the clip that you want to edit in the Timeline or click to select it and press the Edit icon in the Toolbar. This will open the Editing window in the upper right corner of the interface. In this window, you can adjust the brightness/contrast/white balance to change the atmosphere and style of your video, rotate to change its orientation, scale to resize its view, and offset to fix and straighten the clip.
Adjust brightness, contrast, and white balance: simply move the slider or input a number, respectively, to change the values of brightness/contrast/white balance.
There are two ways to rotate, scale and offset a video clip:
Way 1: to rotate/scale a video, move the slider or input a number, respectively. To offset it horizontally (X) or vertically (Y), click the upward triangle to increase the value or the downward triangle to decrease. You can also input a number respectively.
To undo the last change, press the undo arrow to the right. After you make the desired changes, click "OK" to confirm and close the Editing windows or "Reset" to undo all the changes and stay in the window.

Way 2: Double-click on the clip that you want to edit in the Timeline, and you can directly rotate/scale/offset it in the preview window.
To rotate, move your cursor around the white point above the rectangle as the image rotates around it.
To scale, move and adjust one of the corners of the rectangle.
To offset, hover your mouse over the video or image in the preview window to move it horizontally or vertically.
Make Picture-in-Picture Effects
The picture-in-picture effect allows you to display two videos or images in the same screen, with one image being the main one and another, much smaller image.
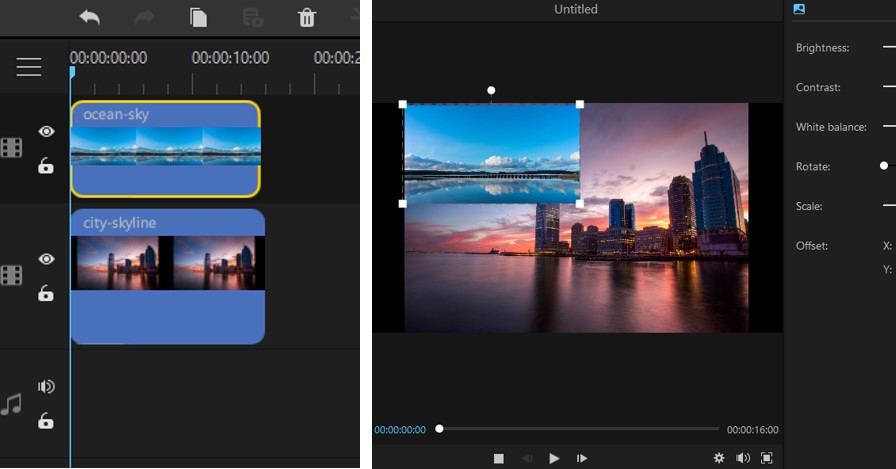
To make a picture-in-picture effect, pile up two media files (video or image) in two different tracks, with one above the other. Choose the one that you want to be the smaller image by double-clicking on it in the track. Then you can edit its scale/position/direction directly in the Preview window or in the Editing window.
Zoom in/out the Timeline
Zooming in/out the clip allows you to see more/fewer details in the Timeline. This doesn't affect the final video edit. To zoom in/out, click to select the clip and head to the right in the Toolbar. There, you can click the Plus icon to zoom in the clip in the Timeline, Minus icon to zoom out, or the Adjust icon to automatically adjust the clip to fit the Timeline frame.

Change Video Playback Quality
The playback quality settings here is for you to adjust the preview so that you can get smoother editing experience.
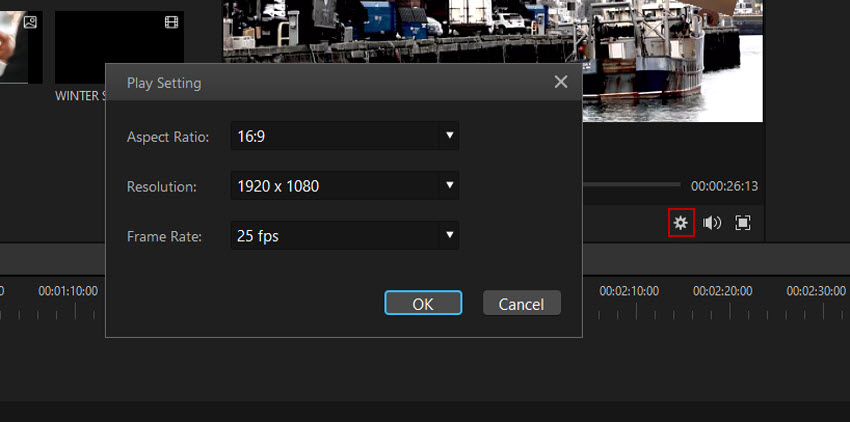
To change the video playback quality, please click the Play Settings icon (the gear) in the bottom right corner of the Preview penal. Then you will open the Play Settings window, in which you can choose options in the three drop-down lists respectively to set the Aspect Ratio, Resolution, and Frame Rate of the preview.
After you set the changes, click "OK" to confirm and close the Play Settings window, or "Cancel" to undo the changes and close the window.
