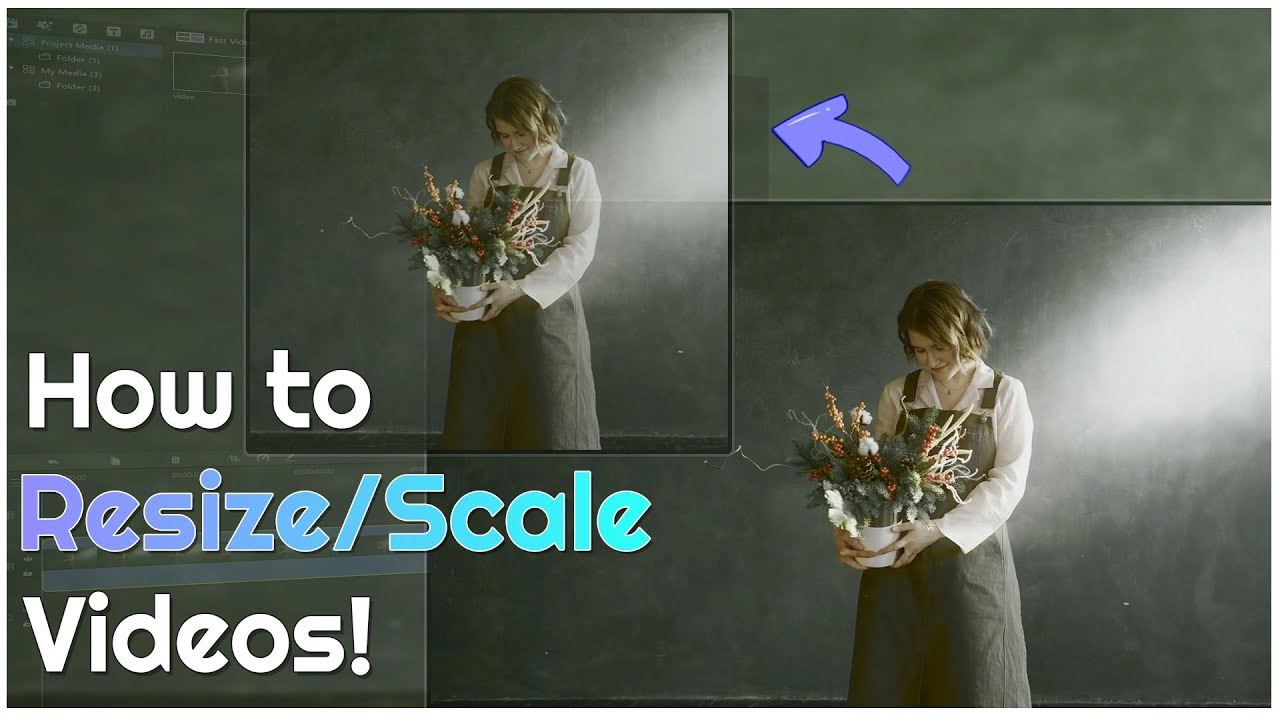
Iit's relatively easy to resize a video using Adobe Premiere. All you have to do is go through the steps properly and you'll be scaling your videos in no time!
Following, we will cover a few quick and easy ways to simplify the whole process and make it easier to resize/scale your video clips, while getting a precise idea about the resize/scale video dimensions in Premiere.
Part 1: How to Resize/Scale Video in Premiere

1. Sequence Settings and Adjusting the Frame Size
The first step in resizing/scaling your video is to set the sequence. You can do this in two ways, either "Scale to Frame Size" or "Set to Frame Size". As all the clips have different resolutions, you will have to resize them to match the sequence size of your entire video.
The steps for both the ways are exactly the same, which is why most people think of them as the same thing. But in reality, when you "Set the Frame Size", you select each clip individually and adjust it to match the existing frame sequence.
On the other hand, "Scale to Frame" means you are converting the clip to the exact resolution of your sequence frame size. This may make the footage a little bit grainy and the quality may also reduce to some extent. Also, the scale size for "Set to Frame" is 200, while for "Scale to Frame" it is 100.
Set to Frame
Step 1: Right-click on the video clip, the sequence of which you wish to adjust.
Step 2: Click on "Set to Frame".
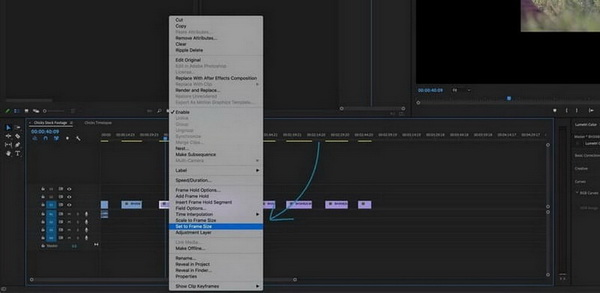
Step 3: This will change the resolution of your footage to match the existing sequence.
Pros:


Cons:

Scale to Frame
Step 1: Right-click on the video clip, which you wish to resize.
Step 2: Click on "Scale to Frame".
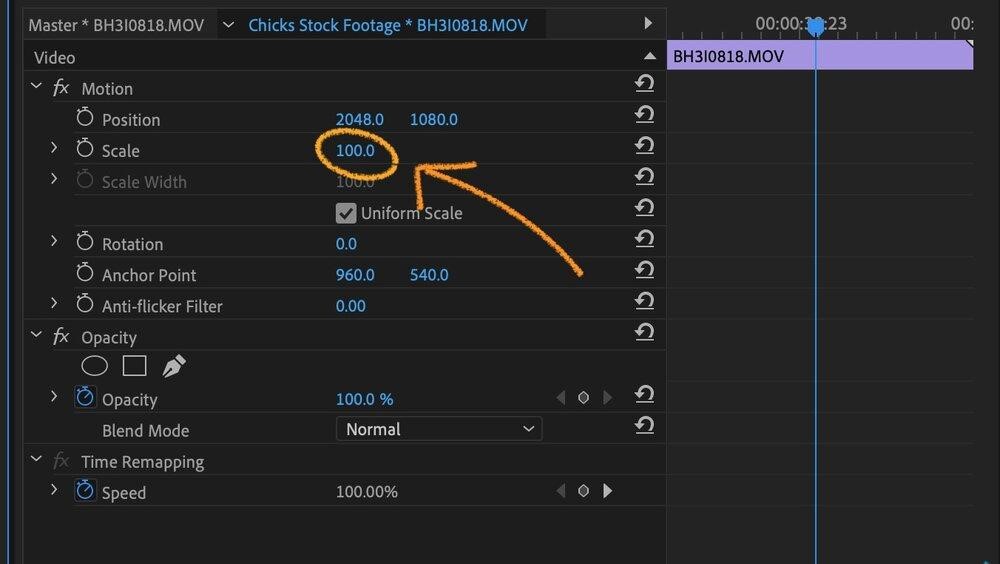
Step 3: This will change the size of your footage to match the existing frame sequence.
Pros:

Cons:


2. Auto Reframe
The frame size can be adjusted manually, as discussed earlier, but it often takes up a lot of your time, especially if you're working with a large number of video clips.
What if we told you that there's a better way to do all this? That's right! Adobe has introduced a new feature "Auto Reframe" which uses machine learning technology to identify and track movement in a video and optimizes it for social media platforms and other devices.
Using this feature is as easy as pie. You simply need one click to change the orientation of the video, without changing the quality or losing track of the movements in the clip. You can use Auto Reframe to resize/scale sequences for square, vertical, and cinematic 16:9 scale sizes.
How to Resize/Scale a Video in Premiere Using Auto Reframe
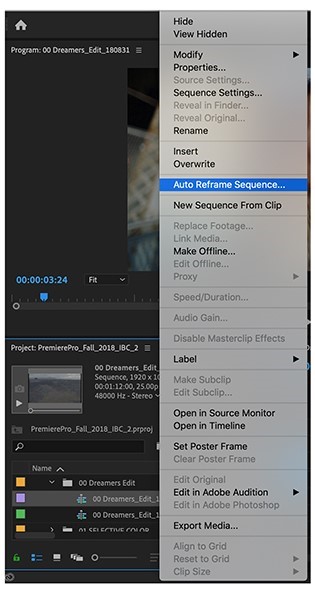
Step 1: Right-click on the entire sequence, and click on "Auto Reframe Sequence".
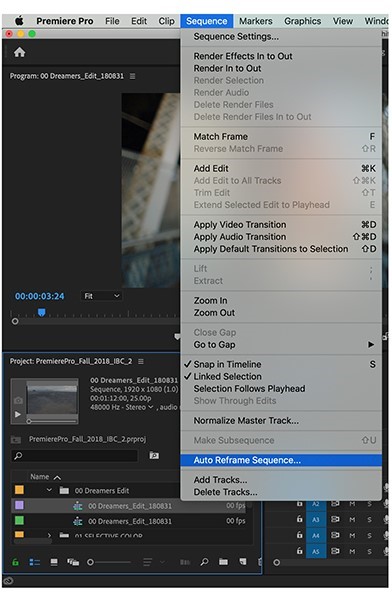
Step 2: Click on "Sequence" and select "Auto Reframe Sequence" from the drop-down menu.
Step 3: A dialogue box will open. Select an aspect ratio from the available presets or enter a custom aspect ratio.
Step 4: You can fine tune the Auto Refresh effect by choosing Slower Motion, Default, or Faster Motion from the list of "Motion Preset".
Pros:


Cons:


Watch this video to see how to scale video on Premiere:
Part 2: Tips to Resize/Scale Video in Premiere
1.Filming
One tip is to leave space around the subject. This means to keep them in the center, so that you can reuse the footage later for some other medium.
2.Still Images
If you have a bunch of still images that need to be resized, do it manually because Auto Reframe does not work well with still images.
3.Usage of Auto Reframe
Although the Auto Reframe option is a life saver, it should be applied only once to a clip. If applied multiple times, it will deteriorate the quality and cause black bars to appear on the sides of your footage.
Also Read:
Add Text in Adobe Premiere Pro >>
Speed Up Video in Premiere Easily & Quickly >>
Part 3: Highly-Recommended Video Editor - iMyFone Filme

If Adobe Premiere seems too technical and difficult to understand, you can always switch to an easier, quicker and cheaper video editor to speed up your videos. Our recommendation is iMyFone Filme.
iMyFone Filme is a very basic video editor, with all the features of a top-notch video editor, at an affordable price. It enables you to create amazing videos and slideshows using a variety of different editing tools.
-
Fast Video Mode
-
Basic Editing Features
To edit your videos in a professional way, iMyFone Filme offers a variety of basic editing tools that can help you to carry out the whole editing process yourself, with optimum ease. You can cut/trim, crop, split, rotate, make picture-in-picture effects and even speed up your videos with just a single click.
If you're not in for applying different effects and filters manually, you can choose the Fast Video Mode to create a fabulous slideshow by choosing from the vast library of built-in templates.
How to Resize/Scale a Video in iMyFone Filme
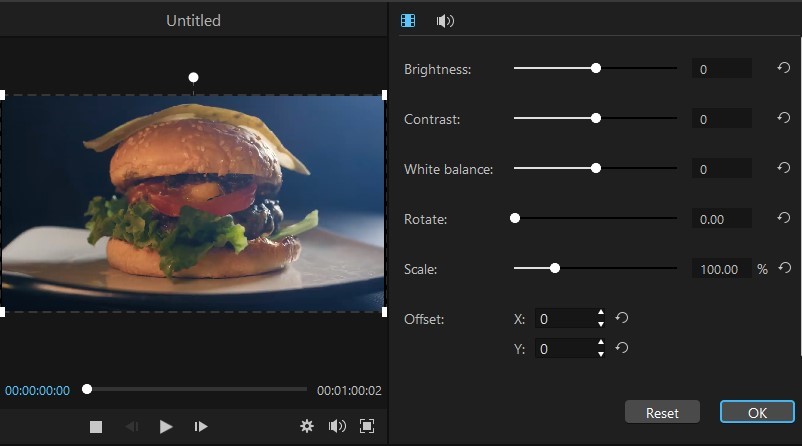
Step 1: Select the clip you want to resize, and click on the clip.
Step 2: This will make a window shown right size. Move the slider or input a number, respectively.
Step 3: Once you have set the desired clip, click "OK" to save the changes.
Watch this video to see how to use Filme to scale video:
Final Thought
Video editing seems like a burdensome task to many, but with so many video editors available out there, it is quite the opposite. With so many one-click features, videos can be edited by anyone with a smartphone.
The trick is to use an easy, quick and inexpensive editor that suits your needs. We have eased your search process by recommending one of the best video editors - iMyFone Filme. So, download it now and start creating mesmerizing videos!


