After Effects does not need an introduction-it is one of the most preferred video editing tools for professional and commercial purposes. However, it is a bit complex for beginners. In this article, we will explain how you can freeze frames in After Effects by following a few simple steps. We will also introduce a simple video editing tool Filme that beginners can use to make their videos perfect.
Part 1. How to Freeze Frame in After Effects
When it comes to video editing, Adobe After Effects is one tool that can never be missed. It has plenty of features and editing tools that other tools don't have. It offers a layer-based editing tool that is the most professional way to edit videos. You can add multiple layers, transitions, effects, audio, and other media at the same instant.
Among all features, one feature that we will talk about is a freeze-frame. The freeze-frame freezes or stops the specific frame that you want to feature or focus. You just need to pick or select the frame that you want to freeze and follow the steps to freeze the frame of your choice.
Steps to Freeze Frame in After Effects
Step 1: Download After Effects
Adobe After Effects requires considerable space on your PC. Download and install it and open it on your desktop. It is compatible with both macOS and Windows.
Step 2: New Composition
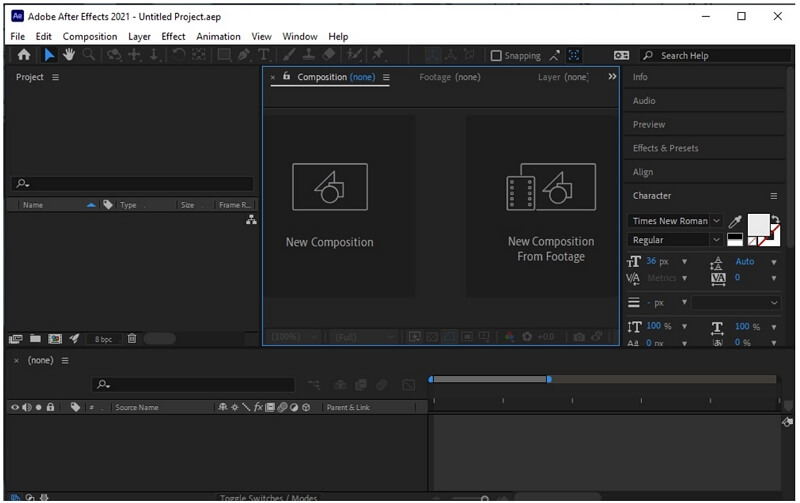
Once you open After Effects, you will see different options for creating or opening a new project. You can just simply drag and drop your video, or you can click on "New Composition from Footage" and browse the video that you want to edit.
Step 3: Video on Timeline
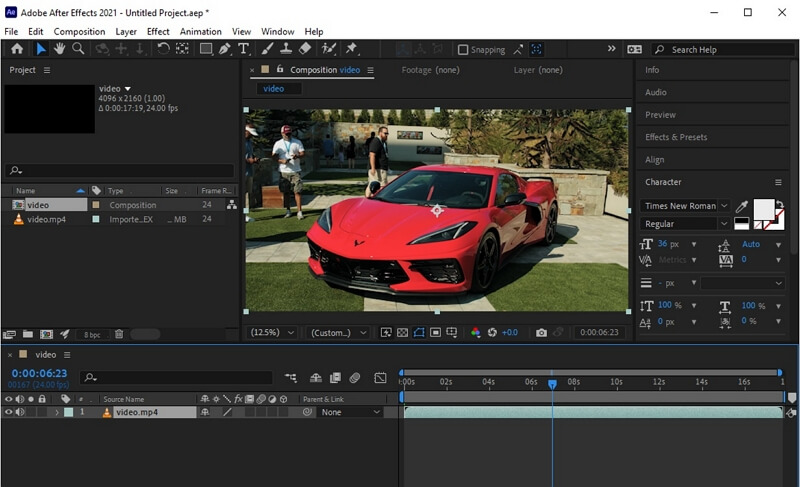
As the video is now imported in After Effects, drag the video down to the timeline so that you can edit it.

Step 4: Select the Frame
Just above the video timeline, you will see a slider or playhead. This slider will help you to select the frame that you want to freeze. By pressing the "Space bar", you can play and pause the video. Play the video and, with the help of the slider, select the frame and pause the video at that instant.
Step 5: Create a New Layer
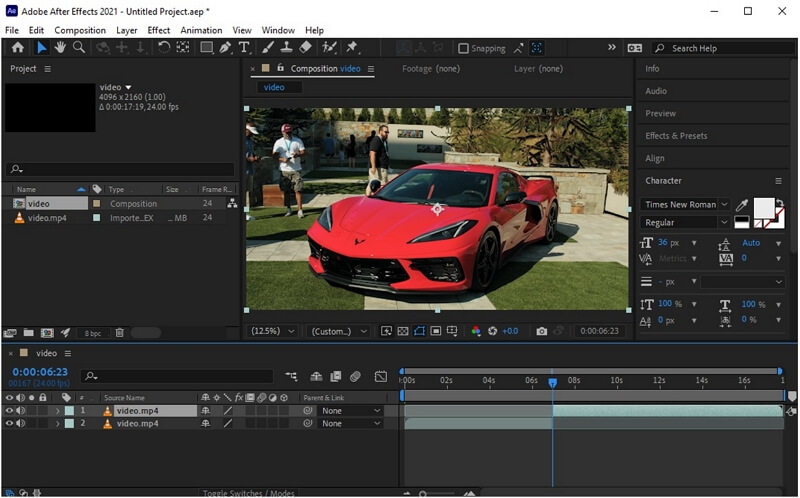
Now that you have paused the video where you want to freeze the frame. Press "Ctrl + Shift + D" to cut the video at that instant. Another layer of the video will be added just after the instant.
Step 6: Freeze the Frame
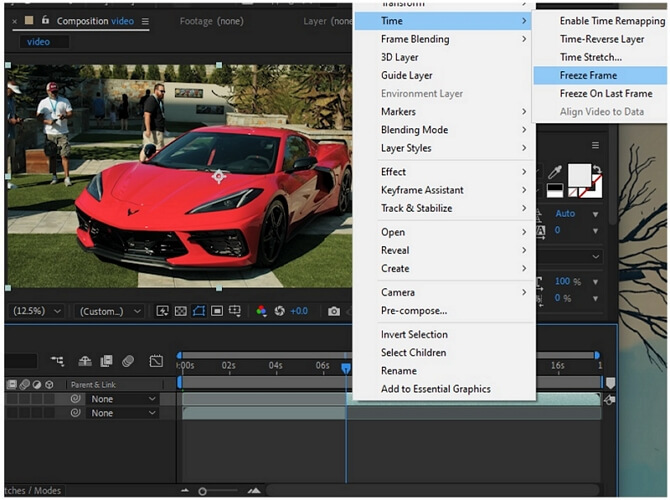
Right-click on the layer, settings will pop up. Go to Time > Freeze Frame. Your selected frame will be frozen.
Step 7: Save the Video
You can go to File > Export to save the video as per your requirement to your PC.
Part 2. FAQs about Freeze Effect on After Effects
What is the Freeze frame shortcut in After Effects?
Select the frame and press "Ctrl + Shift + D" to cut the video. A new layer will be added to the video. Right-click on the video and go to Time, and then Freeze Frame. Your selected frame will be frozen.
Why is the Freeze Frame greyed out in After Effects?
The reason the freeze frame is greyed out is that the freeze frame cannot be added or created from a sequence. You will need to go back to the original clip to create a freeze-frame or any other type of effect.
What does Freeze Frame do?
The freeze-frame creates a pictorial effect, just like the video is frozen at a particular instant. It stops the movement of the video. It converts the video into a still photograph for the desired duration.
Part 3. 1 Click To Freeze Frame – iMyFone Filme
iMyFone Filme is a video editing tool that helps the user to professionally edit their videos. Just like Adobe After Effects, it is also compatible with Mac and Windows. It is also a paid tool but also comes with the trial version.
The freeze-frame effect in iMyFone Filme is pretty simple and easy. The user does not have to go through complications and complex steps. With just a click, your frame will be frozen. Following are the simple steps that you can follow to freeze-frame in iMyFone Filme.
Steps to Freeze Frame Using Filme
Step 1: Open the Video Editor
Download iMyFone Filme. Install the tool and open it. If you want to edit the video, click on "Editing Mode". It will open the video editor.
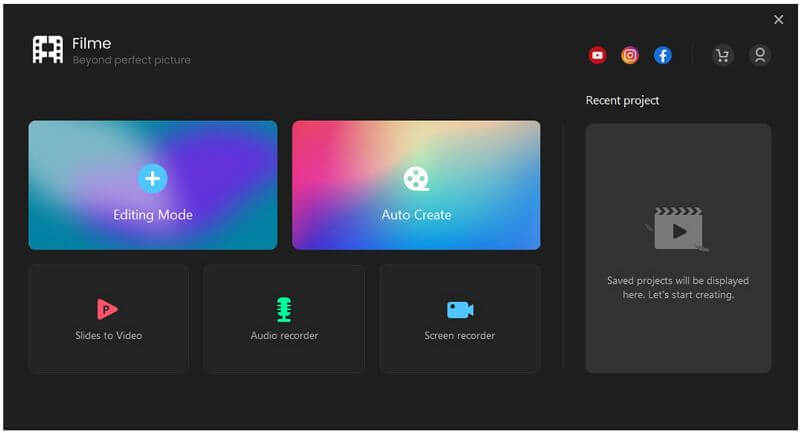
Step 2: Create a New Project
You need to create a new project. Go to File > New Project. Select the aspect ratio of your video.
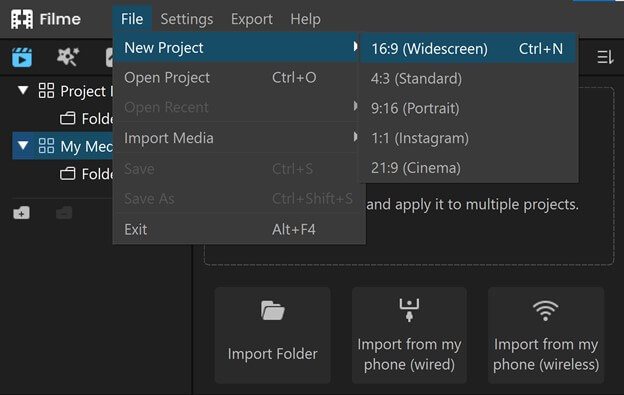
Step 3: Import Media
Now, you need to import the media that you want to edit. You can import videos from the Media menu. It can be multiple videos and audio. However, you can also drag and drop media in the project.
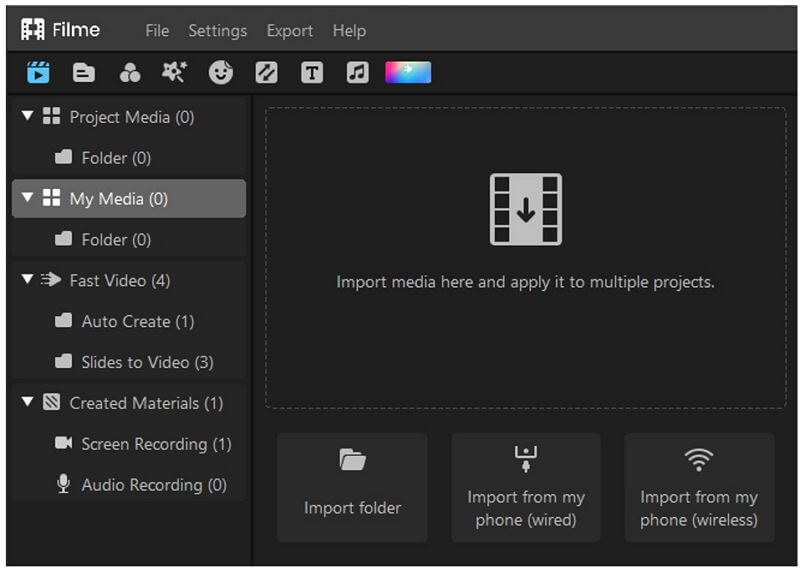
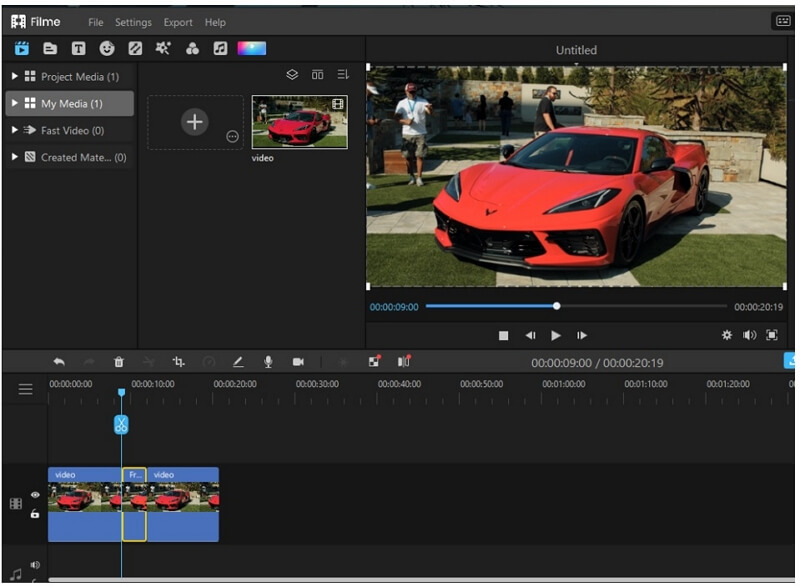
Step 4: Select the Frame
Drag the imported video on the editing timeline. Using the playhead, select the frame that you want to freeze.
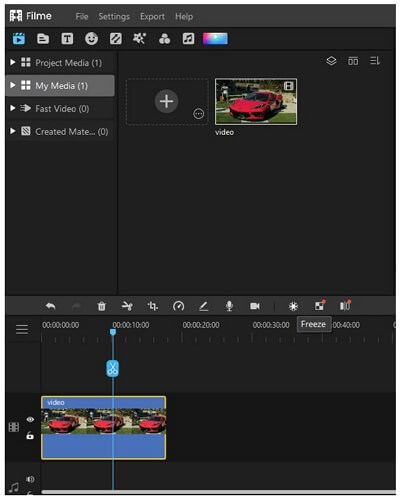
Step 5: Adjust the Duration
Once you have selected the frame, you will see a snow icon just above the timeline. Click that icon to freeze the frame. You can also adjust the freeze-frame slider to adjust the duration of the freeze-frame.
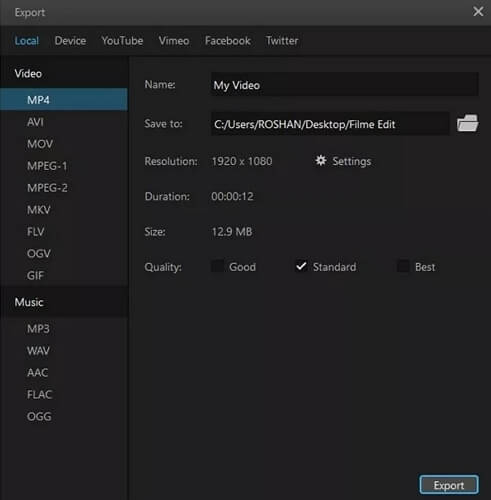
Step 6: Export the Video
If you are satisfied with the video, click on Export and choose the settings for the video.
Also Read:
Detach Audio from Video on iMovie >>
| Adobe After Effects | iMyFone Filme |
|---|---|
| File Size | |
| After Effects is pretty large and would take a lot of time to download. | iMyFone Filme is much smaller than After Effects and can be downloaded within a minute. |
| Freeze Frame Effect | |
| The freeze-frame requires many steps, and it is a little complex with After Effects. | Freeze frame is just a click away with iMyFone Filme. |
| Compatibility | |
| It is compatible with both Windows and Mac. It is a paid tool. | iMyFone Filme is also a paid tool and available on both Windows and Mac; however, it is inexpensive. |
Conclusion
Adobe After Effect is a perfect video editing tool that helps the user to freeze-frame in a video. However, it is much more complex than other video editing tools. iMyFone Filme, on the other hand, is the simplest video editing tool, and you can freeze-frame in just a click.


