Many people want to know about Dropbox automatic slideshow system but they don't know how to do it. In this article, we are going to show you how to make a slideshow with Dropbox photos in a step by step guideline. So there is no need to panic. Also we will provide you an alternative tool for making a slideshow easily instead of using Dropbox.
Part 1: How to Make a Slideshow on Dropbox
Dropbox has a very simple way to create basic slideshow without any hassle. If you just consider Dropbox as simple cloud storage, then this part will shock you. With using proper steps, creating a photo slideshow is easier than ever. Here are the simple steps creating a basic slideshow from Dropbox in a Windows computer –
Step 1: First you need to open Dropbox from your browser or simply open the Dropbox app on your Windows PC. Then login to Dropbox using your account credentials.
Step 2: Now from the left side menu bar of Dropbox, click on the "Paper" option to proceed. Then click on the "Create Paper doc" button.
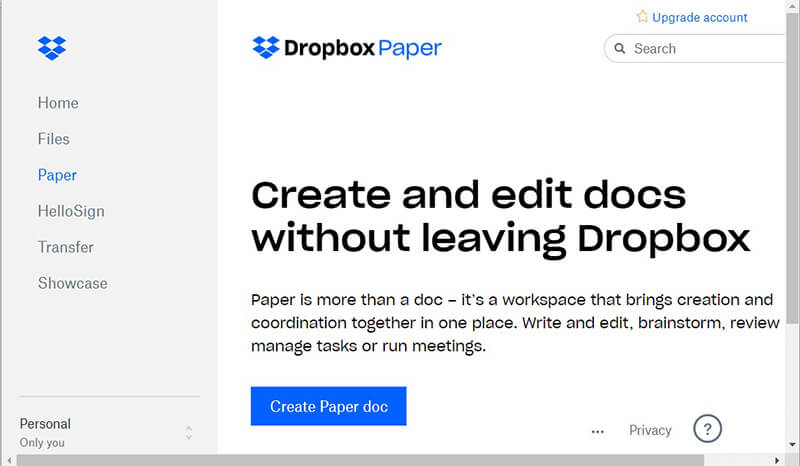
Step 3: Next you need to type in a title for your Dropbox slideshow.

Step 4: After that click on the "+" button and select the image button to add images into the document. You can also directly drag and drop images into the document. Another way is, selecting the "Dropbox" button to add photos from your Dropbox storage. You can add captions into the images by clicking under them easily. After adding photos, you can easily arrange them as well.

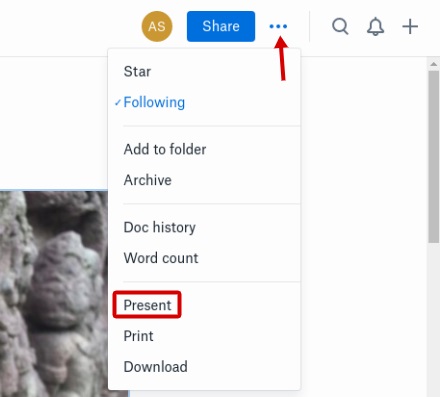
Step 5: After you have arranged the photos according your needs and added captions, you can simply click on the three-dot "…" button at the top right corner of the window to open the more menu.
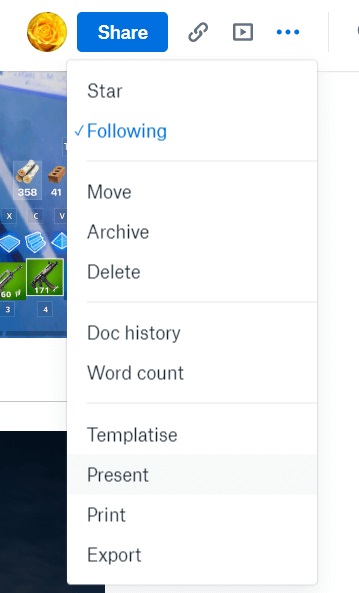
Step 6: Then click on "Present" which will open a new tab in your browser with the slideshow you just created on Dropbox. You can view it full screen by using the double headed arrow icon. You can also use the "Dark Mode" here. You can also use the "Share" option to share the slideshow with other people via email.
Part 2: Recommended Slideshow Maker for Dropbox
There are many other alternative ways for creating much better and cool slideshow easily. If you want use to recommend you the best way for making a slideshow, then iMyFone Filme is a must use recommended tool by us as a slideshow maker for Dropbox photos. It's a powerful video editing software with great slideshow creating features that will help you to make better slideshows easily. With all its attractive features, minimal interface and easy to handle process, Filme can be a great tool for any newbie or expert user to create awesome slideshows.
Key Features:
-
It has fast and pro editing options to make creative videos easily.
-
It has "Fast Video Mode" to create slideshow easily and fast without any hassle.
-
It has various template suggestions that you can use while making your slideshow or video.
-
It can help you do basic video editing without any issue.
-
It allows users to add cool effects into videos for making them look more beautiful and attractive.
Detailed Steps for Creating a Quick but Fancy Slideshow with Filme:
Step 1: Import Photos
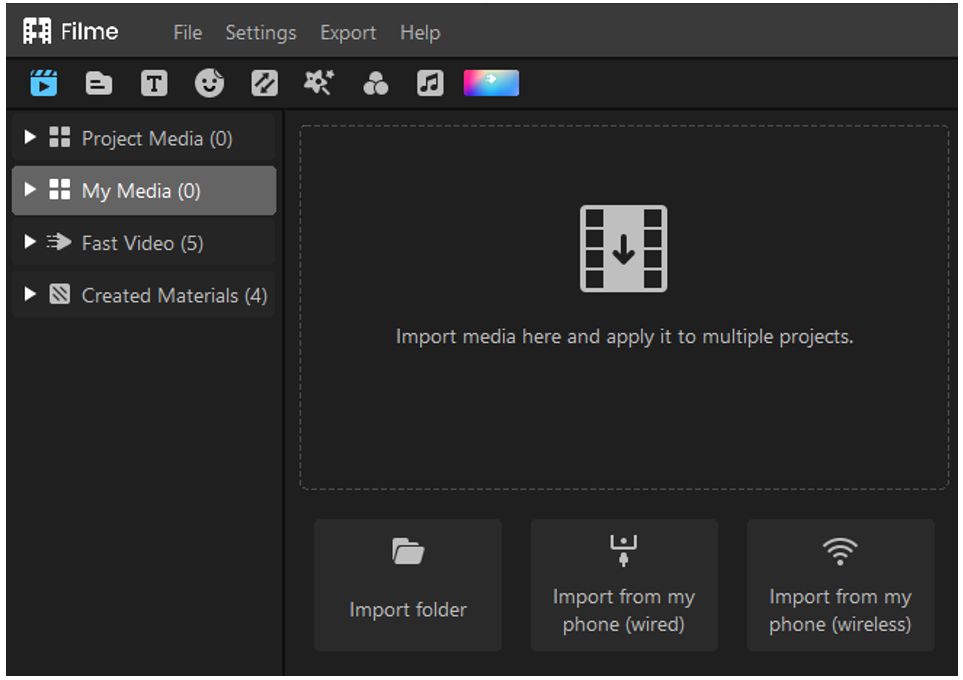
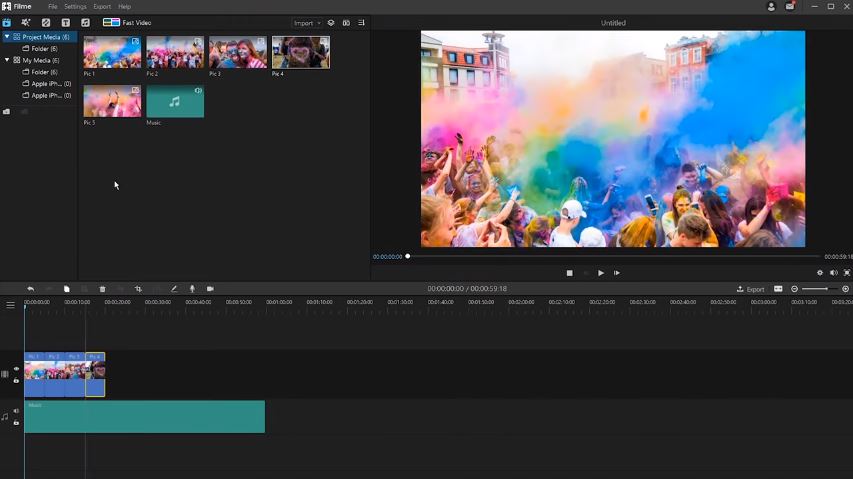
Download and install Filme on your computer. Then you need to start the software and get to the home interface. Next you need to import the necessary photos to the "Media Library" by clicking on the media importing option like below image. This will help you start the slideshow creation process. You can also drag and drop images into the media importing option to import file.
Step 2: Drag Photos to Timeline
Next you can easily drag and drop the photos into the video editing timeline. Here you can easily adjust the duration of each photo for the slideshow as needed.
Step 3: Edit Photos
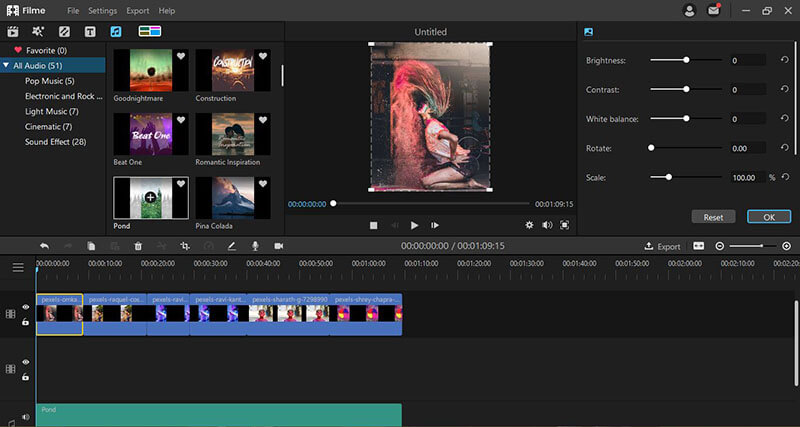
After that, you can adjust the contrast, white balance, photo brightness etc. from the editing window on the right side. To open this editing window, double click on the photo timeline and you'll get a new window opened beside the video preview window. A lot of options will be available for you here to tweak the photos. You can also use the "Crop" and "Pan and Zoom" features for each photo you have added into the timeline. You can also use various filters and effects, texts, transitions, stickers or other elements to make your slideshow look more brilliant and attractive.
Step 4: Export Video
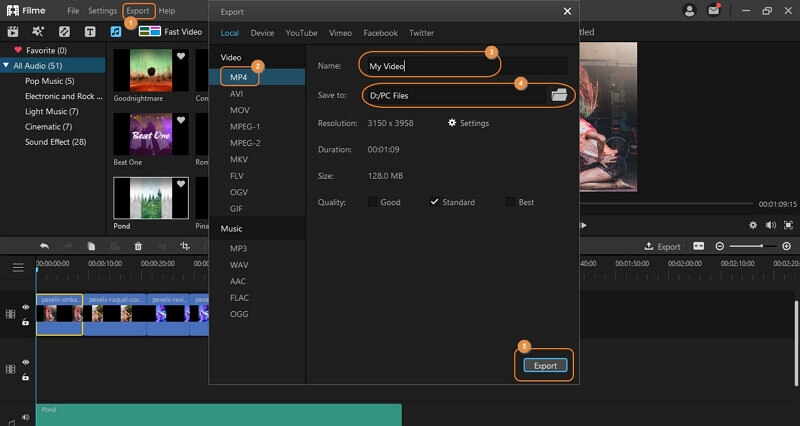
Finally you can easily export the video as a video file by clicking on the "Export" button at the top menu bar. Then select "Export Video" and a new window will open. Here you need to select "MP4" option under "Video" tab. Then rename the video, select output folder and click on the "Export" button from the right corner below this window to confirm the export.
Also Read:
Latest Guide for Making a Slideshow Video on Mobile Phone [Android & iPhone]
Make a Slideshow on TikTok - A Complete Guide
Part 3: Practical Tips for Good Slideshow on Dropbox
After getting the full step by step guideline, still a lot of people can make simple mistakes or forget something crucial while making a slideshow of Dropbox photos. So in order to make you understand this Dropbox slideshow making process clearly, we will provide you a few practical tips for using Dropbox to make a slideshow. These tips will help you keep a few things in mind so that you can use the Dropbox automatic slideshow option without any problem.
- Make sure that you keep the photos in an orderly way. If you don't put them into the document in a proper order then your slideshow making process will fail and you won't have a successful result in the end.
- Dropbox doesn't offer too many options while creating a slideshow. Thought the slideshow making feature is easy to use but Dropbox can only offer some basic moves for making a quick slideshow when needed.
- Make sure to add captions under each photo if you want to create a good quality slideshow. Without captions, it's just a normal photo slideshow that doesn't have any significant purpose of making people understand what the slideshow really mean.
- You must have the photos ready before creating the slideshow. The photos you use into the slideshow must be good quality otherwise you won't have a good quality slideshow in the end. So make sure that the photos are high quality images that don't need any additional editing before using them in a slideshow.
Conclusion:
In the end, there is nothing more to add into this guideline article that is going to make things easier to create a slideshow on Dropbox . With the help of the guideline from this article, you'll become a pro level slideshow maker and you won't have any doubts about how to make a slideshow with Dropbox photos. Still if you want to go with our recommendation and create brilliant slideshows instead of basic ones that hardly do the job, you should start using iMyFone Filme. It's the most useful and creative tool that can help you bring out your own creativity when needed.

iMyFone Filme
20+ Fast Video Templates/110+ Transitions for Slideshow
Download Now


