Recording Zoom meetings comes with many huge benefits. It allows you to save meeting content for easier note-taking after the meeting ends, rehash the project details, and share the content with your teammates.
Unfortunately, the recording process can be a challenge if you do not know how to record a video on Zoom properly. This guide will provide you with all the tips you need to record, save, share, and access all your Zoom meetings.
Part 1: How to Record a Zoom Meeting without Permission
As we have already stated, there are two ways of recording Zoom meetings. The first method allows you to use the in-built Zoom feature while the second method allows you to use a third-party tool.
That means you will have to opt for choose better screen recorder if you are denied the recording permission. Here are the steps to follow when recording with or without permission.
Can I Record a Zoom Meeting without Permission?
Can I record a Zoom meeting without permission? This is among the commonly asked questions. The good news is that you can do that easily. The following is a quick way of recording zoom meetings without permission with help of iMyFone Filme. It only takes a few simple steps.
2. Steps to Record a Zoom Meeting without Permission
Step 1: Launch iMyFone Filme on Your Device
Install iMyFone Filme and launch it on your device. Move to File >> New Project and choose the aspect ratio you want for your video recording.

Bonus Tips:
Create an Awesome Retirement Slideshow with Faster Tools
Special offer that can free try the resoureces for paid. Download it for trying it out!
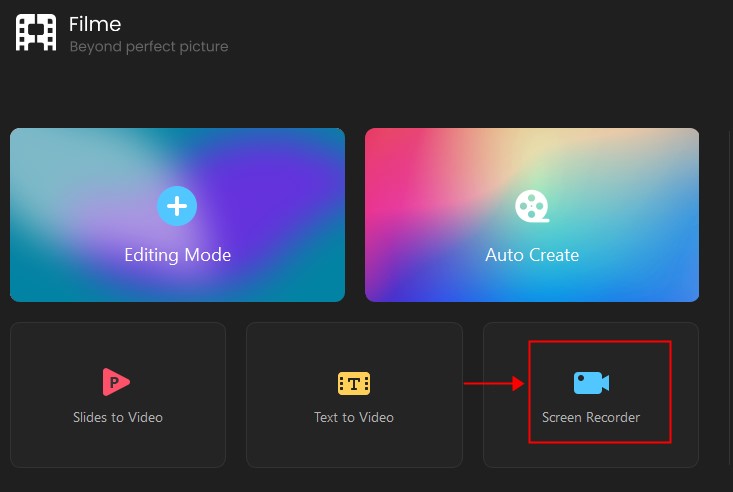
Step 2: Click on the Screen Recording Button
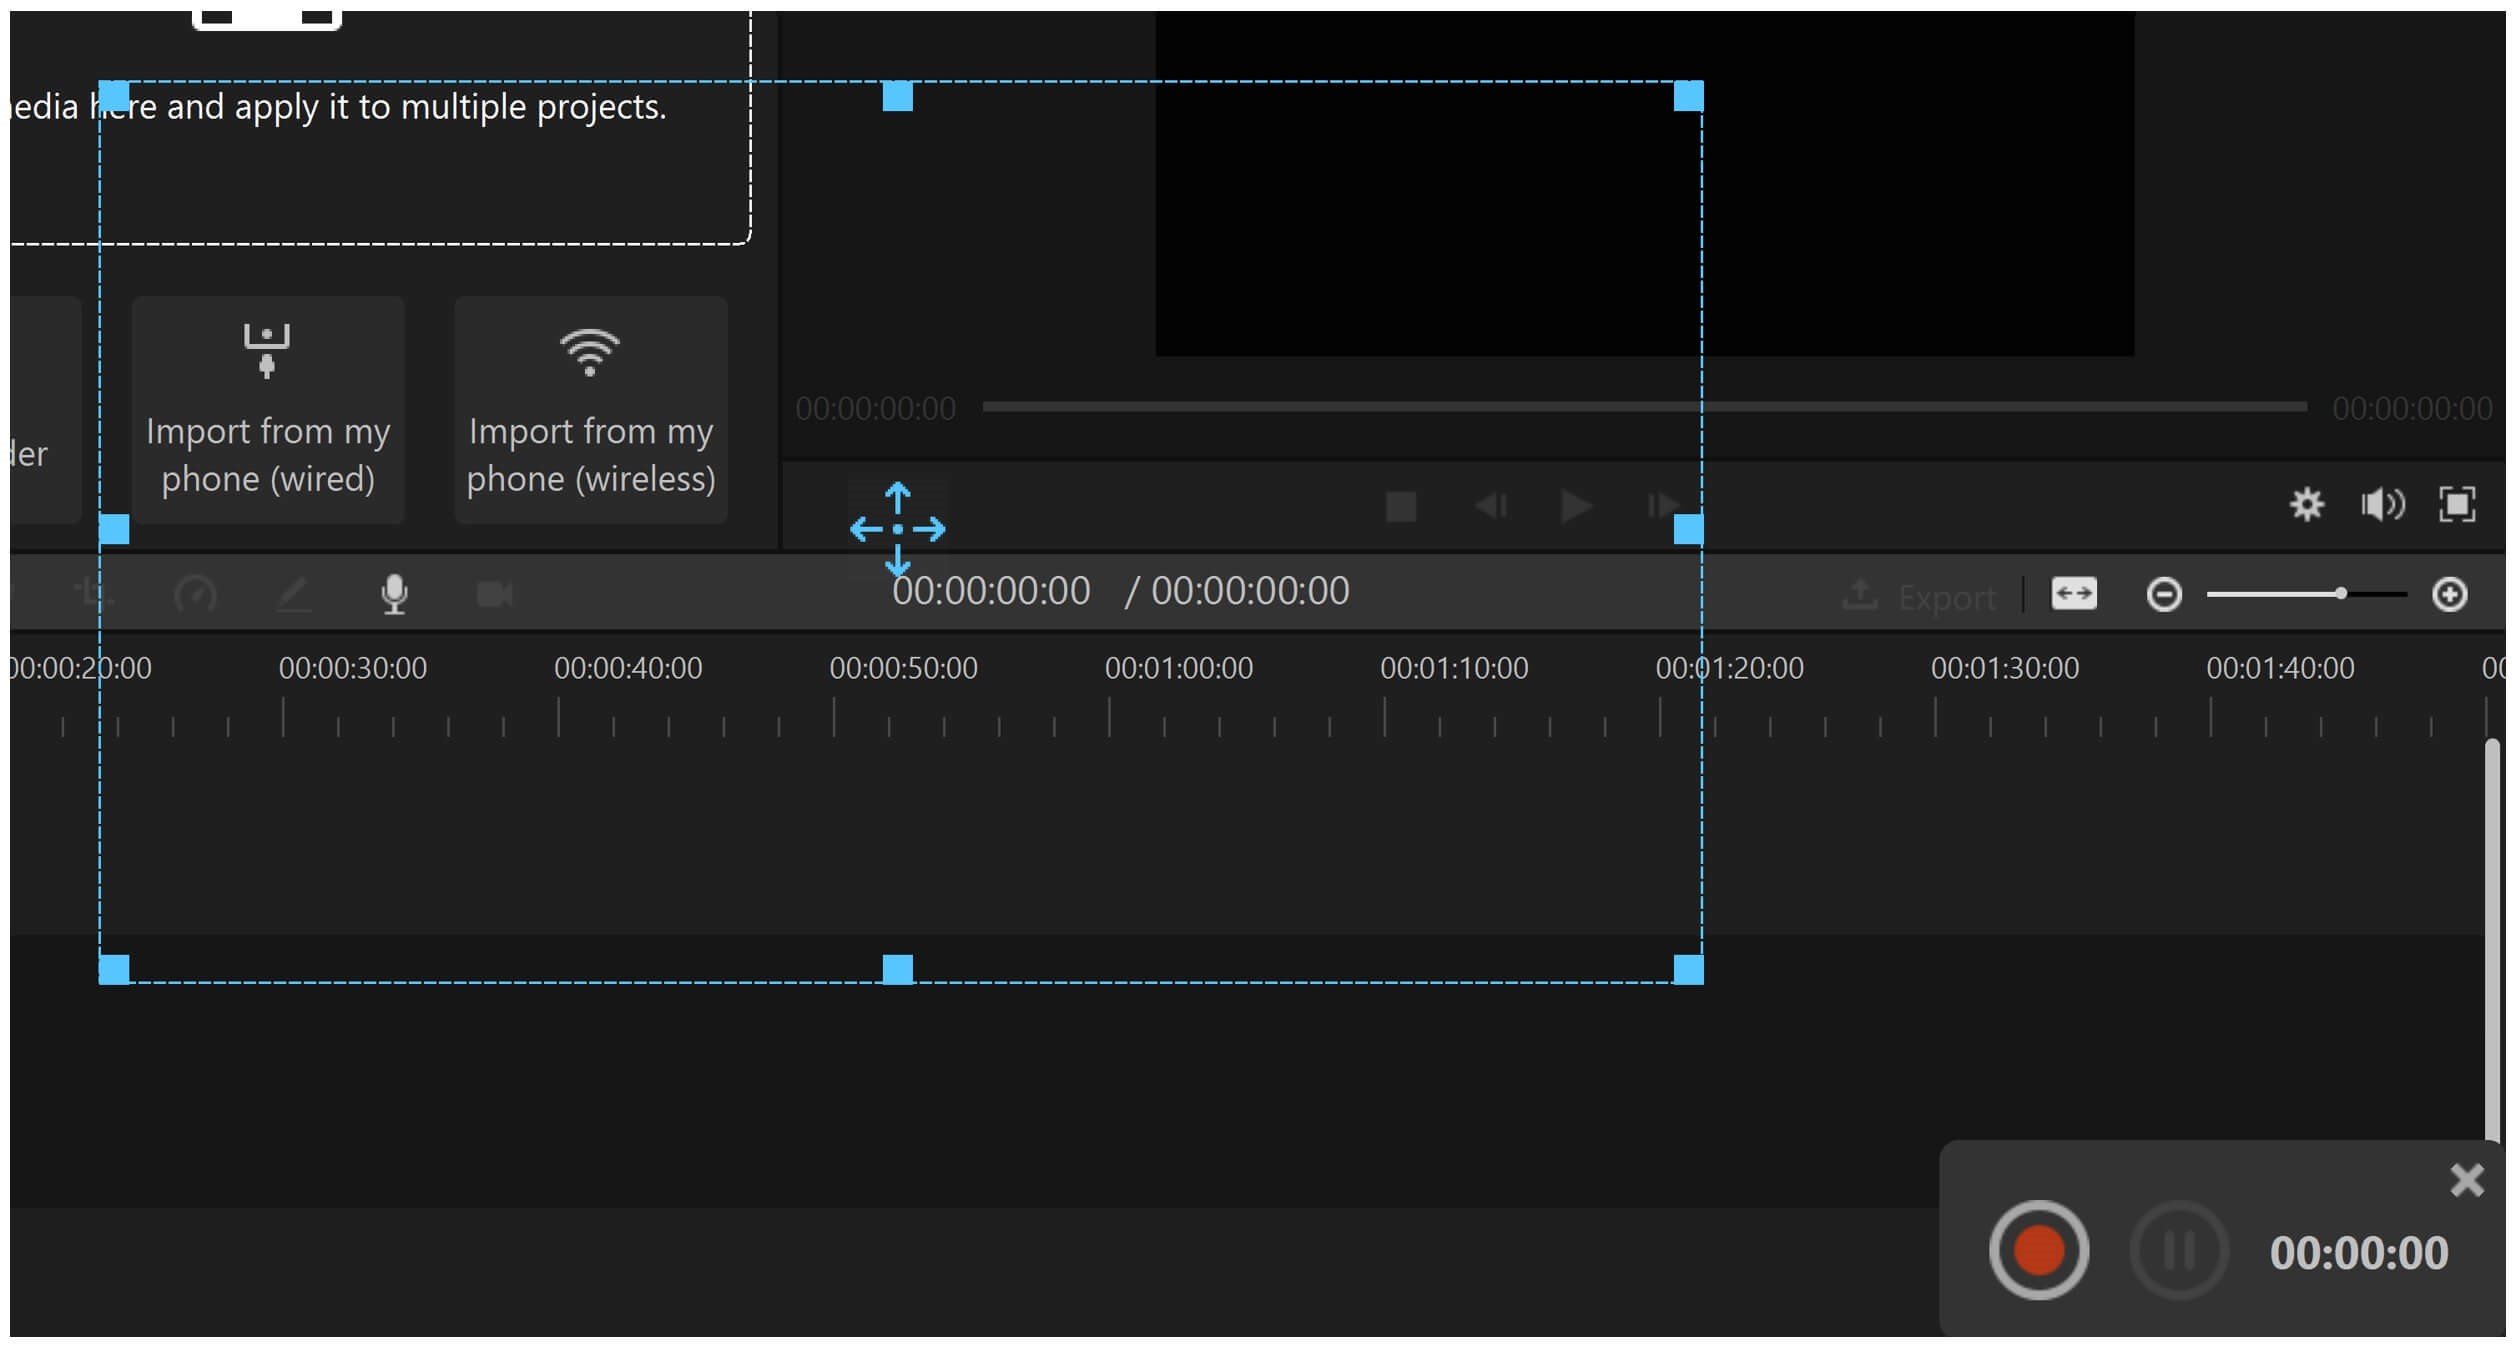
Launch the Zoom meeting and choose the "Screen Recorder" button on iMyFone Filme to start the recording. A rectangle will appear on your computer screen. Adjust it to match the size of the part you want to record.
Step 3: Click on the Start Button
The recording controls will appear at the right side bottom corner. Click on the start button to start the recording. Use the same controls to end the recording.
Step 4: Drag the Recorded Video to the Timeline
Move to the Project Media and drag the recorded video to the timeline. You can make the necessary changes such as trimming the video, adding effects, stickers, transitions, music, text, and images.
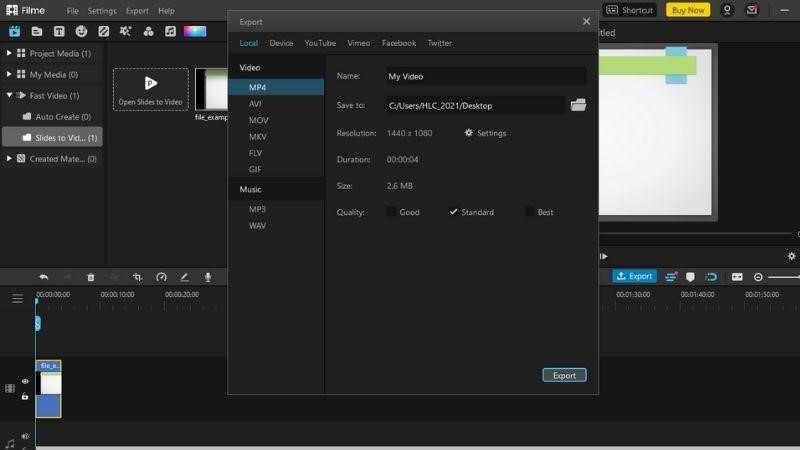
Step 5: Preview and Export the Video
To preview the video and share it or store it on your computer, click on the "Export" button. Choose the settings you need for the video before exporting it. If you are wondering how to convert file to MP4, this tool will help you do that.
Part 2: How to Record a Zoom Meeting on Your Laptop
Here is how to record Zoom meetings using the desktop Zoom app. If you are not the host, you have to request recording permission from the host.
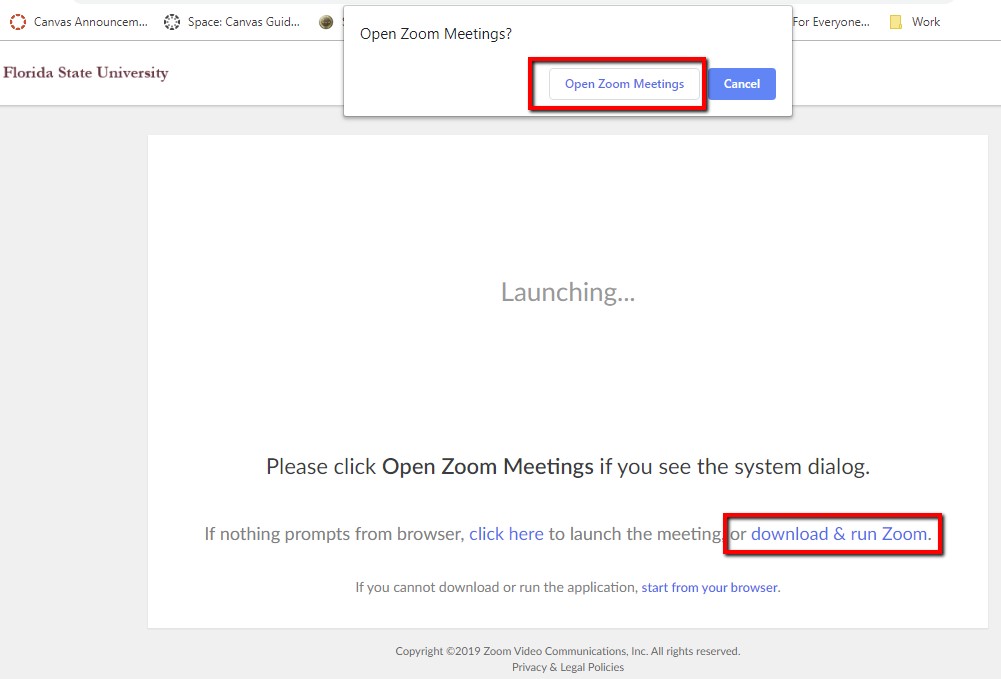
Step 1: Start a Zoom Meeting
Open the Zoom application and start a new meeting. Alternatively, you can hit the Command + Control + V buttons to launch the meeting.
Step 2: Click on the Record Button
Find the "Record" button situated at the bottom of your computer screen. You can also use the Alt + R (Command + Shift + R for mac devices). A small recording mark will appear on the upper-left part of your computer screen indicating that the recording session is in progress.
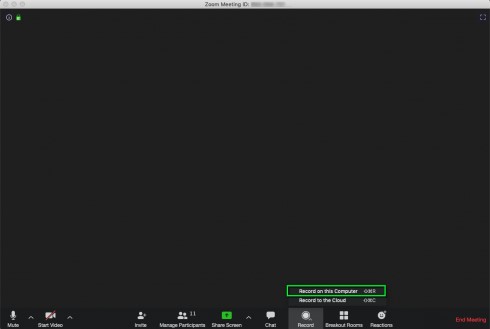
For paid users, Zoom offers the option of starting a Cloud or a local recording.
Step 3: Use Pause or Stop Buttons
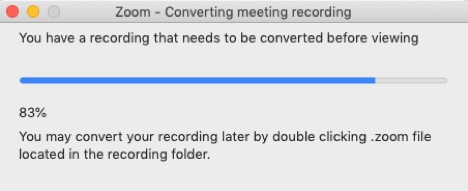
Zoom offers "Pause" and "Stop" buttons to allow users to control the recording sessions. You can use them to pause or stop a recording session at any time. Use Alt + P or Command + Shift + P shortcut key combination to pause the recording or Alt + R or Command + Shift + R to end the recording.
People Who Liked this Content Also Liked
The Definitive Solution for Where to Find Zoom Recording >>
How to Record Yourself and Screen on Zoom-Don't Need to Be the Host >>
How to Convert Zoom Recording to MP4 Quickly >>
Part 3: How to Record a Zoom Meeting on Your Phone
If you are a paid user, you can record meetings easily on your Zoom app. Zoom will save all your recordings on the cloud and you can access them at any time. Here are the steps to follow.
Step 1: Launch the Zoom Meeting and Choose Record
Locate the three dots situated on the bottom-right corner of your screen and tap on them. Select "Record" if you are an Android user or "Record to the Cloud" if you are an iOS user. A recording icon will pop up on the top-right corner.

Step 2: Use the Recording Icon to Control the Recording
Zoom offers a recording icon to allow users to pause or stop the recording at any time. Tap on it when pausing the meeting recording or stopping it is necessary.
Zoom will save the phone recordings in the cloud. To find them, move to the "Meetings" tab on your desktop zoom app or on "My Recordings" on the Zoom website.
Part 4: How to Share Recording Meeting
When using Zoom Local Recording, you will have to locate the video file and upload it to your popular platform for sharing. Here is how to do it.
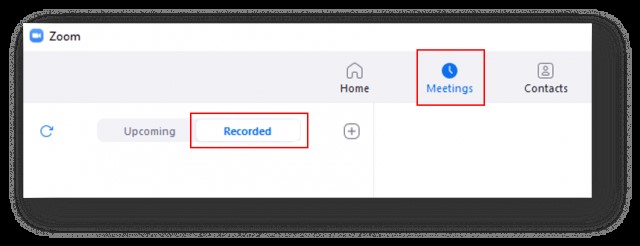
Step 1: Find the Meeting Recording to Share
To find your meeting recordings through the Zoom client, go to Meetings on your desktop computer and click on the "Recorded" tab.
Step 2: Click Open
Choose the meeting you would to share and click the "Open" button to access the folder that holds it.
Step 3: Upload the Recording to Cloud Storage
Upload your MP4 file to a video streaming site like YouTube, Google Drive, or Dropbox. You can also save it on cloud storage.
Step 4: Add Password Protection
Ensure that the video is stored in a private folder or unshared. Add password protection and share the link with your colleagues.
Part 5: How to Share a Zoom Cloud Recording
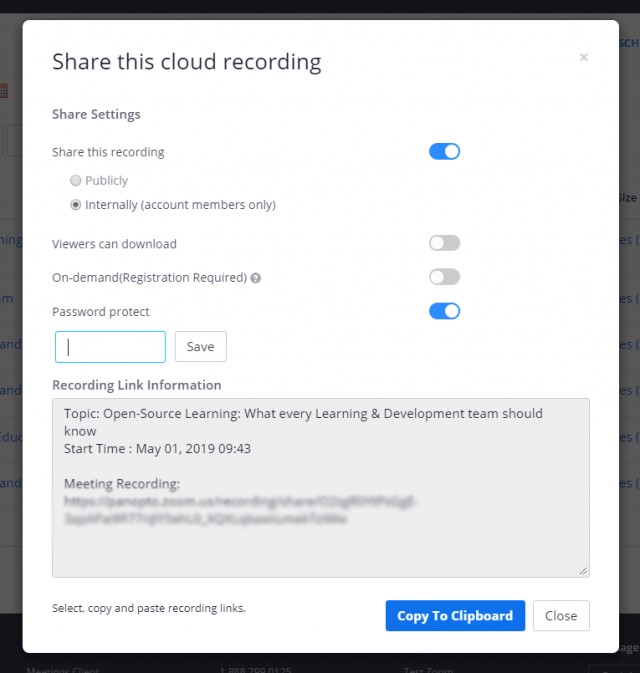
If you have a Zoom subscription, which includes Cloud Recording, then you can skip the upload step and share the recording directly from your Zoom cloud. Here is how to do it.
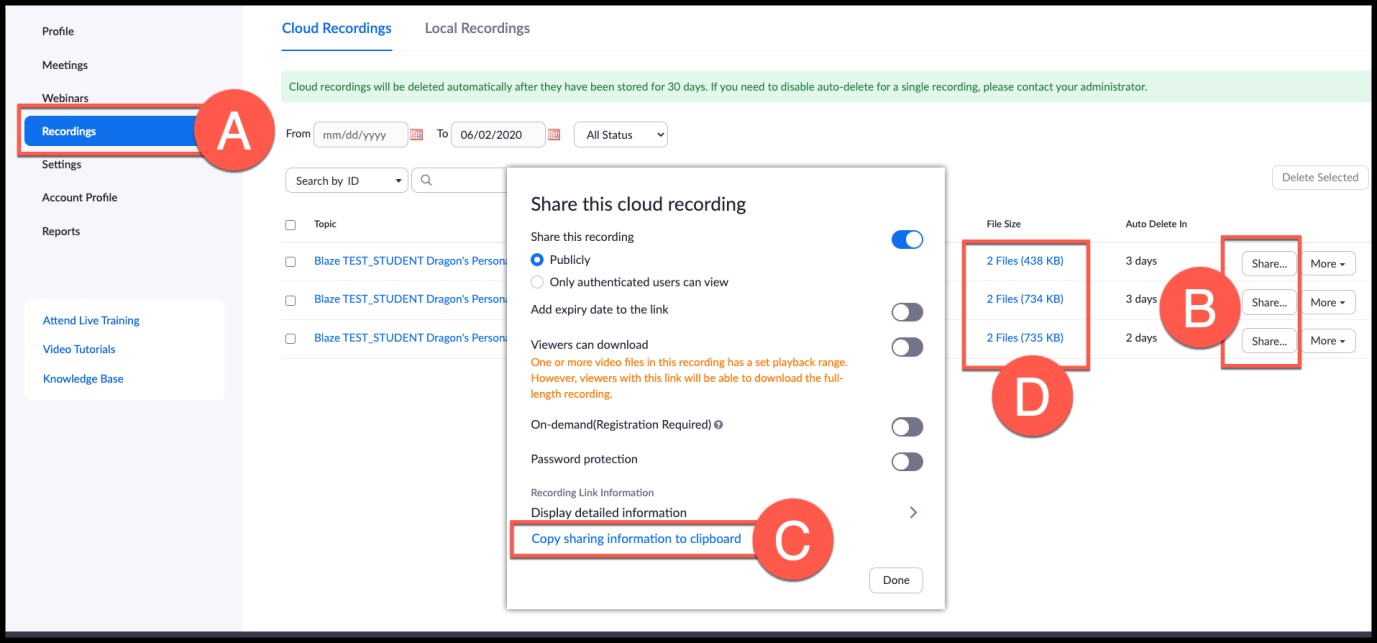
Step 1: Choose Recordings
Open your Zoom account and choose "Recordings" from the right-hand side of your computer screen.
Step 2: Click Share
Click on the "Share" button situated next to the video you want to share. Click on the "Internally" button if you do not want the video to be available publicly. Add a password for extra protection.
Step 3: Send by Email or Corporate Messaging App
Copy the recording link and paste it into your email or messaging app. Share it with your colleagues.
Conclusion
The ability to record Zoom meetings with or without the host's permission comes with many benefits. The internet offers many free tools to allow recording of meetings when you are denied recording permission and iMyFone Filme is among the best. This guide will help you use the Zoom recording feature and iMyFone Filme to record any meeting.


