QuickTime Player is a built-in media player and recorder for all Mac users that allows users to record screen for both iPhone and Mac with great ease. Nothing is more irritating when this app stops functioning in the middle of an important task.
If you're having this issue, then worry not. Read this article till the end to learn about how to fix the QuickTime not recording audio quickly and make it work normally again.

Why QuickTime Not Recording Audio?
It is difficult to pinpoint the reasons why QuickTime screen recording no audio but experts believe any of the below issues could be the culprit:
A temporary glitch in your Mac or QuickTime player that hinders QuickTime to record your voice.
You're using an older or outdated version of QuickTime which is causing the compatibility issues with Mac and thus, cannot record voice.
Mac has restricted QuickTime player from using the system's microphone. You can confirm the System preferences.
The built-in microphone is not selected as the default audio input device in QuickTime settings.
Note that more than one of the above reasons could be at play for causing QuickTime audio error.
How to Fix QuickTime Not Recording Audio?
We have compiled the tested-and-tried methods to help you troubleshoot the QuickTime not recording audio error – no matter the reason why you're facing it in the first place. Implement the below methods and at least one of them will get the job done for you.
1. Update QuickTime
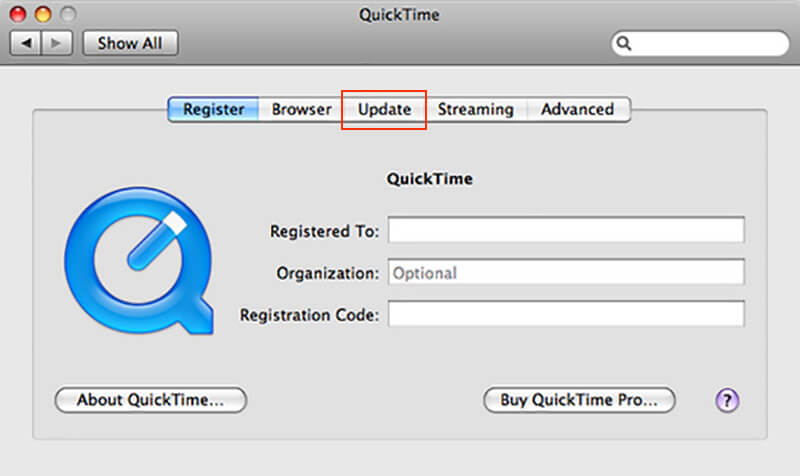
First things first, start by updating the QuickTime app on your Mac. Apple regularly provides updates for all its products/services to let users automatically troubleshoot minor issues like QuickTime audio recording not working.
Similarly, many a time, a minor bug interrupts the normal working of QuickTime and the easiest way to get rid of it is by installing the latest updates, if available. To update QuickTime:
Launch QuickTime on your Mac and navigate to QuickTime Player › Update Existing Software.
If any updates are available, install them right away. Then, restart your computer and try recording audio again to check if the issue persists.
2. Check Preferences
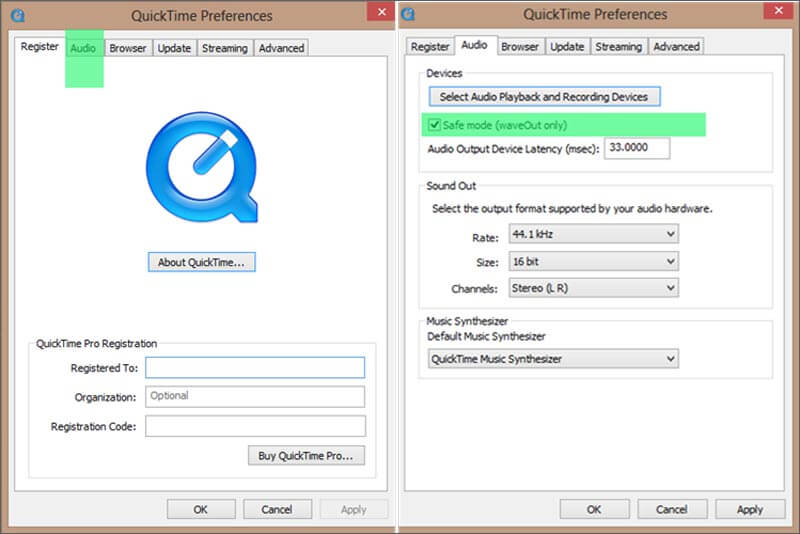
Many users have claimed that adjusting the Preferences Settings of the QuickTime app can fix the sound issue. Here's how you set the preferences to fix QuickTime not recording audio issues:
Launch QuickTime Player on your Mac and hit the Edit option on the top bar.
Now, select the Preferences option to enter the Preferences window.
Here, open the Audio tab, find the Safe mode (waveOut only), and tick in the box in front of it.
Hit on Apply to save the settings. Then, exit the app and relaunch it and confirm if the issue is fixed or not.
3. Check Microphone Settings
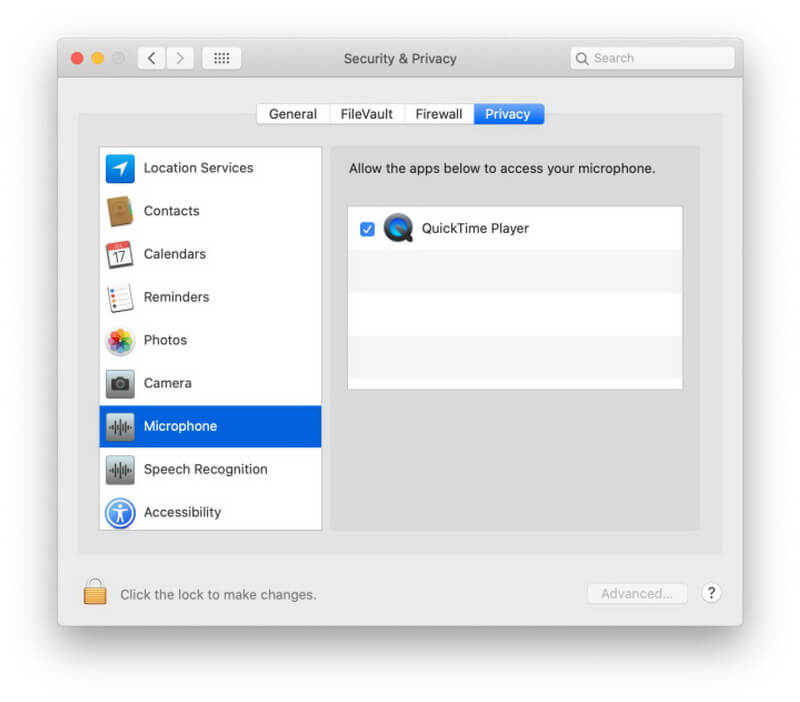
Sometimes, Mac bars QuickTime from using the microphone. If you're facing QuickTime screen recording no audio error, confirm if the app has permission to use Mac's microphone. To do that:
Hit on the Apple logo at the top-left tab and navigate to System Preferences > Security & Privacy > Privacy.
Select the Microphone option and the system will show all the apps that have permission to use your microphone. Make sure QuickTime is displayed in the right window.
If it's not present, hit on the bottom-left corner, enter your password, and add QuickTime to the list.
Finally, restart your Mac and try to record again.
4. Modify QuickTime Settings
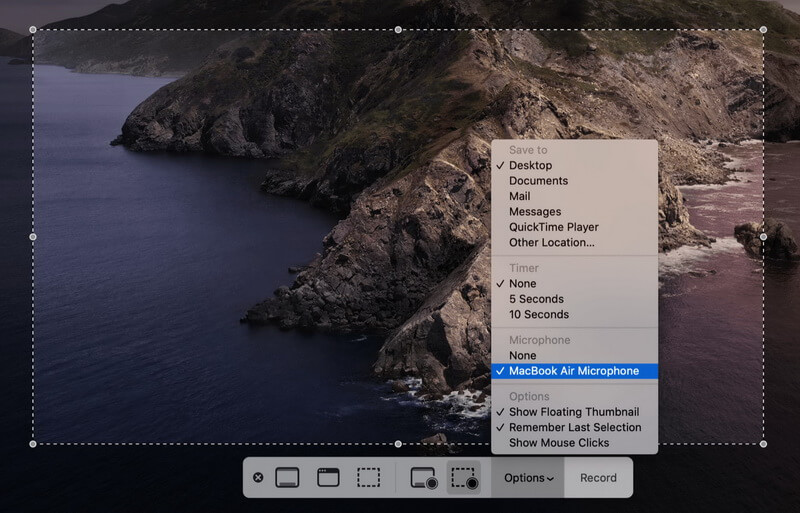
The built-in microphone of your Mac may not be selected as the default audio input device of QuickTime. In such a case, users have to manually select Mac's microphone to record their voice in QuickTime.
Follow to below steps to check and modify the QuickTime audio settings.
On the QuickTime screen, hit on Options and change it from "None" to "MacBook Air Microphone" (or Built-in Microphone).
The program will now record the audio.
Also Read:
Record Audio on Google Slides >>
Record Audio on Final Cut Pro >>
Best QuickTime Alternative to Record Screen with Audio - iMyFone Filme
This section will outline three top alternatives to QuickTime to record your desktop screen with audio. Give it a read and decide which one best suits your requirements.
1. iMyFone Filme
When it comes to the best QuickTime alternative, iMyFone Filme is your perfect choice. With this tool installed on your computer, the recording screen with audio is just one click away.
This simple yet feature-rich tool has been the #1 ranked screen and audio recorder for quite some time now. No advanced skills are required to use Filme which makes it a preferable choice for both beginners and professionals.
What's more, it comes preloaded with tons of audio editing features to help users polish the captured audio.
Key Features of Filme
-
Record screen audio in high quality
-
Record real-time audio from both your microphone and external devices
-
Comes with a built-in audio editor
-
Record video screen
-
Offers unlimited video editing effects.
-
Offers keyboard shortcuts or hotkeys for quick functioning
Pros of Filme
 User-friendly and intuitive interface
 Offers tons of exciting audio editing effects
 Exports audio in multiple output formats
 Records microphone and external device simultaneously
Text Guide
Check out yourself how easy it is to record audio using Filme:
Step 1
Once installed, launch iMyFone Filme on your computer.
Step 2
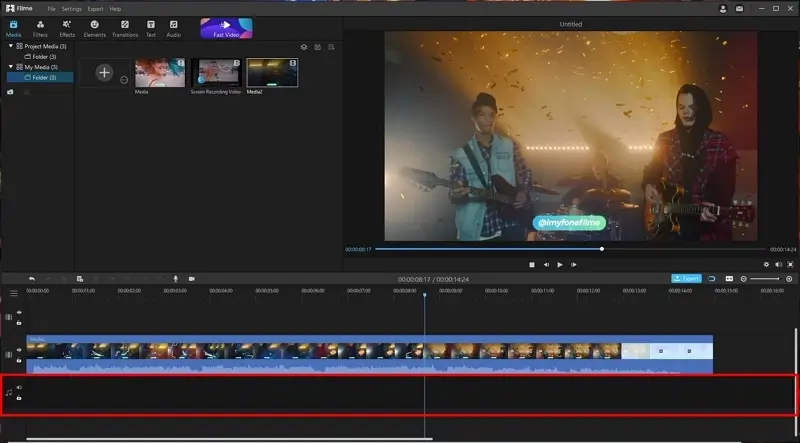
Now, move an audio track into Filme's timeline and click on it to select it.
Step 3
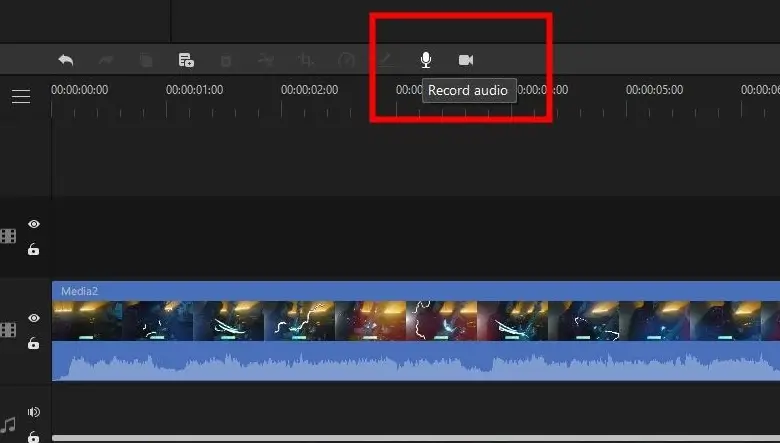
Click on the Record Audio option (microphone icon) as shown in the figure.
Step 4
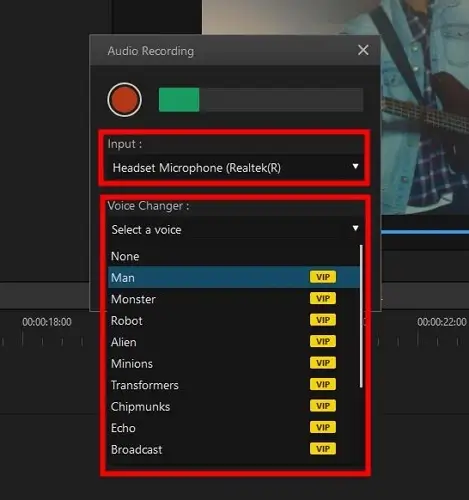
On the pop-up Audio Recording window, set the input to Headset Microphone. You can also choose to record both the sound of the computer and your voice.
Step 5
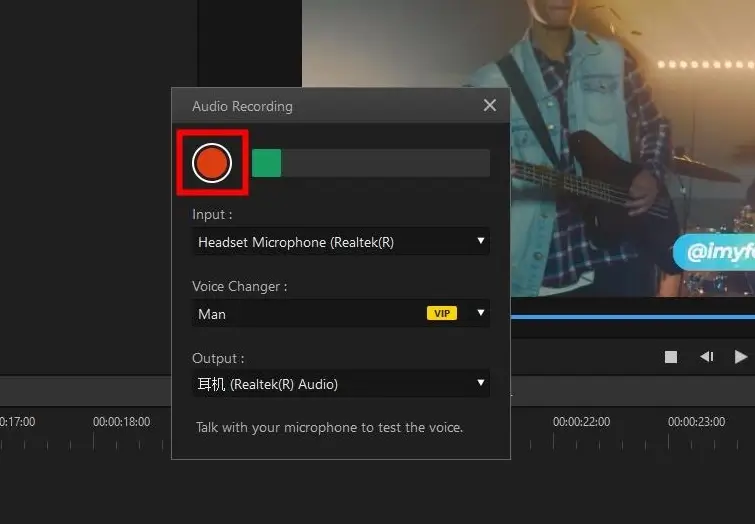
Now, play the audio that you want to record and hit on the Red play button to begin recording discord.
Step 6
When you're done recording, hit on the Stop button and the recorded audio will appear in the timeline. Here, you can trim its length and edit it as you want.
Step 7
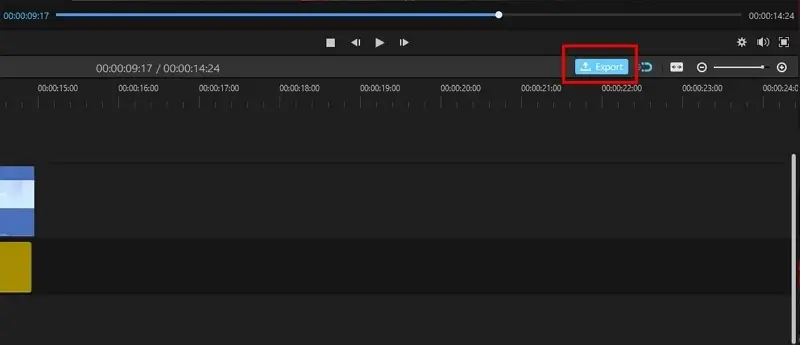
Finally, hit on Export to save it on your computer.
2. Audacity
Audacity is free and open-source software for recording the screen with audio in high quality. Over the years, it has established itself as a top-ranked screen recorder for all operating systems including Windows, macOS, and Linux.
Users can record both computer's microphone and audio from external sources and can export the recordings in multiple formats.

Features of Audacity
Here are the most stellar features of Audacity:
-
Record real-time audio from the screen as well as audio through a microphone or mixer
-
Import Audio from Video Clip
-
Allows multitrack mixing
-
Digitize recordings from other media
Text Guide
Here's how to use Audacity:
Step 1
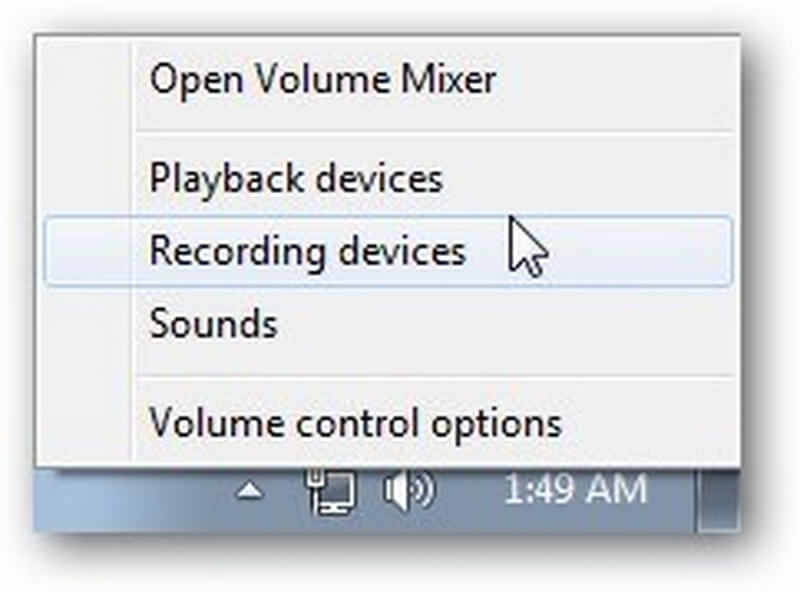
Launch Audacity on your computer and access the "Recording Devices" in the Volume control option.
Step 2
Set Microphone as the default recording device.
Step 3
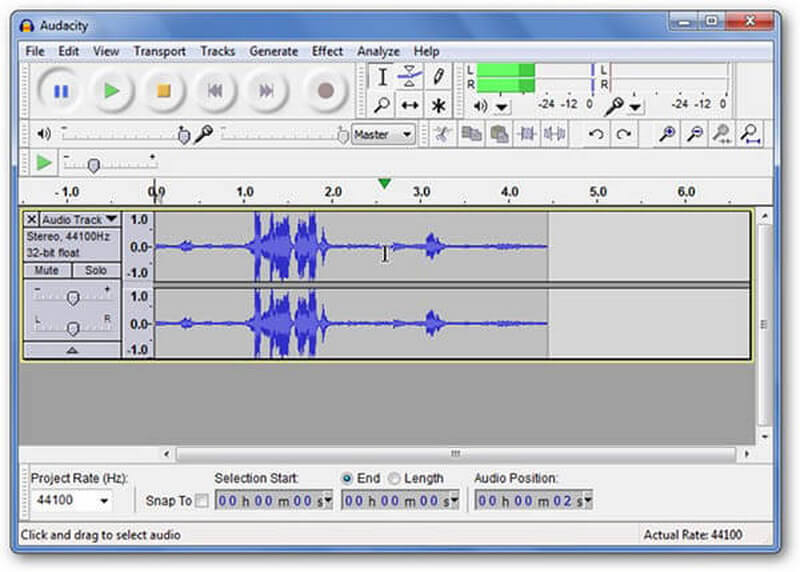
Now, play the audio and hit on the Record button.
Step 4
When you're done recording, go to File > Export, to save the output file.
3. OBS
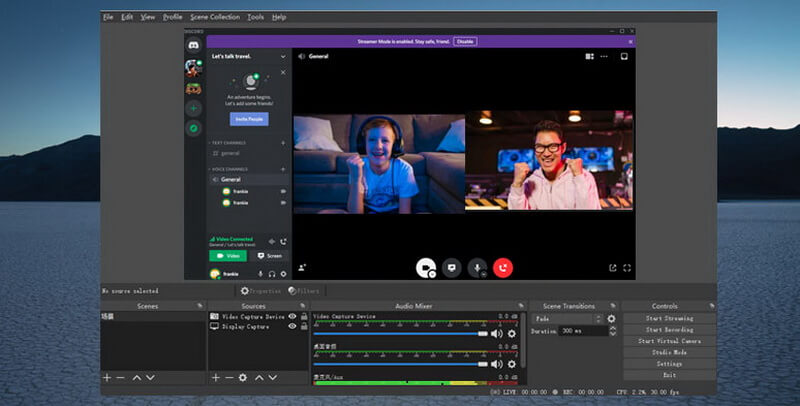
Another highly popular screen recorder that captures both audio and video. OBS is an ideal choice for recording tutorial videos, live streaming, and presentations with audio. Its highlighted aspect is its text to speech feature which transforms any chat into audio.
Key Features of OBS
Below are some of the stellar features that OBS offers to users.
-
Advanced text to speech conversion
-
HD screen capture
-
Real-time video and audio capture
-
Audio and video mixing
-
Video broadcasting to multiple domains
Text Guide
To record audio, follow the below steps:
Step 1
Installing and launch OBS on your computer.
Step 2
From the Home interface, navigate to Settings > Output and choose the Output Mode as Simple.
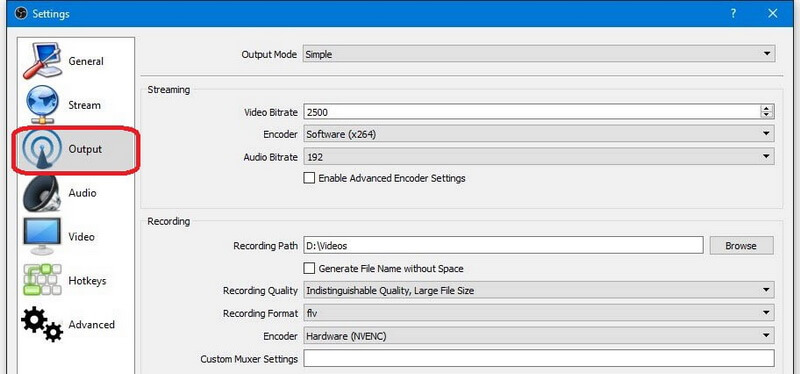
Also, set the Recording Quality as per your requirements.

Step 3
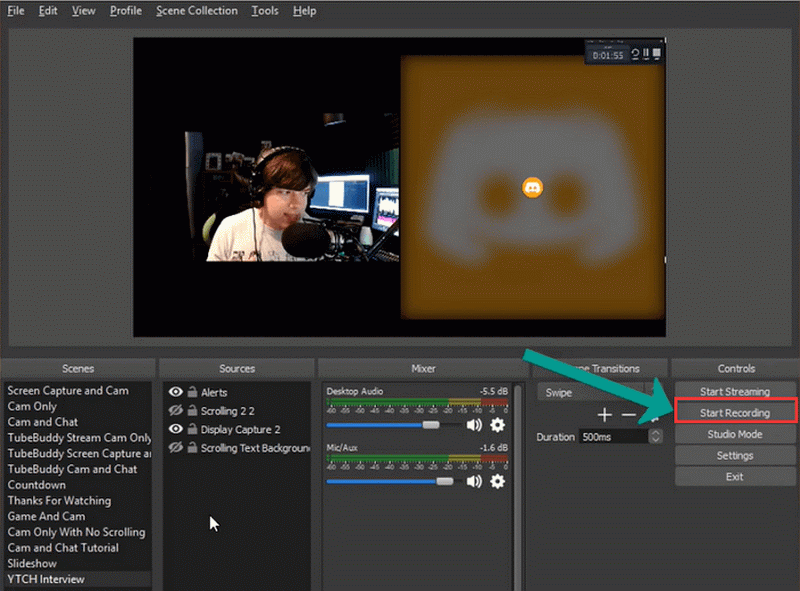
Now, play the discord audio and hit on Start Recording to begin recording it.
Step 4
Click on Stop when you're done. The file will be saved on your computer.
Final Words
To wrap it up, this article has provided a detailed guideline on how to fix the QuickTime not recording audio error. QuickTime is a remarkable app for Mac users to capture the screen – but it also comes across many errors. Hopefully, this guide will help you troubleshoot the QuickTime audio quickly and issue without any hassles.
In case you're still facing the issues, switch to a QuickTime alternative. You can rely on any of the three different screen recorders discussed in this article but we suggest users install the premium version of iMyFone Filme and record their computer's screen with audio.


