One thing that you should know is that volume is a crucial part of any video that you create. I mean, the video can't have blasting volume and then you expect people to watch. It will be super annoying to them, and if the volume is to low, it too will frustrate them a lot, and that means none will want to watch that video. You need to ensure that the volume is balanced, and thankfully, Adobe Premiere Pro allows you to do just that. In fact, there are a number of ways to adjust the volume with this tool – the most straightforward way being using the Effect Controls Panel, which we will discuss in this article.
Part 1. How to Lower Volume/Audio on Premiere Pro
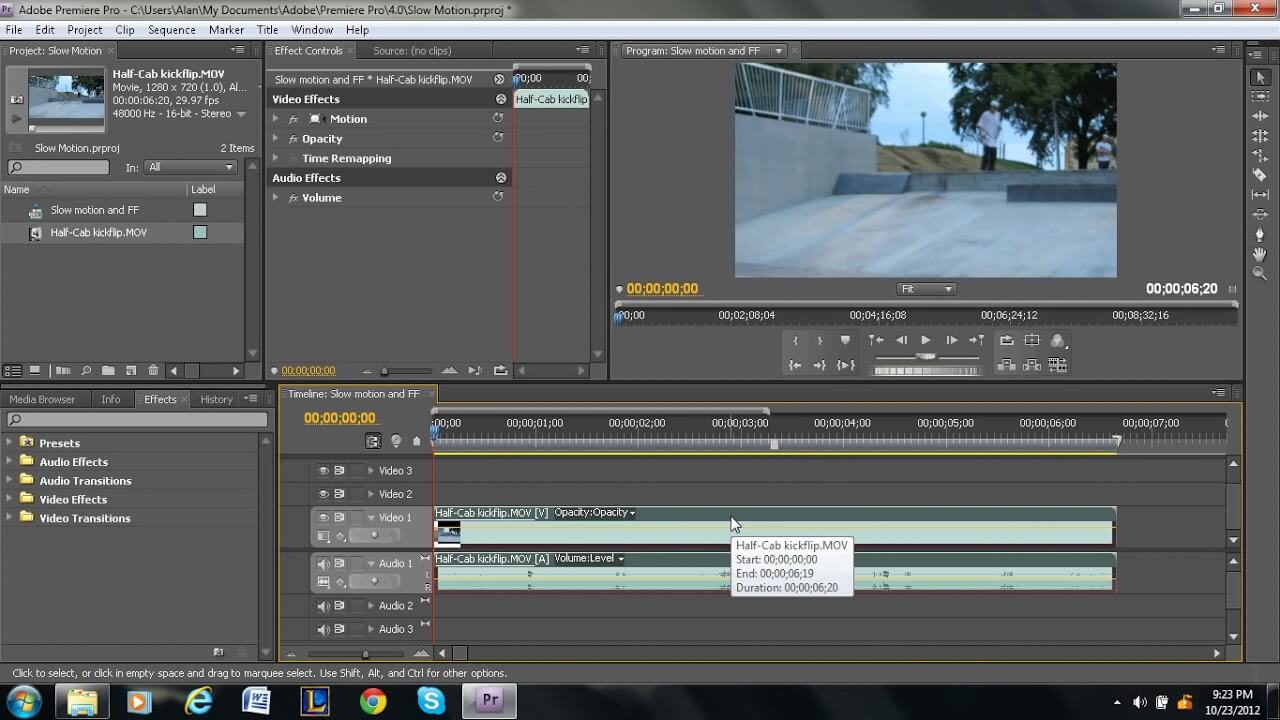
With the effects control panel on premiere pro, you are not only able to add special effects on your video, but it also enables you to adjust the volume on the video to your desired level. It's quite easy to use and navigate. Having said that, here is how you can use it to lower volume in your clip:
Step By Step Guide with Premiere Pro
Step 1: To begin with, upload the clip whose audio you want to lower on the platform, and make sure that you also add it to the timeline.

Step 2: Select the clip on the timeline, and then find the Effects Control Panel, which you will find under the Window Menu. Another way to activate it is to use the keyboard shortcut shift+5.

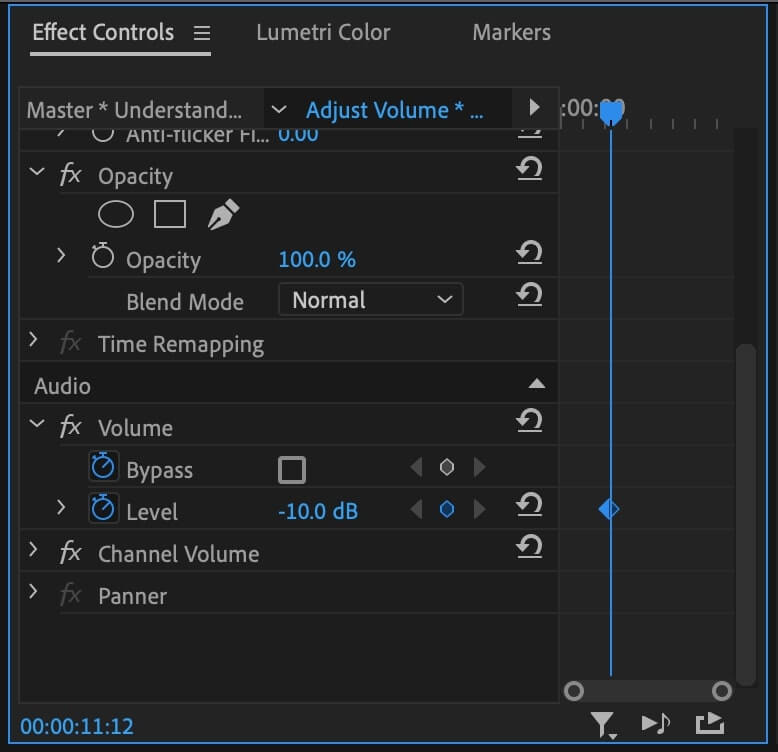
Step 3: Then under the controls panel, find the Level property. Now, by default, the Level property is always at 0.0 decibels (db), which basically means that the volume haven't been touched, and it is as it was when it was originally recorded. To adjust it, you just need to type in the number of decibels you prefer, or you simply click and drag it left or right – depending on what you want to do. Since you want to lower the volume, drag to the negative side, and it will make the audio softer, and if you move to a positive number, you will be increasing the volume.
Stop 4: Once you adjust the volume to the desired level, simply click okay and save the file to your device.
Part 2. Best Alternative Video Editor to Adjust Video Volume - iMyFone Filme
iMyFone Filme is for sure one of the best alternatives when it comes to adjusting the volume in your video, and we will tell you why. Here is the thing, since its introduction into the market, Filme has literary taken the video editing market by stop. It's easy-to-use interface really made it super popular among video editors, especially beginners. Something else that has really set this tool apart is the availability of wide variety of effects that ensures that the resulting video is not only professional, but it is also appealing to watch. Now, one of the factors at play for a video to be appealing and professional is its volume. You need to ensure that the volume is not too loud to be annoying, or too soft that you can't hear anything. Filme enables to adjust the volume in videos with relative ease. In fact, here is a step by step process:
Step 1: Make sure that you have iMyFone Filme on your device. If you don't, download and install. If you have it, then open it.
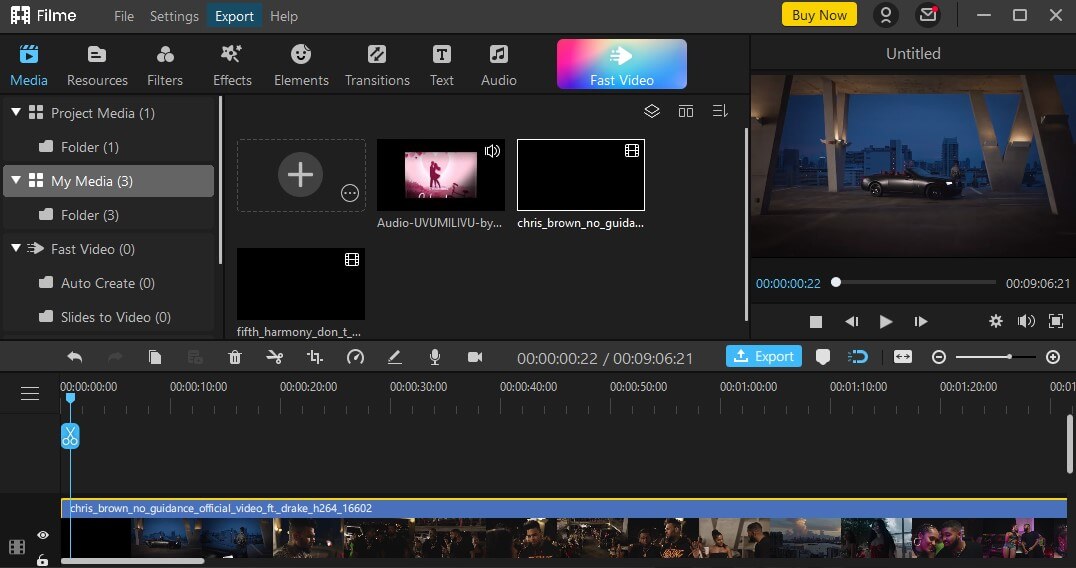
Step 2: Upload the file you seek to lower volume for to the platform. And remember to add it to the timeline from where you do all the editing.

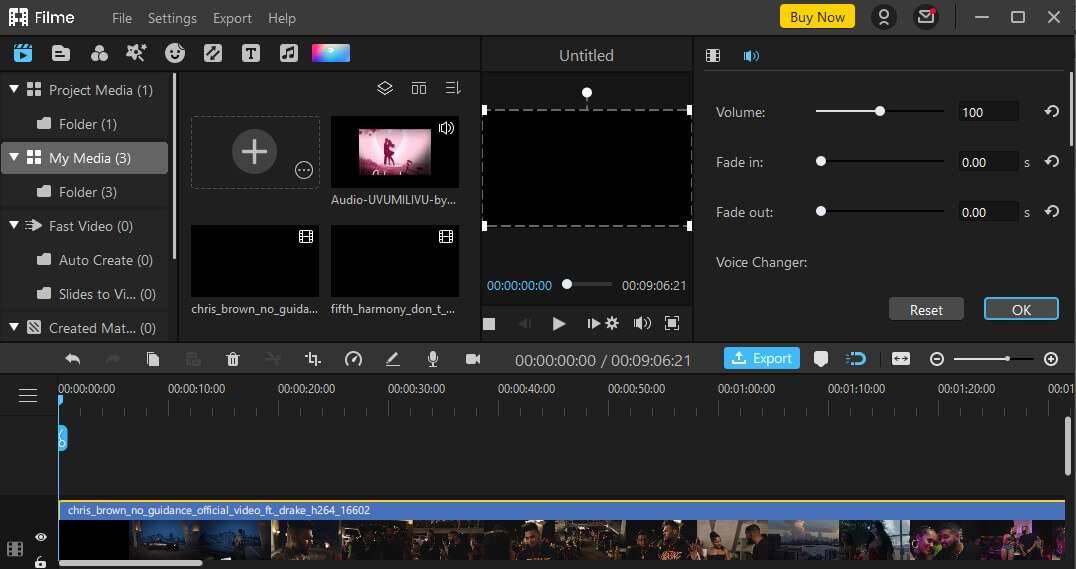
Step 3: Then, double-click on the on the file on the timeline to open the edit menu. You can also right click on the click and select Edit. Now, once the edit menu opens, you will find all the adjustment sliders for volume, as well as fade in and fade out.

Step 4: Once you set the volume to your desired level, then click OK to save the file to your device. It is as simple as that, folks!
Part 3. FAQ about Lower Volume/Audio on Premiere Pro
1. Why is audio not working in Premiere?
If you don't hear any sounds in your playback in premiere pro, it could be because of of the following reasons:
The sound could be disabled
The sound could be muted
The volume is very low that you can't even hear it
Maybe the clip has incompatible codecs
Or maybe there is no audio in that video in the first place.
You need to check what the problem really is, before you know how to solve it.
2. How do you adjust audio levels in Premiere Pro?
It's very simple actually – on the timeline, where the file is, you just need to hover your mouse over the volume band, until the pointer becomes an two black arrows. Once the arrows appear, just drag to the direction you wish to. Dragging upwards will be to increase the volume while dragging downwards will reduce the volume. As easy as that!
3. What is audio gain?
An audio gain stage is basically a point in your audio signal where you are able to make adjustments to the level. In plain language, it's like an amplitude knob found at the input of a hardware or software piece that's able to adjust the volume, or loudness of an audio before it goes through the circuitry.
4. Does gain increase volume?
Gain is more of a tone control than it is a volume control as it determines how hard you are taking the preamp section of your amp. I mean, the gain control feature can set the distortion level in your tone, regardless of how the loud the volume might be. So, to answer the question – no it doesn't.
5. What volume should YouTube videos be?
The issue of the audio level when it comes to your YouTube video remains subjective, but we can agree on one thing: the volume level should never be above 0db, otherwise the video will be horribly distorted and it will be off-putting to your viewers. Now, here is what we recommend, in terms of audio levels for your YouTube Videos:
For dialogue videos, the audio level should be between -6db and -15db. Most YouTubers considers -12db
The overall mix level: -12db to -20db
For music: set it to about -18db to -20db
Remember though, other than the audio level, the quality of the equipment used for your YouTube video is also very crucial.
Final Word
As we conclude, we can say that the volume in any video is very important, as it can turn people off against your video – if it's too high or too low – or it can keep them engaged if the volume is balanced. Other than premiere pro, you can also rely on iMyFone Filme, which is actually super easy to lower volume for your videos. Download the app today, and be guaranteed of the best results.


