When you're editing your clip to reflect the correct speed, there are a variety of approaches you can take. The simplest way is to just scale the clip by reducing its duration without changing its frame rate. However, this results in distortion of timings and can make fast-paced clips look choppy. To avoid these side effects, you will need to use a speed ramp effect in Adobe Premiere Pro or other editing software. Speed ramps are useful if you want to change the pace of the video to make it more relaxed or increase suspenseful moments.
Part 1. How to Speed Ramp Video/Audio/Transition in Premiere Pro
Premiere Pro is an excellent video editor, but i would recommend iMyFone Filme, Filme is more cheaper than Premiere Pro. Filme is a much more comprehensive video editing tool. It supports a wide range of file types and offers all common editing tools, along with filters, transitions, animation, text, fast video mode, and much more, you can upload edited video to facebook,vimeo,youtube with single click. Filme has the best 4k HD support. Download iMyFone Filme below.
Adobe Premiere Pro is a video editing software that can be used to create and edit videos for television or the web. It is used by professionals in the film and video industry as well as those who just want to enjoy making videos with friends and family. Using this tool, you can easily add and change ramp speed. Most editions of Adobe Premiere Pro include all the features you would expect from an application like this: adjustments for color, saturation, contrast, brightness, sharpness; cropping tools; transitions; still image support; filters; effects such as lens flares and initial type treatments.
What sets it apart from other video editors is its intuitive interface combined with a vast list of third-party plug-ins that allow users to create their own custom effects.
Steps to Follow to Add Video Speed Ramp in Adobe Premiere Pro
Step 1: Open the Adobe premiere pro. You can open any version that is available on your device.
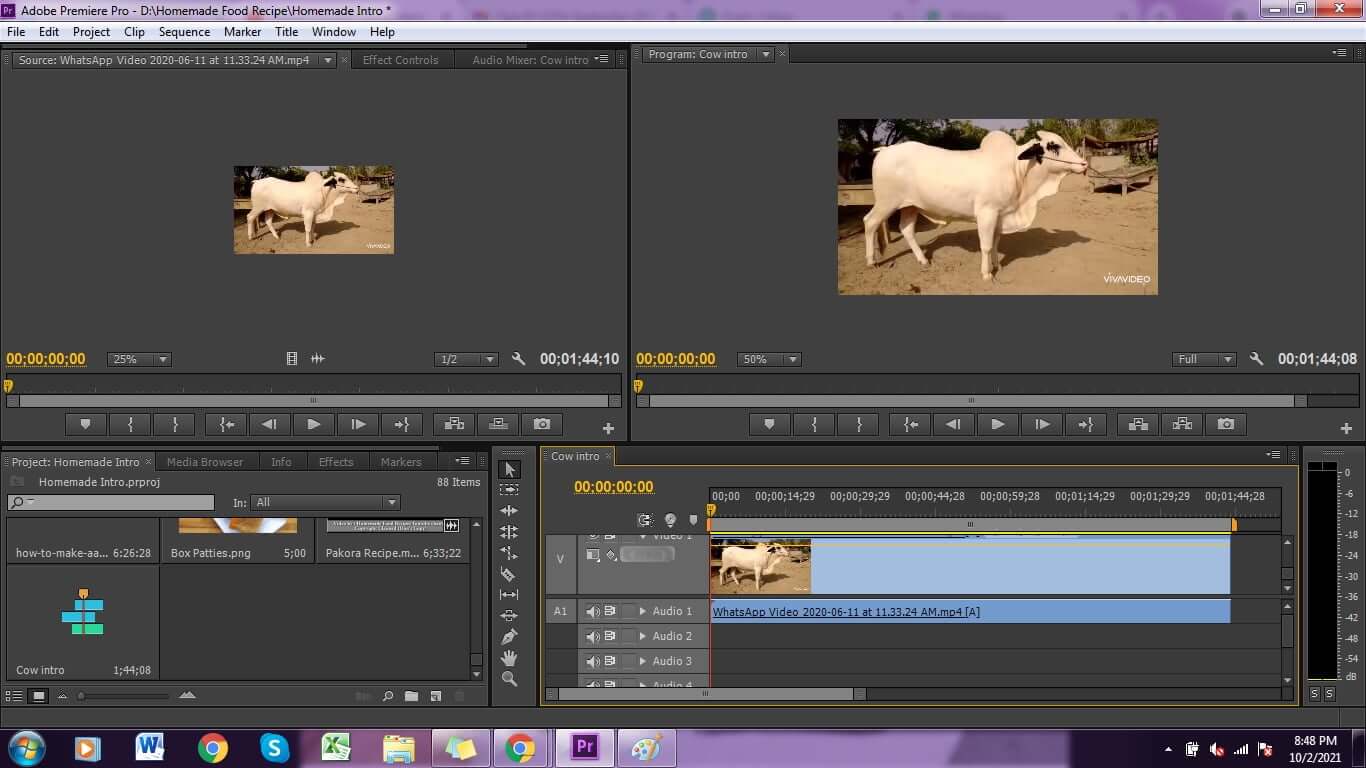
Step 2: To import media. Click on the file and click on the import button that you want to add speed ramp to.
Step 3: Select the desired media. You can select a video that is in the mp4 format. It supports other video formats as well.
Step 4: To start the editing process, drag the video on the timeline.
Step 5: Right click on the video and click on Show Clip Keyframes > Time Remapping > Speed.
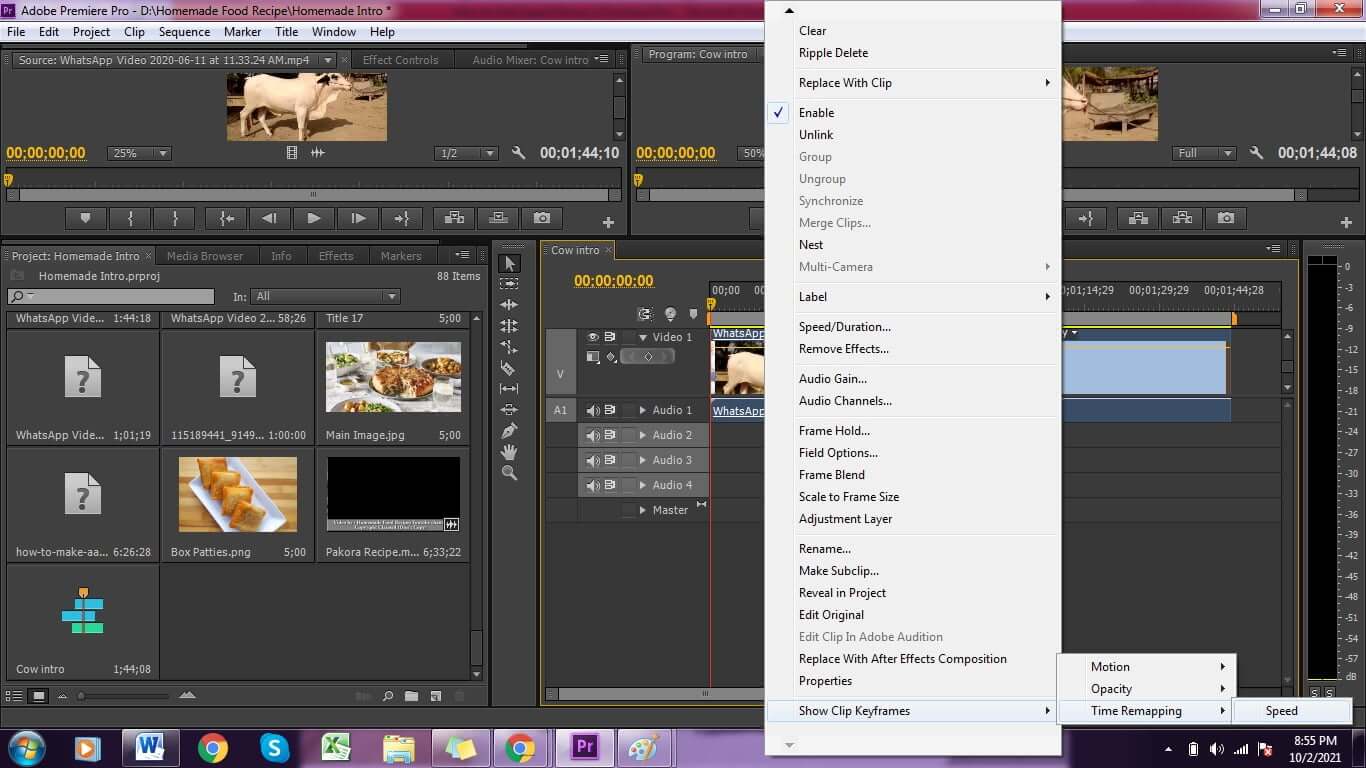
Step 6: Now, preview the video and press the command button and click on the video to insert keyframe. Repeat this step one more time to the point you want to add ramp speed.
Step 7: Now select and part the selection tool between both the selected points. Drag the line and extend it to the desired speed.
Step 8: After doing it, the length of the video will be increased because of the speed.
Step 9: Now, to make it better. Move the first keyframe to the left and second keyframe to the right. This will actually create a ramp.
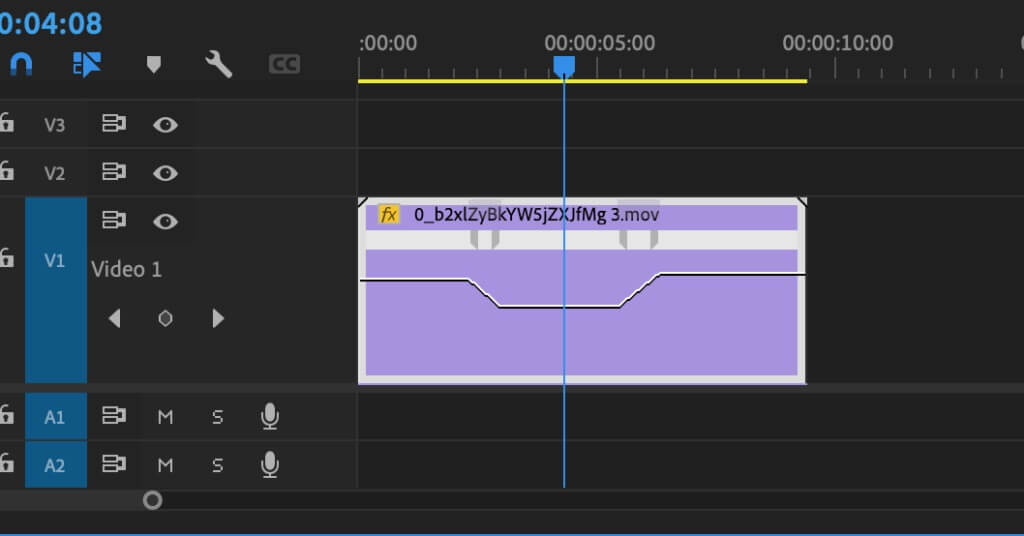
Step 10: You’ll also have the option to move the blue lines, which will impact the speed.
Step 11: That’s it, now you can preview the video and it will add speed ramp to your desired part.
Please note that it may affect your audio part. Since the video part is slower down and audio part is on the same length, the both objects may not be synchronized. But, don’t worry, here are some easy steps to do so. You can easily cut and repeat the audio part to sync your complete video, film or transition.
Steps to Speed Ramp Audio in Premiere Pro
Step 1: Once you’ve edited the video. Don’t save it else it will save the video with the previous audio settings.
Step 2: Cut the audio part using the cut tool.
Step 3: Move the last part of the audio to the right (The end part of the video).
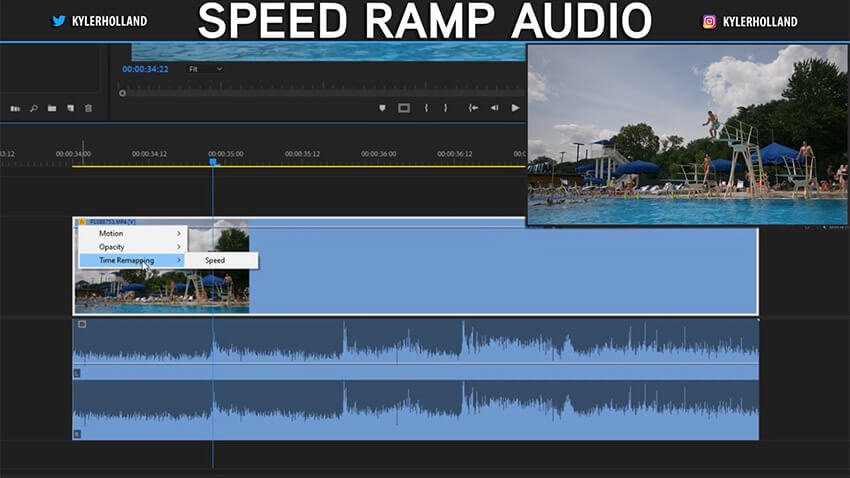
Step 4: Now copy the cut part and paste it again on the empty area. There will be an empty space when the part of the audio will be moved to the right.
Step 5: Copy the part and paste it again on the empty area. Doing this will repeat the same audio.
Step 6: Now all the audios will be synchronized with the actual video.
Step 7: Now you can save your final video in your desired extension.
Using Adobe Premiere Pro, you can easily edit your videos and add speed ramp, but you may have to add third party plugins. There are many features available in this software, but the user has to understand the software as well before using it. We recommend you to watch a few tutorials online and then start working on Adobe Premier Pro.
Part 2. Best Alternative Video Editor to Change Speed - iMyFone Filme
iMyFone Filme is the best alternative to Premiere Pro. Adobe Premiere Pro is used by many editors, and it has many features as well. But, this software requires a basic understanding of video editing. If someone is new in this field, he or she may need some time to understand the tools and features. But, don’t worry; this is not the case in iMyFone Filme. This software is very easy to use. If you’re a beginner you can easily understand its features and start editing your videos in seconds with a few clicks.
Not only this, there are many free tutorials available online, which will help you to learn the basics of this software and start implementing it. This software can easily speed up, slow down, change the pitch, rotate videos, and trim video length. Also, it can correct video distortion like shaking, zooming and distorting effects perfectly. It can change the pitch of the audio file as well as speed up or slow down video/audio clips you have inserted in a timeline.
You can easily change ramp speed of an audio using iMyFone Filme. It also supports many audio effects such as changing the tempo of a song or changing frequency within a song or adding sound effects like beats and bass lines which you need for making music videos.
Steps to Change Video Speed by iMyFone Filme
Step 1: As we want to edit the video, go to “Editing Mode” to open an editing window.
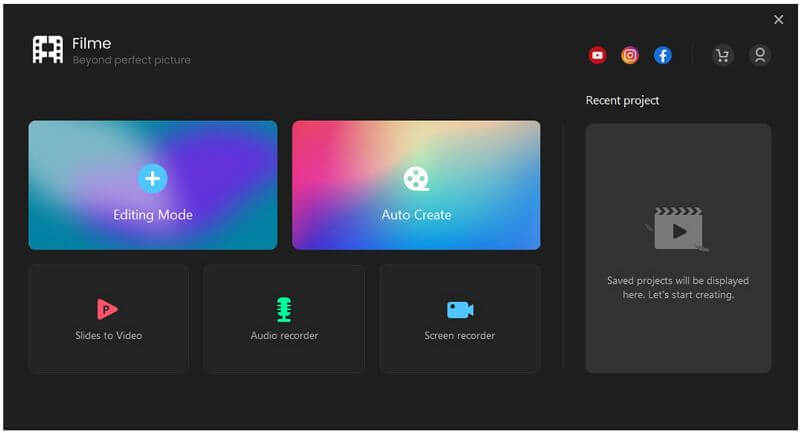
Step 2: After opening the editing window, create a new project.
Step 3: Import the media to iMyFone Filme.
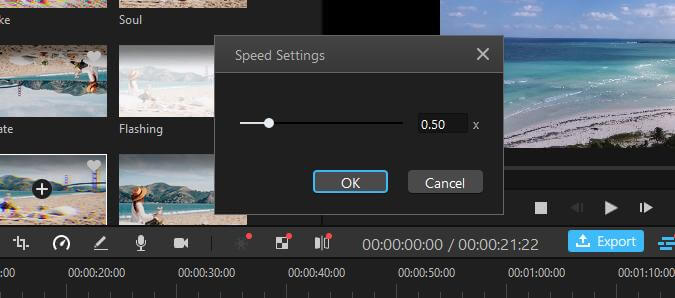
Step 4: After importing the media files, including videos. Drag the video down to the timeline. then you can see the video edit tool bar.

If you see just above the timeline, there is a sequence of editing options and tools. You can change the video speed to 0.2X or 0.5 X.
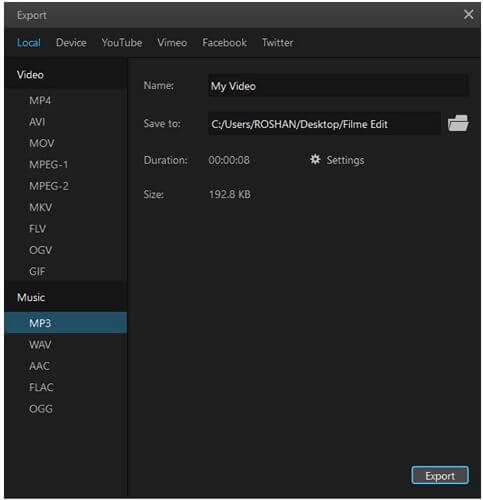
Step 5: After editing, you can save this video. Click on “Export” and export video
Part 3. What is a Speed Ramp?
Speed ramp is an effect that reduces the speed of a scene when the user starts playback of the timeline while another scene is playing back before he/she clicks on the play button. It looks like the camera shakes or gets blurred if you slow down or increase speed too fast while watching a video clip that plays back slower than the original speed.
The Best Reasons for Using a Speed Ramp
Slow down part of the video without end frame blending (video distortion)
Create cinematic effects like camera shake or blurring to highlight an important moment in a scene
Smoothly change the speed of the video clip to match another clip (like overlay clips)
There are many softwares available that will give you the option to speed ramp. In this article, we’ve discussed some easy available software using which you can edit your speed ramp of audio, videos and transitions in minutes. Let’s check them out:
Part 4. FAQ about Speed Ramp in Premiere Pro
1. How Does the Speed Ramp Work in Premiere Pro?
Speed Ramp has two distinct parts to it: the preset settings and the advanced settings. Preset settings are configured for you based on your project’s particular needs. Advanced settings provide greater control over how Speed Ramp operates within your project. Old versions of Premiere require you to install third party plugins.
2. Which Speed Ramp Preset Should I Use?
The best way to determine which Speed Ramp Preset will work best for your project is to try them out. Be sure to compare the Presets that have similar settings, rather than different ones. For instance, testing a fast ramp against a slow one would not help you to see the effects within your project.
3. Why isn’t my Speed Ramp Working?
It is important that you enable Speed Ramp in your Project Settings before attempting to apply it to any clips in your timeline. If you’re using Adobe Premier Pro, you need to check whether your software has third party plugin or not. Once you’ve installed third party plugins, you will have access to all the speed ramp options.
Conclusion
Speed ramps can be fun to add. Although you can use Premiere Pro, we recommend using iMyFone Filme because it is easy to use when compared to other video editing software that is available online. It is flawless in performance and there are no errors when you edit videos with it. This video editor provides many features for free, which are hard to find in any paid app. It is highly recommended for all editors.
If you’re a beginner and would like to save your time and efforts and starting editing your videos, you can go for iMyFone Filme. This software doesn’t require you to spend time learning the software. You can just open the software and start editing it. Most of the options are clear and easy to understand. By using software, you can save your money, time and efforts. Also, you can export the videos in high quality without paying extra charges like many online tools available.


