Among famous and effective video editing tools, Adobe Premiere Pro is one of the best, if not the best. There are plenty of editing features that you can add to your video using Premiere Pro. As it is a professional editing tool, it is a little complex, and some of its options are not suitable for a beginner. There are different tutorials available that you can watch to learn video editing with Premiere Pro.
In this article, we will teach you how to reverse a clip/video during video editing in Premiere Pro. We will explain the step-by-step method. Besides Premiere Pro, another video editing tool is iMyFone Filme which is an effective tool for beginners. We will also introduce this video editor for the ease of readers.
Part 1. How to Reverse a Clip/Video/Footage in Premiere Pro
Premiere Pro is an excellent video editor, but i would recommend iMyFone Filme, Filme is more cheaper than Premiere Pro. Filme is a much more comprehensive video editing tool. It supports a wide range of file types and offers all common editing tools, along with filters, transitions, animation, text, fast video mode, and much more, you can upload edited video to facebook,vimeo,youtube with single click. Filme has the best 4k HD support. Download iMyFone Filme below.
Nothing is shocking about the fact that Adobe Premiere Pro has all the features that a person would expect from a professional editing tool. It is a paid tool, and you have to pay to enjoy its features. However, some of the features are quite hidden in menus and tutorials are just to take the user to these hidden places where they can find editing features and tools.
We will try to illustrate how you can reverse a clip in Adobe Premiere Pro. There is more than one method to play a clip in reverse with Adobe Premiere Pro. Let us get into the steps and procedures that you can follow.
Steps to Reverse a Video Clip in Adobe Premiere Pro
Step 1: Premiere Pro works on Windows and Mac. You can download it to edit your videos. Download and install Premiere Pro. Open the application and create a new project to start editing your video.
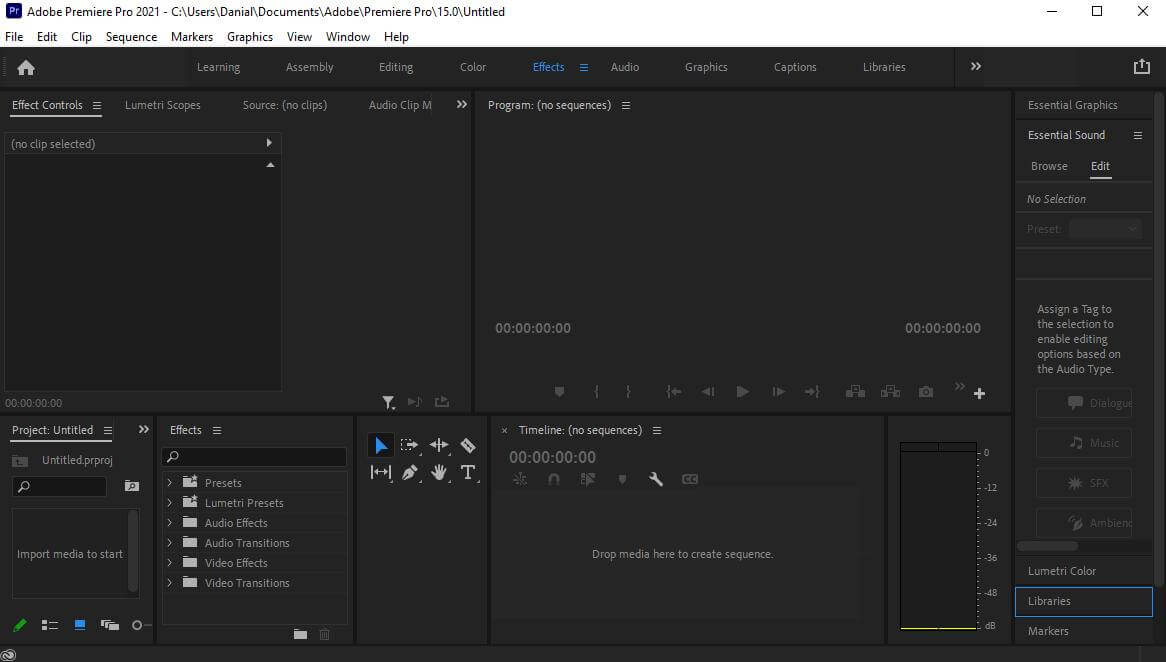
Step 2: After creating a new project, you will see the video editor. On the bottom left side, there is an import window. You can import the media that you want to edit. You can import different videos and audio that you want to be a part of your video editing.
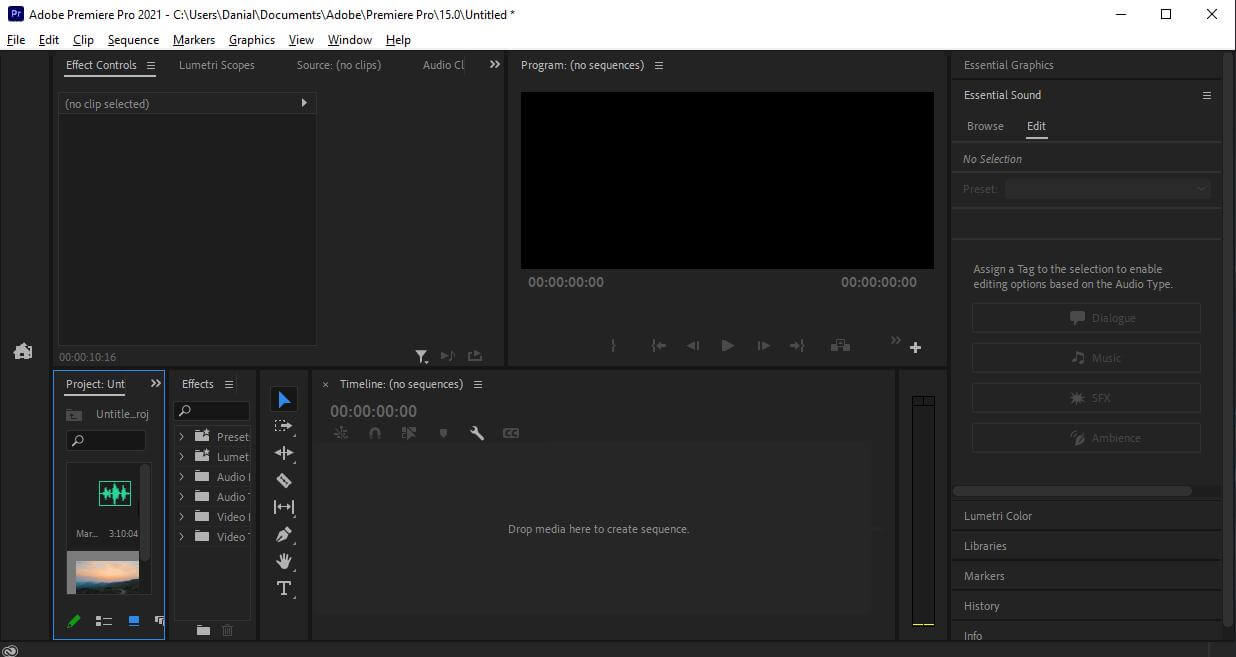
Step 3: Once all the media is imported, drag the media to the timeline. You can also edit your video in steps, one video at a time, and then drag another video to the timeline.
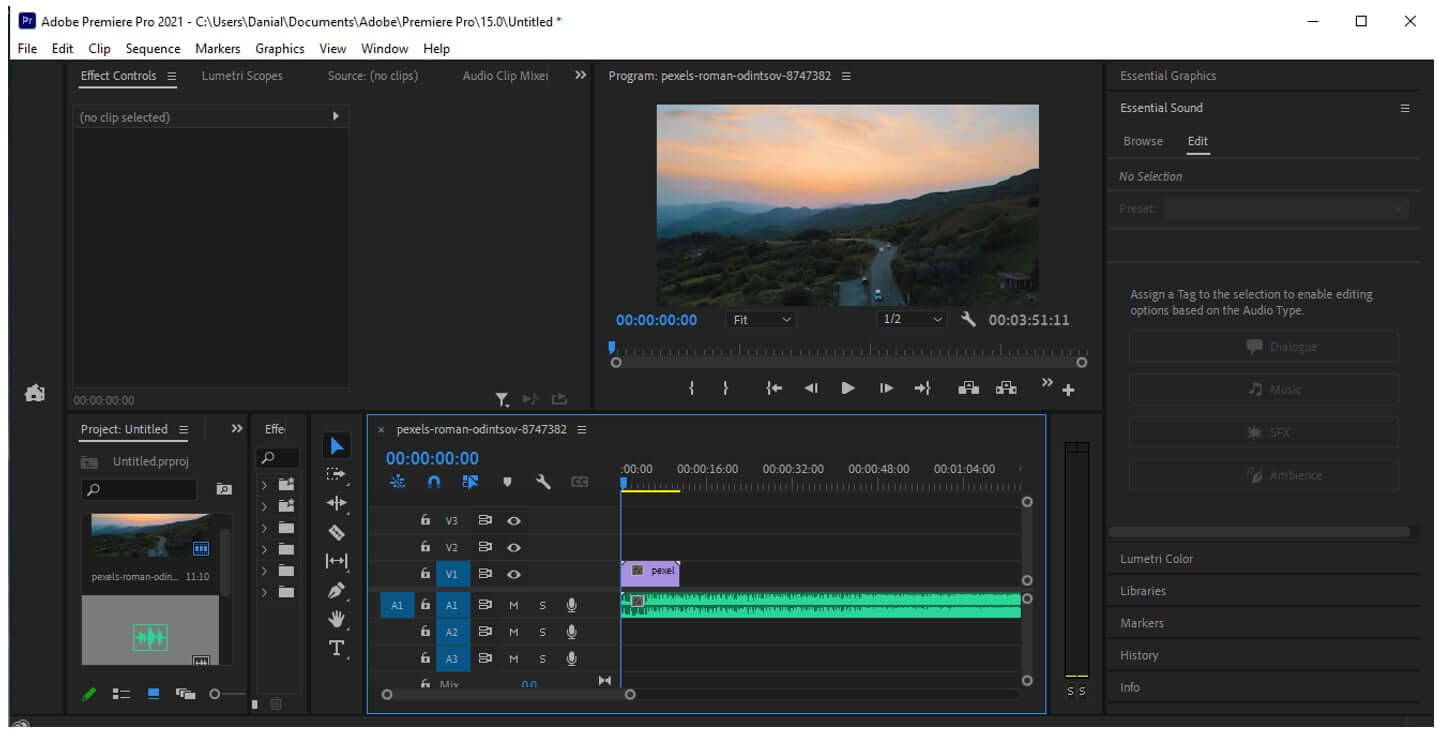
Step 4: Now, as the video is on the timeline, we want to apply an effect that will reverse the video clip. There are two methods to play a clip in reverse. You can use any of these to reverse a video.
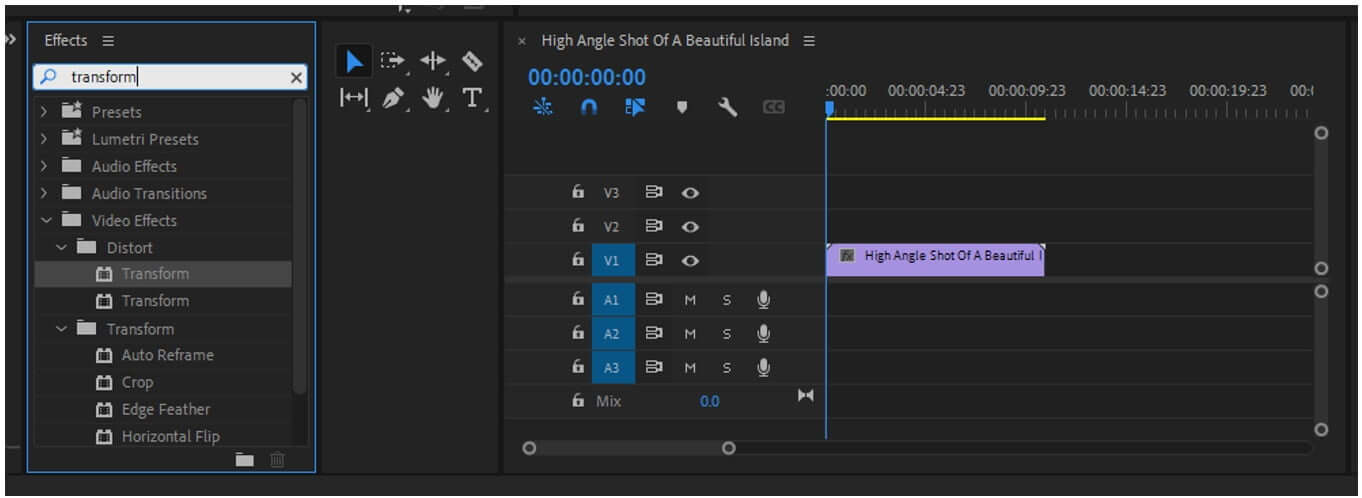
The first method is to go to the search bar of effects. Search for "Transform". Under the folder of "Video Effect" > "Distort", you will see transform. Drag the transform on the video on your timeline. An effect control tab will open. Uncheck the box of "Uniform Scale". Set the "Scale Width" to minus 100 (-100) to reverse your video. Now play the video; it will play in reverse.
The second method is pretty simple, which you can also use to reverse your video. After dragging the video onto the timeline, right-click on the video and go to "Speed/Duration". An options box will open, tick the box of "Reverse Speed" and click "OK". Your video will play in reverse.
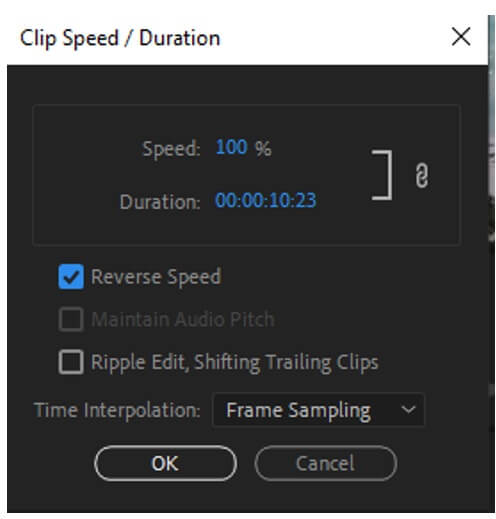
These were the two methods to reverse your video. One reverses the frame of the video, while the other plays the video at reverse speed. You can choose whatever suits your video. These are easy to apply.
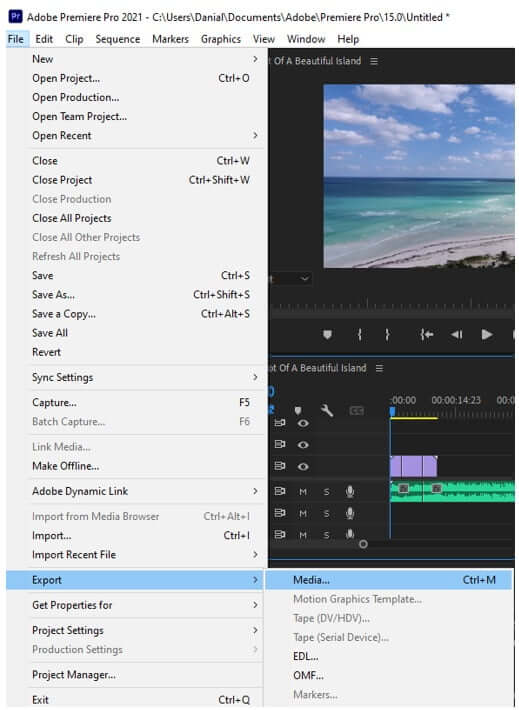
Step 5: After reversing the video clip, you can export the video to your PC. Go to File > Export > Media to save your edited video. Or you can simply press "Ctrl + M" to export your video from the Premiere Pro timeline to your desired destination.
Part 2. Better Alternative Video Editing Tool - iMyFone Filme
iMyFone Filme is an emerging video editing tool that is soothing to beginners. It has multiple editing options, and it is quite easy to use. iMyFone Filme is not only a video editing tool but also allows the user to edit audio, change voice, record screen, change the text to video, and make awesome slideshows. There are many pre-sets that come with iMyFone Filme. Along with that, it has a wide library that consists of audio, transitions, effects, and filters.
iMyFone Filme is a pretty fascinating tool that helps the user to edit videos professionally. The beauty of iMyFone Filme is that it is not complex at all. A beginner can also use this tool to edit videos and apply different types of effects and transitions. Let us see how we can edit videos with iMyFone Filme and what makes it a better alternative to the rest of the video editing tool.
Steps to Edit a Video Using Filme
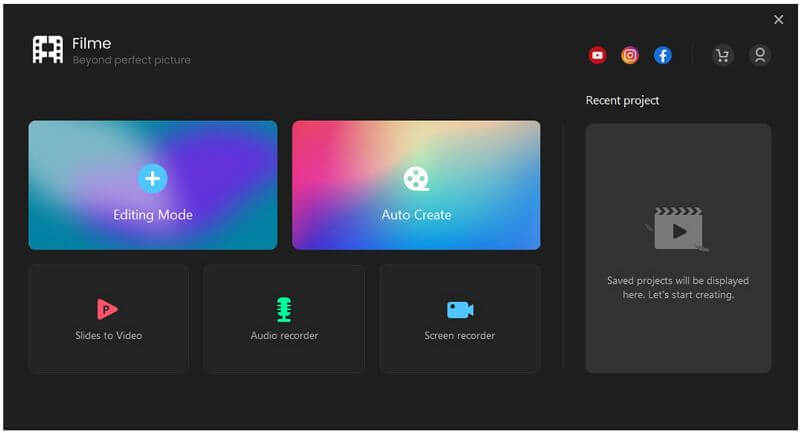
Step 1: iMyFone Filme is a paid tool, but you can download its trial version for free from its website. Once the download completes, install it and open it. As soon as you open it, you will see multiple options, from editing mode to auto-create and slides to video. If you want to edit the video, then go to "Editing Mode".
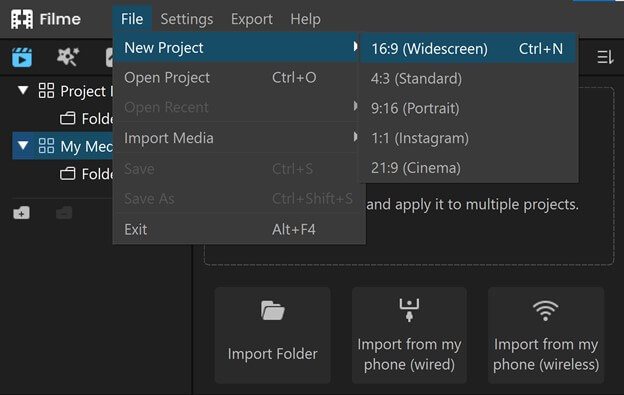
Step 2: Editing mode will open the video editor. It has all the video editing features and options that you can use to edit the video. But first, you need to create a new project. iMyFone Filme allows you to select the aspect ratio of the video that you will import. Go to File and create a new project.
Step 3: iMyFone Filme allows you to import as many videos and audio as you want. You can even import videos of different resolutions, and it will give you an option to match the resolution of the video with the previous one. This feature is also a rare option that we don't get to see in other video editing tools.
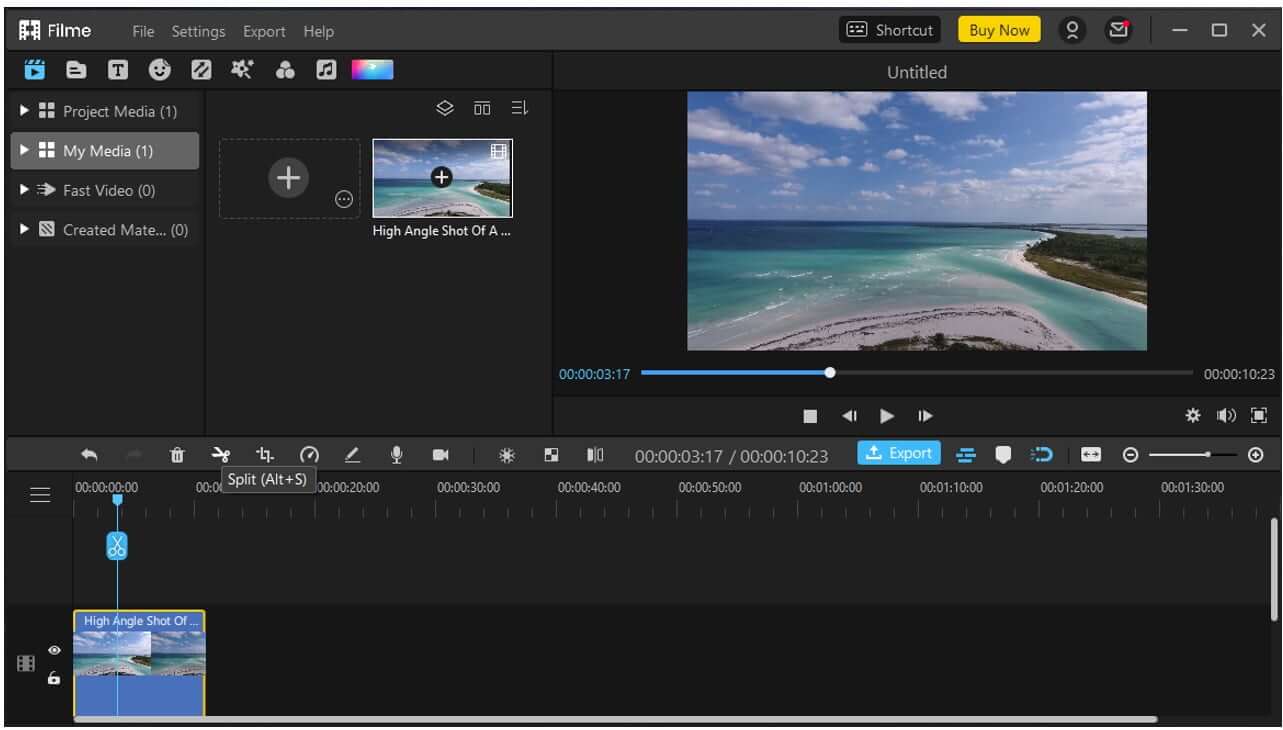
Step 4: After importing media, you can drag it to the timeline so that editing effects can be added to it. Just above the timeline, you will see different options, including freeze frame, mosaic, mirror, screen record, speed, and crop. These are the basic editing options you can use to edit the video.
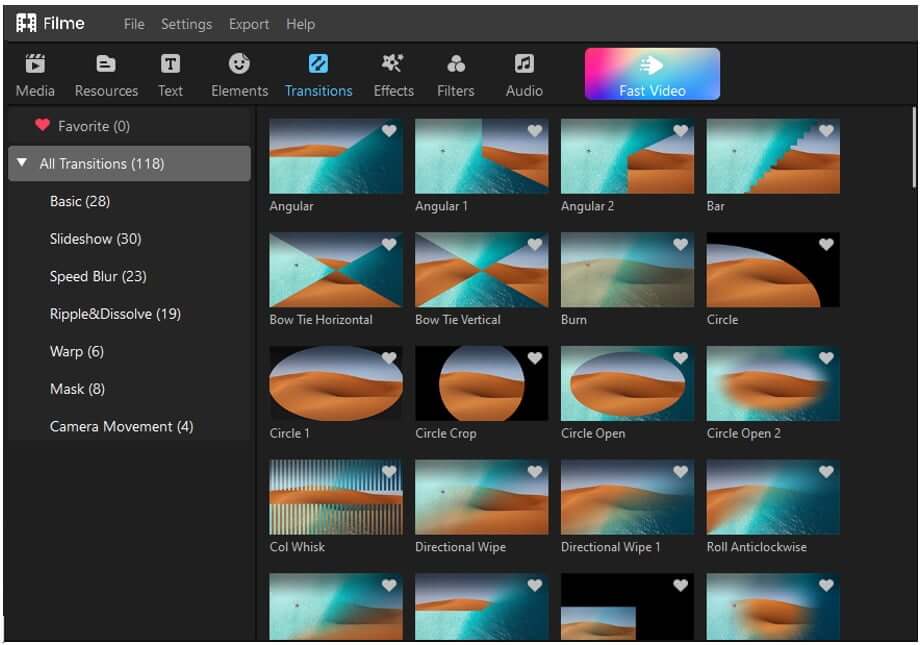
Step 5: If you want to edit your video in detail, then you can go to the above menu bar, where you will see effects, transitions, filters, text, elements, and audio. These are advanced editing features. It includes a transitional and effects pre-set that you can click to add to your video.
It also has a comprehensive audio library from which you can use different audio to add to your video. Moreover, you can also import your music or audio to add to the video. Text in different styles is also available to add subtitles to the video.
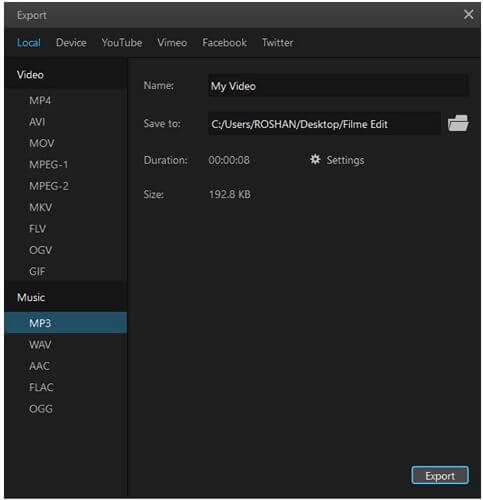
Step 6: When you are done with applying editing effects to the video, you can export your video easily as well. iMyFone Filme gives an option to the user to select the format of the video. Moreover, you can choose the resolution in which you want to save the video. Click on the Export button and export the video as you like.
Part 3. FAQs about How to Reverse a Video Clip
1- How to Reverse Video in Android?
If you don't have a PC and want to reverse a video using your android phone, then you can easily do so. Go to the Play Store and download Reverse Movie FX. It is an application basically to serve this purpose of reversing. Import the video and adjust the setting, and you are done. After the reversing process, you can play the video and also share if you like.
2- How to Reverse Video on iPhone?
Android is pretty common in today's generation, but some people also use iOS devices. You can also reverse a video using an iPhone. You can go to the App Store and search for Reverse Vid. With this application, you can easily reverse your video. Import the video and adjust the reversing speed of the video. You can also preview your video at your desired speed. If you like it, then you can save the video to your phone.
Part 4. Why Do You Need to Reverse a Video and Tips for Reverse Video
Reversing a video is just an effect of a video editing tool. You can adjust the speed and reversing speed of your video with Premiere Pro. There are multiple reasons to which one will need to reverse a video. Firstly, due to multiple videos editing, you will need to match the composition of videos. For this reason, you may need to reverse the video. Secondly, sometimes the reverse video looks better than the original clip; for this, you can also reverse a video.
Tip No 1: Always go for easy video editing tools-the one that you understand and know has a reverse video feature. Checking dozens of tools and video editors will waste your time.
Tip No 2: With Premiere Pro, you have two different methods to reverse a video. These two different methods have different results. Be clear on what you want as an outcome. Try out both and then decide which reversing technique is most suitable for your condition.
Tip No 3: Most of the time, you will need to adjust the speed of the video. The reversal of the video might be too fast for the viewer. With speed adjustment, you can enhance the clarity of the video. Select the perfect speed for video reversal.
Conclusion
It was a simple demonstration of how you can reverse a video or play a clip in reverse with Premiere Pro. There are different methods.ad we have discussed two of them. You can use effects control and speed duration to reverse a clip. However, these both are easy to apply to any video.
iMyFone Filme is a better alternative for video editing. It has numerous pre-sets along with transitions, effects, filters, audio, and text as well. You can also use iMyFone Filme as a beginner because it has an easy user interface that is simple to understand. But bear in mind that it is a paid tool, and you will need to pay to enjoy the full features of this video tool. The one thing that sets iMyFone Filme apart from other tools is that it allows the user to match the resolution of different videos that you import to it. It creates consistency in your video quality which viewers appreciate and enjoy.


