When it comes to video editing, you will see different video editing tools and software that will claim to be the best. Adobe is a name that comes to everyone's minds when it comes to editing as they are the pioneer of video editing tools. Premiere Pro is a product of Adobe that will help you to edit videos professionally.
With Adobe Premiere Pro, you can add a zoom-in/out video transition in a video very easily. We will take you through the step-by-step procedure. For your ease, we will also introduce a simple video editor that can help you add the zoom-in/out video transition with one click.
Part 1. How to Zoom in/out Video/Transition Premiere Pro Timeline
Just like any other professional video editing tool, Adobe Premiere Pro also uses a timeline-based editing feature. It allows the user to edit videos without any hassle.
With Adobe Premiere Pro, you can add different types of transitions and effects. But these transitions cannot be dragged and dropped. You have to create your own pre-set as it is a professional but manual tool. Let us see how we can apply a zoom-in transition to a video in Adobe Premiere Pro.
Steps to Add Zoom in/out Transition Using Adobe Premiere Pro
Step 1: Adobe Premiere Pro is a professional tool, so it will take a few minutes to download. Install the tool and open it on your PC or Mac.
Step 2: Create a new project and import the media that you want to edit. You can drag the video to the project. More than one video can also be imported in Premiere Pro.
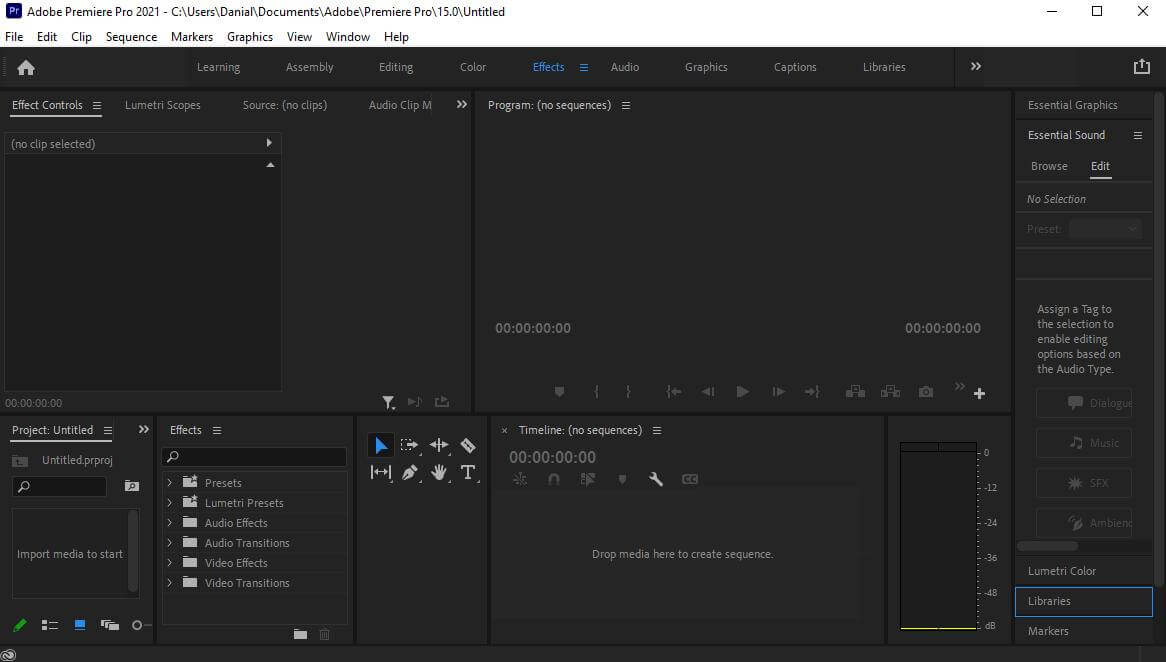
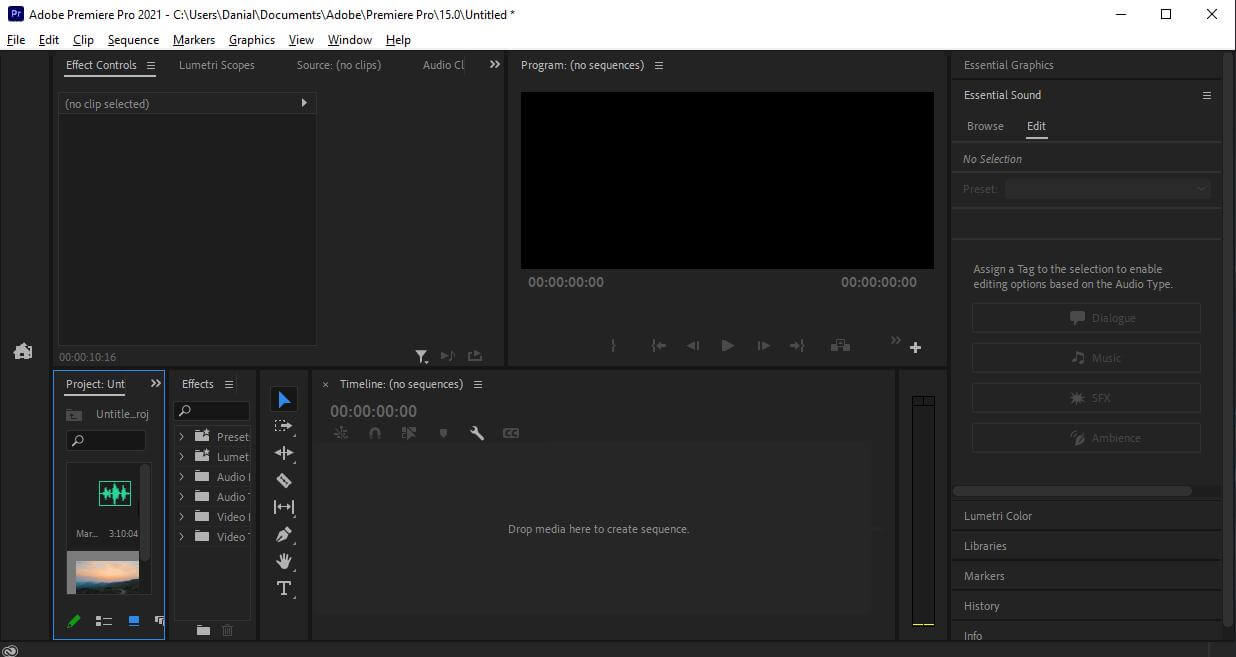
Step 3: After importing the video, drag it over to the editing timeline. Here, changes can be made to the video accordingly. You will see multiple editing options here.
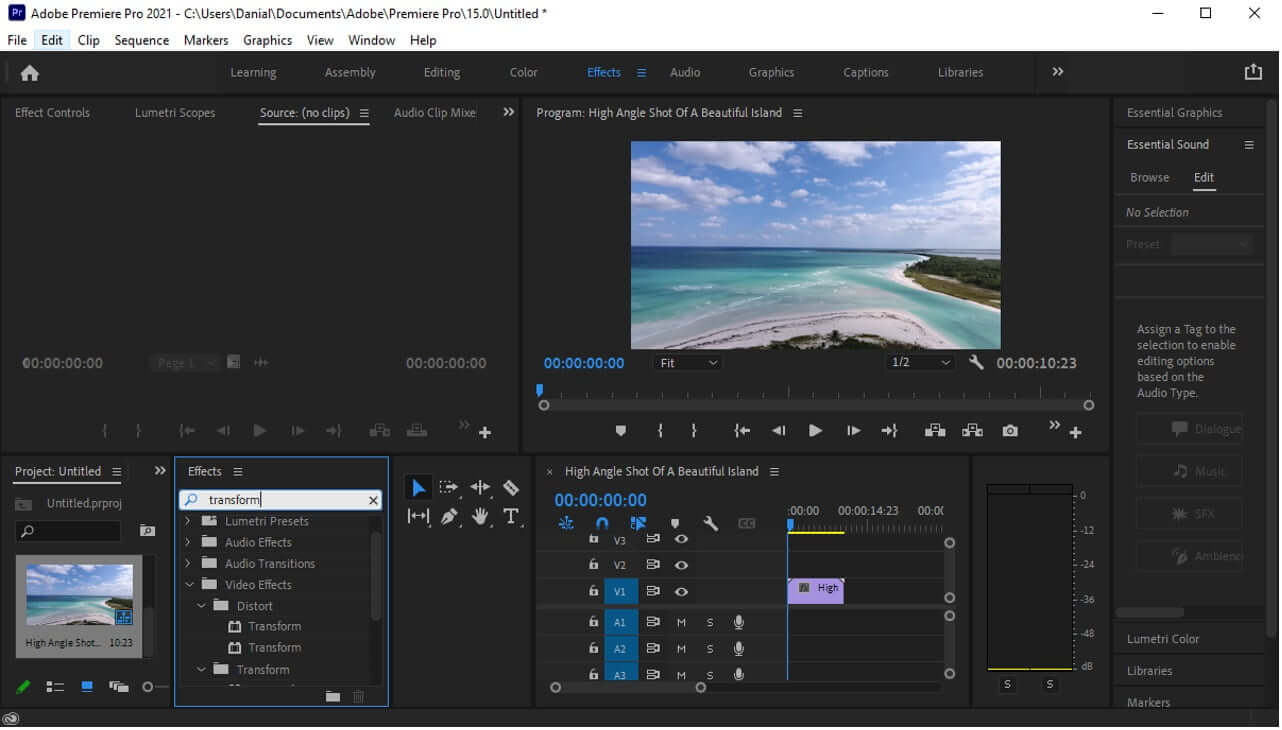
Step 4: Now, as we want to add a zoom-in transition, go to the "Effects" panel and search "Transform". Drag this transform effect over the video to add this to the video on the timeline.
Step 5: Select the video on the timeline by right-clicking. Go to "Effects Controls". Here, you will see different control options that you can add to the video.
Step 6: First, select the instant where you want to zoom in on the video. In the Effect Controls option, go to "Transform". Now go to "Scale" and change the value to 175 and click on the stopwatch. It will create a keyframe.
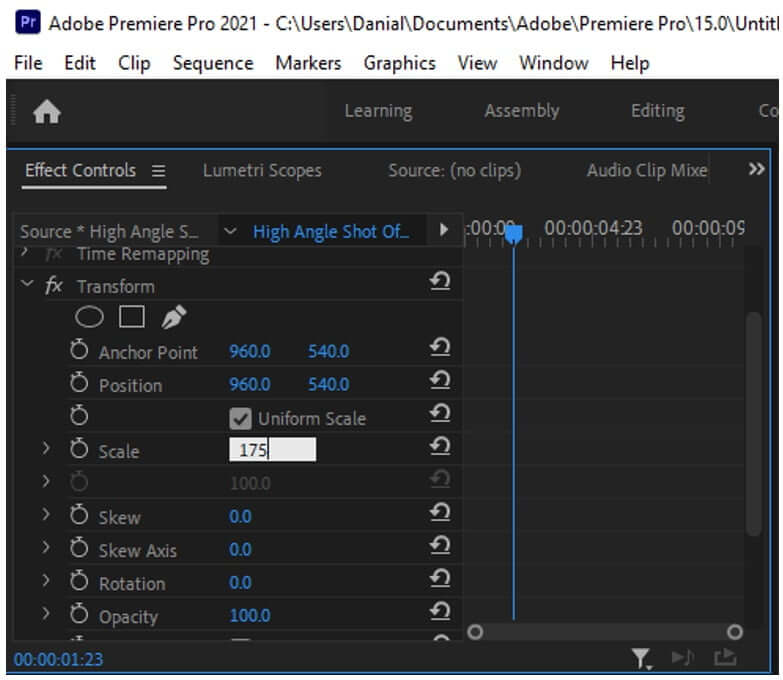
Step 7: By pressing the back arrow key, go back 4-5 frames to add a zoom-in effect. After going to the previous frame, click on the "revert" key, and this will create another keyframe.
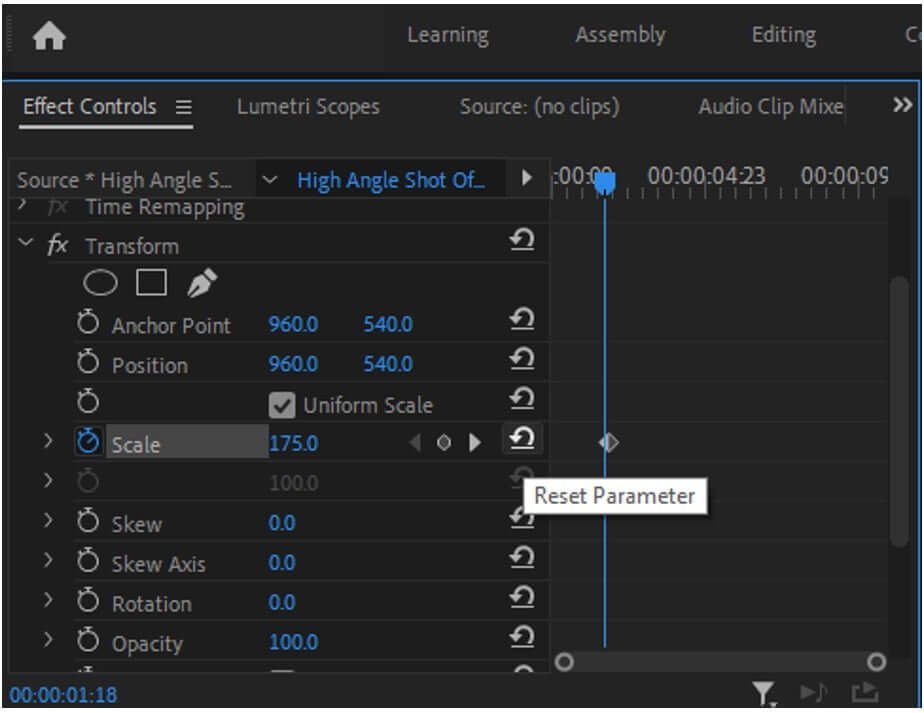
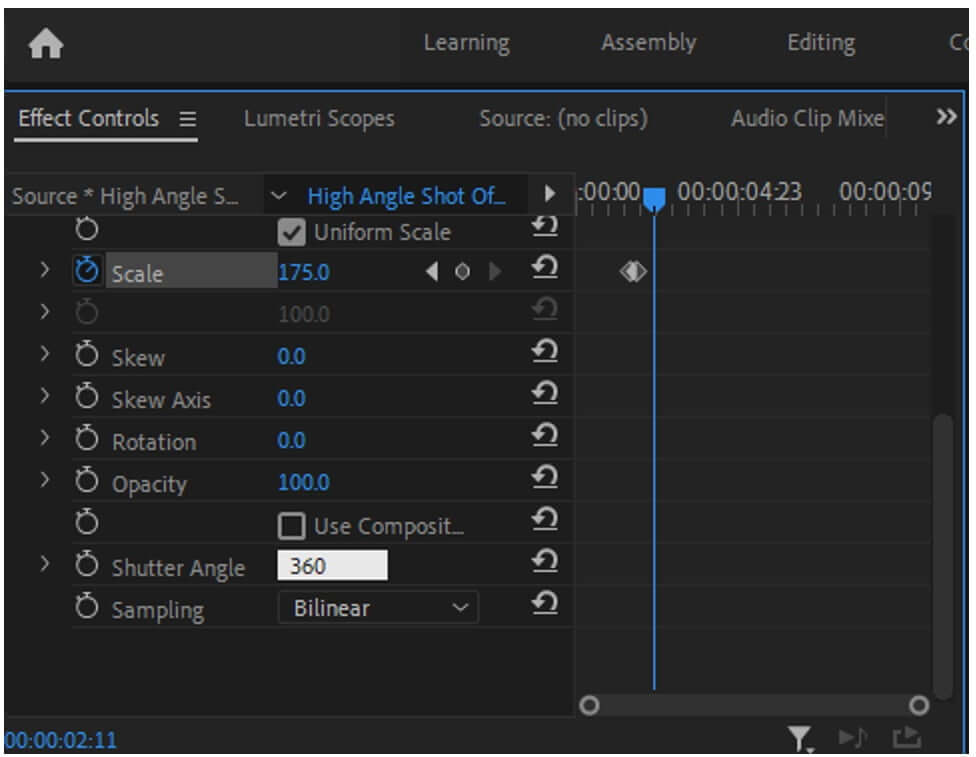
Step 8: Now, if you play the video, you will see a zoom-in transition on the frame where you have increased the value of scale. You can also add a zoom-in blur effect by unchecking the box of composition's shutter angle and changing the shutter angle to 360.
Step 9: Now, if you like the zoom-in transition on your video, you can save it. Go to File > Export and click on Media. Set the export settings and click on Export.
Part 2. Best Alternative Video Editor to Zoom In/Out the Video - iMyFone Filme
iMyFone Filme is also a video editing tool like Premiere Pro. But the main difference between these tools is that iMyFone Filme is much easier and simpler. It uses a simple drag and drop feature that can be helpful to edit a video.
Moreover, there are pre-sets, transitions, effects, and filters that are just one click away. Among these transitions, let us see how we can add a zoom-in transition in a video using iMyFone Filme.
Steps to Add Zoom in/out Video Timeline Using Filme
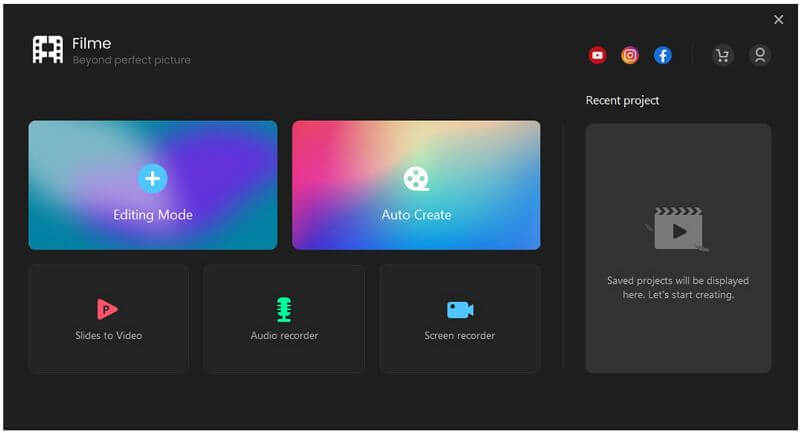
Step 1: Download and install iMyFone Filme if you don't have it yet. Open the application. You will see different options. Among these options, click on "Editing Mode" as we want to edit the video.
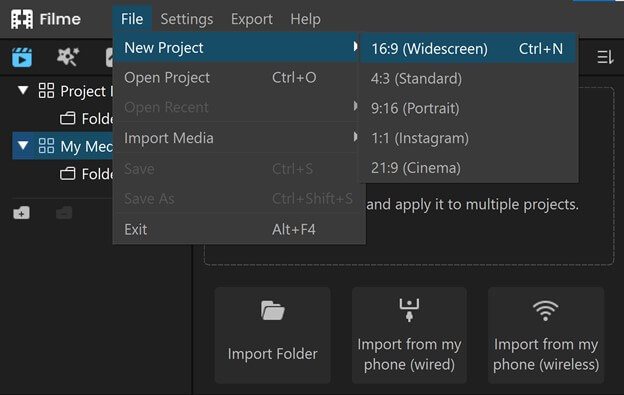
Step 2: You will need to create a new project to edit the video. Go to File>New Project. iMyFone Filme allows the user to select the aspect ratio of the video that he wants to edit. Select the perfect aspect ratio that will suit the video.
Step 3: The next step is to import media files into iMyFone Filme. You can import as many videos as you want. Besides the video, you can also add music or audio to the media panel of your choice. There is also audio available in the Filme's music library.
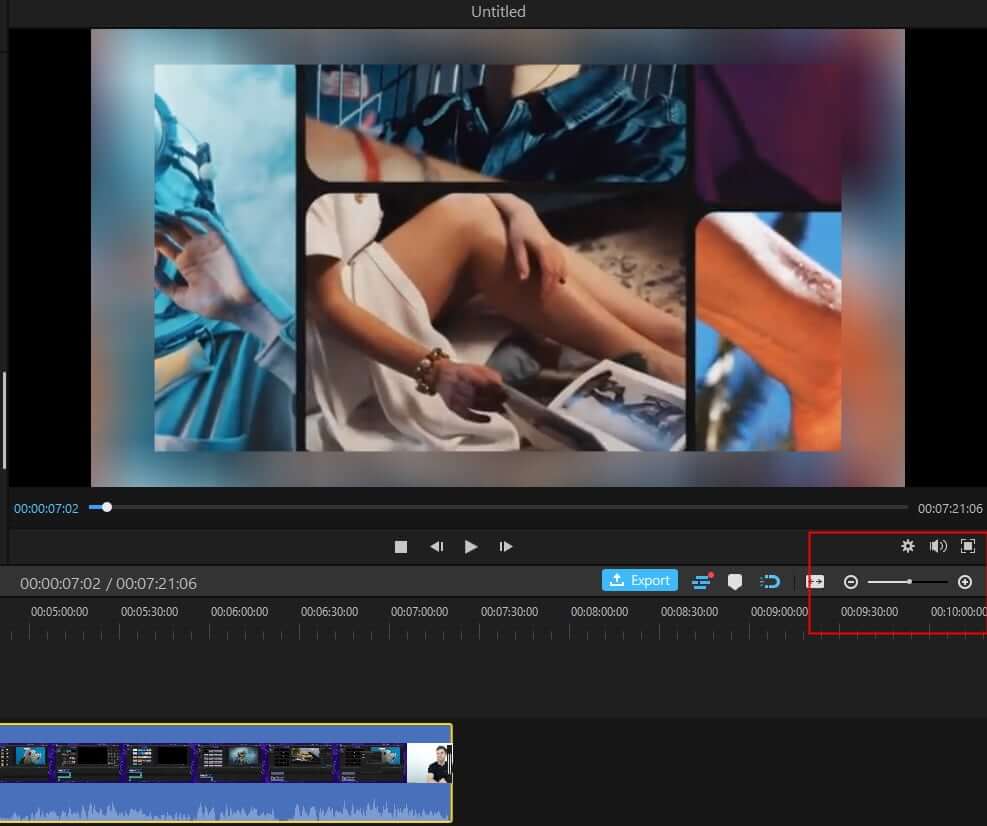
Step 4: To edit the imported video, drag the video down to the timeline. When the video is on the timeline, you can adjust the playhead and add changes to the video as you like. if you want to zoom in/out the video timeline, click the + and - button in the picture show below.
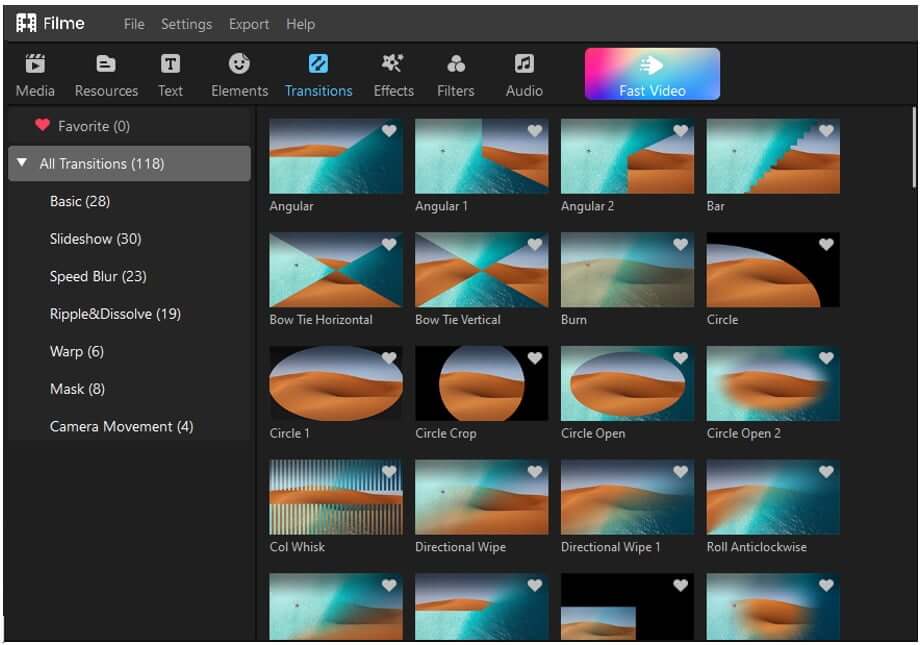
Step 5: Now, if you want to add zoom in transition to the video, go to "Transition" on the top panel and search for "Simple Zoom". It is a pre-made transition that you can just add to the video. Besides this transition, there are also 117 more transitions.
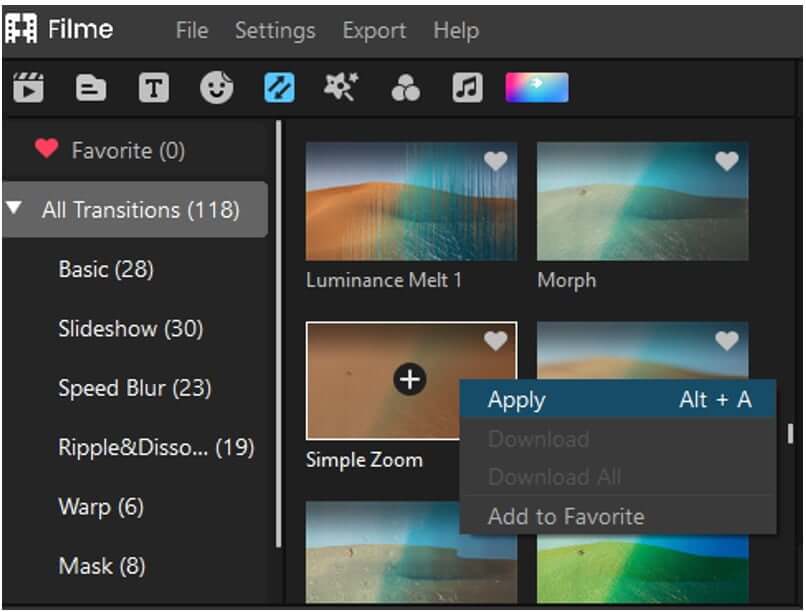
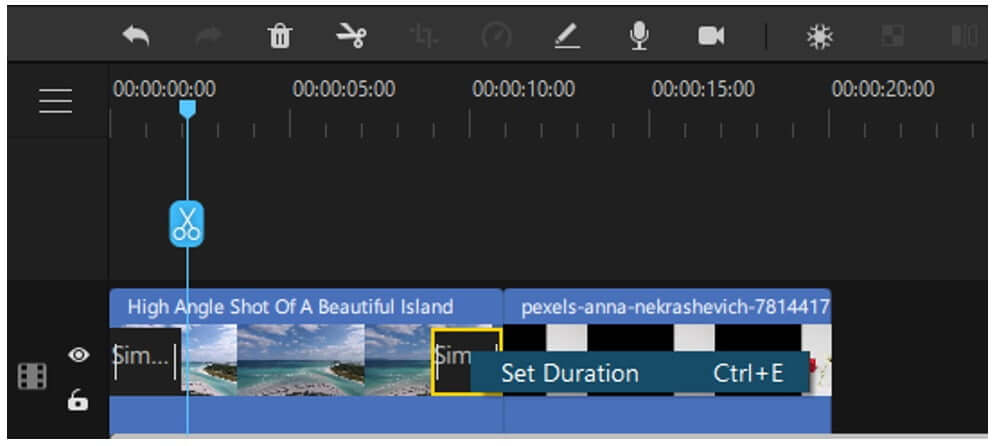
Step 6: Right-click on the transition and click on "apply". This specific transition will be applied to your video. You can also change the duration of the transition by right-clicking on effect and clicking on "Set Duration". The default duration is 2 seconds which you can change according to your video.
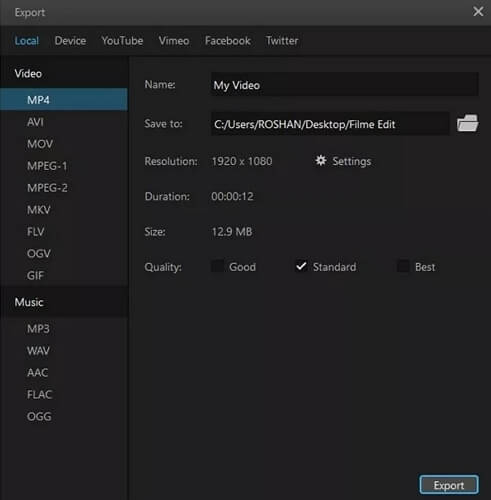
Step 7: If you like the transition, then you can save the video as per your liking. Click on the Export button. Choose the format and resolution in which you want to save the video.
Part 3. Tips for Zoom in Video on Premiere Pro Timeline
1- Save Zoom-In Preset
We have seen the procedure to add a zoom-in transition to a video in Premiere Pro. It is a little more complex than iMyFone Filme. In Premiere Pro, first, you need to select the frame of the clip and then add a transforming effect to it. Then make changes in the effects control.
You can see there are multiple changes that you need to make to just add a zoom-in transition as compared to iMyFone Filme. To make things easier for you in Premiere Pro, you can save this zoom-in transition in pre-sets. Name this pre-set as zoom-in transition or whatever you want. So that if you need it in the future, you won't have to go through these steps again. You will need to click on the pre-set and apply it to the video.
2- Be Creative with Zoom-in
Editing a video with Premiere Pro may be difficult for a beginner or an amateur. But once you get used to it, there is no going back. Premiere Pro is a tool that is vast and has plenty of features other video editing tools don't have. A simple zoom-in transition will look basic in a video. Always try to be creative when adding transitions.
When you are adding a zoom-in transition, you can try to add a blur effect along with it so that the video looks attractive. You can also apply other effects, such as subtitles or filters, to the video along with the zoom-in transition. In this way, your video will look more indulging than a basic zoom-in transition.
3- Premiere Pro Timeline
Premiere Pro allows the user to perform editing on the timeline. It is one of the easiest ways to edit videos. You just need to drag the video on the timeline, and you will see different editing options just above the playhead. If you want to add a zoom-in transition, you will need to add a "Transform Effect" to the video. This will allow you to control parts of the video. You can go to "Effect Controls" to change different settings and add a zoom-in or zoom-out transition easily.
Part 4. FAQ about How to Zoom in/out Video
1- Can You Zoom in/out on Video Editing?
Yes. There are plenty of ways that can help you to zoom in/out on a video. Different video editing tools can easily help you to achieve this target. Some video editing tools are easy, while some are complex. You can add a zoom-in transition with Adobe Premiere Pro, but it will take some time as it is a bit complicated.
iMyFone Filme can do the same thing in less time. It is a perfect alternative to any editing tool that can help you to add a zoom-in transition. It has a simple user interface, and beginners can use it without any problem.
2- What Video Editor Lets You Zoom in/out?
Video editors like Adobe Premiere Pro and iMyFone Filme let you zoom in/out on any video at any instant you want. It depends on the user/editor which tool he wants to use. If he is looking for precision and detail, then surely, he should go for Premiere Pro, but otherwise, iMyFone Filme is the best for quick video editing.
3- How Do I Magnify Part of a Video?
To magnify part of a video, you need to add a zoom-in transition. You can use video editing tools to do so. You can either use Adobe Premiere Pro or iMyFone Filme. As a user, you just need to select the frame where you want to magnify and then apply the zoom-in transition.
Of course, both tools have different ways of applying zoom in transition. One is easy while the other consumes time. Zoom in transition with both tools is illustrated above.
Conclusion
Adding zoom in transition to a video is not very difficult. It is a video editing tool that makes the effects or transition easy or difficult. We have seen Adobe Premiere Pro and iMyFone Filme and their steps to zoom in on a video.
Premiere Pro is a tool that is used professionally because of multiple custom options. The user can make changes to every instant. On the other hand, iMyFone Filme limits the user when it comes to certain effects. But iMyFone Filme is much simpler. You just need to drag and drop the transition on the video. You can also set the duration of the transition as you like. The default duration for any transition on iMyFone Filme is about 2 seconds, which can be changed.


