When it comes to video editing, there are some famous tools on the internet that you must have heard of. Final Cut Pro or FCP is a well-known video editing tool for macOS. It is not compatible with Windows that makes it exclusive for Apple users.
Some problems may arise during the usage of Final Cut Pro; it is just like any other software that is prone to bugs and other issues. The problem could be due to the software or due to PC configuration. However, there are many ways you can troubleshoot these problems. This article will demonstrate how you can come out of these problems and use Final Cut Pro without any hassle.
Top 8 Troubleshooting Tips for Final Cut Pro
Final Cut Pro is a professional editing tool; therefore, it needs a high-end PC; its demands are a bit high. You need to have at least macOS version 11.5.1 or later, 4 GB of RAM for normal editing, 8 GB of RAM for 4K editing, 1 GB of VRAM for 4k editing, a metal-capable graphics card, and 3.8 GB of space available in the disk. Otherwise, it will lag or stutter and cause some problems.
To solve various issues, you can try some tips on your PC. Here are some tips that you can try to get Final Cut Pro back to normal and smooth in the running.
1) Restart Final Cut Pro
One of the most basic troubleshooting methods is to restart your Final Cut Pro. There might be some issue with your software that will be eradicated when you restart it. So, you can go to the setting and click on "Quit and Keep windows". If this doesn't help, you can try other methods to get out of trouble.
2) Perform a Safe Boot
If your problem still arises after restarting Final Cut Pro, then you can try to perform a safe boot. The safe boot is a type of reboot that clears caches of corrupted files and fixes any problem. Moreover, it only loads required kernel extensions, disables extra fonts, checks the startup directory, and disables startup items and logins.
In this way, it only starts certain directories that are important and trashes all the caches. You can perform a Safe Boot by holding down the Shift Key while starting your PC (mac). You will see a grey progress bar, and then the logo of Apple will appear. It will indicate that your PC has started up in Safe Mode. Reboot your PC once Safe Mode starts, and then try opening Final Cut Pro. Hopefully, it will troubleshoot the issues.
3) Disconnect All External Devices and Drives
External devices and drives sometimes cause an issue with Final Cut Pro. In this case, it is better to disconnect all the drives and external devices. If you see that problem is no longer there, then you have found the issue. The issue lies with external devices and drives.
Now connect these external devices or drives one by one to see when the problem arises again. You will discover the specific external drive that is causing the issue.
4) Create a New User Account
To troubleshoot Final Cut Pro issues, you can always create a new user account. It resets all the settings and preferences to default for both the operating system and Final Cut Pro. But you won't be able to access your old files from the Home directory of the old account. If you want to access your old files, you need to store all the libraries in an external drive.
To create a new account, go to System Preferences > Accounts, and here you can create a new account.
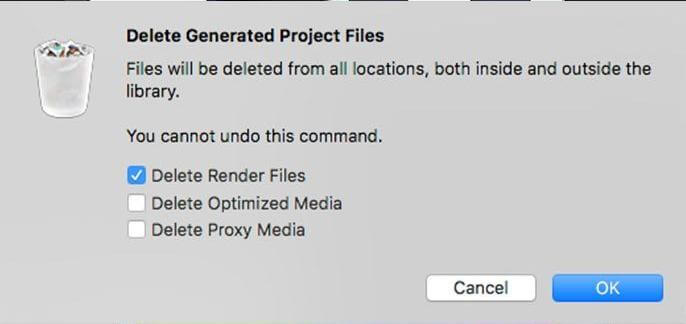
5) Delete Rendered Files and Re-render
Whenever you are editing videos with Final Cut Pro or any other video editing tool, you should know that rendering occurs in the background. It takes a lot of space on your hard drive. Sometimes these render files are corrupt, so they create issues during editing. Open your project in the timeline and choose the specific file. Click on "Delete Project Render Files".
After deleting old rendered files, Final Cut Pro will create new render files that will certainly fix your issue.
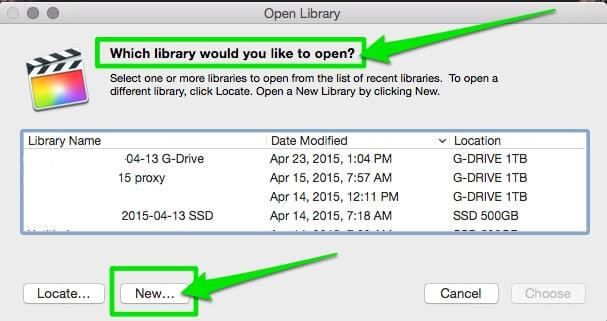
6) Create a New Library
Sometimes your media is the issue that is causing the problem. However, you can always create a new library and a new project. Go to File > New > Project and create a new project. Start copying your old work into the new project. Make sure to test the project after performing copy paste after each stage; this will indicate the problematic media. Then you can remove the media or replace it so that it will work properly.
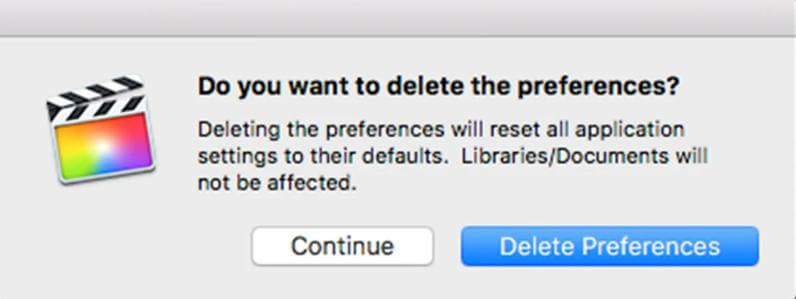
7) Trash FCP X Preferences
Trashing Final Cut Pro X preference files can also solve your issue sometimes. It is intricate work to do, so make sure you follow these steps carefully. First, go to the Finder and hold the Option Key and click on GO. Or you can go to the folder in the Finder and type this command "~/Library/". It will open the library, go to the Preferences Folder. You will see different files. Trash these files: com.apple.FinalCut.LSSharedFileList.plist , com.apple.FinalCut.plist , com.apple.FinalCut.UserDestinations.plist , and all the files that start with the name .com.apple.finalcut.
Empty the trash and then restart Final Cut Pro X; your issue will be resolved now.
8) Uninstall and Re-install Final Cut Pro
After doing all the hard work and following the tips, if the issue arises, you can simply uninstall Final Cut Pro and re-install it. It is because there is a problem with installation, and some files may have missed out during installation. Go to the Applications folder or add/remove the program, uninstall Final Cut Pro and re-install it to solve your issue. But if not, then try contacting Apple's customer support.
We Recommend Another Video Editor with Better Performance - iMyFone Filme
iMyFone Filme is a commendable and user-friendly video editor. It is a professional video editing tool that has different editing features. It is better than some video editing tools because of its simplicity and friendly user interface.
People that are learning and starting to edit videos can use Filme as their tool. You can learn Filme by exploring it. Filme has almost all the features like other video editing tools, so you won't need another tool in your life.
Features
-
Filme has a video resolution match option to make your video in the optimal resolution.
-
It has different built-in transitions, effects, and filters that you can add to the video.
-
It has various tools, including a slideshow maker, voice changer, slides to video converter, text to video maker, and many other exceptional tools.
-
You can also import your music if you don't like audio clips in the default library of Filme. There are many sound effects available for free.
-
Filme supports different formats of videos and resolutions (up to 4K).
-
It also offers freeze-frame and Ken Burns effects.
-
You can export the video in your own choice by selecting the settings, such as resolution, frame rate, bit rate, format, codecs, and sample rate.
Pros:
 Filme has better performance than other video editing tools because it has a bit lower system requirements.
 It works fast and edits video smoothly because it does not take a lot of system space and memory.
 iMyFone Filme has a small file size, so it can be downloaded in a few minutes; other video editing tools are very large in file size and may take up to 25-40 minutes to download.
 It gives the user freedom and easiness to edit videos without any trouble.
 It is compatible with both Windows and macOS.
Step To Use Filme
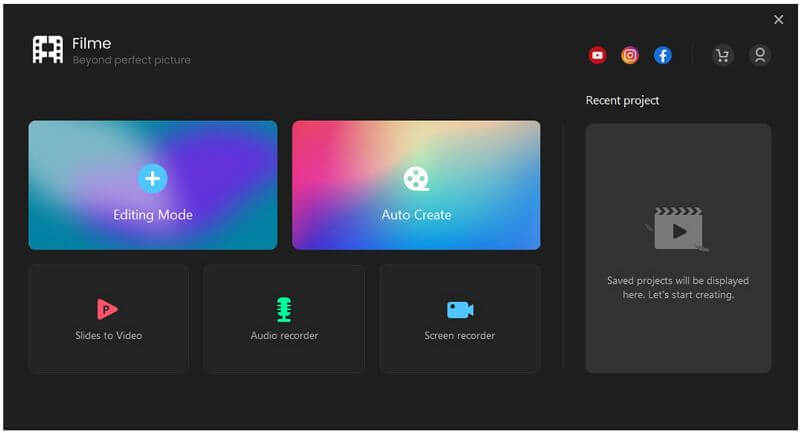
Step 1: Install Filme. Open it, and you will see different options on the home screen. If you want to edit your video quickly, then you need to go to "Auto-Create" mode; it allows you to edit videos much faster than "Editing Mode". There are templates, and you just need to add images and songs to them.
On the other hand, Editing Mode is a full flesh editing window that allows you to fully edit your video with all the effects and features Filme has to offer. So, click on "Editing Mode" to edit the video with Filme. For now, we are covering the steps for the Editing Mode.
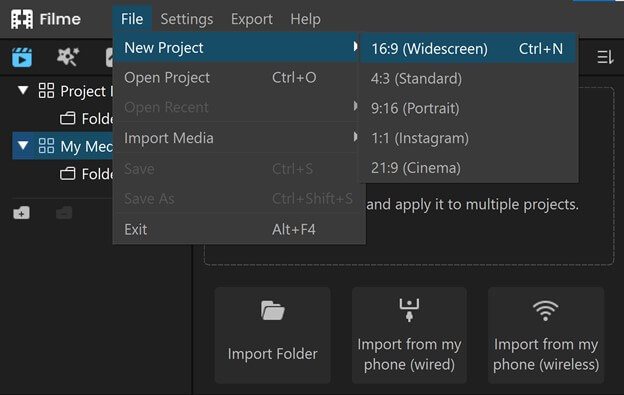
Step 2: The next step is to create a new project and select the perfect aspect ratio of the video. Go to the File menu and create a new project. It is an important step because your video will be shown in this specific ratio. However, if you want, you can change the aspect ratio anytime during the editing.
Step 3: Go to the import window and browse the media that you want to edit. You can import videos, pictures, and audio clips of different formats. Filme supports multiple formats, so there is no need to convert the video to a specific format. You can import as many videos as you want.
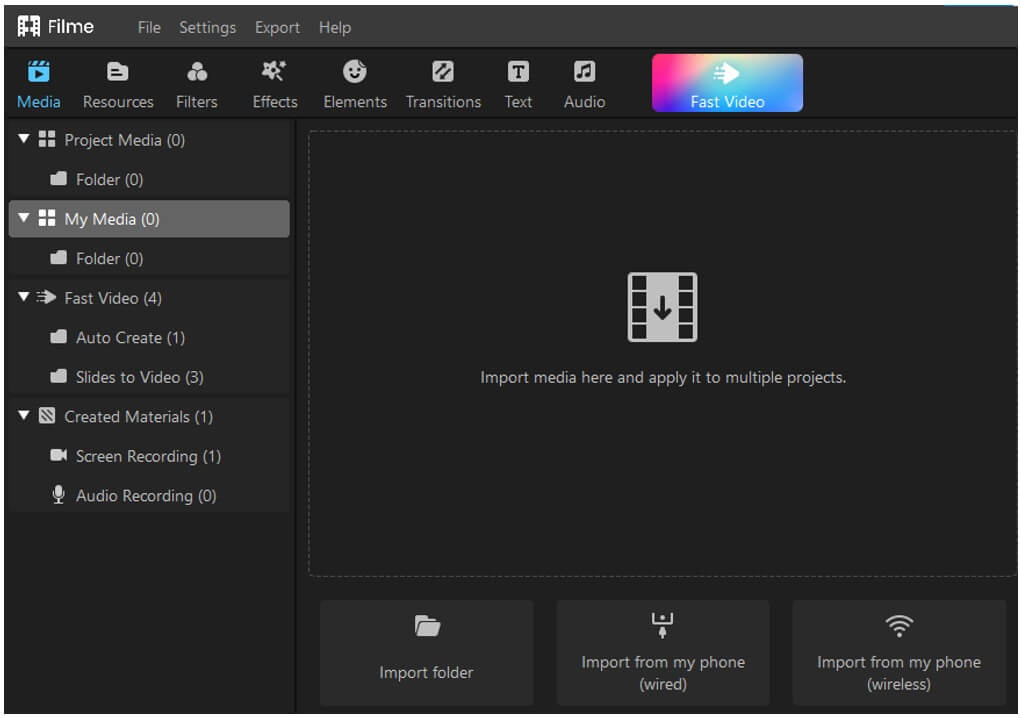
Step 4: Now drag the media down to the timeline to add editing features to it. Filme offers different editing options. You can crop or trim your video as you like. If you want to cut the video, then you can simply trim it.
There are different effects and filters that Filme offers. You can go to the top menu bar, and you will see different options, including effects, transitions, filters, text, elements, and resources. The user can choose any option and edit the video as per his preference.

Filme also offers freeze-frame, Ken Burns effects, and video background fill features. You can use any of these features without any trouble.

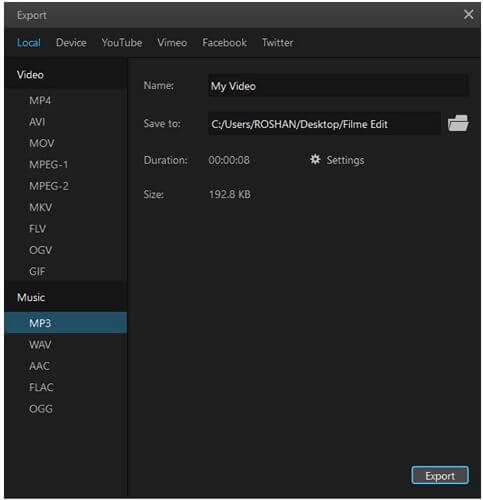
Step 5: Lastly, when you are done with editing, you can simply export the video as per your requirement. You can choose the format of the video, the quality of the video, and the resolution of the video as well.
Conclusion
There could be many reasons for issues in Final Cut Pro. However, there are many solutions that you can try to troubleshoot those problems. It is software, and you are using it on a PC, so there can be problems and issues. But these can be resolved by following the simple tips mentioned above. We have also shared an alternative to edit your videos. Filme is an excellent video editor for beginners and experts. It has low system requirements and works like a charm on both Windows and macOS. You can download the trial version if you want to experiment with it. Filme has better performance, and an easy user interface for the user.


