There are so many tools for editing available that sometimes it gets difficult to choose the most suitable one. But, to help you from this hassle of selecting the editing tool, we provide you with one of the best tools and the best alternative for detaching the audio from a video clip.
How to Detach Audio From a Clip In DaVinci Resolve
DaVinci Resolve
DaVinci Resolve is an editing software for any type of video and audio file. You can use it for many purposes. Let's start with the detaching of audio from a video clip:
Step 1: Open Video
Run the DaVinci Resolve on your device and open the file from 'File' > 'Open' > 'Select video clip.'
Step 2: Unlink Audio
If you want to remove audio from any clip using DaVinci Resolve, all you need to do is click on the chain link that is present in the toolbar above. Or, in other ways, you can just press on the 'ctrl' and 'shift' along with the alphabet 'l' simultaneously to link/unlink the audio from your clip. After that, check its equalizer, and you are done.
Step 3: Save the video
Once you are done with editing and satisfied with the results, you can save the video on your device now.
Features
Other than detaching audios, there are many other amazing features of the DaVinci Resolve. Some of them are:
-
DaVinci Resolve allows you to have high-quality editing with its best professional editing tools.
-
DaVinci Resolve helps you to make great edits with the help of its color correction tools.
-
Fairlight audio is also present in DaVinci Resolve.
-
You can easily remove audio using DaVinci Resolve from any clip you like.
-
DaVinci Resolve has 3D tools that make your edits look animated.
-
You can easily resolve Fx using DaVinci Resolve.
-
DaVinci Resolve has multiuser collaboration too.
People Who Liked this Content Also Liked
How To Remove Watermark with DaVinci Resolve >>
DaVinci Resolve Full Review in 2021 >>
How to Record Audio in DaVinci Resolve
The DaVinci Resolve is the best software for recording voiceover. Follow the steps to get your voice recording directly in the DaVinci.
Step 1: Import Video
This is the starting of any editing procedure. So, open the video that you want to record a voice-over.
Step 2: Record Audio
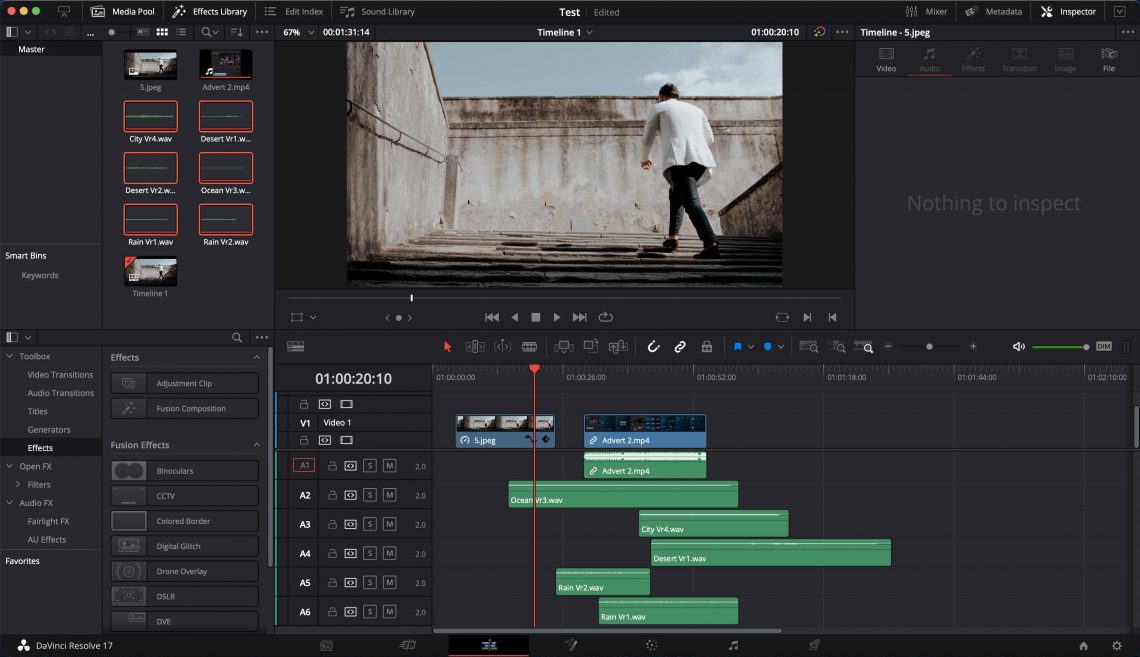
The only thing you need to record your voice is a microphone. For that, go to the input section and start with the voiceover by using the microphone. You have to choose "input" where the "no input" option comes. Choose your audio source present on the left of the module, which pops up, and from the right side, select the track you want to record. After all, that, click on the button "patch" present at the bottom-right corner of your screen. To record, click on the "R"
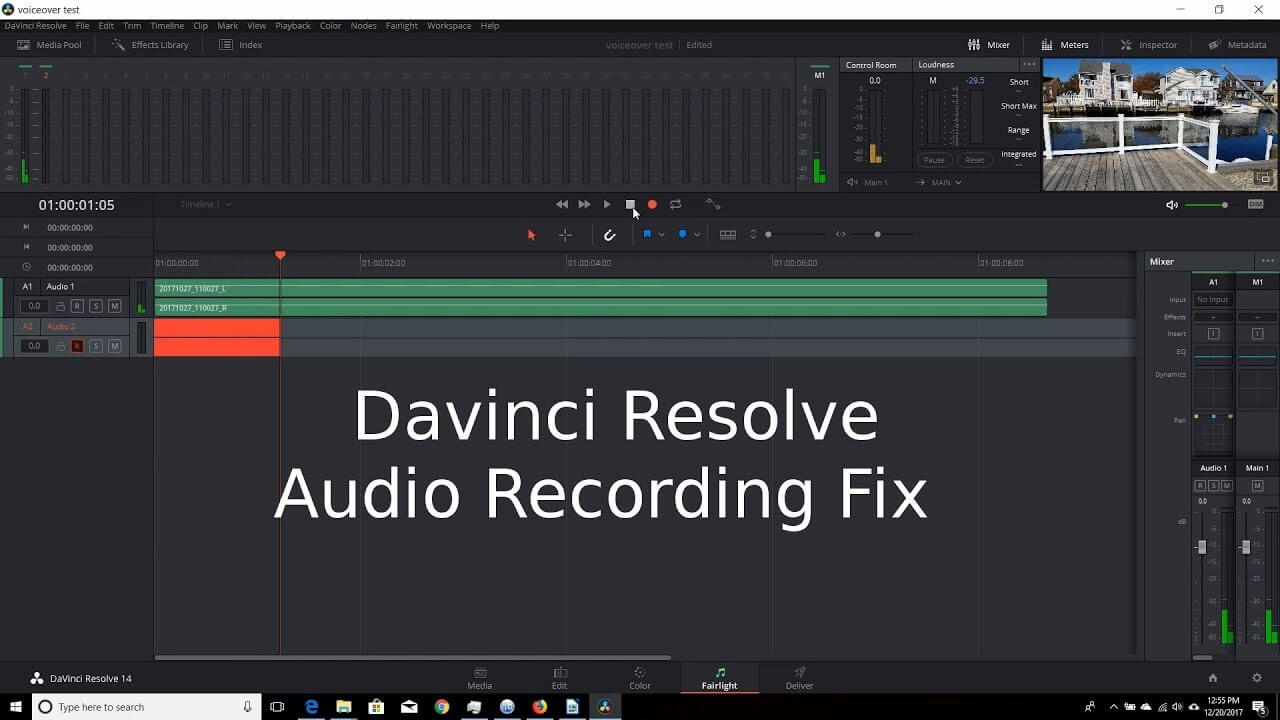
that comes just above your slider and then record whatever you want.
Step 3: Save media
To save the media, go to 'file' > 'Save' and then select the folder and format in which you want to save the video clip.
People Who Liked this Content Also Liked
Top 8 Record Voice With Windows Voice Recorder Or On Mac
How to Zoom in on Audio in DaVinci Resolve
The following steps will explain to you how to zoom in on audio in the DaVinci.
Step 1: Open Video file
To open the video file/files, go to the 'file' and click on 'open.' From there, a window will open up, and you can select the video files and the audio files for your editing.
Step 2: Zoom in
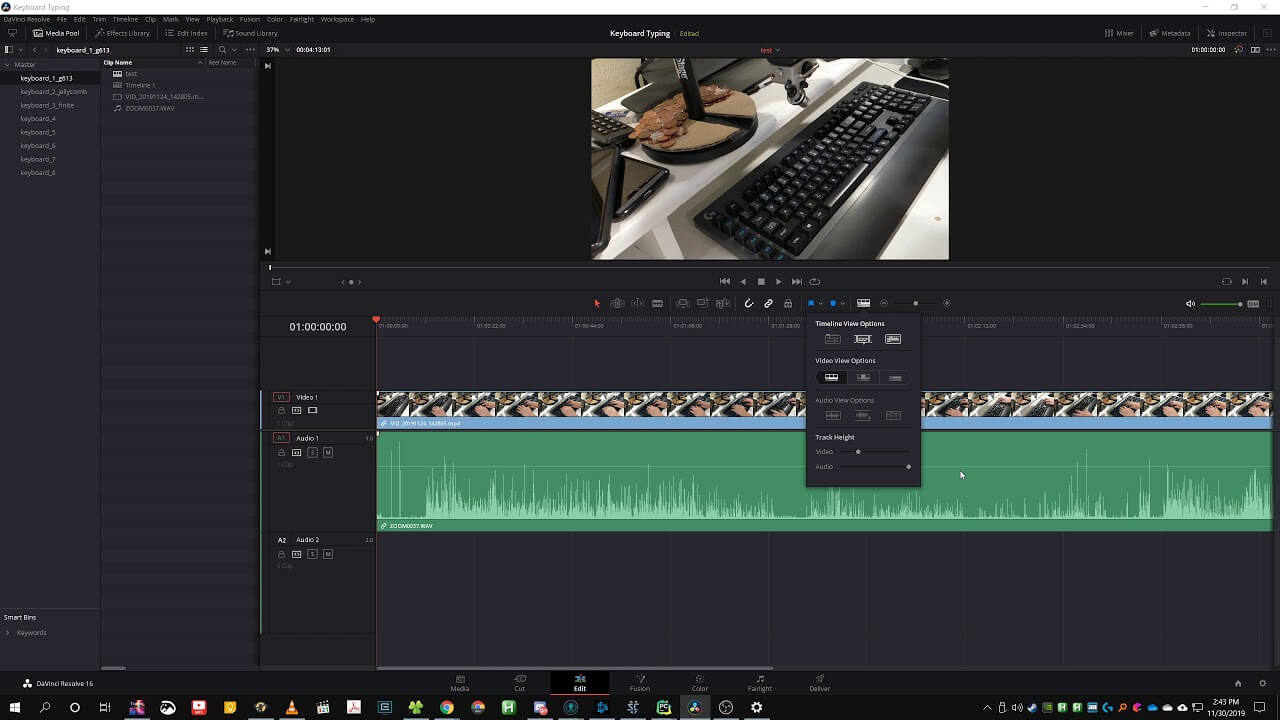
To zoom in on audio using DaVinci Resolve, press down on alt and use the scrolling wheel of your mouse. Using this, you can use the zoom slider that is present at the bottom of your timeline, but the only catch is that it will not adjust the height of your clip, just your width. And if you want to adjust its height, you need to move your mouse to the left of the track name on the track line. Now, on that line, move up to increase or move down to decrease the height of your clip.
Step 3: Save
To save the edited clip, go to 'file' and click on 'save.'
How to Fade Audio in DaVinci Resolve
To know how to fade audio in DaVinci, follow the following steps:
Step 1: Import Video clips
You will have to start by importing the video clips along with the audio if you want to edit more professionally.
Step 2: Fade Audio
If you want to fade audio from your clip using DaVinci Resolve, you can do this by placing the playhead at the beginning of where you want the fade effect to start and then drop it where you want the effect to end. Now you need to select the audio clip and select the option "trim" from the top menu. Now choose the effect "fade in to playhead” or “fade out from playhead."
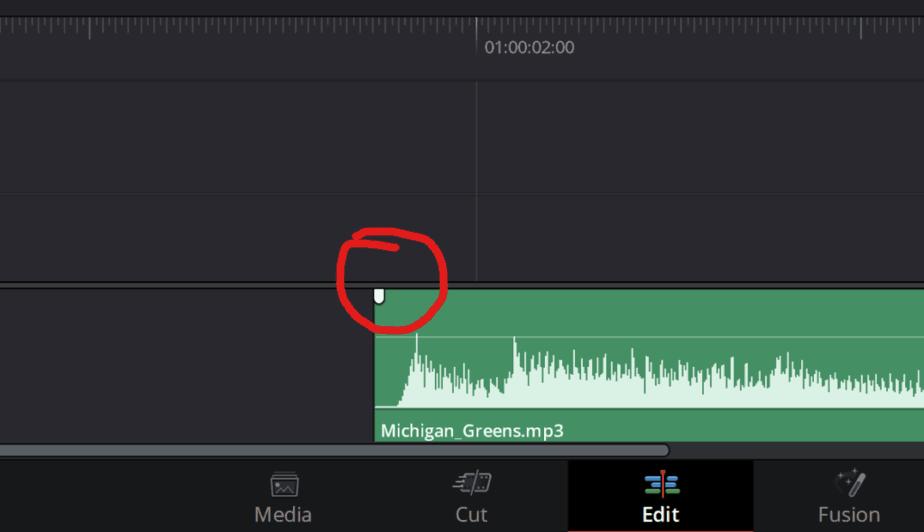
An easier way is that you move the white pointers present at the starting of your clip to the area you want the fade to begin from and then drop it where you want the fade effect to end.
Step 3: Save the file
As before, let's save now to finalize the result of our editing.
How to Crossfade Audio in DaVinci Resolve
To start with the crossfading audio process in the DaVinci, you have to import the file first.
Step 1: Import Files
To import the file/files, select the option of import from 'Files.'
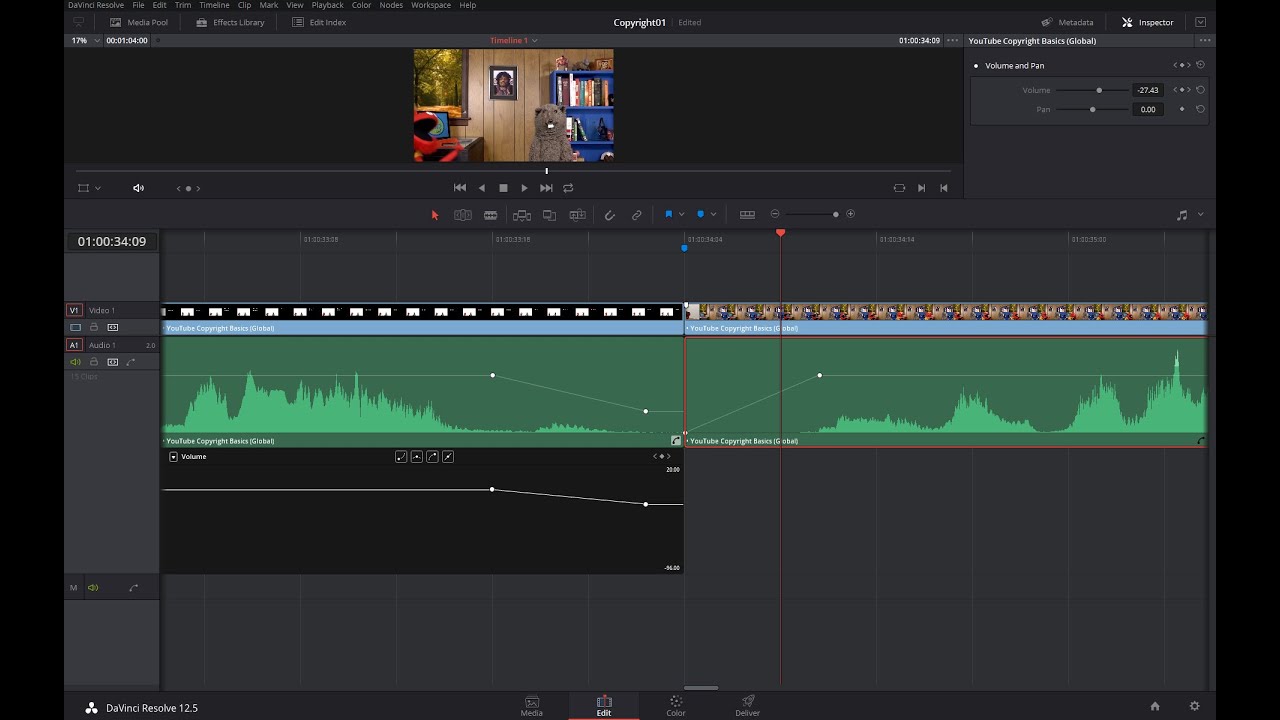
Step 2: Crossfade Audio
If you want to crossfade audio using DaVinci Resolve, there are two ways. Either you can drag this effect to your clip, or you can move your cursor just above the breaks in the clips, then right-click, and you will see the option to add the crossfade effect on your clip.
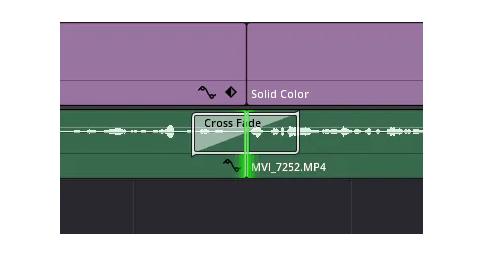
Step 3: Save Final Result
Finally, save the final result on your device so that you can share it with your friends and family or your social media.
How to Add Audio Reverb in DaVinci Resolve
Looking for ways to add audio reverb using DaVinci Resolve? Then this is what you need to do.
Step 1: Open in DaVinci
This is the very first step. Go to the File and press the Import option to get the video you want to edit.
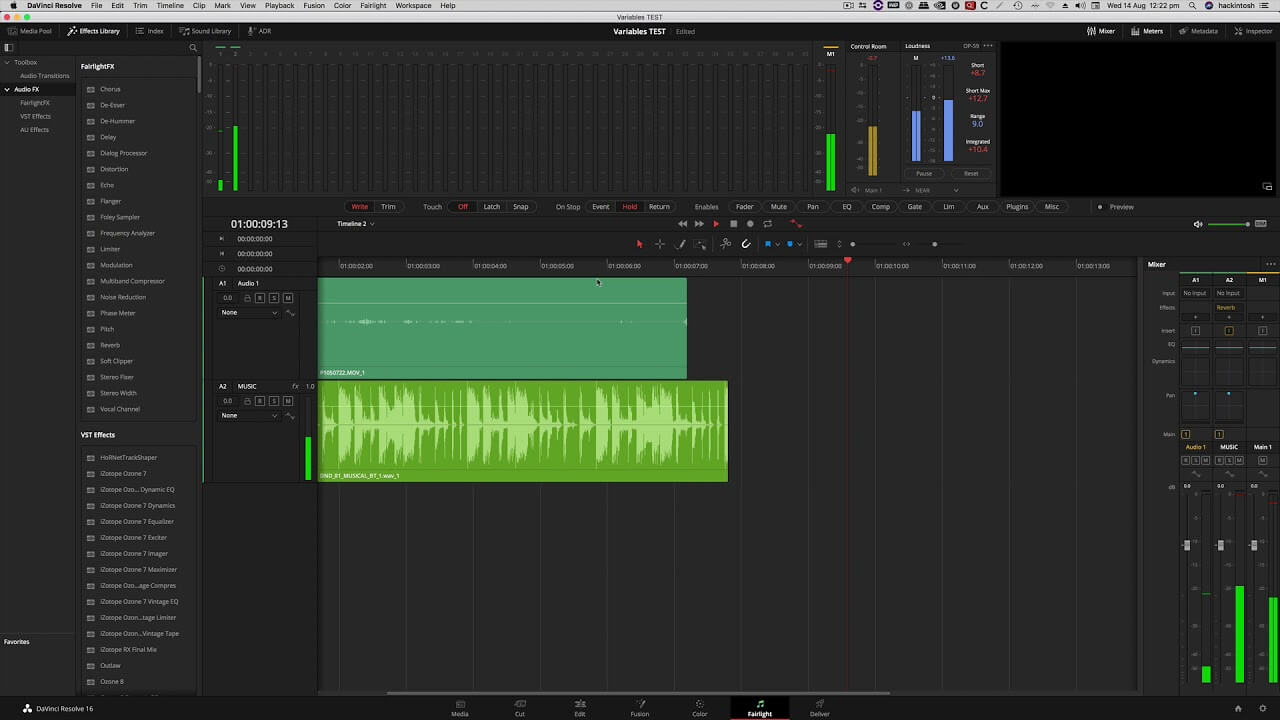
Step 2: Add Audio Reverb
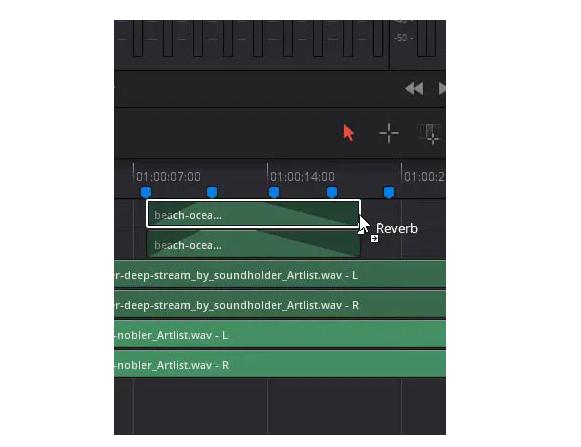
Go to the effects library in the Fairlight page, and then scroll till you find the reverb effect. When you add the reverb effect in your audio, a module will pop up; you can tweak it however you want to set its reverb power.
Step 3: Export video
The last step is also the same as all the above ones. And this is to save the file on your device so you can use it later. You can use the shortcut keys, or you can manually save the file by selecting 'Save' from the 'File.'
How to Pitchshift Audio in DaVinci Resolve
We are going to discuss the process of pitch-shifting audio in DaVinci down below:
Step 1: Import Video in DaVinci
You have to open the file in the DaVinci first and then start the process of pitch-shifting audio from the video clip. To import the file, go to the 'file' and click 'import.'
Step 2: Pitchshift Audio
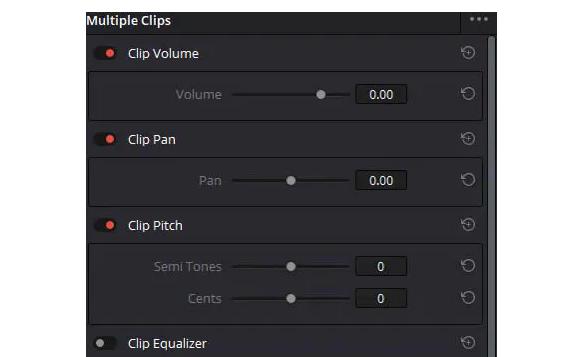
If you are looking for ways to shift your audio pitch, then DaVinci Resolve is the best solution. You might have seen many tutorials on how to remove your pitch using this software, but nothing has been explained thoroughly. I'll explain it to you in the easiest way possible. First of all, you need to select the clip you want the pitch-shifted in the Fairlight page and open the inspector. After that, you need to go to the pitch section and tweak its settings. But don't try tweaking a lot. A little bit is more than enough, as the pitch controls are overly sensitive.
Step 3: Export from DaVinci
Now, let's save the video once all the editing is done. The shortcut to save is 'ctrl+S.'
People Who Liked this Content Also Liked
How to Easily Remove Audio Adobe Premiere [Bonus Tips] >>
How to Remove Audio from Video – 8 Methods You Should Know >>
How to Detach Audio and Edit Sound in Filme Easily
iMyFone Filme
iMyFone Filme is an editing software for photos, videos, and audio. You can merge them, or you can do editing of individual files. Today, we are going to learn how to detach audio and edit sound in iMyFone Filme. The steps for this are:
There are only four steps to this; follow them correctly to remove/detach the audio from any clip easily.
Step 1: Import both audio and video clips
The first thing you need to do is import your media into filme so that they can come into its library.
Step 2: Detach Audio with 1 click
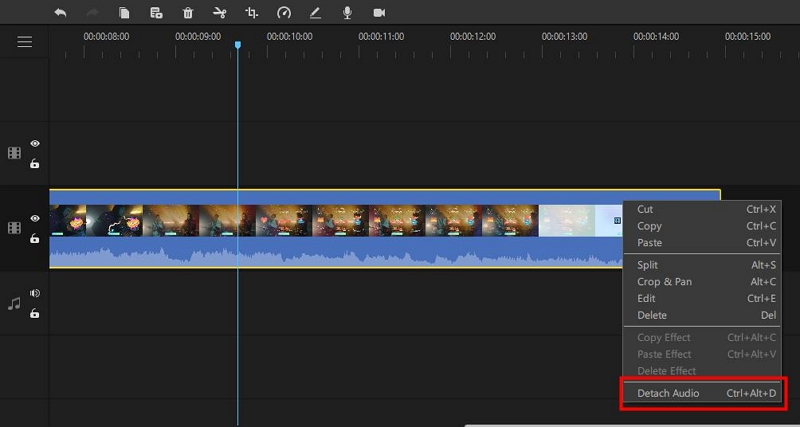
Right-click the video to detach audio so as to better edit your video separately.
Step 3: Go to the "Audio and video" option.
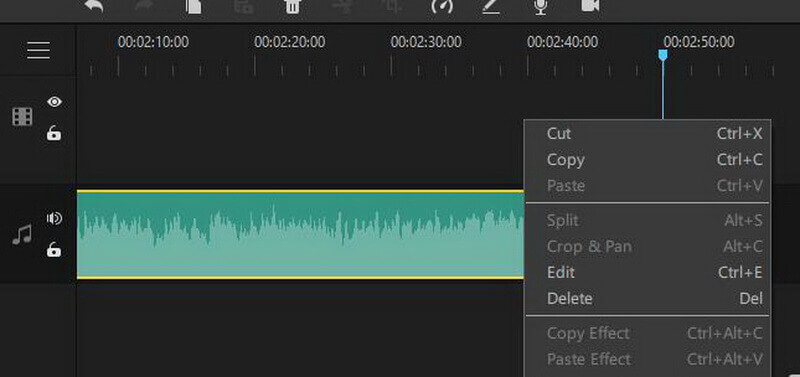
When you have your files in the editing panel, you can easily edit whatever you want in them. You need to right-click on your video file to see the edit option there. Click on that, and then another file will open at the top-left corner of your screen. There you will see the video and audio editing option. To remove the audio from the video, drag the dial of the volume panel to the very left to reduce it to zero. And then, you can use the other audio to get it mixed with your original video clip.
Step 4: Save
When you are done with removing and adding audio, save the new file with the desired name! There is a "save" option present at the top-left of your screen, click on it, and then you are done.
Features
Here we go with the amazing features of iMyFone Filme.
-
Filme is the pure definition of simplicity; it has the simplest toolset anyone can easily use.
-
Filme allows you to create slideshows using the pre-prepared features.
-
Filme has pre-prepared effects, filters, templates, and transitions that help to make a user's edit look fabulous.
-
Filme is compatible with almost every format out there, including MP3, MP4, WMA, MKV, MPEG, etc.
-
Filme allows you to remove or add audio from any desired clip.
From the above content, one thing is clear that iMyFone Filme is the best alternative for every editing procedure. No matter what software or tool you are to use, Filme is the best way to get the same, if not more, professional editing result. So, better to choose this if you want to save time.


 iMyFone MagicMic
 Free Download


