It is disappointing to shoot a video with damaging parts. Don't worry, as iMovie's introduction makes it easy to remove unwanted parts of the video. You will not require shooting the video again and again to ensure quality. This application is easy to use to enable anyone to edit and turn the photos and videos into a compelling storytelling movie. This article will guide you on how to crop a video on iMovie.
How to Crop a Video using Apple iMovie
Now, you want to make sure that the video is clear and exciting. After you import your video in iMovie, you may want to clean up your footage, remove the parts you might not like, and keep only the movie's best moments. And the question is, how to crop a video clip in iMovie?
iMovie is a great software that supports Mac. So, you will not need to be a professional editor to use it. It makes it easy for users to crop videos without consulting experts. It can be suitable for you if you want to focus on a specific part of the frame and make the video look good on social media platforms. Here are easy steps to crop a video on iMovie:
1. On the application folder, open iMovie on your Mac.
2. Click on the "Import" media and drag and drop the video you want to crop.
3. Drag the video into the iMovie timeline.
4. Click on the "Crop" button - A faint grey button in the editing section.
5. Use the shafts at the corner of the video to adjust and crop where needed.
6.Once you adjust according to your satisfaction, click on the blue button at the right corner to apply the changes.
Also Read: Create a Picture-in-picture Video in iMovie >>
How to Crop a Video using iMovie Alternative - Filme
Though iMovie is a powerful video-editor, it only supports Mac system. You might need to use an alternative software of you are a windows user. Filme for Window is an advanced video editing software that comes with a user friendly, intuitive interface. It is among the leading free software applications for windows. It features multiple editing modes and a single click video creation and extension template collections to allow you to come up with Vlogs quickly. The good thing about this editing tool is that it allows one to create a mix of images, videos, and text to develop an engaging experience for followers. Here are the steps of cropping a video using Filme on windows:
-
Downlaod Filme and launch it on your computer.
-
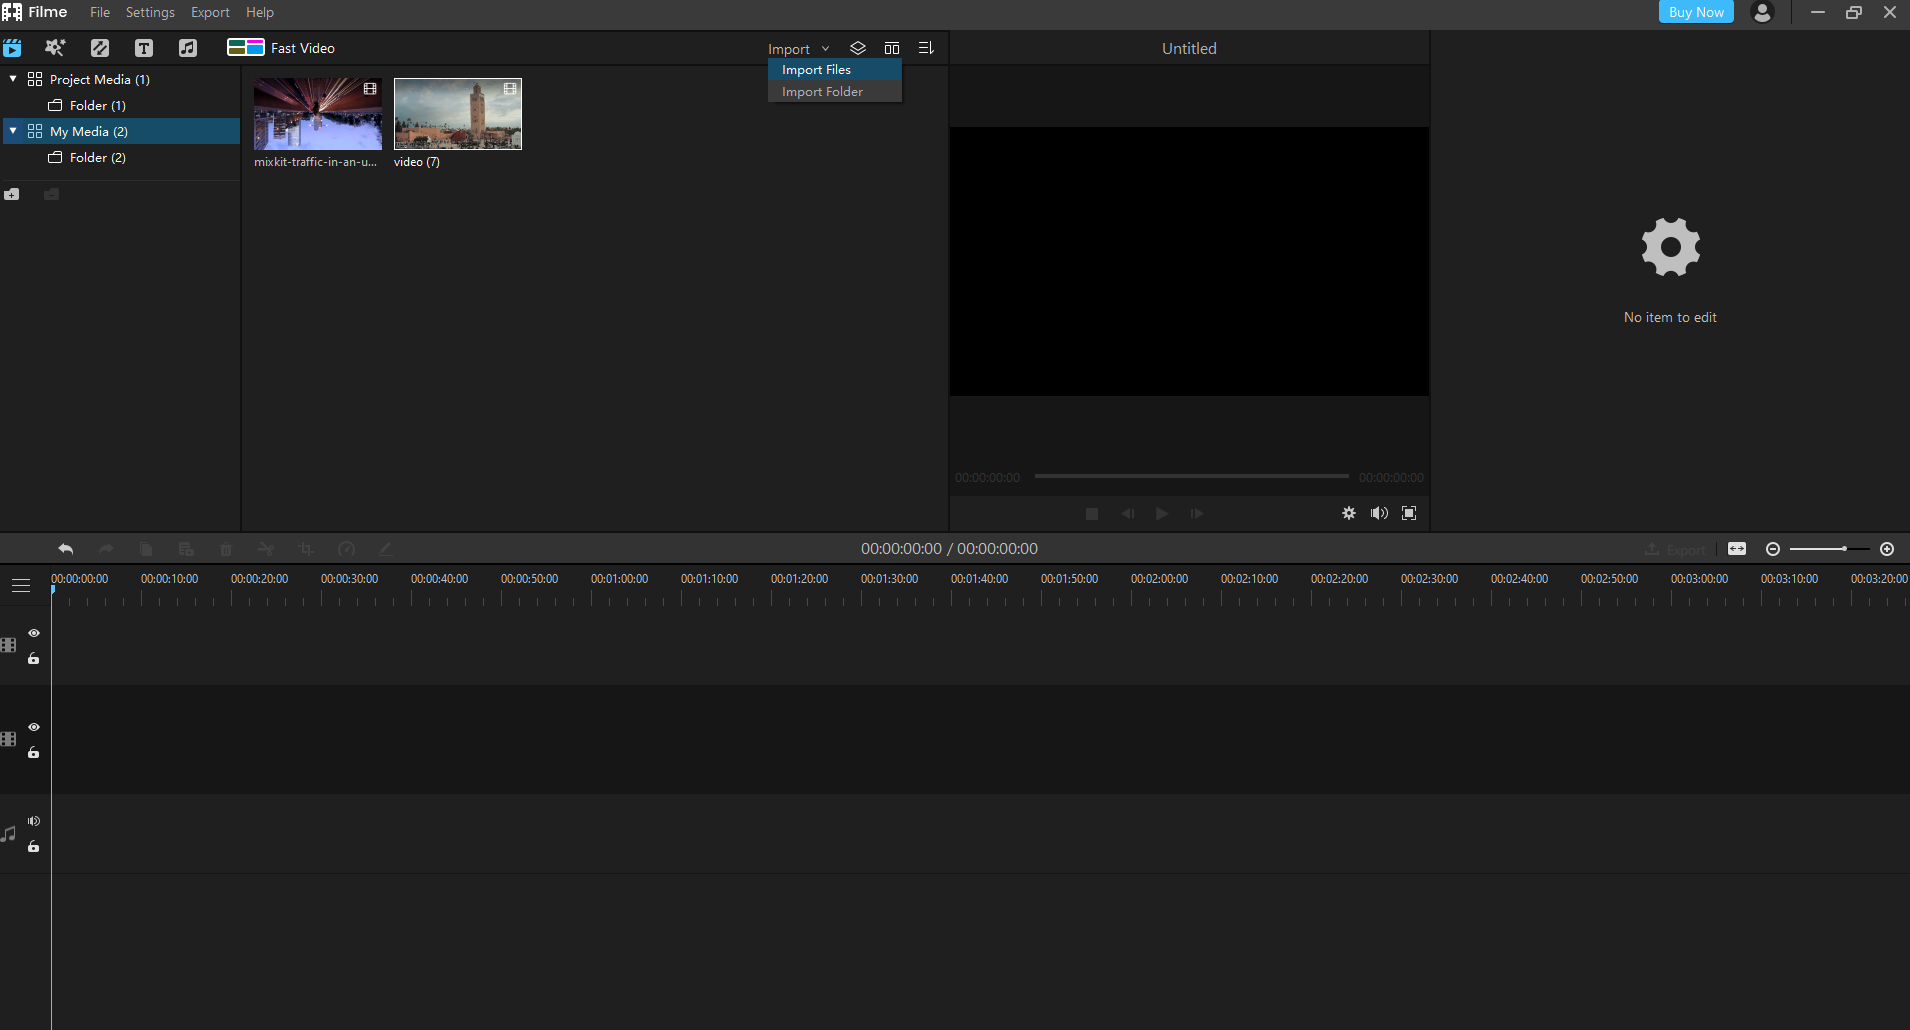
Import your media by file or folder by clicking on Import.
-
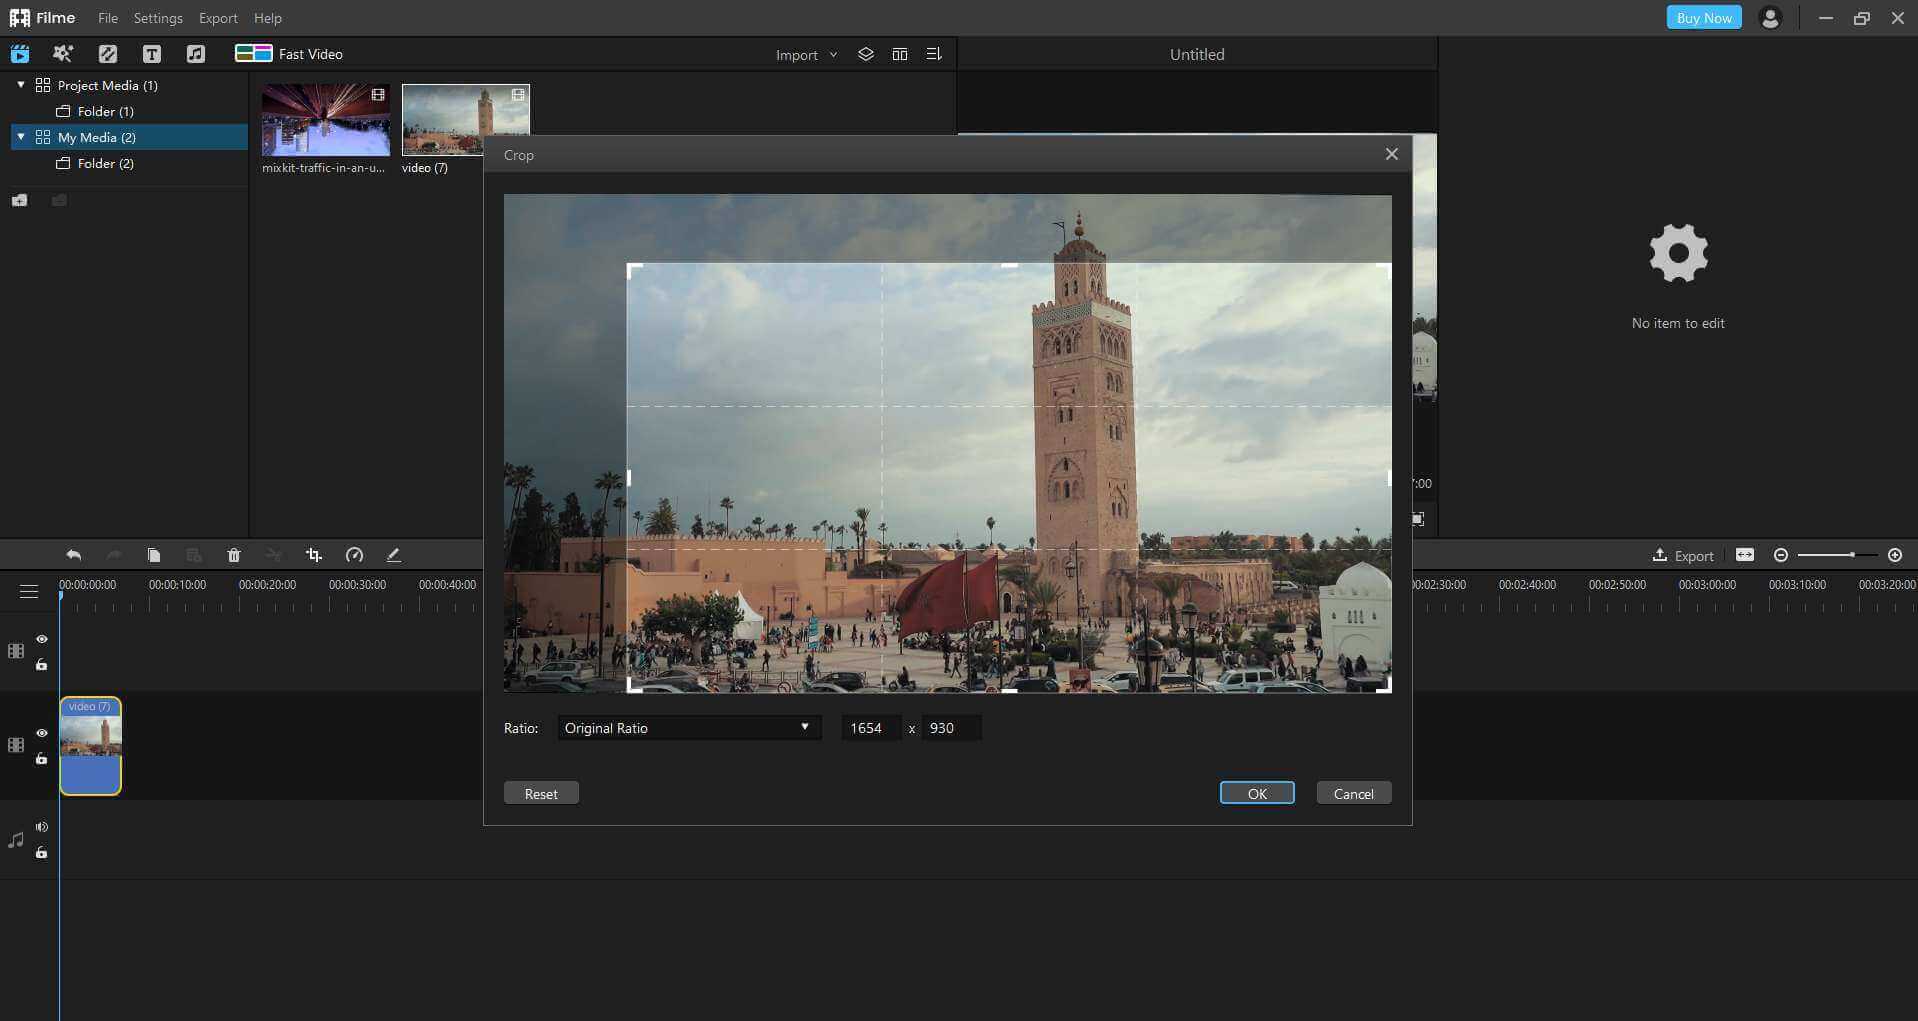
Click on the crop icon in the toolbar, and a crop window will open.
-
Use the corner of the rectangle to crop the video screen, and the bottom left of the screen to adjust the ratio.
-
Select the custom option, so you can input the ratio you want in the two boxes.
-
Click "OK"; to confirm and "Cancel"; to undo the changes.


Key Features:
-
Fast Video Mode: A feature that gives Filme an edge over other video editors. It helps to create slideshows with a single click.
-
Essential editing features: Crop, rotate, trim your videos, adjust speed and picture-in-picture effects to help you create a high-quality video.
-
Special effects: Add creative texts, filters and transitions to make your video a masterpiece.
Video Editing Tips
Video editing is not such a difficult task, and neither is it a simple one. It depends on how conversant one is with video editing tips and hacks. They include joining, trimming, rotating, cropping, reducing and compressing, improving resolutions, and changing the aspect ratio. Once you understand such essential tips, you're well-groomed to go on how to crop a video on iMovie.
Since this article has concentrated on video cropping, then what next after you are through? Probably the next thing is to share the cropped videos to your Mac. However, before sharing the video(s), here are some few things to do:
1.First, one should have to preview the video before exporting it to your hard drive.
2.While previewing, ensure the video is not too much cropped.
3.Ensure your cropped video's aspect is similar to that preferred output format.
It is essential to note that the quality of cropped videos can, to some extent, depend on the output format chosen. For instance, selecting small dimensions alongside a large dimension output will, for sure, negatively impact the video's quality.
Also Read: Crop video on Windows 10 >>
Watch this video to learn how to use Filme to edit videos:
How to Share Cropped Videos on Mac
Sharing cropped videos is nothing compared to trimming itself. It is effortless. Here are the steps to follow for a smooth sharing process.
1. Look for the share button. How do you find it? Locate it by clicking on the "File" in the top toolbar then click on it (share).
2. A drop-down menu appears the click on "File."
3. A menu will appear asking if you would want to rename the video.
4. A pop-up appears one last time querying where to save the file and reconfirming the name.
5. Click on "Next." At this point, the newly cropped video gets saved to your suggested location on your Mac. It is worth noting that the default location is the Mac desktop.
Conclusion
As explained in this article, how to crop a video using iMovie is very simple and straight forward. There are several Fast and Easy Methods to Crop Your Videos. If you're an mac user, iMovie seems to be the best and quickest. If you are a Windows user, Filme is a great choice. Therefore, don't struggle with video cropping tasks. Just get on iMovie and Filme and have them done in a blink of an eye.


