iMovie is an easy and fun Software that anybody can use to make outstanding and interesting videos quickly. Here, you would have loads of templates available in the software that can easily help you make an iMovie slideshow on Mac
You have the option to add, cut, or correct the effects inside the available footage to make a unique thing. Else, you would also have the option to start making anything from scratch without any hurdles. It gives you advanced editing options to push your creative limits.
Part 1: How to Create a Slideshow in iMovie in Less Than 3 minutes
Mac users can now enjoy making slideshow videos on their systems with the help of iMovie software that is pretty much available with all the features required to make a video. The best part about this software is that you can implement your storytelling skills inside every video you will make using this software.
Here, iMovie brings you the opportunities to make a video slideshow of your videos and images for whatever purpose. The iMovie slideshow templates can handle different sizes of videos and pictures and bring more support to let it look beautiful.
You can pretty much use these videos for marketing purposes, YouTube channels, or whatever you want to do with them. There are no limitations when it comes to using iMovie on MAC.
Steps to create a slideshow in iMovie:
Step 1: Open your MAC system and click on the Search icon by typing iMovie. Now, the software will open up for you on the screen.
Step 2: After the iMovie will open for you, you will see plenty of already installed projects and add a new option. You can choose the project depending on your preferences. When you click on Add new, it will show you the “Click movie” option, and that’s the same option you should click.
Step 3: The third step will be to select the images you wanted to include in the project. Therefore, you need to select the photo library link that will appear on the left side for you. From there, you can easily import the pictures or movies inside the project.
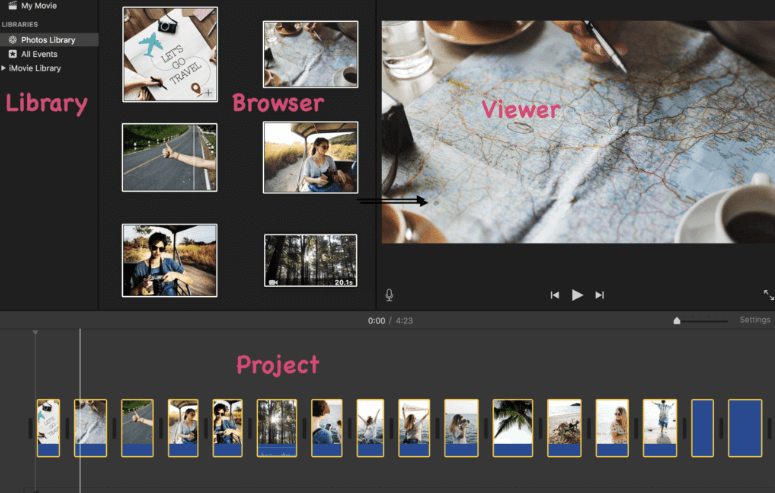
Step 4: After adding the pictures and videos, the next step is to start the project and see your project's right patterns. If everything is ok, then there is nothing to do. However, you can change the order if it’s wrong by dragging them from one point to another in the timeline section.
Step 5: You can make the video as long as you can or as shorter as possible by considering the Trim feature. Project pane or Browser pane are the two features where you would easily perform a similar task.
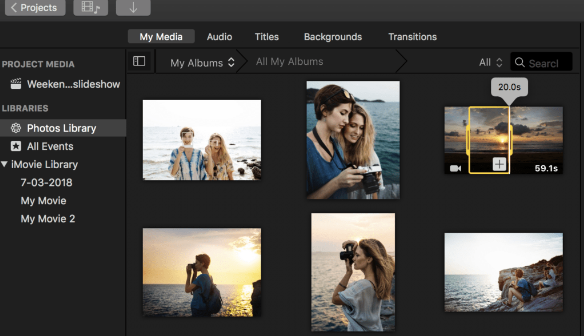
Step 6: You can use the slow-motion effect to the still images on the project timeline. After you click on any specific photo, go to the cropping option and select the ken burns option.
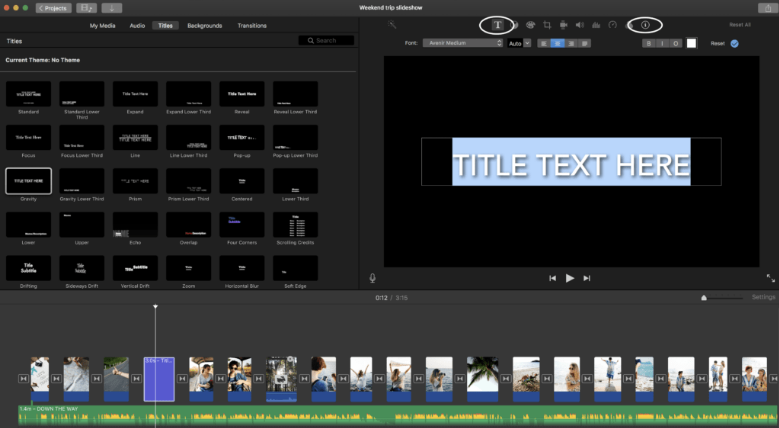
Step 7: On the browser pane, you would see some options that can help you to add text and title in iMovie.
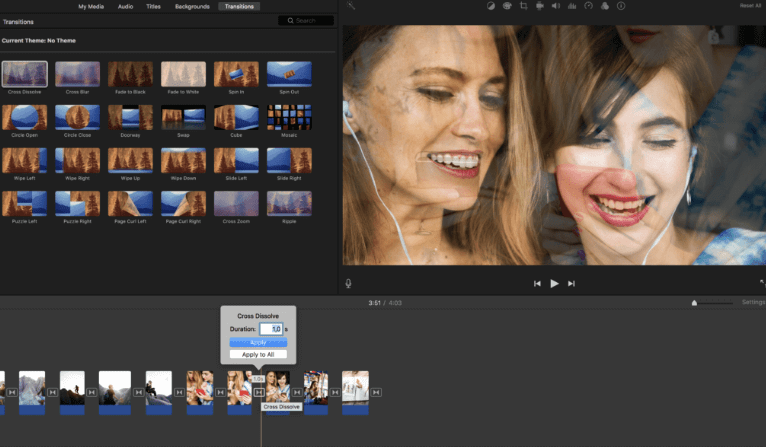
Step 8: You would include the Transition effects by clicking on the Browse pane where similar options are available for you.
Step 9: You will see the Audio button on the top area of the software. From there, you can include several music’s.
Step 10: The last step would be to synchronize the video and then Export it on your System so you can easily share it with others.
Pros:


Cons:

Part 2: 7 Tips to Create Wonderful Slideshows
Many of you might want to know how to make a slideshow on Mac using iMovie to bring compelling results for you. We will tell you about how to make a slideshow in iMovie that will bring a positive response for you despite any reasons. It will be seven effective tips, so focus deeply.
Include the Supporting Points
You need to practice repeatedly to bring the main message into the Slides that will last longer. Therefore, the supporting points need to be your slideshow's major structure as they can bring you a good response. In other words, the listener experiences need to be enhanced throughout the time if you demand good results out of it.
Include a Consistent Feel and Look
The second outstanding thing you can think about is to make a consistent feel and look into your iMovie Slideshow. We want to say here that you should include the same story feel in each slide, such as the imagery, colors, and typography.
Less but more expressive text
Never include more texts into the slides that would look like a Word document file. Making a slideshow in iMovie needs to be less in words but more expressive.
Include Transitions
Never try to use the same feel or structure in every iMovie slideshow template. Try to think about including the Transitions in your topic. In other words, try to implement different styles between the topics that can generate transitions for you.
Only Use Photos that makes sense
It’s not mandatory to include a lot of pictures in the slideshow. Instead of that, try to use the photos in less amount, but the photos need to be more expressive so that their minimal quantity would show a lot of meaningful data to others.
Sensible Charts and Graphs is a Must
Graphs and Charts are other important things to convey your message into the Slideshow. Therefore, include it whenever it’s needed. Also, make sure to include simple charts.
Don’t Use Auto play Feature
Whenever you add videos, never set the auto playfeature. Sometimes, it would irritate the viewers. Hence, the interesting aspect only comes to the slideshow whenever a person manually plays it throughout the transitions.
Part 3: Best Alternative to iMovie for Slideshow Making- iMyFone Filme
iMyfone Filme
You may not want the iMovie slideshow to make the slideshow. There is nothing wrong with that at all. Instead of that, you have other options as well to use for making a slideshow. Yes, we are talking about iMyfone Filme.
Filme is easy to understand and fun software that anybody can use to create interesting slideshow for different reasons. You have the option to add, cut, or correct the available footage to create a unique slideshow in the software. Apart from that, you also can create a new slideshow from scratch by using the advanced editing options of this software.
- It comes with an audio option where you can edit, record, or add it depending upon your preferences in the slideshow.
- The title and text can be included depending upon your needs.
- You can select the preferable color and font style as well for it in the desired setting bar.
- Delete, Split, and trim features are also available in the Slideshow. The reason of adding them is to help you set the slideshow with or without any music depending upon your needs.
- You can run multiple projects at the same time on iMovie related to Slideshow making.
- Moreover, it has pre-built backdrops and themes that helps you to start the slideshow creating instantly without considering it from the scratch.
Key Features:
How to Create a Slideshow Using iMyFone Filme?
Step 1. First of all, Open the Software and Click on the New project Option. Else, you would have the option to use their pre-designed templates available.
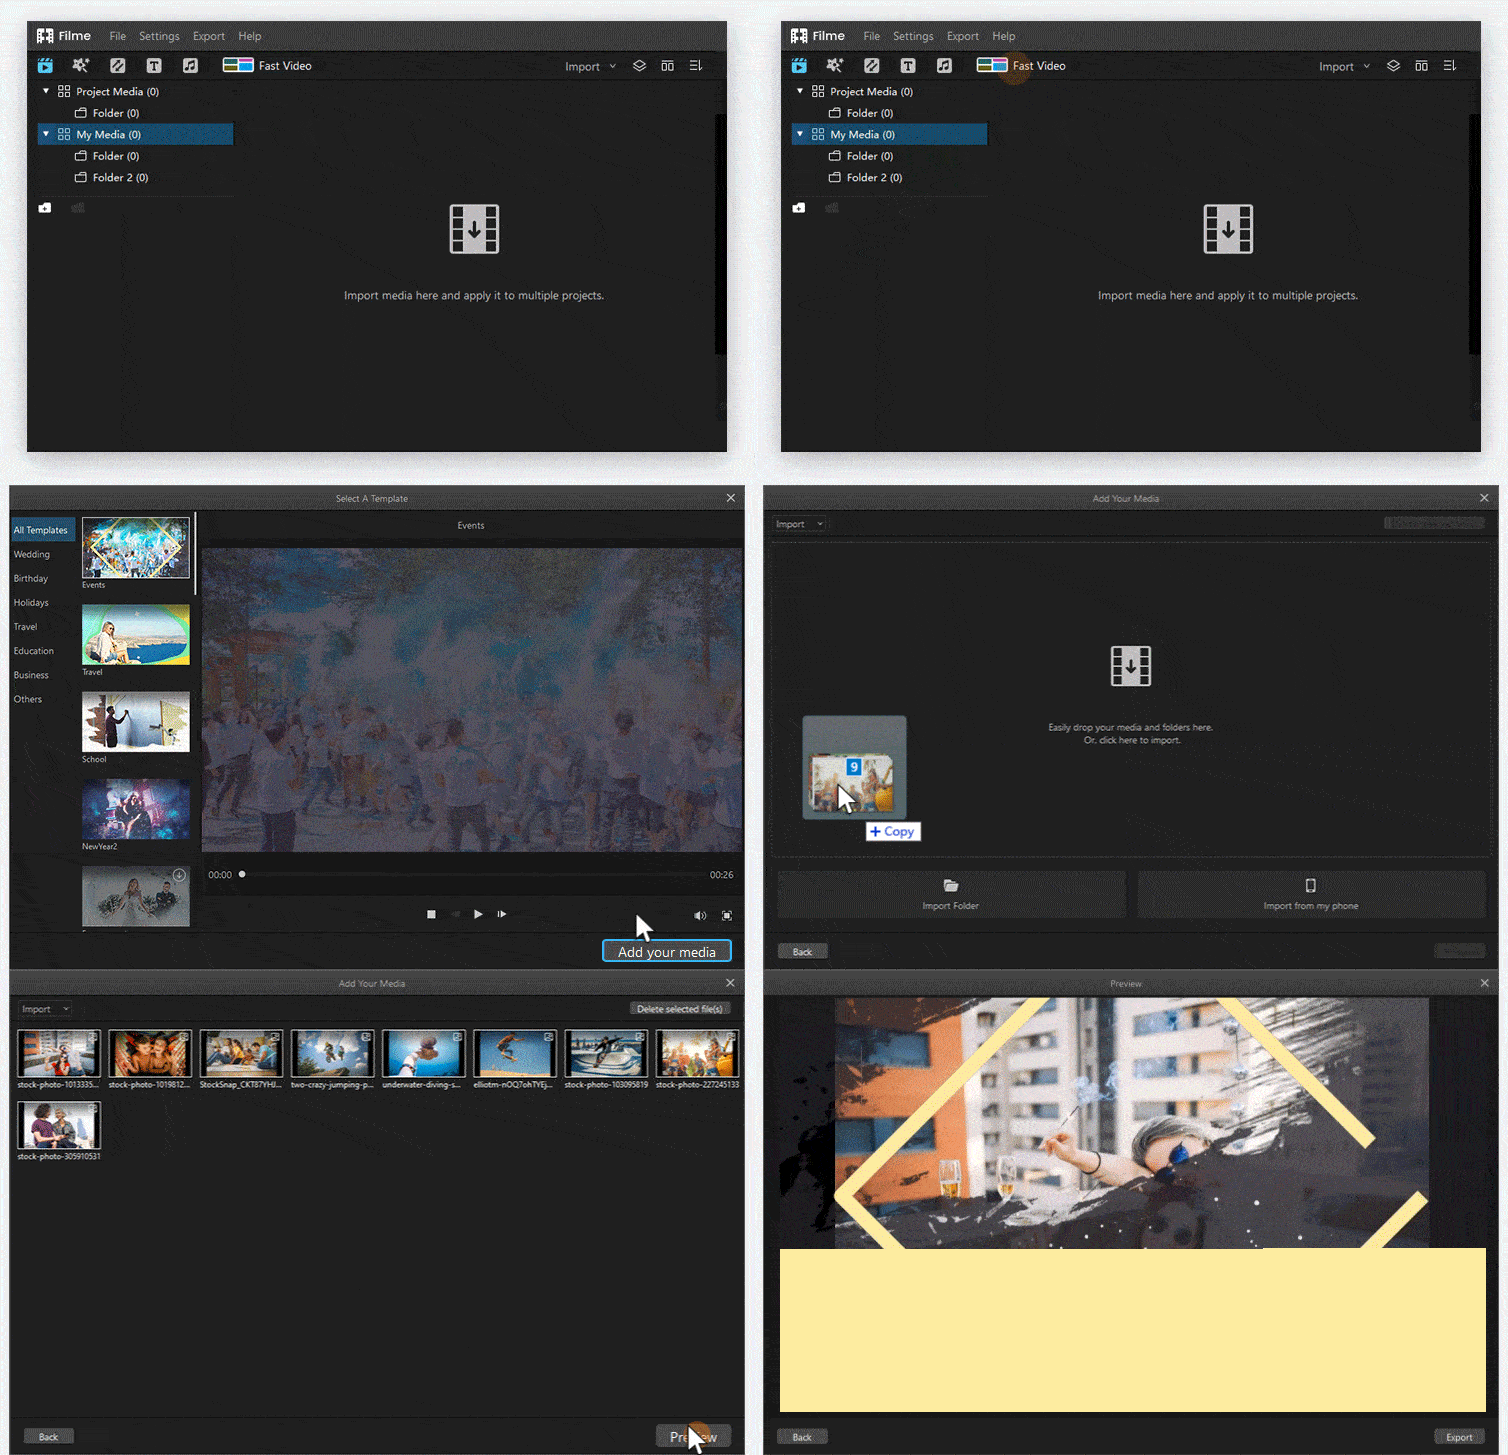
Step 2. The second step would be to include all of the elements you want in your Slideshow iMyFone Filme. Here, you can import the videos and photos. You can directly click on the import option and include all of the photos or videos you need in it. Else, there are other ways as well to do this step.
Step 3. After you Import all of the photos and videos in the Software, it’s time to use them in the Timeline. For that, you can easily drag and drop the pictures and videos you want to include in the timeline. Meanwhile, you can set the rhythm of the picture and videos by expanding or stretching it inside the timeline.
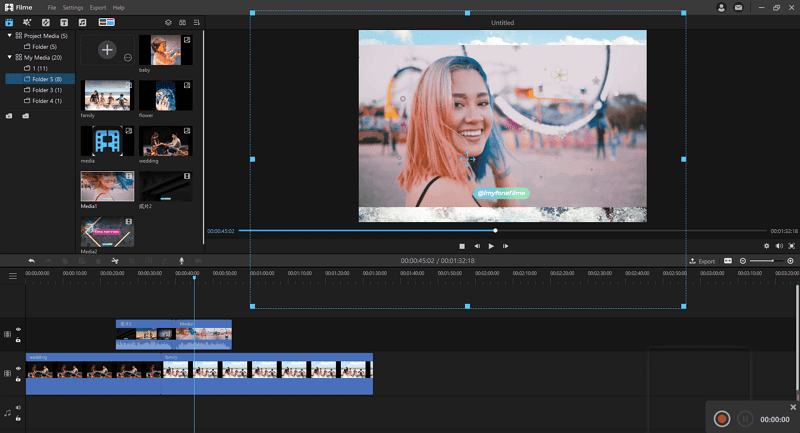
Step 4. If you want to resize or edit any of the videos or photos in the timeline, you need to double-click on the desired photo. From there, you will see at the top right section of the software that has some available options for you. There, you can change the color by setting contrast, brightness, and white balance. On the other hand, you can use Scale to resize the photo or video easily.
In general, you have all the authorities to edit the Slideshow the way you want. There are no limitations; however, you have to apply customization by considering the available options in front of you.
Step 5. At last, you can export the Project to save it on your System and then use it for different purposes.
Part 4: FAQs about Creating a iMovie Slideshow
1. How to Make an iMovie Continuously Loop on a Mac?
Step 1: Open the iMovie software and select the video that you want to Loop.
Step 2: Consider the Loop Playback feature by clicking on the View menu. After that, play the video, and it will start looping the video continuously for you until you manually stop it.
Step 3: If you want to export the move anywhere else, you can click on the share button.
Step 4: Now, select the option for file and then click on the next option. From there, you have to save the video from converting and then saving it.
2. How Do I Get More iMovie Trailer Templates?
Step 1: Open the iMovie Application and click on add new project Option. There, you will need to click on the “Trailer” option.
Step 2: Now, you will have loads of iMovie Trailer templates available to the screen. You can move the cursor to any template and click on the play button to watch it.
Step 3: Depending upon your preferences, click on the desired template and then click on the create option. At last, make sure to click on the “Ok” button.
3. How to Make an iMovie Slideshow with Music?
Step 1: Create a project and import all major elements like Pictures and videos in it. Now, drag and drop every element to the timeline in an orderly way.
Step 2: The second step is to import the music into the software. After that, you can similarly drag and drop the music in the timeline. You can import multiple musics in the iMovie and then expand or stretch it depending upon the preferences. Now, you can make a music video in iMovie! Isn't it easy?
4. How to Randomize Photos in iMovie Slideshow?
You can randomize the Photo in iMovie Slideshow by manually doing the procedure. Click on the photos you want to randomize in un-even order and drag-and-drop them. Meanwhile, iMovie will automatically shift the other photos to the down and right section to easily accommodate every new photo.


