Video recording in certain situations and scenarios can be challenging. It is difficult for the cameraman to keep his hands steady and the camera stable. As a result, the video turns out to be a little shaky. For that reason, we use the stabilizer effect in video editing to stabilize the video.
There are many video editing tools available that can stabilize the video, but today we will talk about Adobe Premiere Pro. Let us see how we can stabilize video by using warp stabilizer. Moreover, we will also share a simple video editor that can help you edit videos without any hassle.
Part 1. How to Stabilize Video Clip in Premiere Pro Using Warp Stabilizer
Although there are different types of video stabilizers available in the market, we will use Premiere Pro and demonstrate the steps of how we can stabilize video. Out of different effects, we will use the warp stabilizer of Adobe Premiere Pro, which is a known video effect for its video stabilization capability.
It does not matter if the camera quality is insufficient or the camera is quite shaky while recording; the warp stabilizer will stabilize the video up to its full capacity. Let us see how we can use the warp stabilizer in Adobe Premiere Pro.
Steps to Stabilize Video Using Warp Stabilizer in Premiere Pro
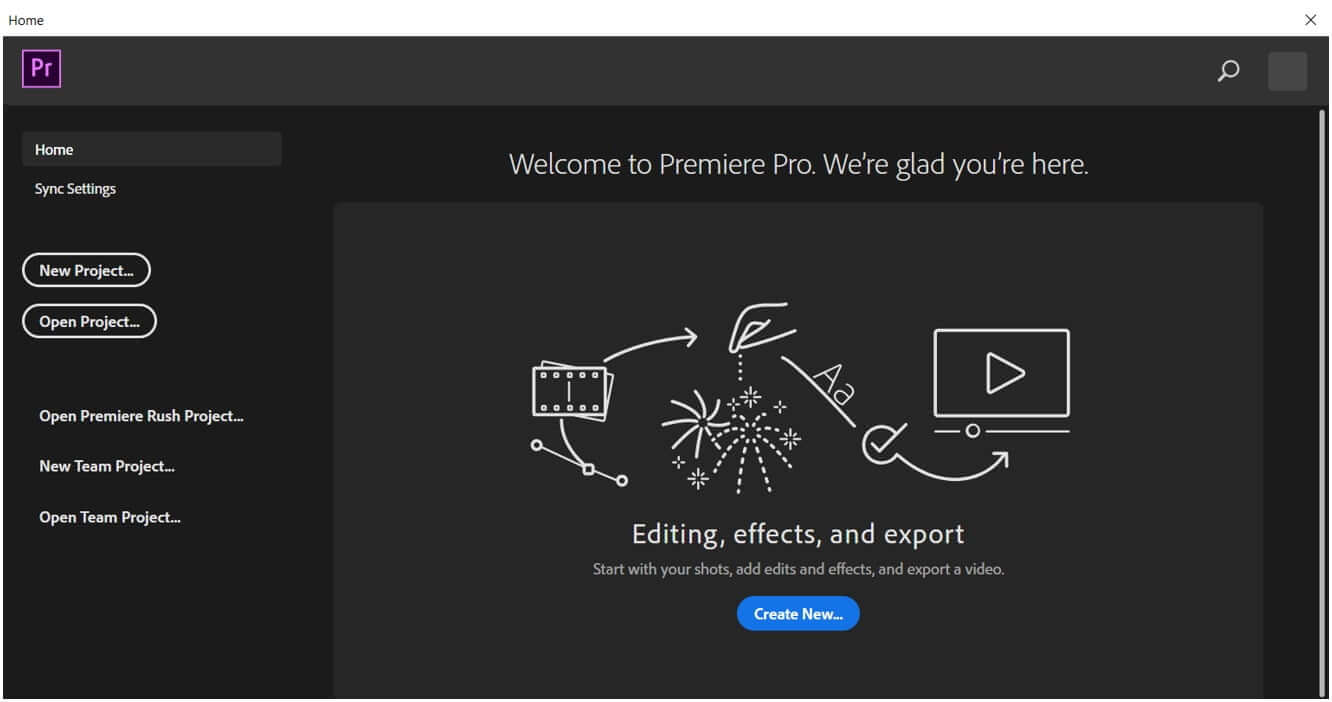
Step 1: Download and install Adobe Premiere Pro. Open the app and create a new project as we want to edit the video, specifically stabilize the video. An editing window will open.
Step 2: As the editing window opens, you will observe multiple small panels. Go to the import window, which is usually on the bottom left of the screen. Import video or videos that you want to stabilize using the warp stabilizer of Premiere Pro.
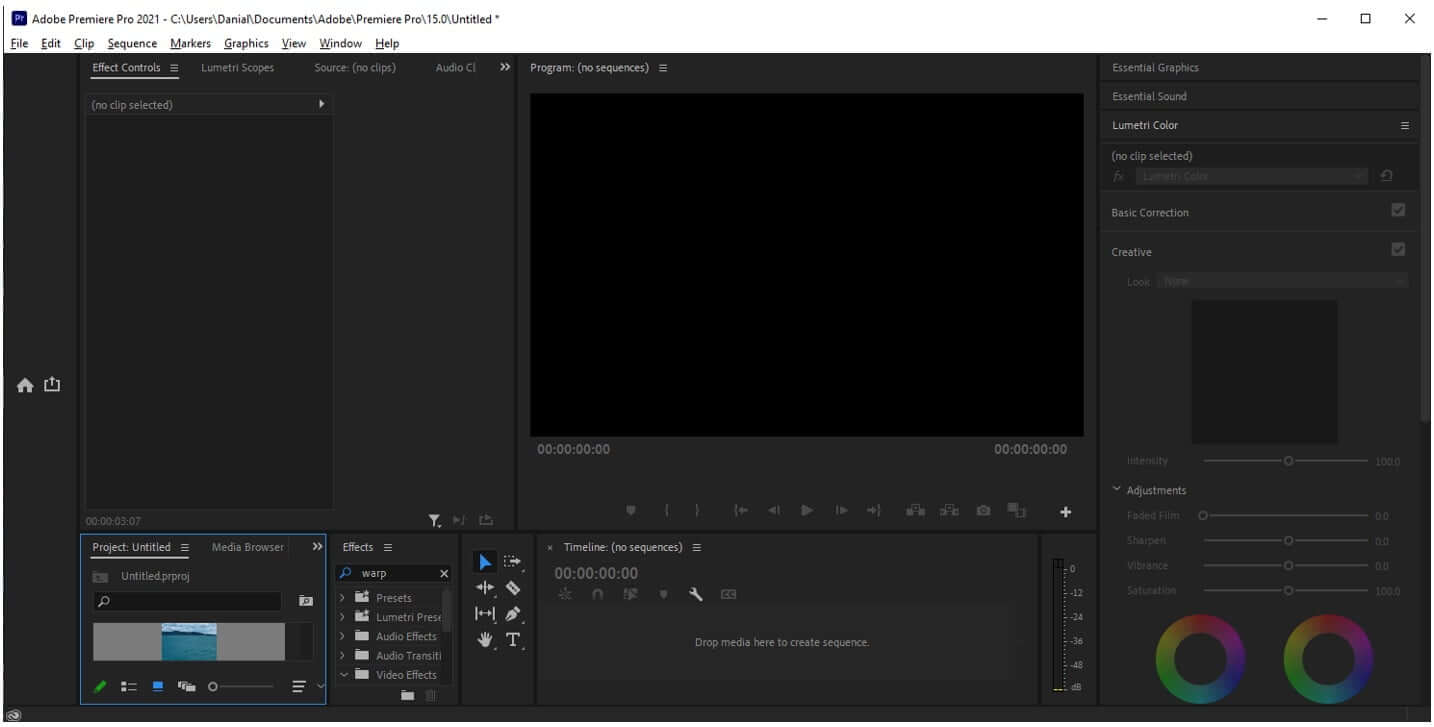
Step 3: Now, we want to edit the video and apply effects to it. For that, we need to drag the video on the timeline. When the video is on the timeline, we can apply any effect or transition to it that we want.

Step 4: As our target is to stabilize the video, go to the effects window and search for "warp stabilizer". Just under the video effects folder, you will see a subfolder of distort in which you need to find the warp stabilizer. To add it to the video, drag this warp stabilizer effect to the video track on the timeline.

Premiere Pro will analyze the video in the background and then stabilize it as much as possible. It will take a few seconds, and the warp stabilizer will do its work. Your video will be much smoother and stabilized than before.
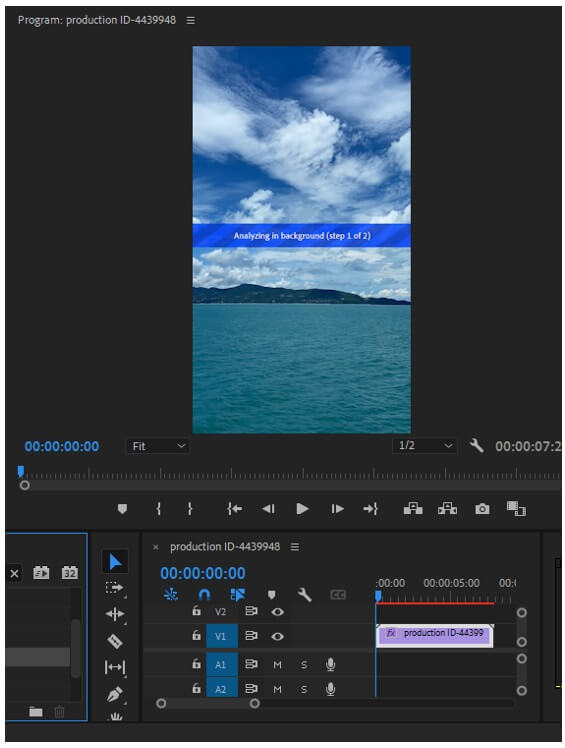
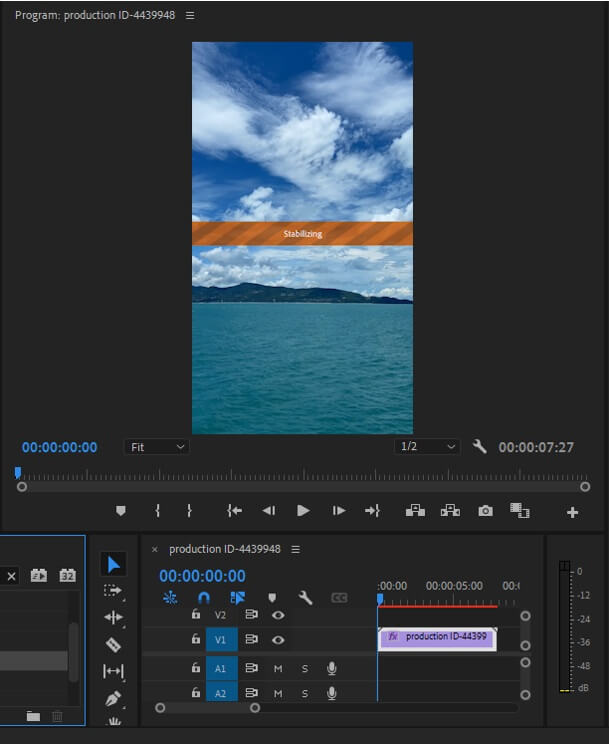
Step 5: This is stabilization at default settings; if you want, you can adjust and set different options in the "Effects Control" as per your requirement and liking.
Step 6: When the video is stabilized, you can simply export it by pressing the export shortcut "Ctrl + M". Alternatively, you can go to File > Export > Media and export it according to your settings.
Part 2. Best Alternative Video Editor to Make Less Shaky Video - iMyFone Filme
iMyFone Filme is the best alternative to Premiere Pro because it has all the effects and tools of a professional video editing tool. It has multiple transitions, filters, and effects that can easily be applied to any video. Moreover, it gives you the freedom to add in your music if you don't like the music in its library. It gives the user freedom to edit the video according to his liking.
There can be many reasons why the video looks shaky and a little blurry. One of the reasons can be the camera and shaky hands. However, video quality also plays an important part in making the video blurry and unstable. But we can try to use different tools with iMyFone Filme to edit the video.
Steps to Edit Video in Filme
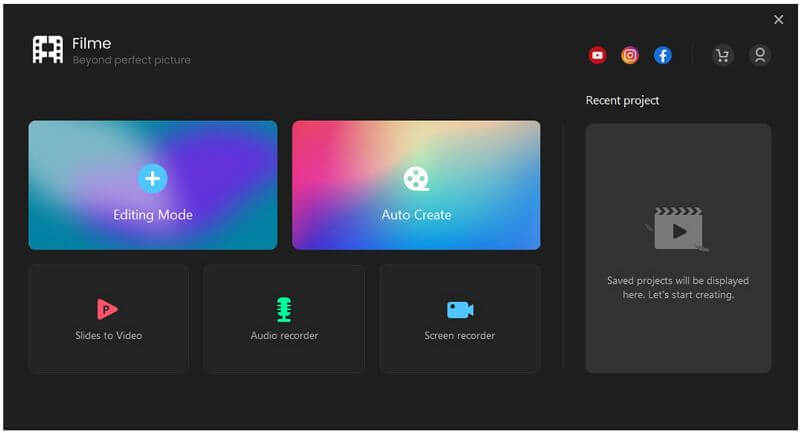
Step 1: iMyFone Filme is much smaller in size than Premiere Pro and will take just a few seconds to download. You can go to the website and download it easily. Install it and open the app. Click on "Editing Mode" to edit the video.
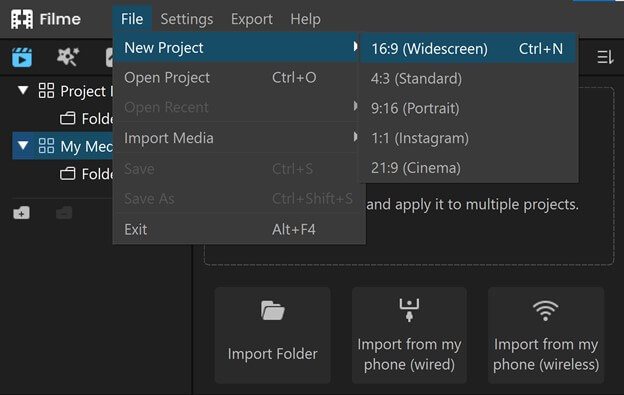
Step 2: Create a new project so that you can start editing from scratch. It will display an option to select the aspect ratio. Select the aspect ratio in which you want to view and edit the video.
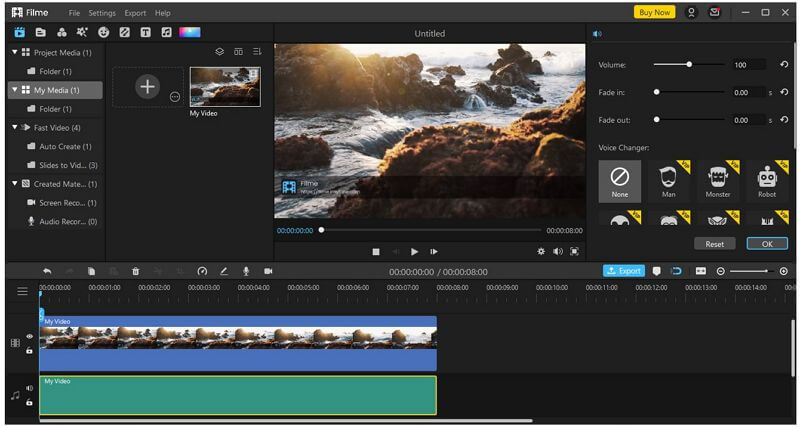
Step 3: The third step is to import the media to iMyFone Filme. You can import videos and audio to iMyFone Filme without any hassle. It allows you to upload different videos with different resolutions. After importing videos, Drag them to the timeline.
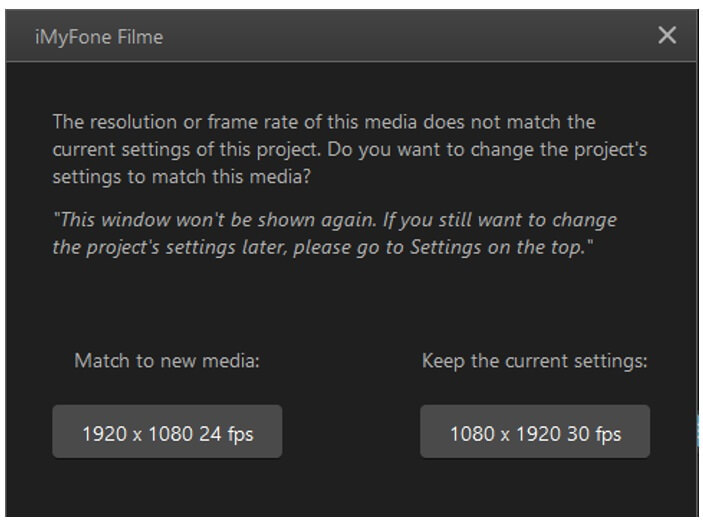
Step 4: If you have placed different videos on the timeline with different resolutions, then iMyFone Filme gives you the option of matching the video resolution or keeping the resolution of the video. In this way, the quality of the video will be consistent, and the video won't blur in any case.
Step 5: You can apply different transitions and effects to your video. iMyFone Filme has a wide range of options that you can choose from. It makes editing easy because it is just a drag-and-drop tool. The user enjoys editing with iMyFone Filme as it has a user-friendly interface.
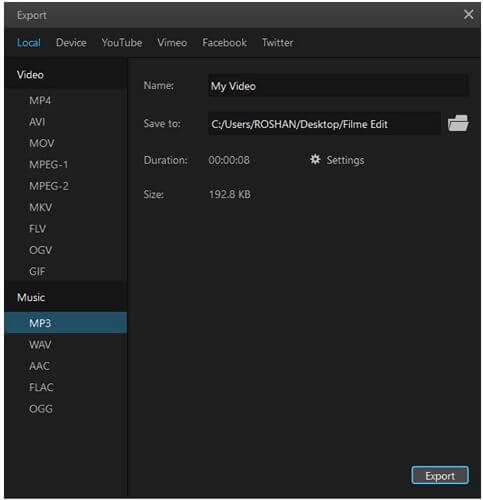
Step 6: When you are done editing, you can export the video according to the video quality, resolution, and format that you want. It makes it easy for the user to select the settings that he wants the video to be saved.
Part 3. What is Warp Stabilizer and Tips Using Warp Stabilizer
Warp stabilizer is a video effect that falls under the category of distortion in Adobe Premiere Pro. It stabilizes the video if it is shaky. The shakiness can be due to mishandling of the camera or low frames per second camera. However, the warp stabilizer transforms the shaky videos into smooth and steady videos.
Tip:1. Use Where Necessary
Warp stabilizer should be used carefully. You cannot apply it to any footage. If the footage is shaky and it is prominent, use it. It utilizes your PC to the fullest and takes time to stabilize the video. It will first analyze the video and then apply a stabilization effect to it to make it smoother and less shaky.
Tip:2. No to Low-quality Video
Bear in mind that the warp stabilizer does not fix blurry videos. It does not clear the video; it only stabilizes it. If your video is of low quality, then applying the warp stabilizer to it won't fix the issue. Get the raw format or good quality video so that stability and smoothness can be added to it.
Tip:3. Take Wide Frame Shots
When you know about warp stabilizers, then push your limits to video recording. Increase the shutter speed and broaden your frame. The Warp stabilizer got your back and will stabilize the video. The video will not be shaky at any cost. It will analyze and stabilize the video in a few seconds, and you will be surprised by the outcome.
Tip:4. Removing Warp Stabilizer
If you want to remove the warp stabilizer from the video, then go to the video on your timeline and right-click on it. You will see different options; among these options, click on "Remove Attributes". You will see the warp stabilizer in the effects. Click on "OK" to remove this effect from your video. Moreover, you will see the difference in the steadiness of the video.
Part 4. FAQs about How to Stabilize Shaky Video
1- What is the Difference Between a Blurry and Shaky Video?
Beginners usually get confused after seeing these two terms. However, these are completely different. A blurry video means that the objects in the video are not clear. It could be due to the poor video quality or camera. On the other hand, a shaky video is clear, so you can see the objects in it. But it has a shaky effect due to mishandling of the camera.
2- Can You Stabilize Any Video?
No, you cannot stabilize all types of videos. Make sure the video is recorded at the optimal quality. Otherwise, there is no way to make the video better.
Stabilization only improves the shaky instants from the video. The video editor analyzes the shakes in the video and then makes it stable. For instance, if you are not using a gimbal, then your video will probably have shakiness in it. Thus, you need to use the stabilizer in this case. Keep in mind that a video stabilizer cannot make a blurry video clearer.
Thus, there are limitations when it comes to stabilizing a video.
3- How Do You Stabilize Footage?
When it comes to stabilizing footage, there are multiple stabilizers available online. You can use any of these tools to stabilize the video. You can also find phone applications that will do the trick for you. But if you want to use Premiere Pro to fix your shaky video and make it smooth, then you can use the warp stabilizer of Adobe Premiere Pro. It is a video effect that you can drag to the video without any issue.
Moreover, if you want to make changes to it, then you can adjust it from the effects control panel, where you can find different options to change or adjust anything in the video. Therefore, Premiere Pro gives you full control of stabilizing a video.
Conclusion
Sometimes we feel like we are recording with static and stable hands, but when we see the video clip, it is a little shaky. It is important to fix this shakiness, and there are different tools available that have stabilization features. Here we have discussed Premiere Pro and how you can smooth your shaky videos using it. Premiere Pro has a video effect known as a warp stabilizer. It stabilizes the video and makes your video stable and less shaky. It is one of the best solutions to shaky videos that you can on the internet.
iMyFone Filme is an alternative to Premiere Pro that you can use to edit any kind of video. With iMyFone Filme, you have the freedom to apply any kind of effect, transition, filter, or template to the video. It has every tool that you need to make your video more than amazing, and the best part is that it is perfect for beginners.


