Using a green screen for a video is a creative way to add a different background according to your choice. With a green screen, it is fairly easy to remove the green part and add in any picture or video in place of it. Nowadays, it is the most used method for video creativity and innovation. Many video editing tools allow you to edit these clips and add any background you want. Premiere Pro is one of the video editing tools that helps that user to do green screen or remove the green screen from any video or picture using its chroma key feature. For beginners, we will share a simple and user-friendly tool that they can use.
Part 1. How to Remove Green Screen in Premiere Pro?
First, you need a compatible video editor that can remove the green screen, and Premiere Pro is perfect for that. Secondly, you will need a clip that has been recorded on a green screen. There are plenty of ideas you can get from the internet to make your green screen. However, even if the background is not pretty much green, you can use Premiere Pro to make it greener, like neon green, with the options available in Premiere Pro.
Once you have a video clip that has a green screen, we can use Premiere Pro to make it transparent. Transparency is just to reveal or portray the background, which is another video/image behind this green screen. Let us see how you can remove the green screen in Premiere Pro using the Chroma key feature.
Steps By Step Guide with Premiere Pro
Step 1: Premiere Pro is a paid tool that you need to subscribe to or purchase to use it. It is a professional tool that has all the features that you can imagine as an editor. Download the app and make sure you have the perfect system requirements to run it so that it doesn't lag or stutter. Open the app and create a new project to be able to edit your video.
Step 2: Once you create a new project, you will see multiple small windows that will help to edit the videos. These small windows have different features and effects that you can add to the video. To edit the video, you will need to go to the project window and import the videos that you want to edit. Make sure that the clip should have the green screen behind so it can be removed.
Step 3: If the videos are imported, you need to drag the media down to the timeline so that effects can be added to it to remove the green screen. Drag the videos down to the timeline. Make sure that the green screen video is on top of the background clip so that when the green screen is removed, you can see the background behind it.
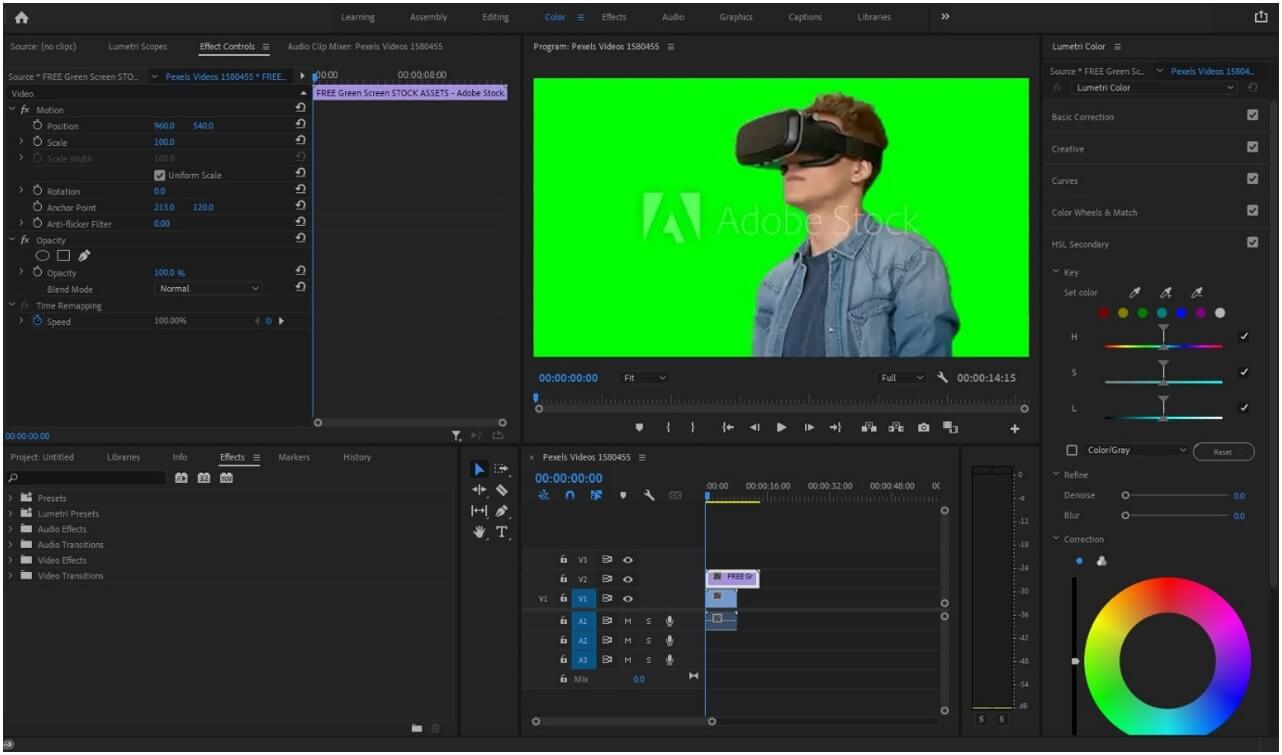
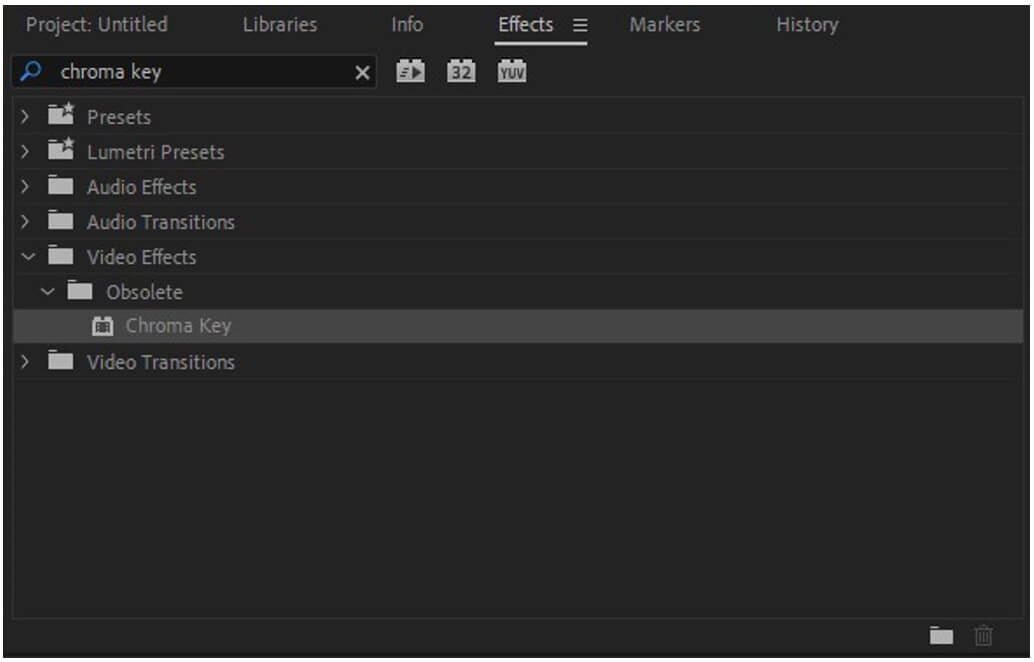
Step 4: Here, the magic of Premiere Pro comes; go to the "Effects" panel and search for "Chroma Key". Drag this effect and drop it on the green screen footage.
Step 5: Now go to the "Effects Control" and go to the options under the Chroma key. Go to the color option and select the dropper by clicking on it. Take the dropper to the green footage and left-click on the green screen. The green screen will be removed.
If the green screen is not perfectly removed, then you can adjust the settings of similarity, blend, threshold, and cutoff.
You can also remove the green screen by using "Ultra Key". Search Ultra Key in the "Effects" panel and drop it onto the green screen footage. Go to the "Effects Control" and "Key Color" option under the heading of Ultra Key. Take the dropper of key color and select the green color of the green screen footage. It will be removed. The only difference between chroma key and ultra-key is that ultra-key has more options to add finishing touches to the footage.
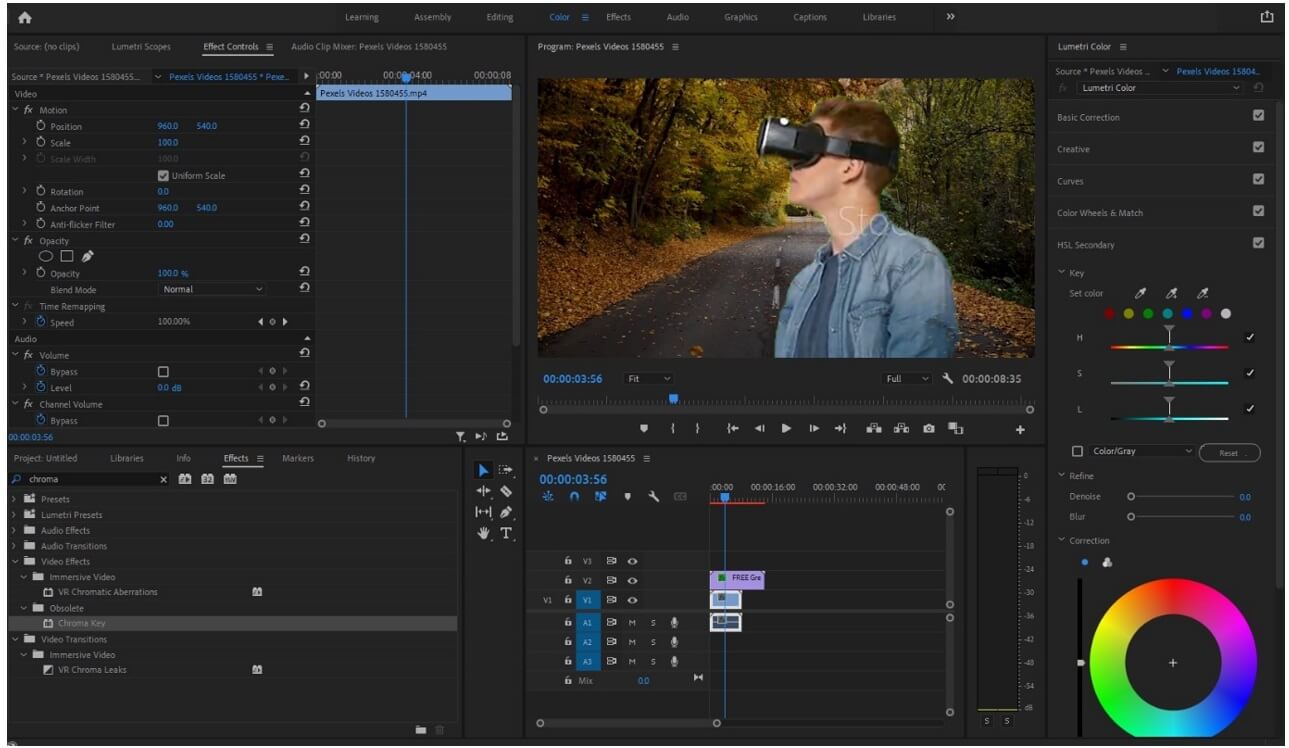
Step 6: After removing the green screen from the footage, you can export your video according to your requirements. Go to Files > Export > Media and export the footage. You can choose the resolution and format of the video. Moreover, you can also select the format of the audio. It also allows you to compress the video and save it in low quality.
Part 2. Best Alternative Video Editor to Change Video Background - iMyFone Filme
iMyFone Filme is the best alternative video editing tool on the internet that one can find. It has all the features of a professional editing tool and helps the user to edit videos easily without any complications. But when it comes to the removal or addition of the green screen, we cannot compare Premiere Pro with Filme. It is because Filme does not have the feature to remove the green screen and make it transparent. But what we can do is add a green screen background to the video using its background fill feature.
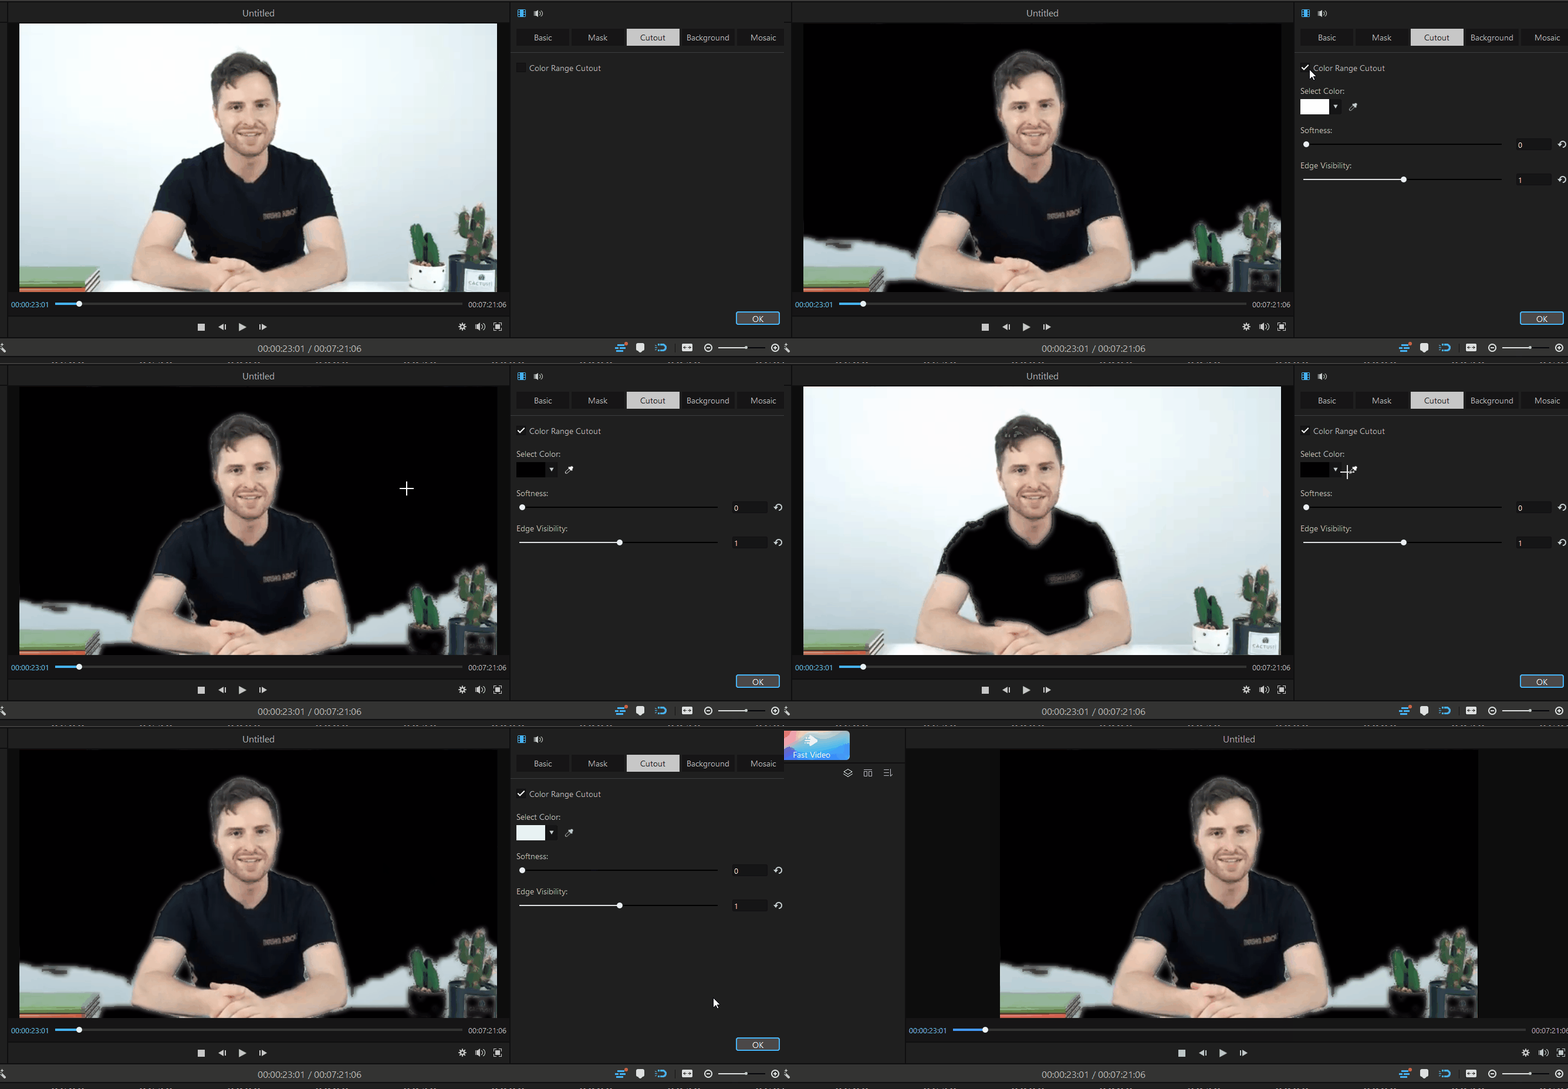
Let us see how we can use the Filme background fill feature to fill the background with green color. Here are the simple steps you need to follow.
Steps By Step Guide Using Filme
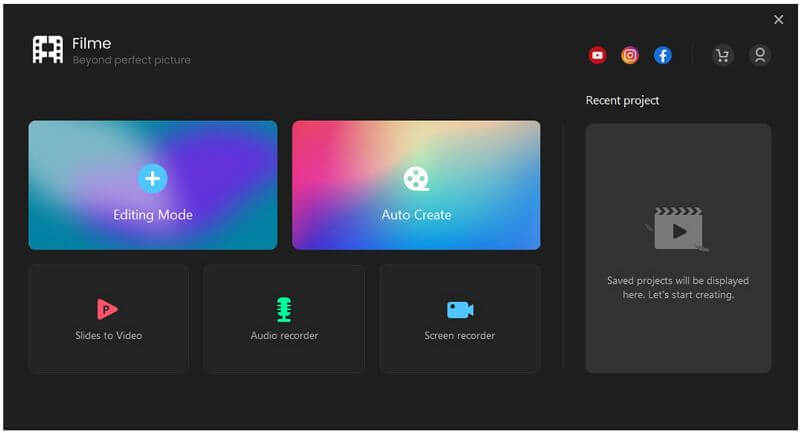
Step 1: iMyFone Filme is also a paid tool, but you can use its free trial version. Download the tool and install it on your PC. Once you open it, there will be 4-5 different options to choose from. Click on "Editing Mode".
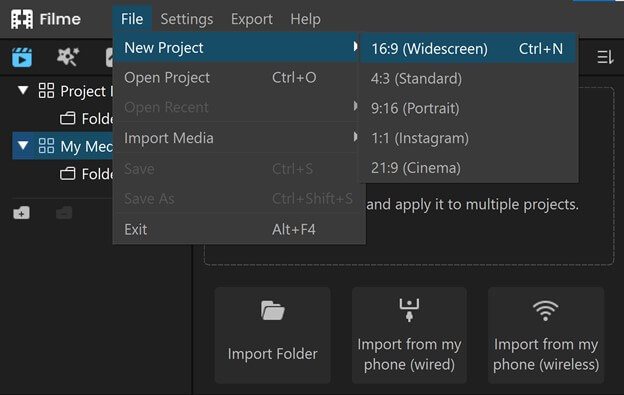
Step 2: After entering into Editing mode, create a new project from the File menu and select the aspect ratio of the video. You can select the aspect ratio as per your video and requirement.
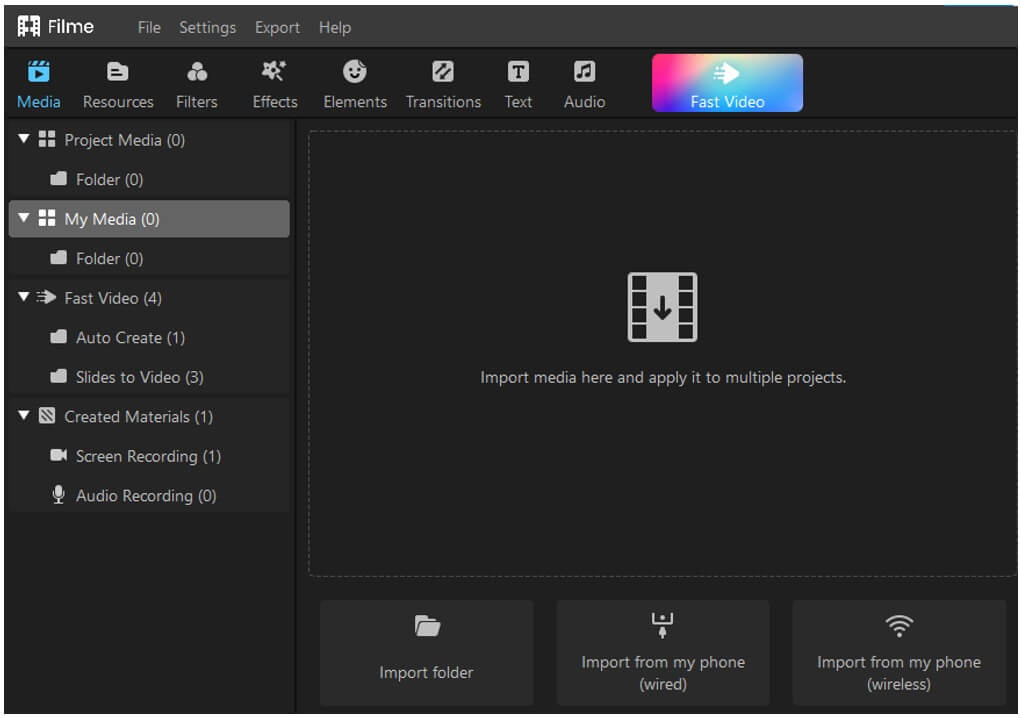
Step 3: Go to the import window and browse the media that you want to edit or add background to. Here you can import multiple videos and audio clips at once. You can also import pictures as short clips.
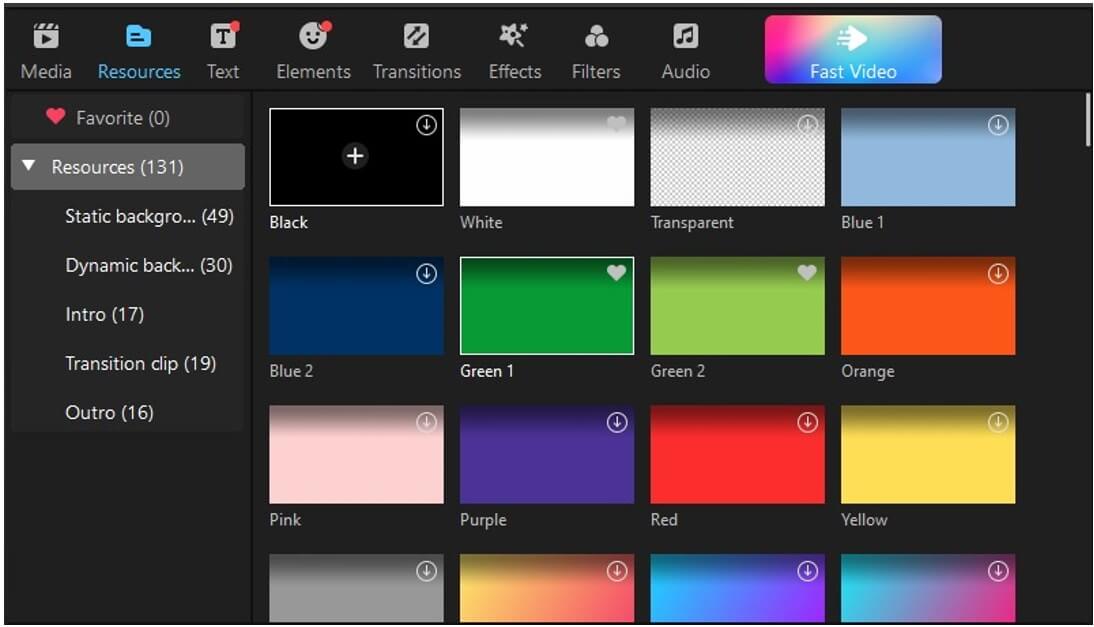
Step 4: Drag the media down to the timeline where you can add the background fill feature. There are two ways to fill the background with green color to make it look like a green screen. You can either go to resources, and you will have five types of background with 113 varieties. But as we want to make it green, we can choose the static background and select green color. Then drag this background down to the timeline to add it to the video.
Or you can right-click on the video and click on the Edit option above the timeline. A window will open on the right side. Here, you will see the background option. Tap on it, and you will have different background options. Select solids as we want to add a green background and select green color. The green color background will be added to the video.
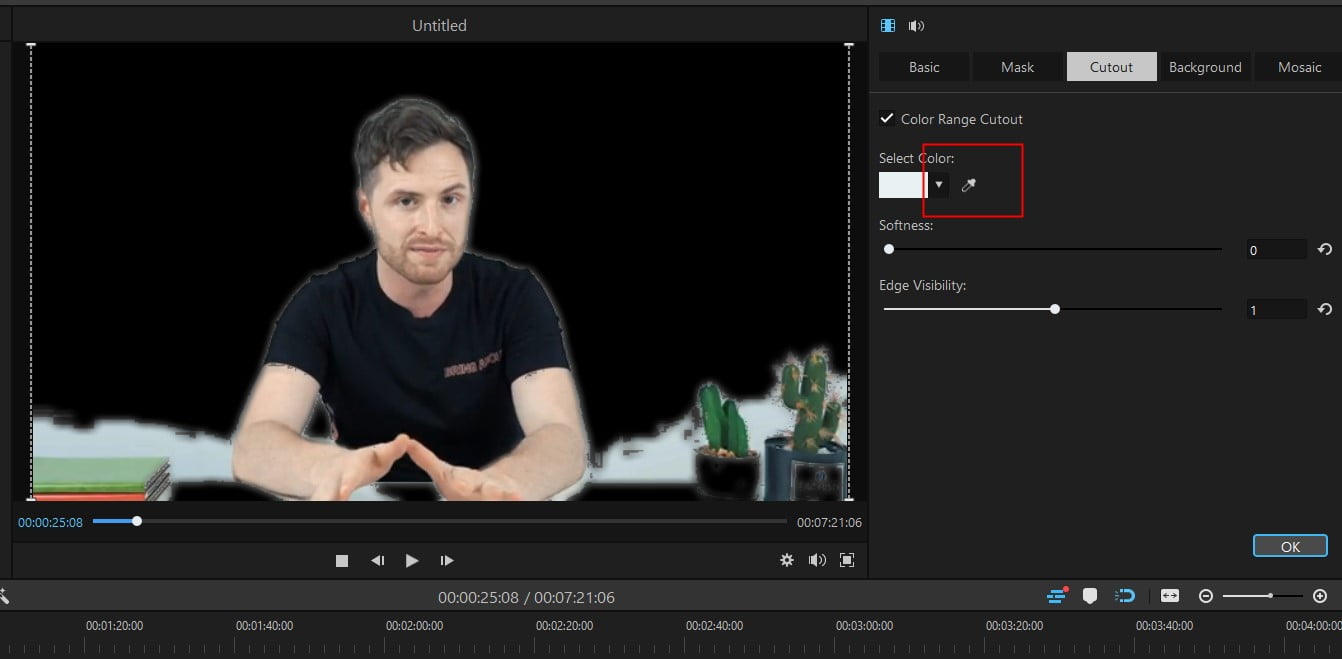
Step 5: Now that the video's background is in green color, you can export it easily. Click on the "Export" button and export according to your requirements.
Part 3. Why Do You Need Green Screen?
Using a green screen as a background is known as chroma keying. This green screen allows the user to put any background picture or video in place of it even if the subject is away from the background. It is common in film and productions to add the background of places they can't go. A green background is filtered out, and any background is replaced with it making it look like real footage with a real background.
After recording in the green screen, you can use Premiere Pro to remove this green screen and place any background you want.
Part 4. FAQs about Do Green Screen/Chroma Key in Premiere Pro
1. Does the chroma key remove the green background precisely?
Chroma key not only removes green background but can remove any background. You just need to select the color with the dropper tool, and that color will be removed or made transparent so that background is visible. But this removal is not precise, and there might be some color edges that you may need to remove by adjusting the settings via the effects control panel.
2. Can we use the ultra key in place of the chroma key?
Yes. The effect of Ultra Key is the alternative to Chroma Key. It works the same. The only thing that separates these effects is that with Ultra Key, you can remove the background more precisely as it has multiple options to adjust the color of the background.
Conclusion
Green Screen is pretty common now in the modern age. It replaces any background and makes the video more interesting. It is common in films and advertisements to record the video in such places where the people or crew cannot go. You can make your green screen at home if you cannot afford a professional one. With Premiere Pro, you can make your green screen look more professional by coloring features. Or you can Filme background fill feature to add green background to your video.
After recording on the green screen, you can remove it using Premiere Pro. It offers Chroma key features that can remove the green screen easily without any trouble. You can also use the Ultra Key effect to remove it. Moreover, you can add details and precision to the video by adjusting the settings in the Effects Control window.
If you are a beginner and you are looking for a simple and user-friendly video editor, you can use Filme. It has effects, transitions, sound effects, filters, stickers, text styles, backgrounds, and everything in one place. You can use it to make your videos stand out from the crowd.


