Among professional editing tools, color correction and color grading are the most important ones. They can change the look and effect of your video.
Color match is a procedure that involves different steps of color correction and adjustment of different color settings, which includes hue, saturation, brightness, contrast, exposure, shadow, highlights, and much more.
Color match is usually done when multiple clips have different color frames. To make the video consistent and engaging, we match the color of videos using different tools. These tools are important and not available in every video editor.
In this article, we will have to see how to use color match tools and color grade, color correction in Premiere Pro. We will also see a simple alternative that beginners can use.
Part 1. How to Color Match from Different Cameras in Premiere Pro
The color match can be of different types. It can be a different video with different color grading, or it can be the same video with different cameras. The color grading mainly depends on the cameras. For example, some cameras have a good contrast while others have a good saturation. To make these videos match in terms of color, we use different settings in Premiere Pro.
Let us see how we can match the color of videos from the different cameras using Premiere Pro. It is a professional tool and possesses every color grading and adjustment option required to match the color of the video.
Steps to Color Match Two Videos Using Premiere Pro
Step 1: First, download and install Premiere Pro on your PC. It is a paid tool and compatible with both macOS and Windows. Install the tool and open it.
Step 2: Create a new project and choose the appropriate settings. An editing window will open with a bunch of editing options and small windows to guide you throughout the editing process.
Step 3: On the bottom left of your Premiere Pro window, you will see an import window. You can double-click on it and browse different media that you want to edit. You can import an unlimited number of videos and audio clips if you want. Premiere Pro allows you to upload different formats of videos and audio.
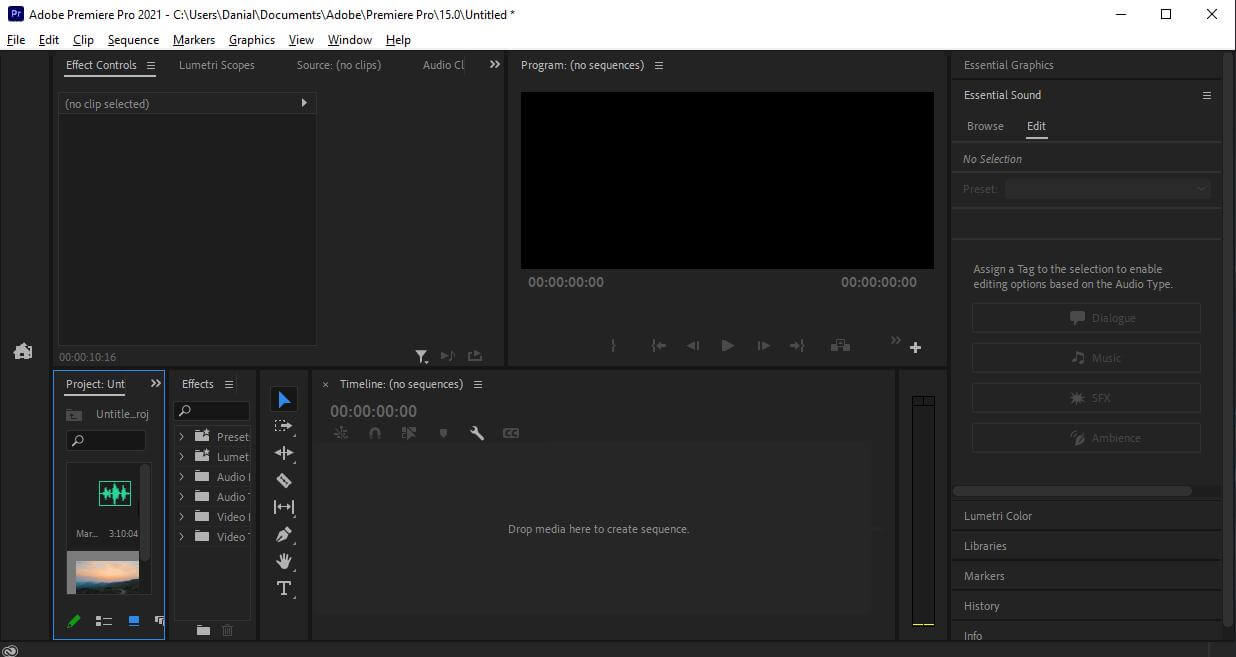
Step 4: Now that you have selected the media that you want to edit. Drag the media to the timeline. On the timeline, you can add any effect or editing feature that you want. Just select the feature and drag it on the video which is on the timeline; it will be added.
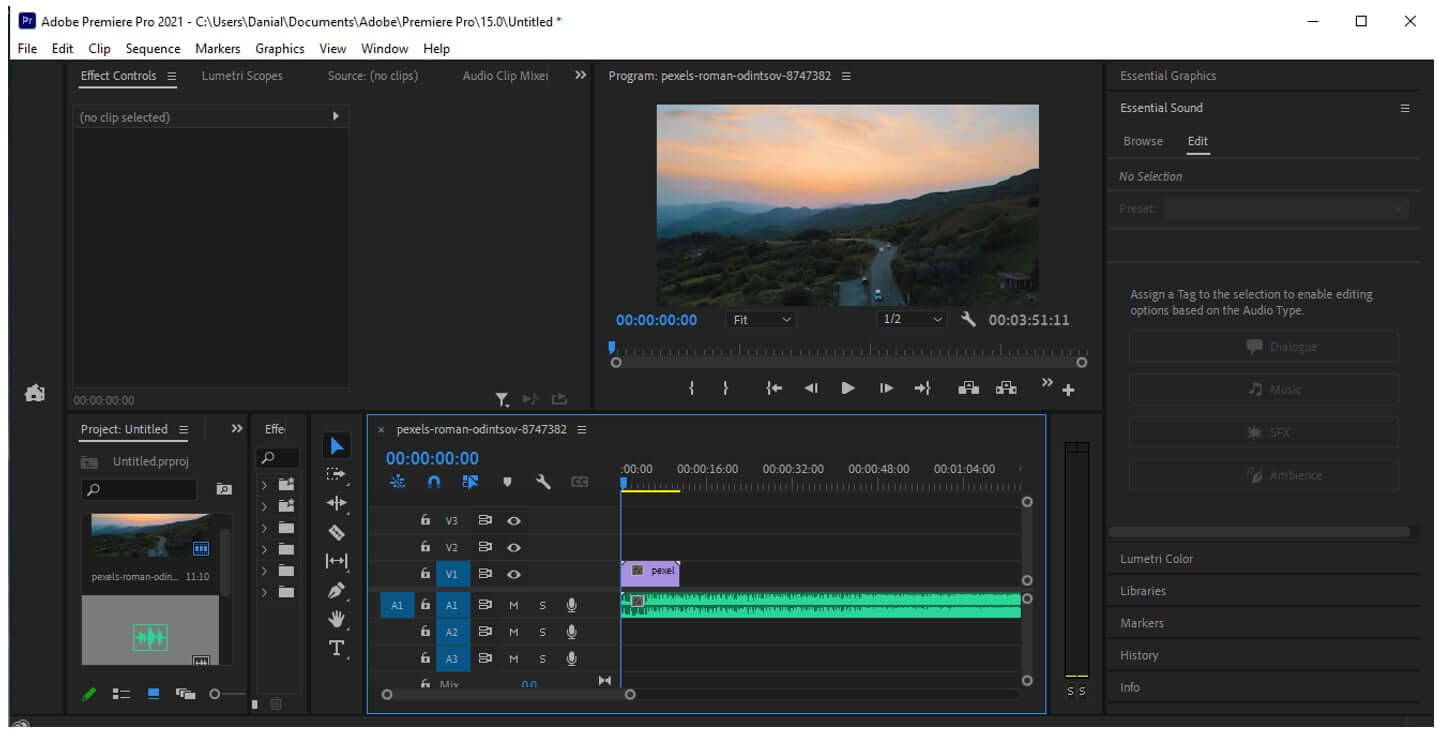
Step 5: As videos are now added to the timeline from different cameras, it is now time to match the color of these videos. First, you need to make one video or clip reference so that you can make changes to other videos/videos accordingly.
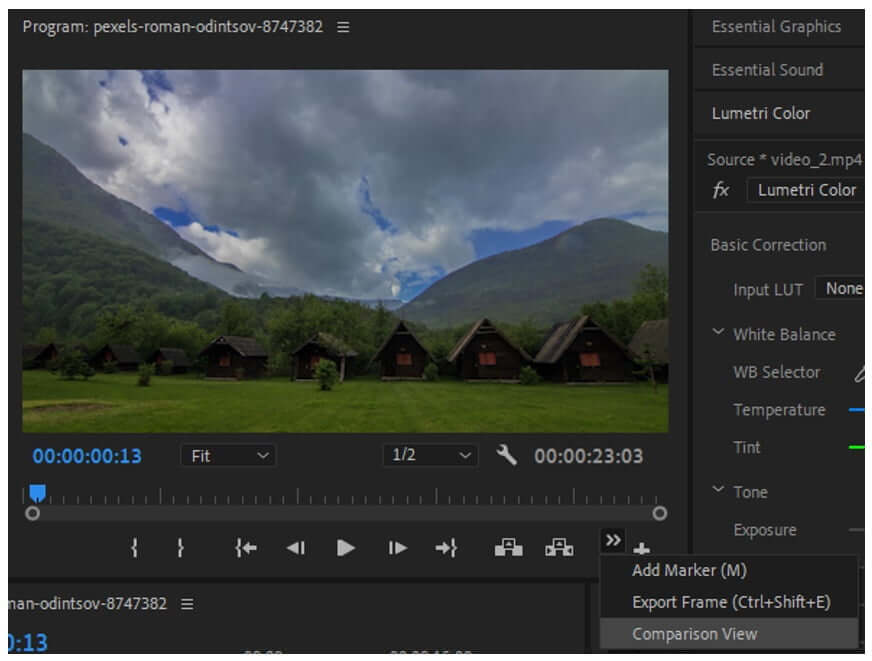
Go to the “Comparison View” just below the preview so that you can see the difference while matching the colors.
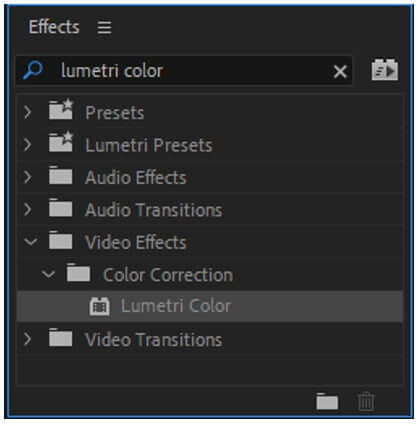
Go to the “Effects” panel and search for “Lumetri Color”, drag it to the video you want to make color changes to.
Now go to the “Effect Color” panel and to “RGB curves”. Adjust the curves to match the color of the video.
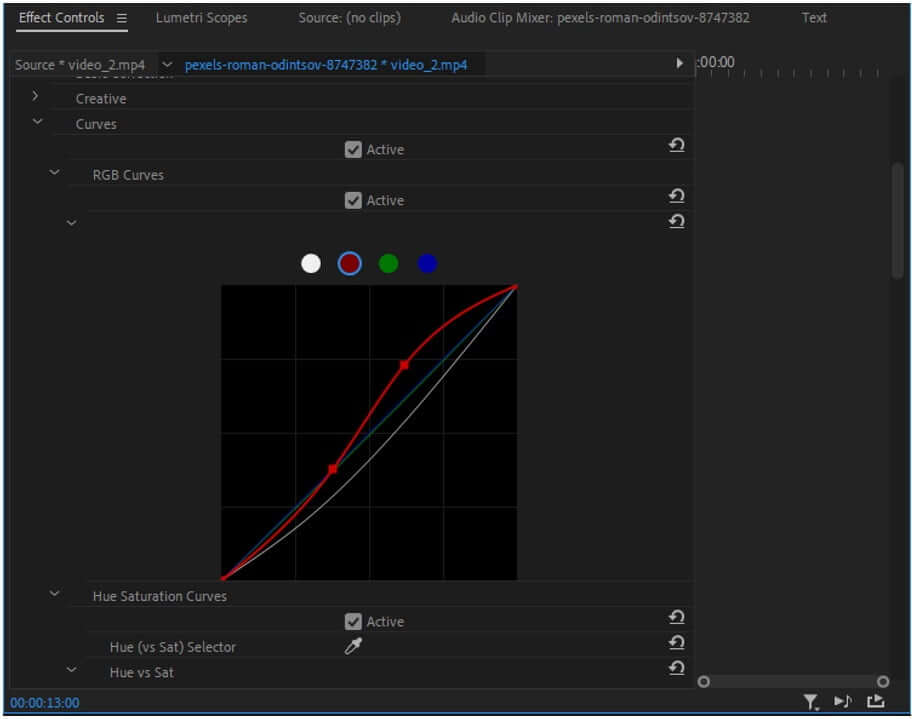
You can also adjust the saturation, brightness, shadow, highlights, and exposure of the video to match it to the reference video clip.
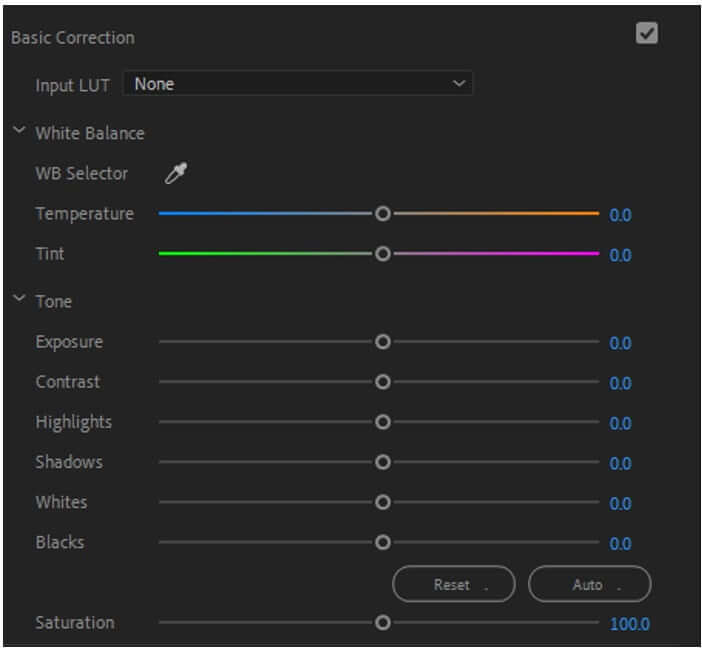
Moreover, there are other basic correction options to which you can make adjustments to match the color of videos from different cameras.
With Premiere Pro, it is not complicated once you get on with it.
Step 6: If the color match is on point for you, then you can export the video. Press “Ctrl + M” and the export window will pop up. Choose the setting in which you want to export the video. It includes format, resolution, file size, and destination. Click “OK” to export the video.
Part 2. Match Color Using Reference Clips
Using reference clips to match the color of videos is another method in which you make your video consistent in terms of colors. The major difference between the above method and these steps is that these steps are automatic. You don’t have to play with the color curves and wheels to match the color of the videos. It is much simpler and easier.
Let us see how different this method is from the other and how much time it consumes.
This method involves the same steps till importing the videos and dragging them to the timeline.
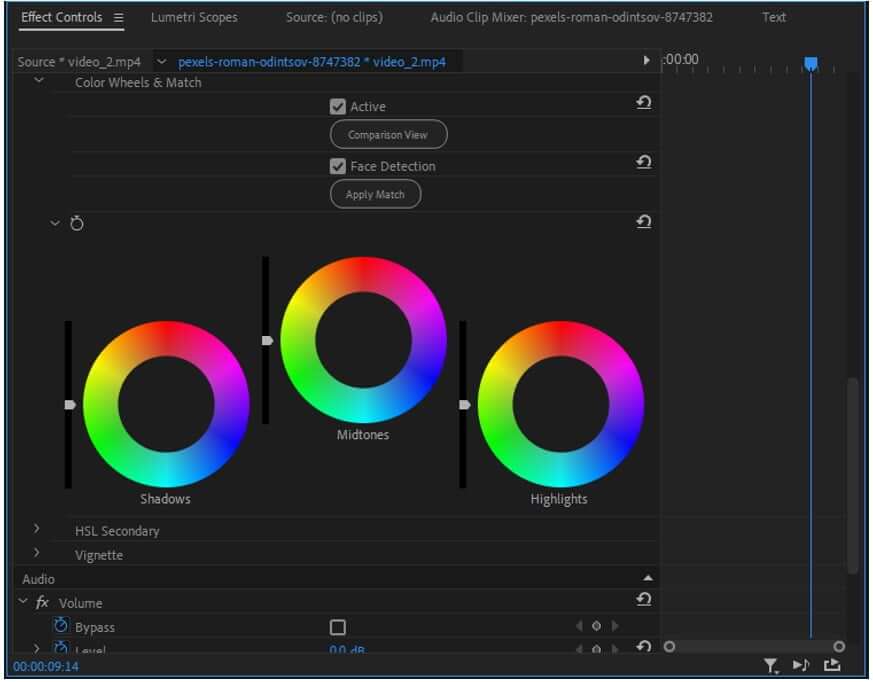
Step 1: Reference clips means making a clip reference for the other clips. Choose a reference clip and click on “Comparison View”. Move the playhead to the clip in which you want to apply the color match. Drag “Lumetri Color” on that clip. Go to “Effect Control” > “Lumetri Color” > “Color Wheel & Match”.
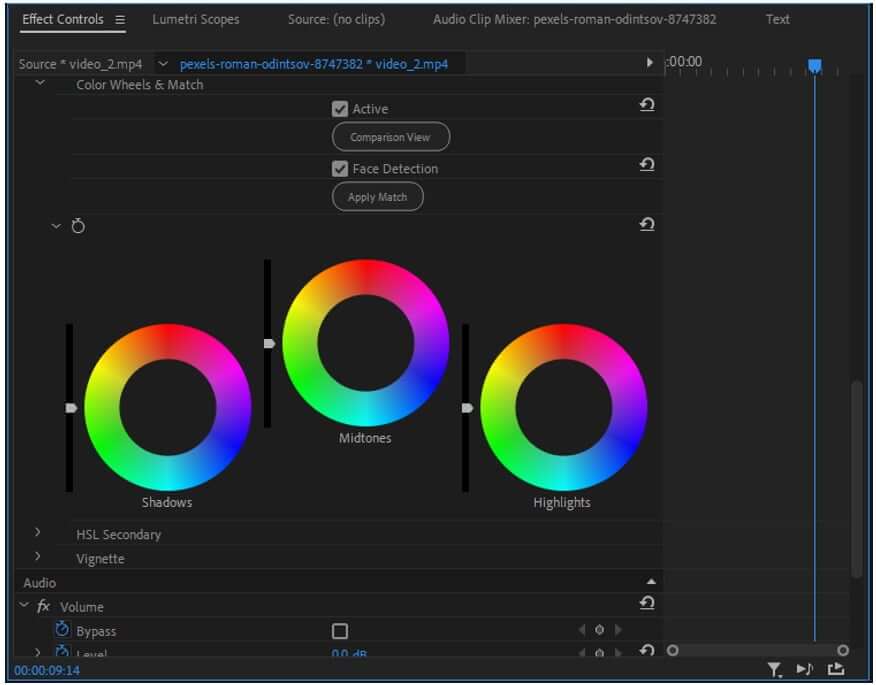
Here, you will see an option of “Apply Match”. Premiere Pro will examine the reference clip and then apply the color match to the clip you’ve selected. Just after a few seconds, you will see the clip will change its color. If you are not satisfied with it completely, then you can manually adjust the color wheel and other basic color correction settings.
Step 2: You can now easily export the clip by going to File > Export > Media or by pressing “Ctrl + M”. Either of these will work and will export your video.
Part 3. How to Do Color Correction and Color Grading in Premiere Pro
Beginners think that color correction and color grading are the same. Although the same settings control them, they have different meanings.
Color correction means correcting the colors that are supposed to be and making things just as the human eye sees them. If you didn’t have a perfect setting in your camera, for example, exposure and white balance, you can correct these settings so that the video can be just as you wanted it to be on camera. Color correction does not mean that you have to be creative with it. You can adjust exposure, contrast, highlights, white balance, shadows, blacks, and white.
In contrast, color grading means being creative with the colors of the video and adding aesthetic looks to it. It can perfectly portray or display a visual mood or certain tone. You can color grade your video with the same adjustment options and color wheel. The only difference is between natural colors and creative colors.
Premiere Pro is a video editing tool that helps the user to color correct and color grade any footage that they like. Let us see the steps to manage color correction and color grading in Premiere Pro.
Steps for Color Correction and Color Grading in Premiere Pro
Step 1: Open the application and create a new project with settings that you like.
Step 2: Next thing you need to do is import videos to which you want to apply color correction and color grading. Go to the import window and double-click on it to browse multiple videos to edit. Drag the video/videos to the timeline where editing effects or color effects can be added to it.
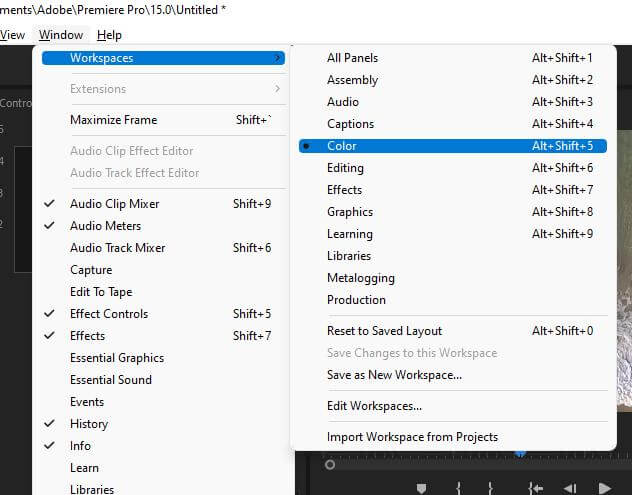
Step 3: To be able to apply color changes to the video, make sure you are in the “Color” tab. If you don’t see a color tab on top, go to Window > Workspace > Color. It will appear on the top. It will also open the “Lumetri Color” tab on the right side.
You will see different lumetri scopes on the left side that will guide you about color correction and color grading. When you adjust or slide the color settings in the Lumetri color tab, you will observe the changes in scopes and waveform.
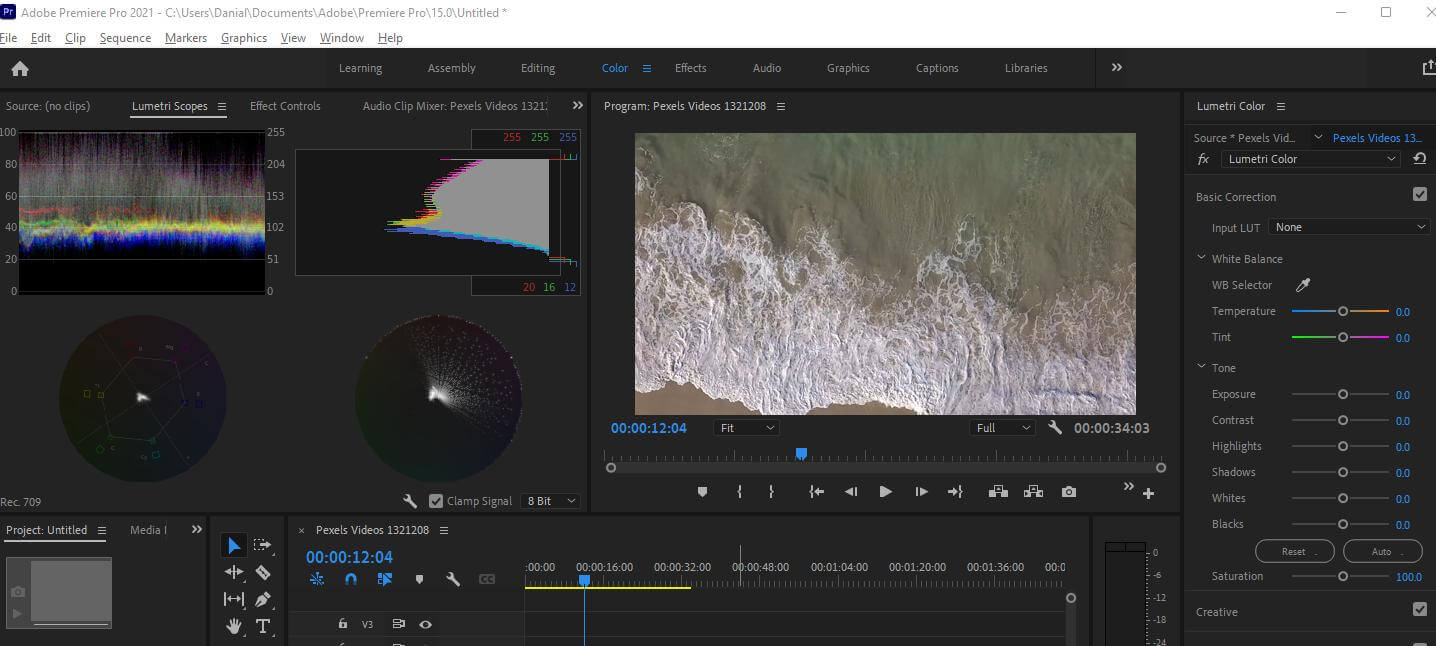
Step 4: To color correct the video, you can adjust the color settings and even color curves and color wheel. But make sure that the video looks natural and only colors are adjusted.
In color grading, you can bring out the colors from the video and make it look creative and enhancing. You can also adjust color depending upon the temperature and weather.
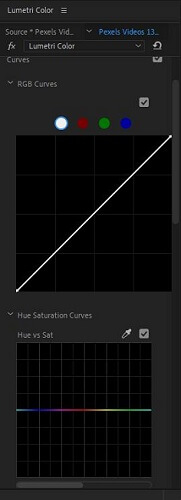
premiere-pro-rgb-color-curves
Step 5: When you are done with adjusting the colors of the video, you can export the video by going to File > Export > Media. You can select different settings of the video that you want it to be exported in.
Part 4. Best Alternative Video Editor to Change Video Color - iMyFone Filme
iMyFone Filme is one of the best alternative video editing tools that you can find on the market. It is a great tool with plenty of features just a click away. It is simple and easy to use.
iMyFone Filme has premium filters, transitions, effects, and other editing tools that one expects from a professional tool. Although it does not have every feature of Premiere Pro, it can be used as an alternative most of the time.
Let us see how we can use iMyFone Filme to change video color and match two videos in terms of color grading. It is easier than Premiere Pro and effective as well. Download Filme now.
Steps to Change Video Color Using Filme
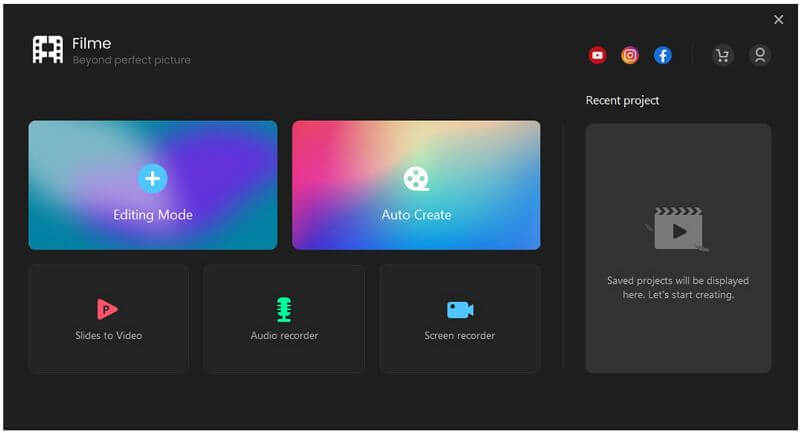
Step 1: You can easily download iMyFone Filme as it is compatible on both platforms: Windows and macOS. It has a small file size and can be downloaded in a few minutes. Install it and open it. It has many options as it is just like a professional editing tool. Click on “Editing Mode” so you can edit your videos.
Step 2: Create a new project and select the aspect ratio for your video. It will display almost all the aspect ratios. Choose wisely to which your video is suitable.
Step 3: Go to the import window and import videos or audio clips. You can import unlimited videos if you want. After importing, drag the video down to the timeline where editing effects can be added to it.
Step 4: As we want to change the video color, iMyFone Filme provides the user a few options by which he can change the color. First, go to the above option bar and click on “Filters”. iMyFone Filme provides 88 filter colors through which you can change the color of the video.
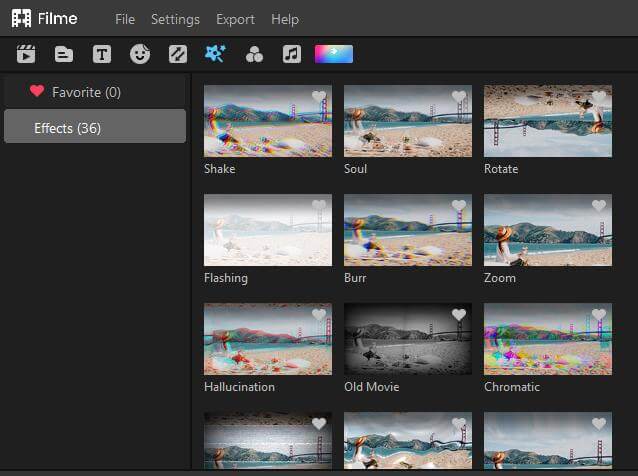
Moreover, if you want to adjust more, right-click on the video and click on “Edit”. An editing window with an option will open right next to the preview.
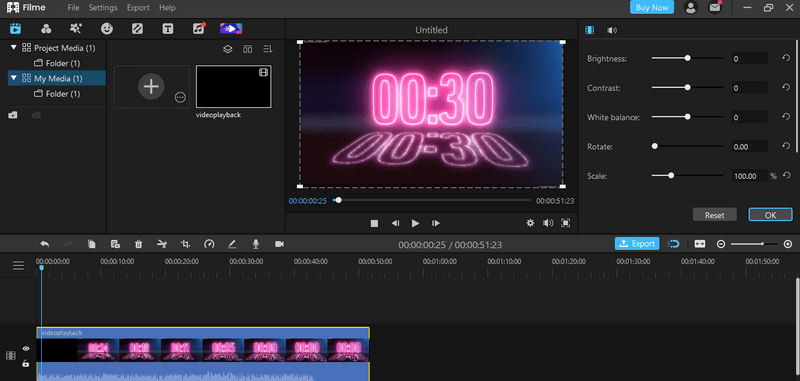
Here, you will see different options, including brightness, contrast, and white balance. With these settings, adjust the color of the video.
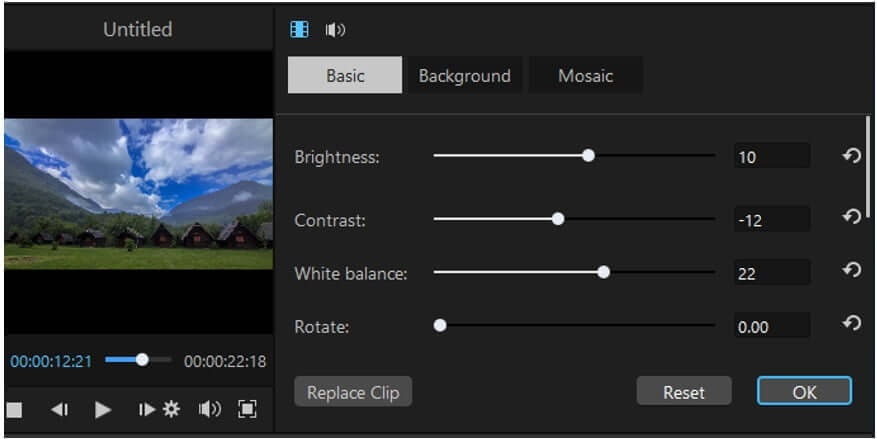
Step 5: You are done changing the color of the video; click on “Export” to export the video according to your requirements.
Part 5. FAQs about Use Color Match Tools in Premiere Pro
Q. How do you color match in Premiere Pro?
You can match the color of videos in Premiere Pro using two different methods. Either you can match color manually, or you can compare and match color automatically. These both are effective and can help you to match the colors of different videos.
Q. How do I color match two videos?
You can make one video as a reference video whose color you want to see in your videos. Then apply the Lumetri color effect on the other video. You can adjust the RGB curves to match the color of the two videos. Or you can choose to compare and match the color by clicking on “Apply Match” which refers to match color.
Q. How do you use the color tool in Premiere Pro?
There are plenty of color tools in Premiere Pro. There are color wheels, basic color correction settings, Lumetri color effects, color grading, and much more. You can watch video tutorials or explore these settings by yourself and learn how to color a video.
Q. What is the difference between color match and color grade?
Color matching is matching the color of a video with another video. Thus, you need at least two videos for this purposes or more than that. On the other hand, color grading can be done on one video. Moreover, color matching is a special feature of Premiere Pro, so you can match the color of all your video clips without any hassle. It is an automated process.
Conclusion
When we are editing multiple videos, one of the most important things is to keep the video consistent, whether it be quality-wise or color-wise. Keeping a video consistent is very important because it plays a high role in defining the personality of the editor. You can use professional editing tools like Premiere Pro to match the color of the videos. It has plenty of color correction and color grading options like color wheels and RGB curves that help the user to match color easily.
If you find these adjustments and settings complex, then there is an alternative tool to color your videos, and that is iMyFone Filme. It is an easy tool with a user-friendly interface. It helps the user to apply filters, transitions, and effects to the video. Moreover, it also has some basic adjustments, including brightness, contrast, and white balance that you can use. It is a very easy tool as compared to Premiere Pro as it colors your video quickly.


