LUT stands for Look UP Table; it is a term that describes an array of numbers consisting of color effects or filters to enhance your video. It has the power to make your video colorful and engaging, and it has the strength to attract people towards it. Adobe Premiere Pro has a few default LUT effects that you can add to your video. You can also download and add your desired LUTs to make your video more pleasing.
In this article, we will see how you can add LUTs in Premiere Pro. Adding default LUTs is easy, but if you need to add your desired LUT, you have to go through a few steps to download and browse it. Moreover, we will also share an alternative video editor if you want to add LUTs without any hassle.
Part 1. How to Add LUTs to Video in Premiere Pro
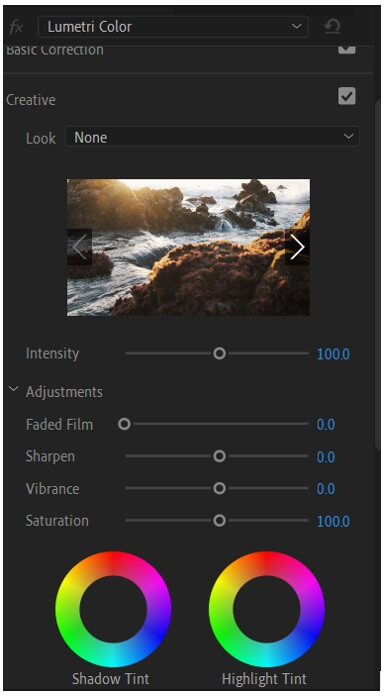
LUT is an editing tool that gives your exciting video filters to make your video more appealing. Premiere Pro has many default LUTs, and you can also make some adjustments to them. The adjustments include Faded Film, Vibrance, Sharpen, Saturation, and Tint. Adjustments allow you to control the color effects and make them as you like.
The steps below will show you how to add LUTs to your video in Premiere Pro.
Step By Step Guide with Premiere Pro
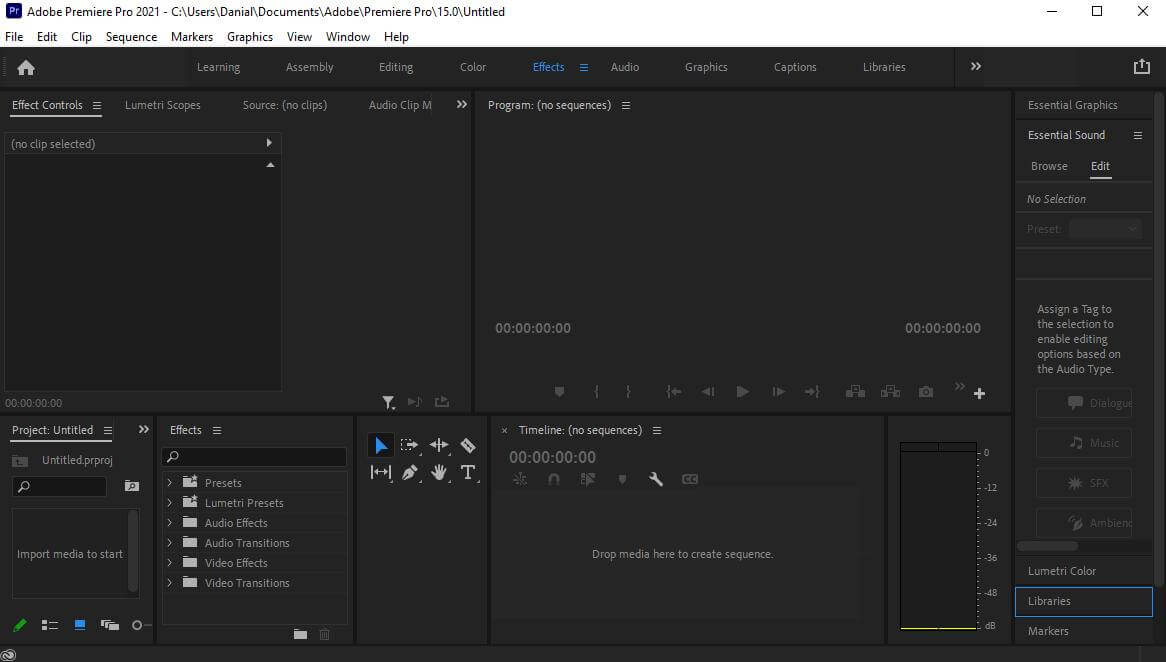
Step 1: Firstly, download Premiere Pro by going to the following link. Install it on your computer. Open it, and another window will appear. Click on New Project to proceed to the editing interface.
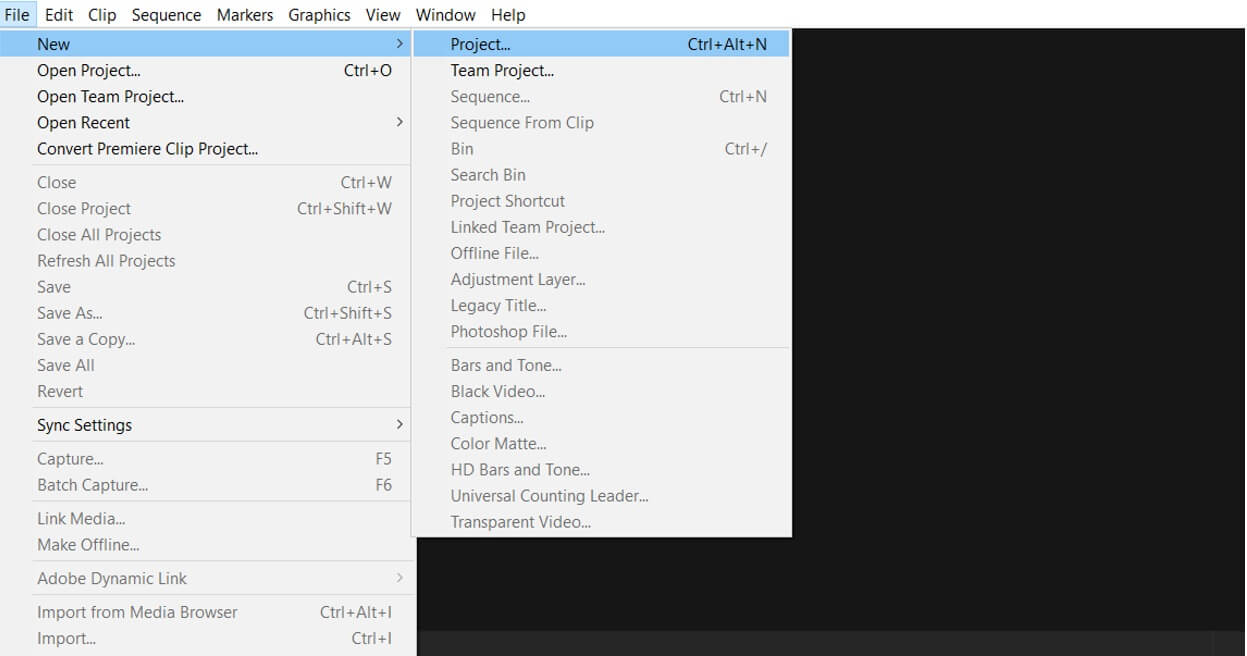
You can also create a new project by going on File > New > Project, or you can use a shortcut key Ctrl + Alt +N.
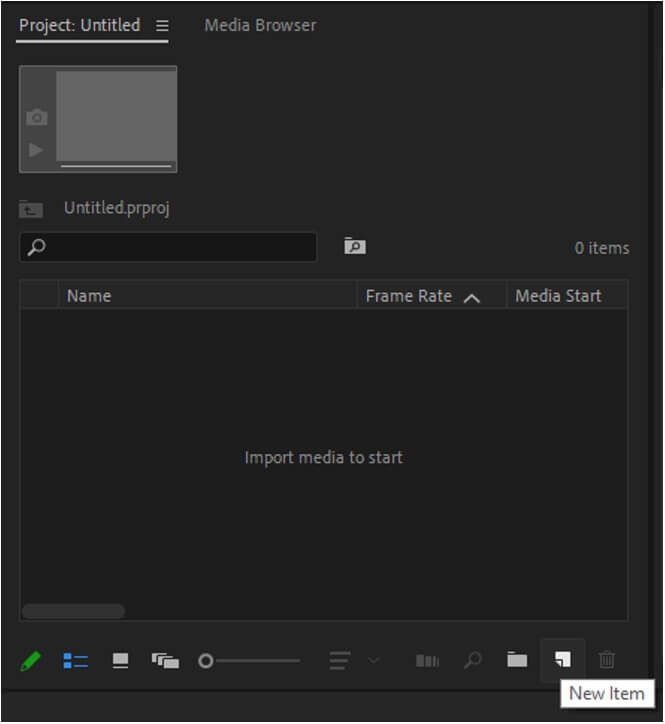
Step 2: Click on Media at the bottom left and add your videos to import. After that, drag it to the Timeline. Use low-quality videos or proxies to avoid lag issues while adding effects.
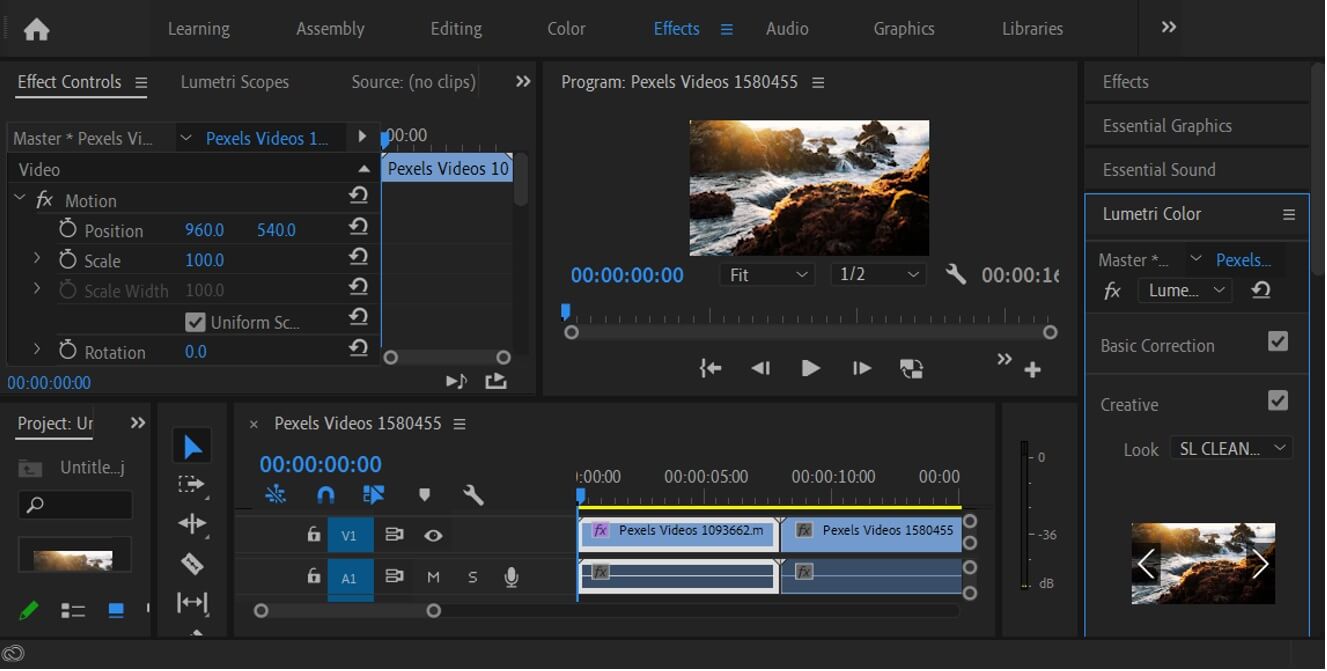
Step 3: To add LUTs to your video, click on the Effects tab on the top, and the Effects panel will open. Go to Lumetri Color > Creative > Look. A drop-down menu will appear. The menu will have a few LUTs, and you can pick your desired ones to make your video more charming. Adding LUTs to your videos is very easy; you can do it within a few minutes.
Step 4: You can adjust the color settings by going to the Adjustments section below. It also has a feature to add a vignette effect to your video. You can use RGB curves, Hue Saturations curves, and the Color wheel to adjust the color as you like.
Step 5: After adding LUTs, click on File. Go to Export and click on Media.
Part 2. Free LUTs for Premiere Pro Download to Make a Cinematic Video
LUTs have the ability to give your video a cinematic look. Premiere Pro allows you to download and add LUTs of your desired choice from any website. There are many free websites from where you can download and browse your favorite LUTs. We are going to list a few websites that you can try and download suitable LUTs for your project.
1) Motion Array
Motion Array is the best website for downloading free LUTs for your video. It offers 35+ free LUTs to make your video cinematic. It also has a wide range of premium LUTs, and you can buy them to make your videos stand out from the crowd.
2) Fix The Photo
Fix the Photo is also a helpful website with a wide range of LUTs to make your video look incredible. It has 110+ LUTs to modify your videos to the next level. Some of the LUTs are available for free, and you can use them on Premiere Pro.
3) Shutterstock
Shutterstock is also a trustworthy website to download free LUTs for your video. It offers a free LUT pack in a zip version that you can easily download from the website.
4) Filtergrade
Filtergrade is a website that offers a free LUT pack that you can unpack on your computer and use the LUTs in Premiere Pro. The website also has many other editing packs which you can download and make your video more compelling.
Steps to Use the Downloaded LUTs in Premiere Pro
After Downloading your LUTs from any website, follow the steps to import your LUT in Premiere Pro and add it to your video.
Go to Effects > Lumetri color > Creative > Look. A drop-down menu will appear; click on Browse. Now, you have to go to the location where you have saved LUTs and then click on Open. Now, you will see the LUT on your video.
If you want to import the whole folder of LUTs to appear in Premiere Pro, you can quickly bring it. Go to This PC > Local Drive: C > Program Files > Adobe > Adobe Premiere Pro > Lumetri > LUTs, then add all your LUTs in the folder to bring them to your Adobe Premiere Pro.
Part 3. Best Alternative Video Editor to Use Free LUTs or Filter - iMyFone Filme
We have discussed how to add LUTs in Adobe Premiere Pro on your video, but Premiere Pro is slightly difficult for beginners. Therefore, we recommend iMyFone Filme, the best alternative and a very simple editing tool that anyone can use.
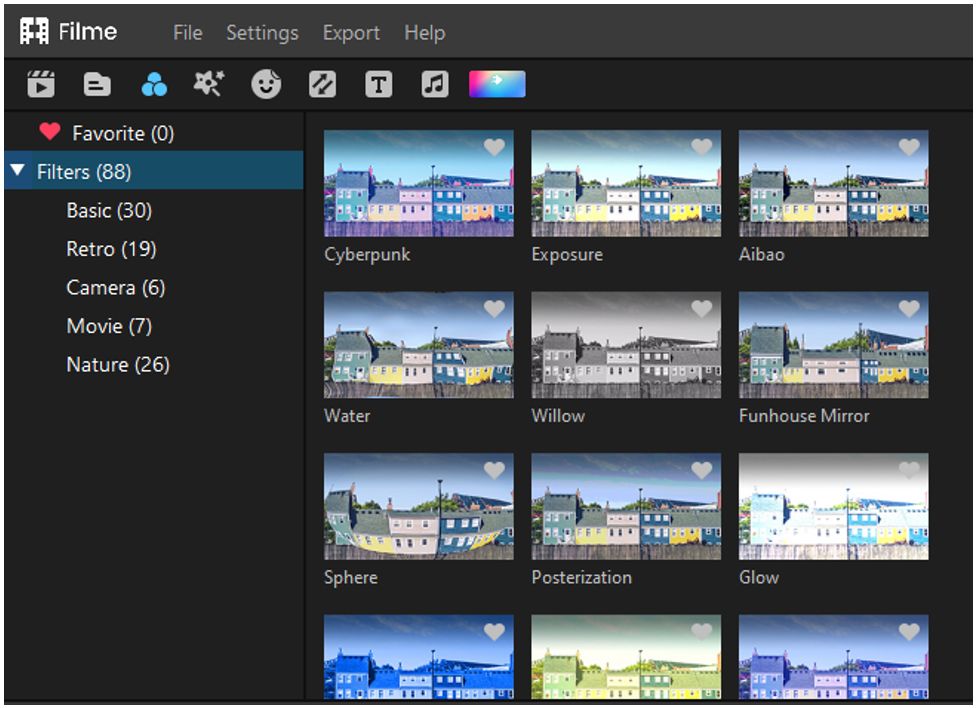
iMyFone Filme has 80+ filters in it, which works as LUTs. You can add them with one click. Filme is the best and the most straightforward editing tool that a beginner can also use. It has a wide range of editing tools such as transitions, templates, text, stickers, and filters.
The steps below will show you how to add filters in iMyFone Filme.
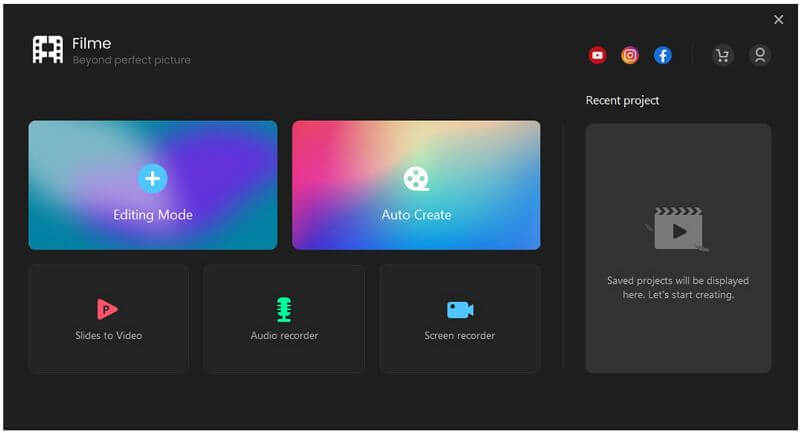
Step 1: The first step is to download and install iMyFone Filme on your computer. Open it, and you will see the most attractive and straightforward interface. Click on Editing Mode to proceed to the editing panel.
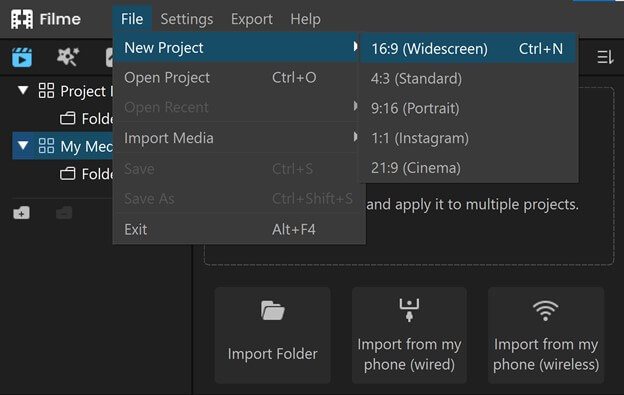
Step 2: Now click on File > New Project and select the aspect ratio to begin editing. You can also use a shortcut key Ctrl + N to start a new project.
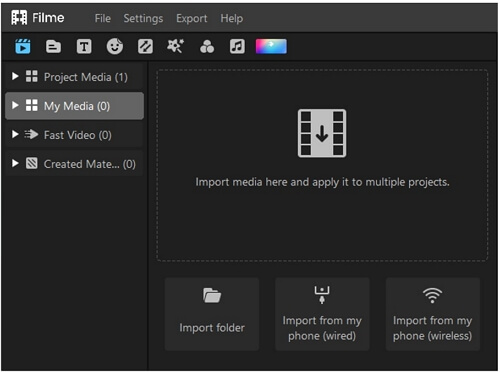
Step 3: Now import your video by clicking on Import media. After importing, drag your video to Timeline, or you can also click on the + button on your video to add it to the Timeline.
Step 4: Now click on the Filters icon on the menu bar at the upper left corner. You will see a wide range of filters that you can add to your video when you click on them. You will have many exciting and very cool filters which can give your video a cinematic look and feel.
You can also adjust the colors of your video by double-clicking on it. There will be options to adjust the color. You can also add transitions to your video, which gives your video an enchanting look and attracts more audience towards your editing.
You can add transitions within a minute in iMyFone Filme. Go to the Transition icon, and it will display 110+ transitions to make your video more appealing. Drag any of them to the video.
Step 5: After editing, export your file by clicking on Export. Select your desired file location where you want to save it.
Part 4. FAQs about How to Add/Import/Install Luts in Premiere Pro
1. Can I import my desired LUT in Premiere Pro?
Yes, you can import your desired LUT just in a few steps. Download your favorite LUT on your computer through any website, as discussed above in this article. Go to the Effects > Lumetri color > creative > look and browse the LUT where you have saved.
2. How to save a LUT file in Lumetri?
You can save your whole LUT file in Lumetri to save yourself from browsing again and again. Download the LUT pack from any free website; mentioned above in this article. Now Cut that folder and go to This PC > Program Files > Adobe > Premiere Pro > Lumetri > LUTs. Paste it there. The file will be successfully uploaded, and now you can check in Premiere Pro that your folder has been uploaded.
You can enjoy making cool videos from your collection of LUTs without any trouble.
Conclusion
We have discussed Premiere Pro's features above and how you can add LUTs to your videos. Premiere Pro has LUTs by default, but you can also download new ones to make everything more appealing. We have discussed the steps of adding new LUTs to Premiere Pro. Undoubtedly, Premiere Pro is one of the best video editors, but it is a bit difficult for new users.
iMyFone Filme is the simplest and easiest editing application with exciting default editing tools. You can save time by editing your video in a few clicks. It is an effortless application that anyone can access without having any trouble. We would prefer you to download iMyFone Filme instead of tricky applications. It has everything in it, and you just need to choose what you want for your video.


