Have you ever wanted to remove the background from an image but didn’t have professional editing skills? Don’t worry! Photopea has got you covered. In this tutorial, we'll show you how to remove background from an image in Photopea step-by-step. You don't need a costly editing program or professional qualities. Photopea is a free, browser-based photo editor that is easy to use and provides you with advanced editing features.
Now, unlock the secret to effortlessly removing image backgrounds in seconds with Photopea - Say Goodbye to Frustration!

Part 1: How to Remove Background in Photopea Using Remove BG
First things first, let's get familiar with Photopea, an online photo editor that is free and user-friendly. It’s a powerful alternative for those who don’t want to spend a lot of money on commercial software such as Photoshop or don’t have a local editing program installed.
Photopea is a photoshop-like and browser-based photo editing tool with a wide range of features such as open, edit and save file types like Photoshop (PSD), Sketch or XD, PNG, JPG, SVG, and many more. You could work without interruption with the help of Photopea-compatible settings, shortcuts, and mouse gestures. The tool has a customizable and logical interface, making it easy for beginners to use.

How to Remove Background in Photopea:
Step #1: Open Photopea in your browser.
First, open your favourite web browser and type in “Photopea” or directly enter this URL: https://www.photopea.com/
Step #2: Upload the image you want to edit into Photopea.
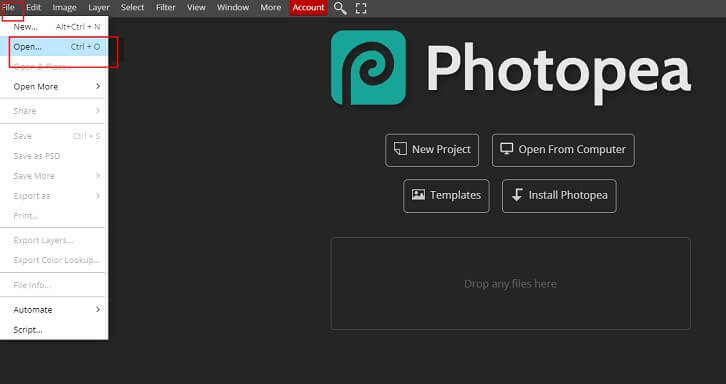
Next, you can start creating your image by importing a file or an image you want to edit into Photopea. You can do this by clicking "File" in the top left corner of the Photopea interface and selecting "Open".
Step #3: Use the Remove BG Tool.
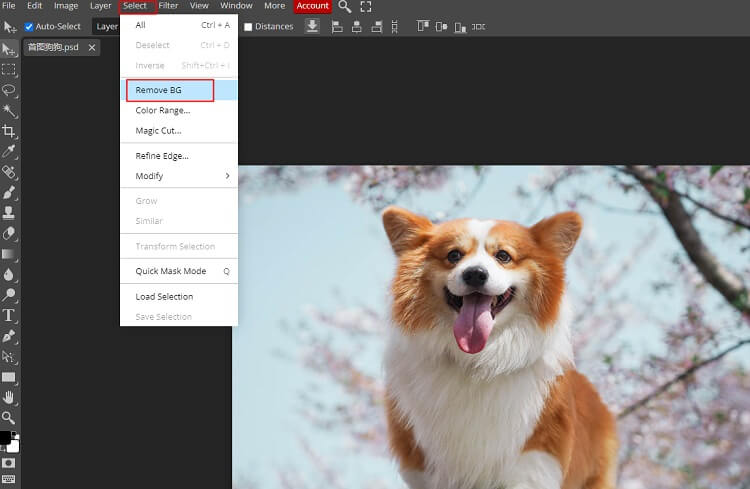
Click on "Select" > "Remove BG" to automatically remove the background.
Step #4: Save the edited image.
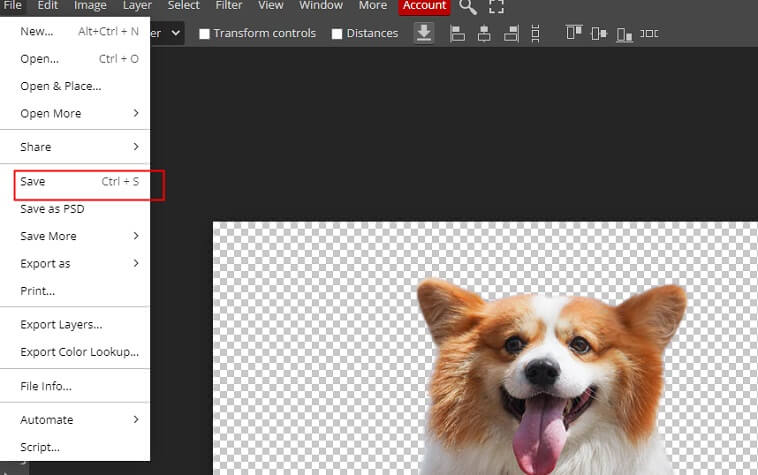
After removing the background, click on "File" > "Save" to save the image with transparent background.
Pros:
 Free of charge.
 Compatible with various image formats.
 Has a lot of powerful image processing tools.
 Has a user-friendly interface.
Cons:
![]() Requires an internet connection and may run slowly with a weak signal
Requires an internet connection and may run slowly with a weak signal
![]() Not as advanced as desktop software such as Photoshop
Not as advanced as desktop software such as Photoshop
![]() Some features may not work in older browsers
Some features may not work in older browsers
Part 2: Bonus Tip: How to Change Background in Photopea
After getting the background removed, you might want to add a new one. Fortunately, Photopea can help you with that.
A Step-by-Step Guide to Change Background in Photopea
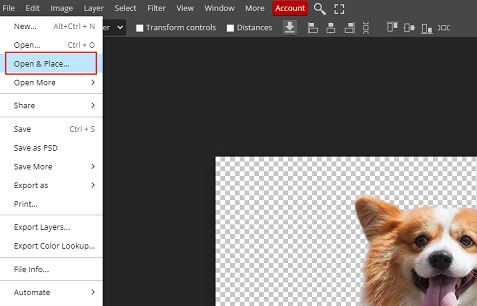
Step #1: Click on "File" > "Open & Place" to import the new background image into Photopea.
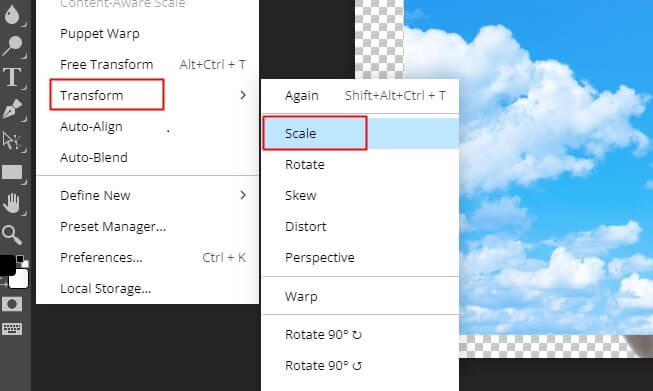
Step #2: Under the "Edit" option, select "Transform" > "Scale" to resize the background image till it is suitable, finally, click on "Enter" to apply the changes.
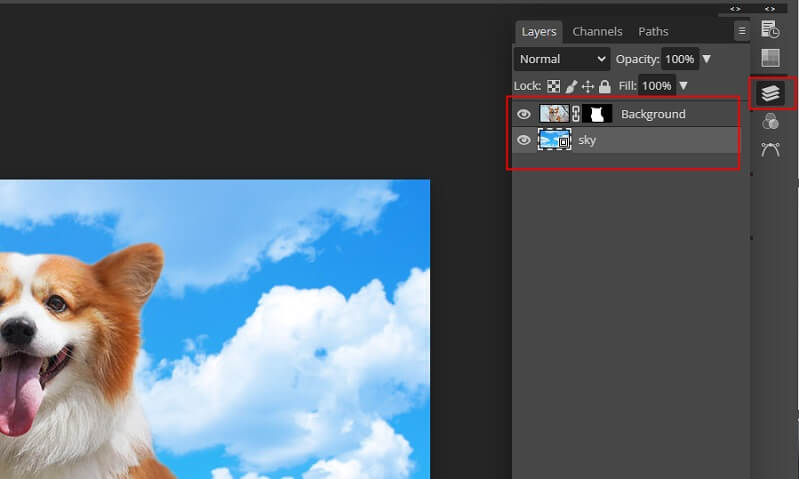
Step #3: Unfold "Layers" in the right panel, drag the new background below the object layer, and the background will be added to your image.
Although changing background can be realized in Photopea, it's not that easy to do if you have no editing skills before. Here you can use iMyFone MagicPic to help change background in one click.
A Step-by-Step Guide to Change Background in MagicPic
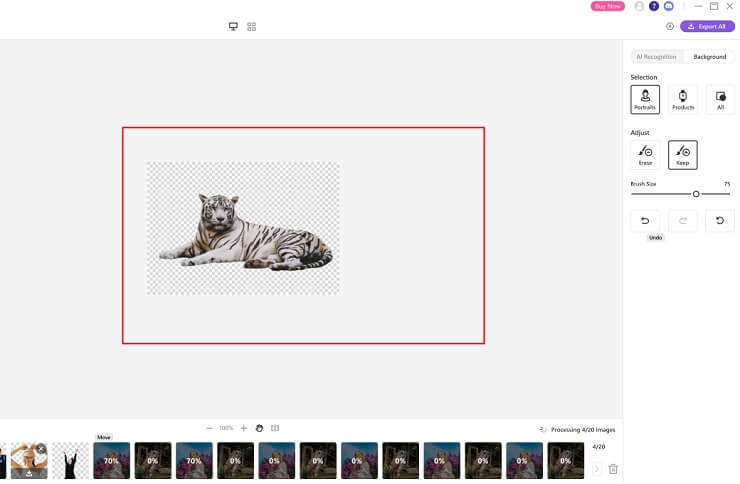
Step #1: AI Auto-Remove Background Instantly.
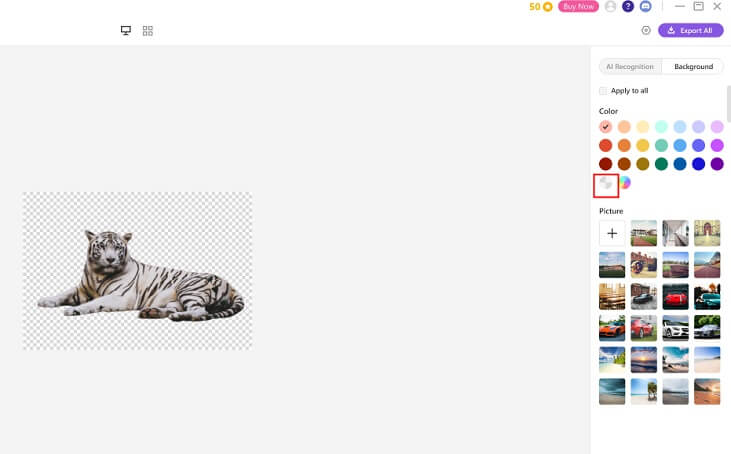
Step #2: Click on "Background" > "Color"/"Picture"/"+" to add a solid color, background template, or your own custom background as the new image background.
Part 3: Best Alternative to Photopea--Bulk Remove Background with Single Click
While Photopea is an excellent tool for removing backgrounds, it's not the only option available. One of the best alternatives is iMyFone MagicPic.
iMyFone MagicPic is an AI-powered background removing tool that allows you to bulk remove backgrounds from images with single click. It supports simultaneously processing multiple pictures to save your time, and offers various kinds of modes to meet your special needs, such as product cutout to obtain pictures for e-commerce, portrait mode for making passport photo photos effortlessly, and more.

Free Get Images with Transparent Background:
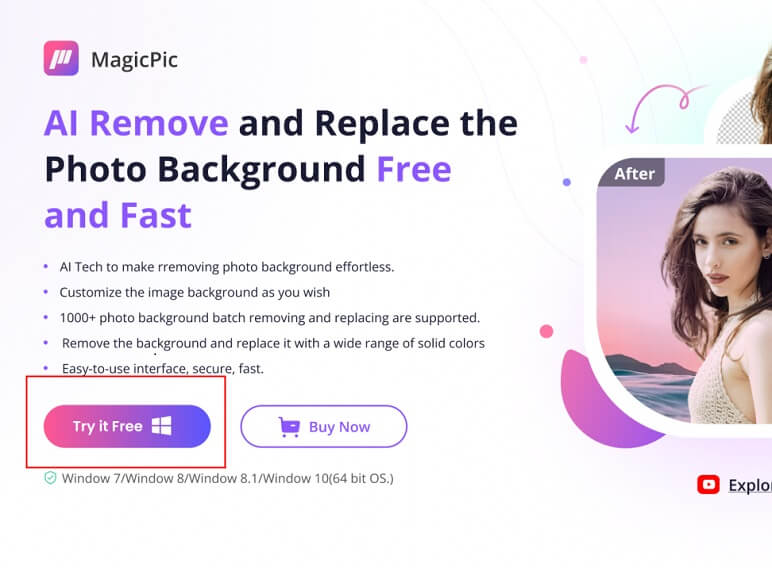
Step #1: Download and install the MagicPic software.
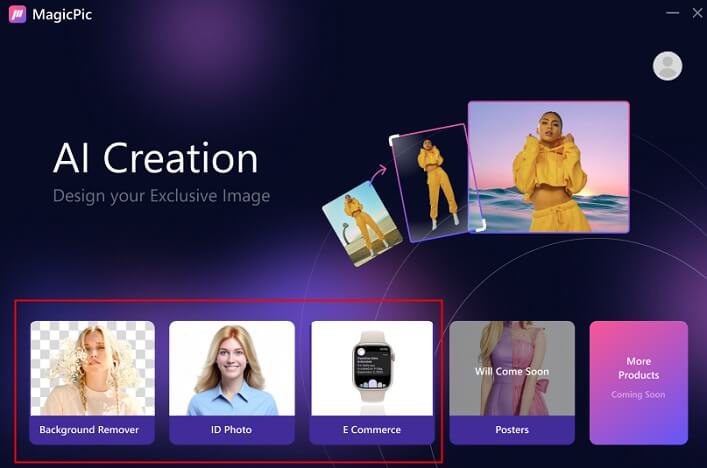
Step #2: Click on One Function Based on Your Needs.
Step #3: AI Auto-Remove Background Instantly.

Pros:
 Easy to use.
 Works well with complex backgrounds.
 Supports bulk background removal with single click.
 Various modes to meet unique needs.
 Fully customizable background to unleash creativity.
 Stunning background templates.
Cons:
![]() It's a new product, not so famous in the market.
It's a new product, not so famous in the market.
Part 4: FAQs About Removing background in Photopea
Does Photopea support batch processing images?
No, Photopea doesn't support batch processing at this time. Each image must be edited using Photopea's manual method to remove the background. However, you can use iMyFone MagicPic to bulk remove background with single click.
What should I do if I accidentally removed a part of the object I want to keep?
You can use the “Undo” button located on the top left corner of the Photopea interface to revert your previous edit. Alternatively, you can use the “History” panel on the right side of the screen to go back to any previous edits you made.
Can I use Photopea to remove the background from a complex image with many objects?
Yes, you can undoubtedly use Photopea to remove the background from complex images. However, for more complicated shapes, you might need a combination of different selection tools, such as the Lasso tool, to make your selection more precise. It takes some practice to master the selection tools, so be patient.
Final Words
Overall, Photopea is an excellent alternative for those who want to remove image background professionally at zero costs. But it may take some practice to master the selection tools, and it does not support batch removal, which largely decrease the work efficiency. Don't worry!
iMyFone MagicPic got your back! It is a good choice to go, since it supports batch removal with single click powered by AI, and background replacement and customization are also supported.


