Sometimes when you select an image to add to a slide, it holds some irritating background stuff that can affect the effectiveness of your content.
That's why you'd always want to delete the particular photo from the background to make things relevant and prettier.
Making Image Background Transparent in Word/Powerpoint/Google Slides is just more than convenient, but if you want to Remove Background Online using AI without download, you can try TopMediai FREE to get background removed and changed literaly in one click.

Part 1. How to Remove Image White Backgrounds 100% Automatically[Editor's Choice]
MarkGo
If you're looking to erase background from your photo, hiring the services of iMyFone MarkGo is a great idea. It is a courageous tool that has impressed thousands of users with its work ethic and superior quality.
Using MarkGo, you can explore tons of brilliant features to make your content superb. Importantly, it offers a pretty negotiable and simple user interface, eradicating any possibility of getting prior knowledge before using it.

Wonderful Features of iMyFone MarkGo
User-friendly, without any technical knowledge required to remove image background in just one single click.
Easy to remove image background or watermark for videos and pics, with no traces at all.
Free to try the remover, during which you can check the compatibility.
Able to add watermark for up tp 100 pics in batch for copyright considerations.
Step 1: Launch MarkGo
To begin with, you need to look for downloading iMyFone MarkGo from its official site. After downloading it, you need to install it on your Windows or Desktop PC. Next, you need to launch it to start the proceedings.
Step 2: Upload an image you want to remove background
After launching MarkGo, you'll see four options on the screen. You need to select Remove image watermark and upload a picture later.

Step 3: Hit Selection Tool and cover the watermark you plan to remove
Once you have uploaded your picture, you need to hit the'' Selection Tool'' option from there. This process allows you to move the cursor to the part of your image you'd wish to remove.

Now, you'll need to click on the Remove Now option to preview the outcome of your operation. You'll see now that the background you were looking to remove has been deleted.
Step 5: Export your file
After removing the image background, you can save it on your desktop by hitting the "Export" button from the bottom of your screen.
Part 2. How to Make Image Background Transparent in Google Slides
You can use Google Slides to make visual presentations. Apart from generating breathtaking visual presentations, you can insert background photos to the presentations to make them more pleasing to the eyes.
But, sometimes, you'll need to tweak these images to make them relevant and to the point. Although you add background photos to increase the look of your slides, these images, when not adjusted properly, can create a headache for you.
For instance, if you're to insert a dark background image into dark text, it can affect the beauty of your hard work. It is why editing these images has become pretty necessary.
Step 1: Navigate to Google Drive account
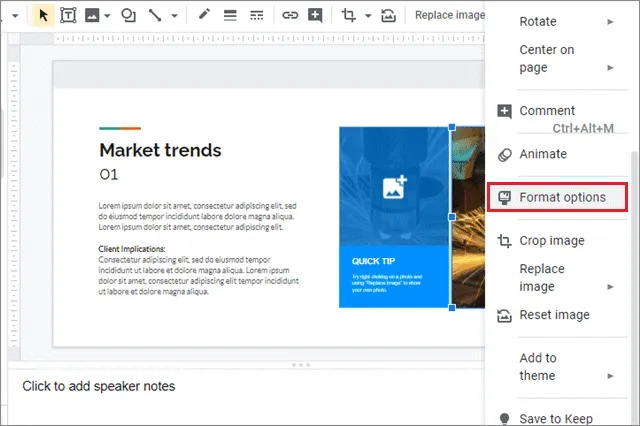
Navigate to Google Drive account and open the presentation from there. It would help if you made sure the presentation you open offers background images to make the edit look practical.
Step 2: Select the Format option
Hit Format options after right-clicking on your image. After, a pane will emerge with formatting options.
Step 3: Press Adjustments
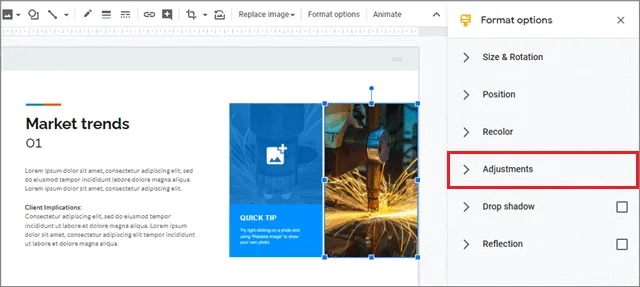
In this phase, you'll only need to navigate to the pane and hit the'' Adjustments'' option from there.
Step 4: Make your Background transparent.
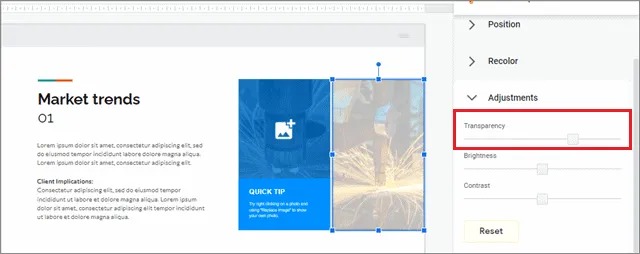
Now, a sliding bar appears for adjusting your background photo's transparency. From there, you can adjust the degree of transparency to make things look settled for you.
In addition, you can use the Contrast and Brightness bars to edit the image more appropriately. After performing these operations, your presentation will look dead set to impress your audience.
Part 2. How to Remove Image Fill or Backgrounds in Microsoft Word
If you've edited an image and then realize you need to remove its background to make it relevant, you can serve your purpose in Microsoft Word after a few moments.
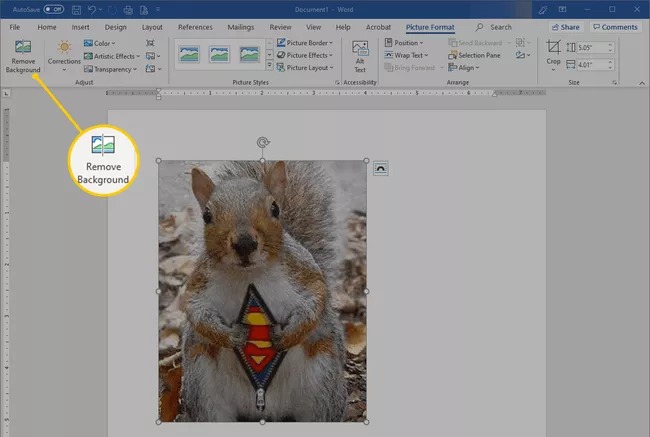
First of all, you'll need to download Microsoft Word on your desktop. Later, you'll need to tap on the'' Insert'' option after launching the Word document. Now, you can select any photo you want to delete the background from.
Step 2: Hit Remove Background
You'll need to press Remove Background after navigating to the Picture Format tab option in this phase. If you're using 2016 or older versions, you can move to the Format tab.
Note: If you can't see the Format tab or Picture Format, you've accidentally selected multiple images or haven't selected any image from there.
Step 3: Hit Mark Areas to Keep
In this phase, you'll need to decide whether you want to delete the market area in magenta or not.
Later, you'll need to press '' Mark Areas to Keep'' to remove the magenta highlight from your image's section you don't want to remove.
After hitting this option, you can select the part you don't want to delete from there. If you're using Microsoft Word on Mac, hit the "What to Keep" option.
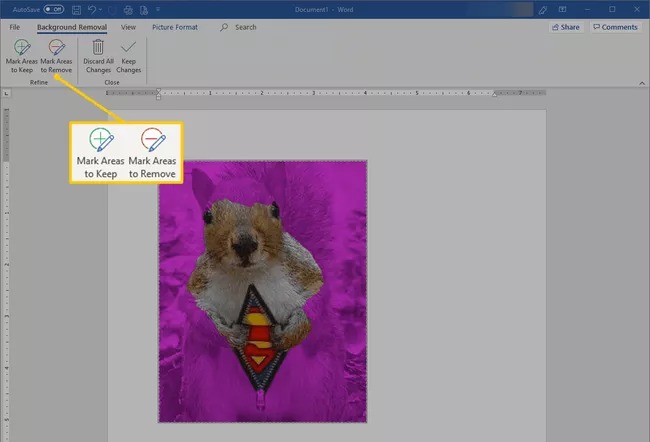
Step 4: Tap Mark Areas to Remove
In this step, you'll need to hit "Mark Areas to Remove" to select the part of the image you're looking to remove. Later, you can select the relevant parts from there go ahead. Mac users can select" What to Remove."
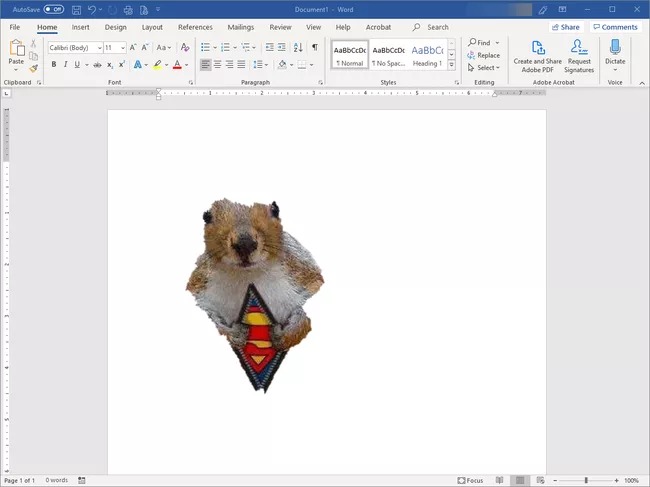
Step 5: Press Keep Changes
After deleting the desired parts from your image, you need to hit the'' Keep Changes'' option from there.
Step 6: Preview your image
After making the necessary changes, you can see a modified picture on the screen.
If you're still not happy with the result, you can go back and perform the same operations again to get your job done.
How to Remove the Background from a Picture in Microsoft PowerPoint
Using Microsoft PowerPoint, you can generate flawless slides for your presentation. Millions of users have been using the services of this software to get prepared for business and education purposes.
Apart from offering brilliant slides, Microsoft PowerPoint also offers editing tools, including removing background from your picture.
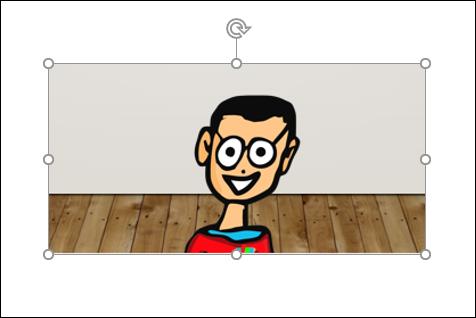
Step 1: Launch Microsoft PowerPoint
After launching Microsoft PowerPoint, you'll need to select insert to upload an image you're looking to delete the background.
Step 2: Select '' Format'' tab
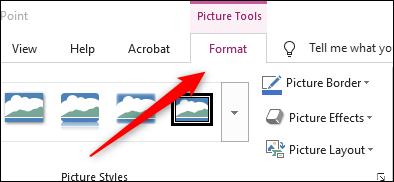
After inserting the image, you'll need to press Format from there.
Step 3: Navigate to Adjust group.
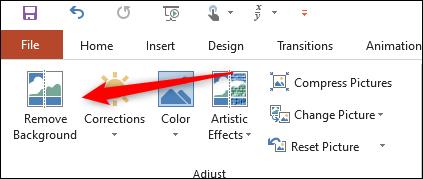
In this phase, you'll need to hit the '' Remove background'' icon after entering the Adjust group.
Step 4: Select the part of your background.
Now, you'll need to select the parts of the image you don't want to get rid of the background for. After, PowerPoint will highlight the part of the background you're looking to erase.
Note: To select the image parts you don't want to get rid of, select Mark Areas to Keep. And, hit "Mark Areas to Remove" for selecting the parts of the photo you'd not want to remove from there.
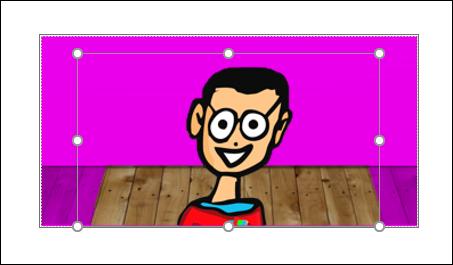
Step 5: Remove the wooden background.
Suppose we're going to remove the wooden background from the picture we've selected to remove the background from. We're selecting '' Mark Areas to Remove'' to get this done.
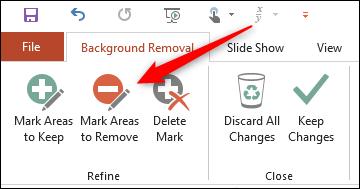
Step 6: Drag the cursor.
Now, you'll see a cursor that turns into a pencil. Later, all you need to do is push the cursor around the parts of the wooden background you must be looking to remove.
After finishing, you only need to click somewhere outside your image. This process will save all you've made.
Conclusion
You can erase the background from a photo using different kinds of tools. We have mentioned how to remove a picture's background with the help of Google Slides, Microsoft Word, and Microsoft PowerPoint.
All these methods are worth your attention and are time-saving. But, if you want to serve your purpose more prolifically, get the services of iMyFone MarkGo.
It is an unbelievable tool that aims to remove the background of any kind from your video or picture with minimal effort.
Luckily, unlike other tools, MarkGo doesn't image quality loss which is quite heartening to come across.


