There are people who do not want to pay heavy subscription fees for recording screens using an app. A common question asked by many such people is how to record screen on android without app.
Well, we have got the perfect answer to your question. We will help you choose the best android built-in screen recorder to add more to your screen recording experience. Let us see how.
Part 1: Method 1: How to Record Screen on Android without App: Quick Settings Tile [Samsung & LG]
If you are out of people who really want to know how to record a screen on android without the app, this content is worth giving a read. You can simply use the Quick Settings Tile (Samsung & LG) for this purpose. It works as a built-in android screen recorder and helps you record your screen by following just a few easy steps.
But one main thing that you must know is that it is an android 10 built-in screen recorder and supports only android 10 devices. Android 10 Samsung and LG devices have custom UI, which allows you to enable screen recording from the comfort of your home. Isn't this great?
Steps to use the Quick Settings Tile [Samsung & LG]
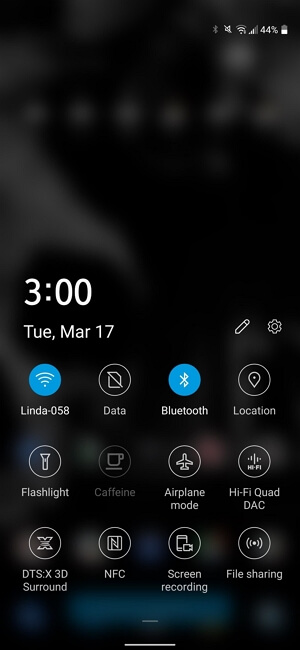
Go to the 'Quick Settings' of your device. To open the 'Quick Settings Menu,' you need to swipe down from the top of the screen.
Then choose the 'Screen Recorder' options from the ones being displayed on the screen. If it is inconvenient for you to select the options, fully expand the screen to see things much clearer for this swipe down one more time.
You can see more options on the other page by swiping left.
A counter will be displayed on your screen, which will start recording from zero once you tap on the option.
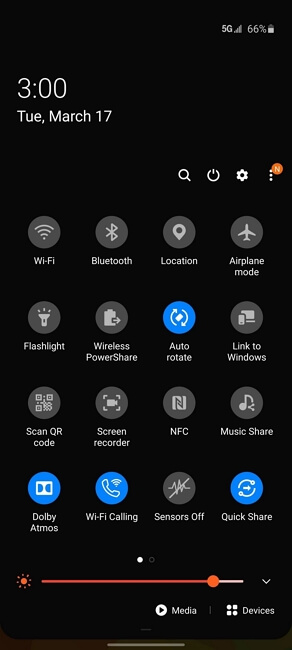
In the case of Samsung phones, you have to confirm if you want to record the audio or not. You can either choose to include your phone's internal audio or microphone input or deny including any audio at all.
Part 2: Method 2: How to Record Screen on Android without App: ADB Command [All Others]
Another great android built-in screen recorder is the ADB Command. To learn to record using this android screen recorder, built feature, follow these steps:
Step 1: Download the Platform Tools
Before you start using ADB, the very first thing you have to do is to download Platform Tools Files by Google. The file you will download will be a zip file.
Step 2: Extract the zip file
Now comes the extraction of the zip file. Extract the zip file to the desktop so that you can easily locate your folder later.
Step 3: Open prompt in the Platform Tools Folder
For people who are using a Windows device, directly open the Command Prompt. For people using the ADB Command on macOS or Linux device, open the terminal. When the Command Line Tools is open, type in cd.
To add space, press the spacebar key. Now from your desktop, drag the Platform-Tools folder to the Command Prompt or Terminal window. This will end up auto-populating its location. Now press the enter key for redirecting the command-line tool to make sure that it is operating in the same folder where the files want it to run the ADB commands.
Step 4: Now allow USB Debugging
For the USB Debugging, connect the phone to the computer. From the 'About Phone' go to the 'Settings,' click on 'Build number' and unhide the Developer Options. Do this repeatedly for seven times which will prompt you to enter the lock screen password. Now choose 'Developer Options' from the 'Settings.'
Step 5: Enable your recorder and start recording
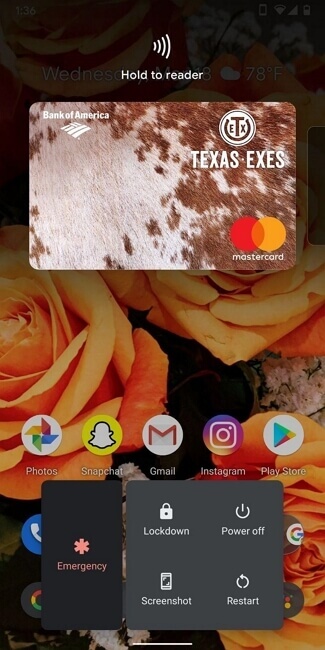
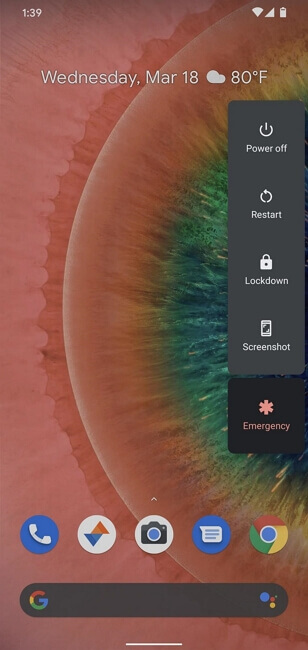
Now send a command to enable your recorder and long-press the power button to go to the 'Power menu.' Again long-press the screenshot button until a menu appears, which has the 'Start Recording' button. Click on the 'Recording button,' and you will see a new popup menu that will notify you that clicking this button will start recording everything on your screen as soon it is started. Now select 'Start Now' if you still want to record your screen..'
A 'Screen Recording' title will appear on the screen, which will have the pause, stop and cancel options. You can take advantage of these options as per your requirements. Clicking this stop will not directly save your recording. You can access this notification any time by pulling down the tray from the top.
Part 3: Method 3: Use All-in-One Screen Recorder & Video Editor on Desktop iMyFone Filme (Win&Mac)
iMyFone Filme is software that helps you record your phone screen and even edit your recordings right at the moment. It is featured with great themes and preset templates that you can use for editing your videos totally free of cost. Reading about the features and advantages of iMyFone Filme will help you understand it better.
-
Easy interface
Using iMyFone Filme is really easy. Even beginners do not have any problem using this software.
-
Dual functioning
It has 2 in 1 function that allows both screen recording and video editing.
-
Free to use
The best thing about this software is that all the designs and templates are totally free of cost. This means anyone can use these designs for editing videos without paying any fee.
-
Video layering
You can also share your image or even videos with the help of the software.
-
Efficient backup
In case your files accidentally get lost, you can pick them up from the backup folder.
-
Multiple editing options
It allows you to use the crop rotate and split tool for editing your video with even greater efficiency.
-
Easy export
You can easily export your edited and recorded videos to your device's media in just a few clicks.
-
Instant preview option
This software also allows you to review your recording right after you stop it instantly.
-
Audio supported
The best thing about this software is that it allows you to add audio to your recordings to make them more engaging.
Key features and advantages
How to Record Your Screen Using iMyFone Filme
For recording your screen using iMyFone Filme, follow this guide:
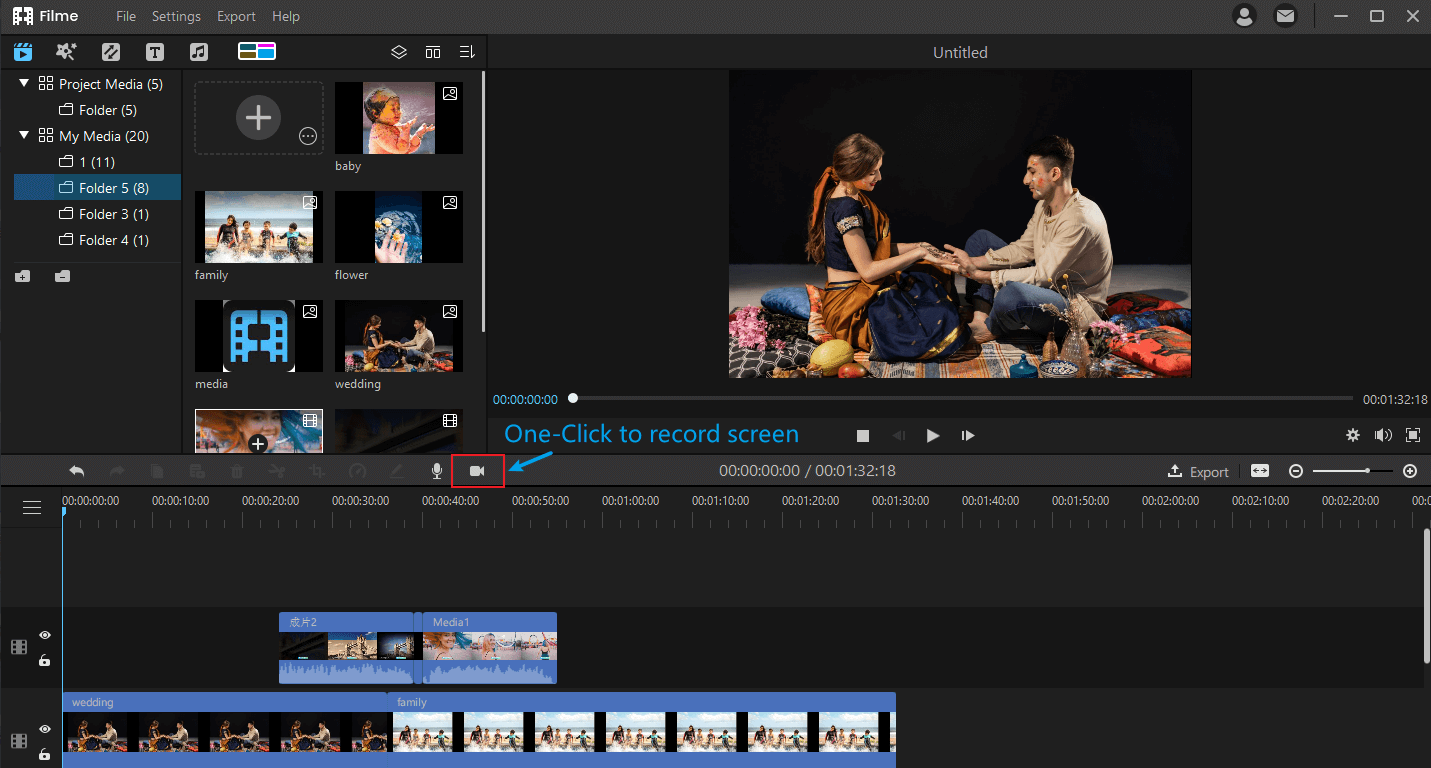
Step 1: Record Your Video with 3 Clicks
You can record your video with this with just three clicks. Let us see how to to do that. First of all, open the screen you want to record and press the recording button to start recording. Click on the stop button to finish the recording.
Step 2: Get the Video in Your Media Library at Once
iMyFone Filme has storage benefits too. You can also export your recorded video to the Media Library. From there, you can easily export it to your phone's internal storage. How cool is that, isn't it?
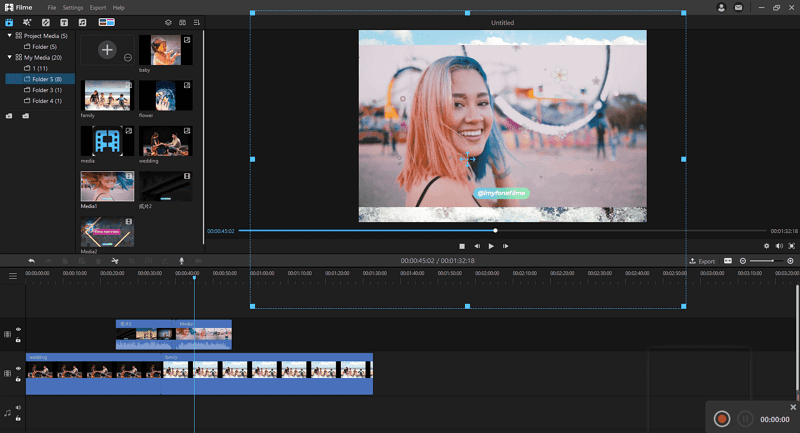
Step 3: Cut the Videos, add filters, and add music and text
iMyFone Filme provides you another great feature of Editing your screen recordings. You have free access to a lot of filters and effects for editing your recording. And this can be done without paying any single penny, yes it is totally free of cost. Not just this, but also you are free to add audio to your recording to make it engaging for the viewers. iMyFone Filme allows you to add colors to your screen recordings and make font changes.
Part 4: Pro tips for Android Screen Recording
There some really cool tips that will help your Android screen recording experience. Let us see what they are!
Prepare an outline before you start.
Make sure you have an outline in hand before starting your recording. By having an outline, you can prevent taking those long recording pauses even if you get confused. Try this tip and see how it works.
Make sure it's quiet.
The environment where you plan to record plays an important role in deciding the overall quality of your recording. Make sure that the environment where you are recording is quiet to reduce any background noises in your final recording.
Practice makes a man perfect.
You can never record it all perfectly in the first attempt. The more you practice, the better are the results. So always practice twice or at least once before you start your final recording.
Choose an appropriate length.
The length of your screen recording really matters when it comes to the engagement of your audience. Always remember that people never like recordings that are too long. Everyone has a busy routine just like you, and he would definitely want to go for a short recording that says it all.
Audio quality matters
If you are adding audio to your recording, check on the quality of your audio. Bad audio quality is not something that people would like. Prefer using HD audios in your recordings.


