When you are preparing a presentation and you get the message "My PowerPoint size is too big" and you immediately google "how to compress video in PowerPoint". This is something that has happened to all of us, so today in this article we are going to teach you things like: how to compress images in PowerPoint, how to compress video in PowerPoint and much more.
Part 1: How to Compress Video in Powerpoint
You can compress video and audio files in a PowerPoint presentation to reduce the file size (although this is not always recommended). Since video and audio inserted into a PowerPoint file are embedded or copied into the presentation by default (as of 2010), video and audio media can increase the file size significantly. If you compress files, both video and audio files are compressed.
When you compress media in PowerPoint, embedded subtitles and alternate audio tracks will be removed in the compression process. If you have trimmed media in PowerPoint, the trimmed parts will also be removed during compression.
Compressing the videos in Powerpoint is a crucial step as we have already mentioned to reduce the weight of the file so now we will teach you How to Compress Video in Powerpoint and the steps you must follow:
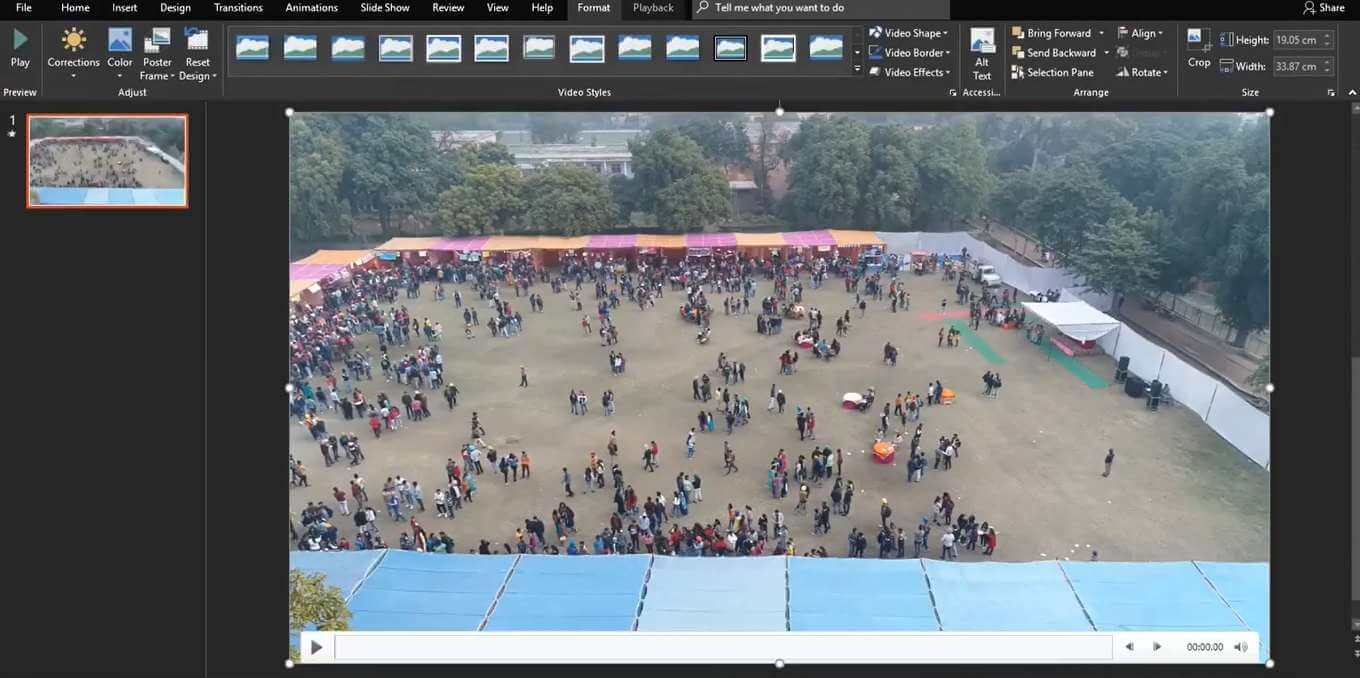
1. Insert your video in the slide(the video which you want to compress)
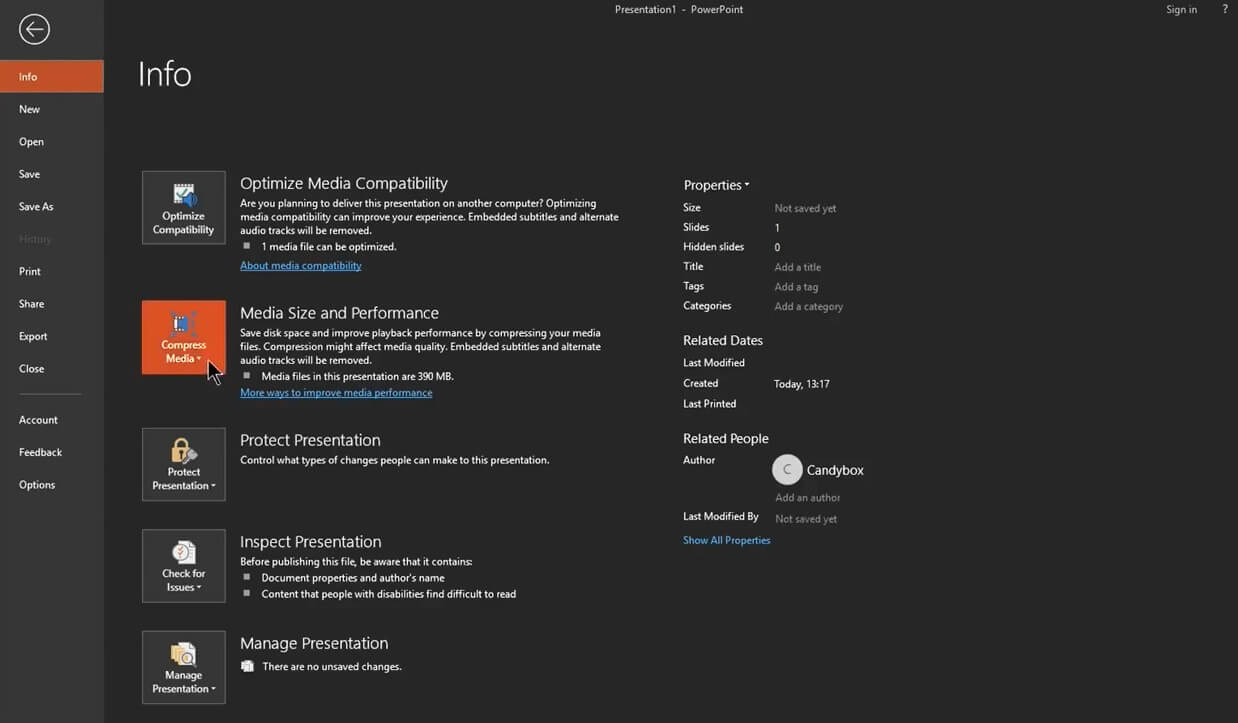
2. Look at the top left of your screen and you will see the option "File" Press it and then press “Media Size and Performance”
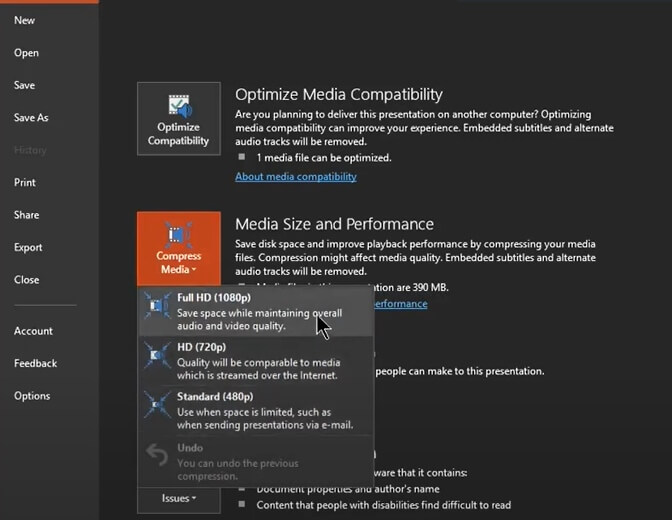
To specify the quality of the video, which in turn, determines the size of the video, select one of the following:
- Full HD (1080p): Save space while maintaining overall audio and video quality.
- HD (720p): Quality will be comparable to media which is streamed over the Internet.
- Standard(480p): Use when space is limited, such as when you are sending presentations via e-mail.
3. When you press the option(Full HD, HD. Standard ) that best suits your situation, a bar will appear that once the load is finished you will see how the weight of the file will have decreased a lot.
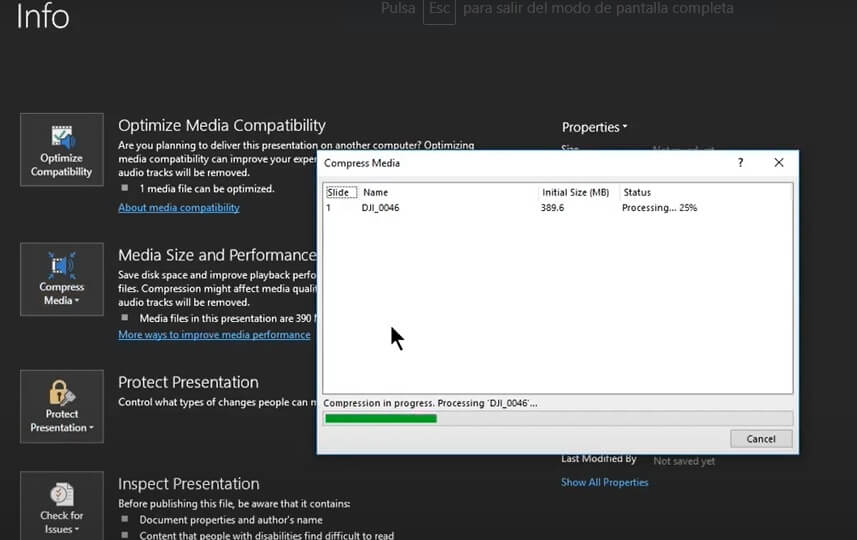
If you are not sure which compression option to choose, I recommend at least compressing using the Full HD (1080p) option for your video. Full HD (1080p) works great for whatever screen you're presenting on. If you want to lower the file size further, try one of the smaller formats, but be careful. Similar to compressing images and photos, the lower the compression format or quality of your videos (or other files), the lower the playback quality of your video. What I usually recommend when creating presentations is to use the highest possible compression rate. When you choose the compression size, PowerPoint begins compressing all the videos in your presentation. When you're done, a dialog box will show you how much space you saved with each compressed video.
iMyFone Filme
Your best video creator !
Download NowPart 2: How to Compress A PowerPoint ( by Compressing Image)
How to Compress images in Powerpoint
If you have many images in your presentation, you can save a lot of space by compressing them. This is a quick and easy way to reduce the size of your PowerPoint file. If the presentation that we have created just includes images, the option Size and performance of multimedia files will not be displayed in the Information menu of PowerPoint, since only videos and audios are considered multimedia content. When this option appears, PowerPoint forces us to use the function available in the application to reduce the size of the images in order to reduce the final size of the file that we have created. To reduce the size of the images included in a PowerPoint file, we must follow the following steps:
1. First, we must select any of the images that are part of the file
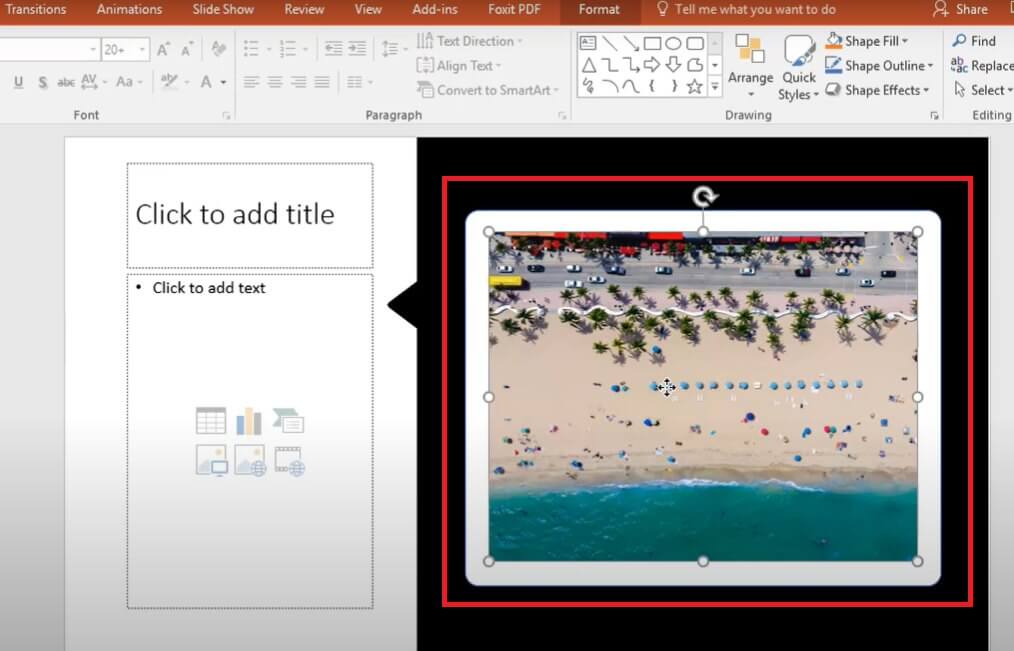
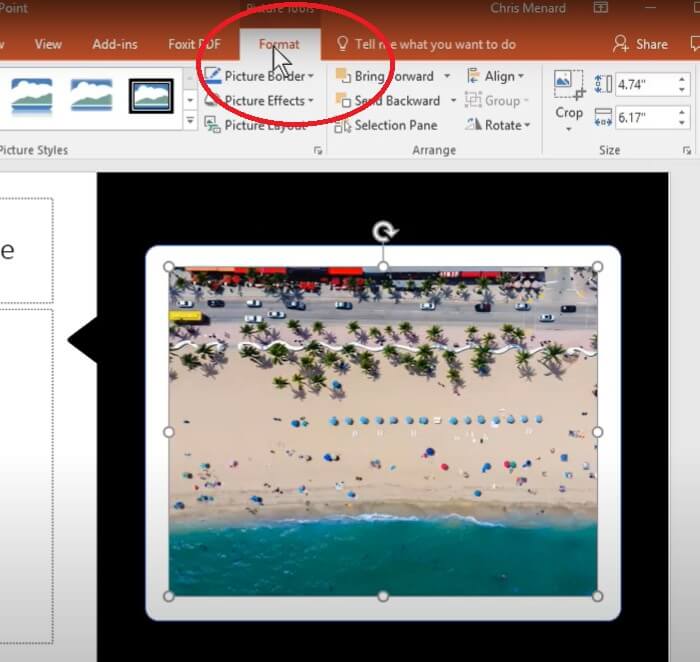
2. Next, we go, inside the tape, to Format.
If you are not using the latest version of PowerPoint, the tab is called the Pictures Tool Format tab. The Picture Format tab is where all the commands and features related to working with and editing images and photos in PowerPoint are located.
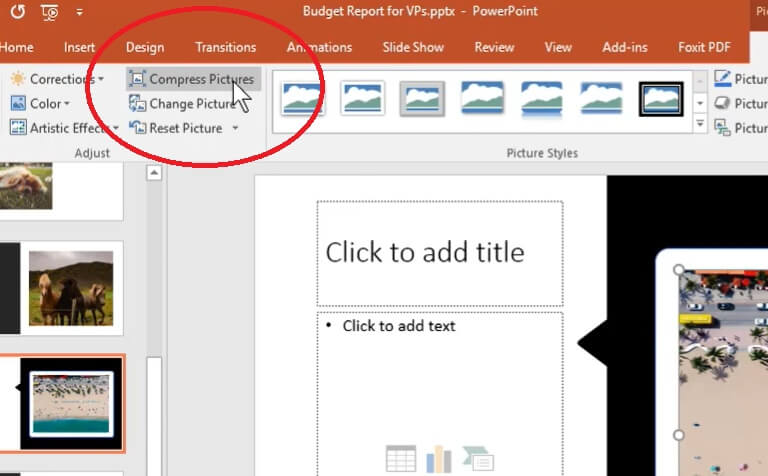
3. Within Format, on the left, click on Compress images.
4. Next, we must establish what resolution we want the included images to preserve from the following options
• High fidelity: Preserves the quality of the original image.
• HD - perfect for HD resolution displays
• Printing: Quality that will allow us to print the slides at a good resolution and will be displayed with excellent quality on any screen.
• Web: This option is the one that we must select if we are going to make the presentation via the web or through a projector.
• Email. Reduce the size of the file to the maximum to be able to send it by email.
• Use the default resolution. This option preserves the original resolution of all images that are part of the presentation.
If You Want To Compress Only 1 Image Then Check The Option "Apply Only To This Picture"
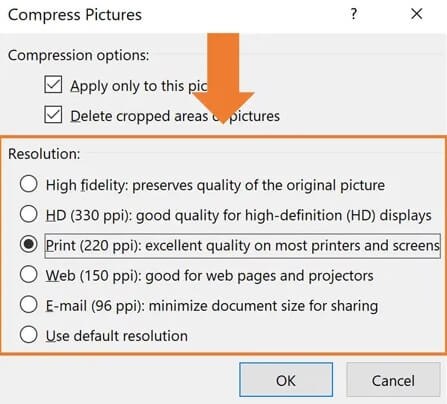
Before clicking OK, this is your opportunity to double-check your selections to make sure you get the compression results you want. Again I recommend working with your images one by one and compressing them, rather than applying the changes to all the images within your presentation. Once we have established the format that we want all the images in our file to offer, we must save the changes so that we can see reflected as soon as the PowerPoint file space has been reduced.
CONCLUSION
Compressing images in PowerPoint is one of the ways to dramatically reduce overall file size so that you can more easily share your presentation with other people. With that said, I only recommend compressing your images if you really need to. If you're using a USB drive to share your presentation or you're running your presentation from your own computer, you don't have to compress everything.
iMyFone Filme
Your best video creator !
Download Now


