


Can you do the zoom screen recording? Yes, definitely you can. Stay with us, and we will guide you on how you can record the Zoom screen.
Zoom is one of the most popular software for video communication. It is used in almost every industry, including business, teaching, and politics. Sometimes, we often need to record the meetings on Zoom so that we can use them later. You can record your meeting with the Zoom application or any third-party application. In this article, we will explain how you can record your meetings on Zoom. Zoom has some limitations; therefore, we will also have a look at its alternatives.

Part 1. How to Do The Zoom Screen Recording
Zoom enables hosts to record the meetings. The meeting can only be recorded by the host or the person who has permission to do so. The host can grant recording permission to the participants. If you are a host or eligible participant, you can follow the given steps to record the screen.
Note: While recording using Zoom, only the zoom window is recorded. You cannot record anything outside that window.
Step 1. Start a meeting. When everything is ready, click on the record button.

Step 2. You might have two options when you click the record button. The two options will be “Record on this Computer” and “Record to the Cloud”.
“Record on this Computer” is for saving the recorded video on the computer. This is an excellent feature, and the video is directly stored after the end of the meeting. Keep in mind that this feature is only available on computers; you will not find it while using Zoom on your mobile.
“Record to the Cloud” saves the video file in the Zoom cloud. This video can also be shared easily, and you can also download it later. It is available on mobile, but the host must be a licensed user.
If there is no option and the video is being recorded once you press the record button, then by default, it will be “Record on this Computer”
Step 3. Once you start the recording, you will see the pause and stop button; you can easily control the recording.

Step 4. The recorded video will only be saved after ending the meeting. It will be saved to the computer or cloud (as selected by the user). You can check the Documents>Zoom folder. You will have the recordings in folders renamed by date and time.
In Zoom, go to the Meetings. Click on the Recorded tab. You will see the recorded videos here with options to play, share, delete, etc.
Part 2. 4 Software Tools to Record Screen Zoom Meetings
iMyFone Filme
Filme is a video editing tool, which can also record your computer screen. You can easily record the screen and edit the video using the same tool.
Reasons to Choose Filme
-
Filme is a user-friendly video editor, which can be used by anyone. It is perfect for beginners.
-
It has all video editing tools that you can use to edit the recorded video.
-
It can record the zoom screen or whole computer screen.
-
It has no limitations; you can record the screen without taking permission from the host.
Features:
-
The screen recorder is quite simple, and you can use it to record the screen. The size of the screen can also be adjusted as you like.
-
You can add effects, transitions, stickers, images, audio, or anything to the recorded video using Filme.
-
You can create the picture-in-picture effect. You can place your own video at the bottom of the recording to explain everything.
-
The final video can be exported in any format you prefer. You can also adjust advanced settings, including frame rate, bitrate, resolution, etc.
Steps to Use Filme for Screen Recording
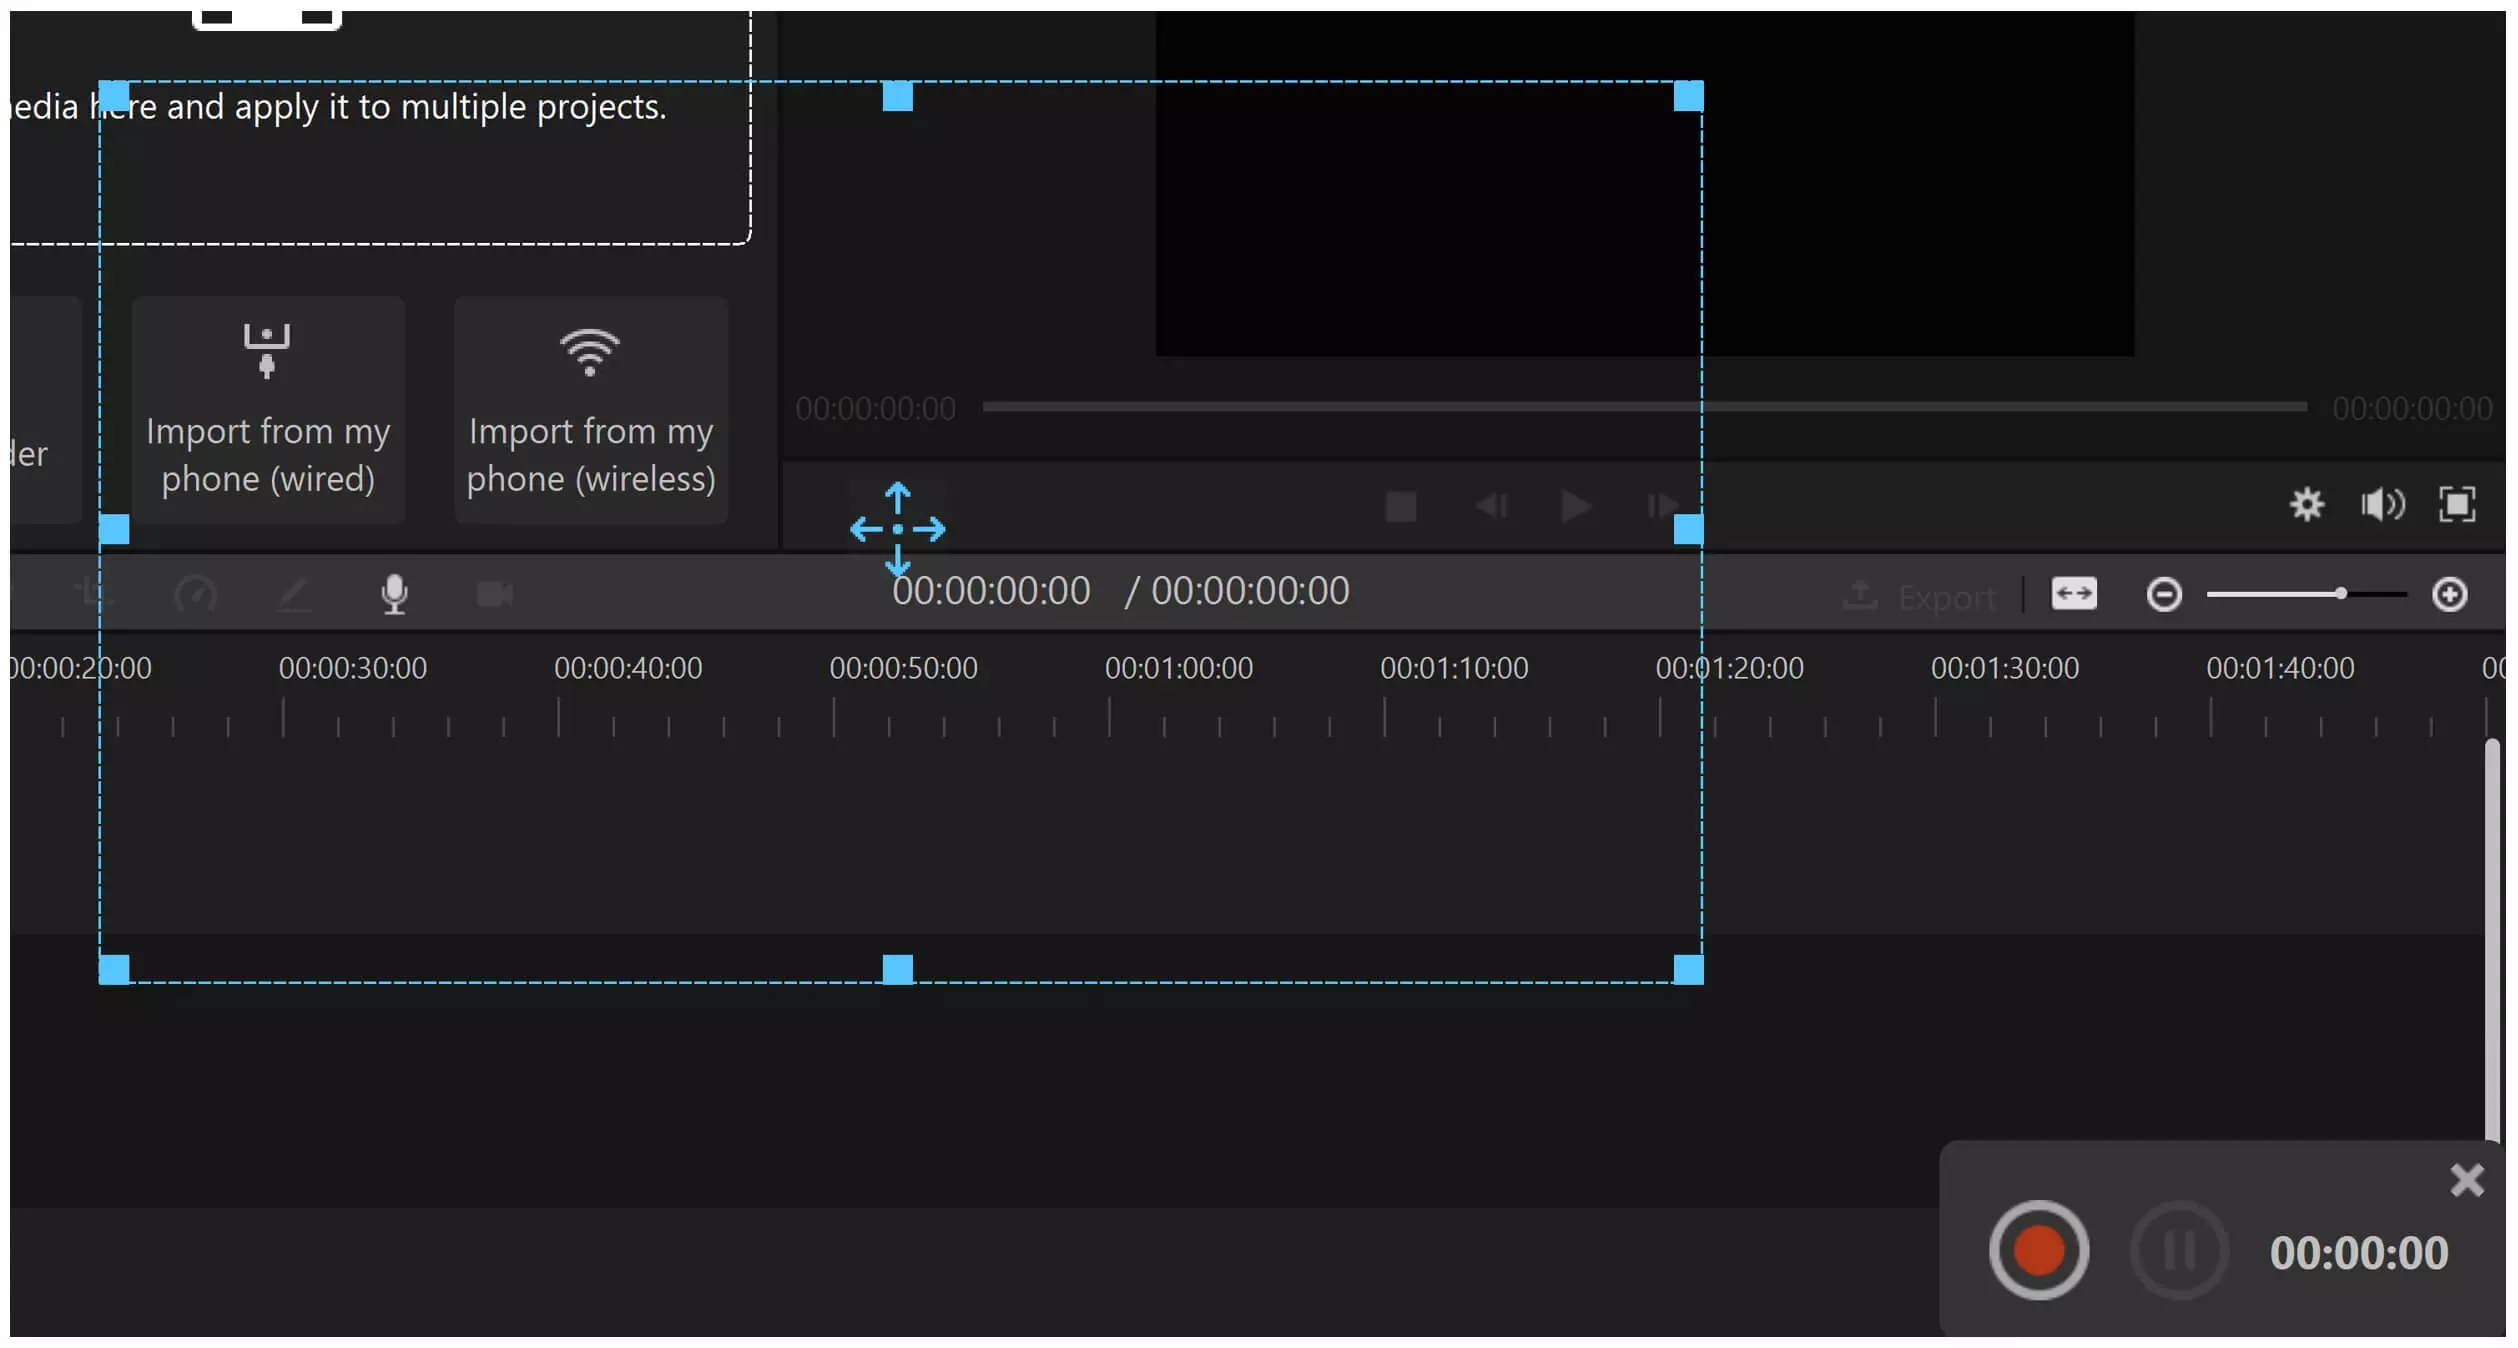
Step 1. Open Filme on your computer. Go to File>New Project and click on any aspect ratio you like for the video.
Step 2. Click on the screen recording button over the timeline. You will see a rectangle on the screen. Adjust the rectangle according to the screen size you need for recording.

Step 3. You will have the recording controls at the bottom right corner. Click on the start button when you are ready. Stop the recording using the same controls.
Step 4. The recorded video will appear in the Project Media. Drag it to the timeline. Now, you can make as many changes as you like. You can trim the video by dragging the ends of the video clip in the timeline.
Step 5. You can add effects, transitions, stickers, music, images, and everything you like. Select anything from the menu and drag it to the timeline. If you want to add text, go to the Text menu, select any text style, and drag it to the timeline.

Step 6. Click on the Export button. Select the settings you need for the video and click on Export.
OBS Studio
OBS Studio is a completely free application for desktops. You can install this powerful tool and use it for screen recording. You can record the display, window, webcam, image, slideshow, and other things using this tool.
Steps to Use OBS
Step 1. Open OBS studio on your computer.

Step 2. Before we start recording, there are a few things you need to adjust. The first one is audio. You have an audio mixer panel on the screen. You can adjust the volume of desktop audio and microphone. You can also mute them.
Step 3. You have the Scenes panel. Here, you can add more scenes and name them as you like. You need to add a source to start recording. In the Source panel, click on the “+” button. You will see several options there. For screen recording, you need to click on Display Capture.

Step 4. Select the scene and go to the Filters tab. Click on the “+” button, and now, you can add filters. After adding filters, click on Close.
Step 5. On the right, you will have the Start Recording button. Click on the button, and it will start recording. You can stop the recording whenever you want. You can also pause the recording.
Step 6. Go to the File menu and click on Show Recordings. It will open the folders where your recording is saved.
Also Read:
Best Ways to Record Your Computer's Screen & Webcam >>
iOS Built-in Screen Recorder - iOS
iOS has its own screen recorder, so you don’t need to download a third-party application. You can easily record your screen, but you need to make a few changes in your settings before your start.
Steps to Use Built-in Screen Recorder in iOS
Step 1. On your iOS device, go to Settings.
Step 2. Tap on Control Center.
Step 3. Tap on Customized Controls.
Step 4. You will have the tools that are already included in the Control Center. You need to find Screen Recording in More Controls and tap on the “+” button. It will be added to the Control Center.
Step 5. Now, you can come back to the home page. Swipe down from the top of the screen. You will see the white dot icon, which is for screen recording. Tap on it and hold to see the settings. You will see the microphone option, so you can turn it on or off.
Step 6. Tap on the icon, and it will start the recording. You will have a timer on the top. You can stop the recording by tapping on the recording button again.
Mobizen Screen Recorder – Android
Mobizen is a free screen recording for Android. You can easily record the video using it and make some basic changes to the video, like trimming and adding sound.
Steps to Use Mobizen on Your Phone.
Step 1. Launch Mobizen application on your Android device. You will see a small “m” icon on the right of the screen. Tap on it and tap on the video camera icon.
![]()
Step 2. You need to confirm to start the recording. Tap on Start Now. The recording will start after the timer.
Step 3. To stop the recording, you need to tap on the icon again and tap on the stop button. You will see a new dialogue box with three options: Delete, Close, and Watch Video. Tap on Watch Video.

Step 4. You will see the video in the library. You can share it from here. Tap on the edit button.

Step 5. You will be in the video editor. First, you can trim the video using the handles on the timeline. You can also add intro and outro if you have any saved videos for it. At the top, you will see the music option. Tap on it. You can adjust the volume or add new audio. When you are done, tap on the Save button at the top right corner.

Final Words
We have explained how you can screen record on zoom. We have shared the step-by-step method of recording the screen. You can record your screen on zoom if you are the host or you have permission to record the screen. There are other limitations as well. Therefore, we recommend Filme, which is a video editing tool. You can use it to record the screen and edit the recorded videos. It is a user-friendly tool that offers you everything to create an awesome video.


